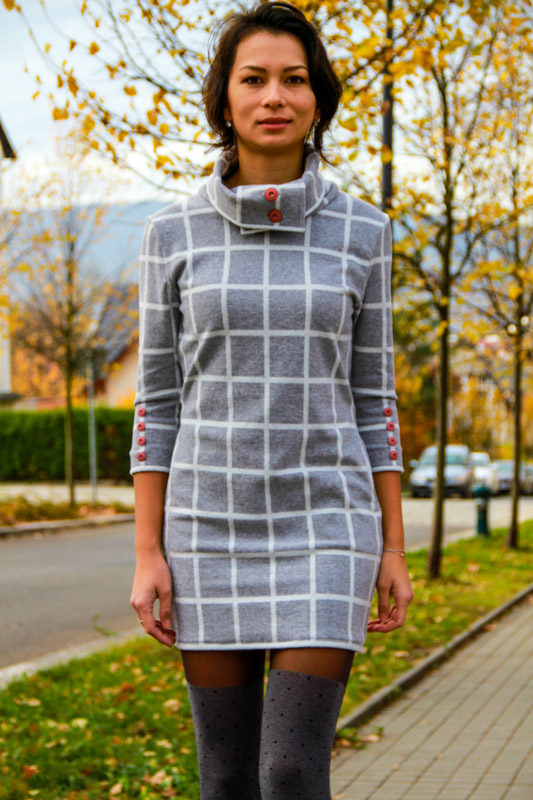
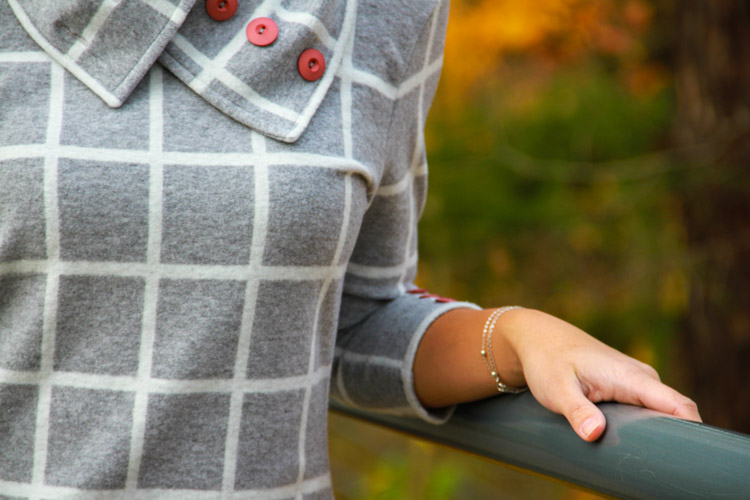
As I said in the previous article, this pattern was on my mind for some time and only recently I finally got a chance to design it. So today I would like to introduce to you the pattern for women's autumn dress LUCKY YOU and sewing instructions for the classic version of this dress. Today's article is about the more elegant version of this dress made from fabric with beautiful checkered print.
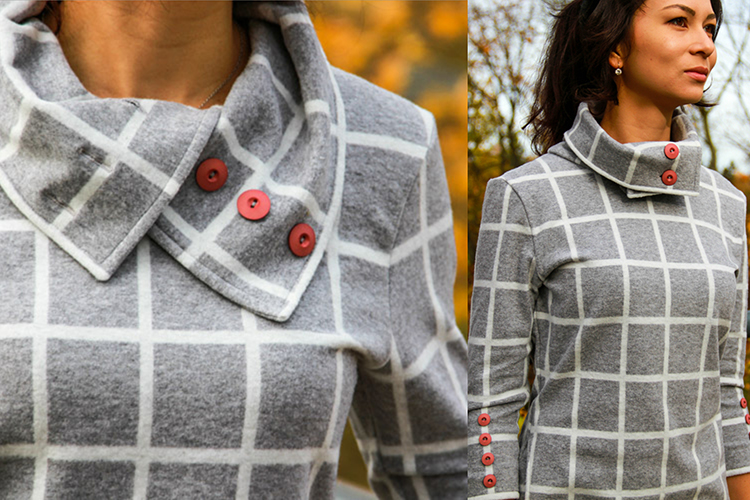
The pattern for women's autumn dress
You can get this pattern for women’s autumn (or winter :) ) dress here:
The pattern for women’s dress LUCKY YOU
Recommended material
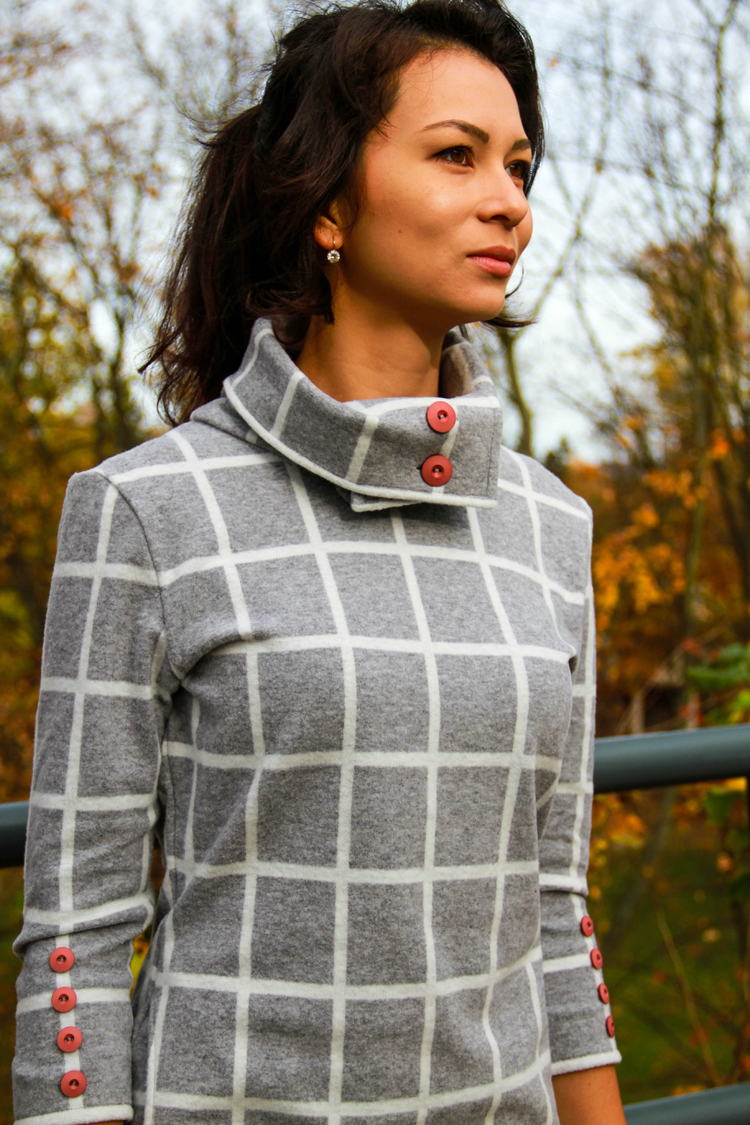
I bought my (incredibly soft) fabric at Dumlatek.cz (Here it is:
This pattern is designed for elastic fabrics of medium thickness. You can use:
- elastic fleece
- suede knits (Nicky velour)
- sweater knits
- stretchy laid-in knits (make sure it really is elastic - some combed laid-in knits aren’t)
- elastic faux fur (it’s a good idea to ask sellers if the fabric is elastic or not when shopping online - sometimes you won’t be able to find out based on description and composition alone)
- it’s also possible to use warmkeeper (alpen fleece)
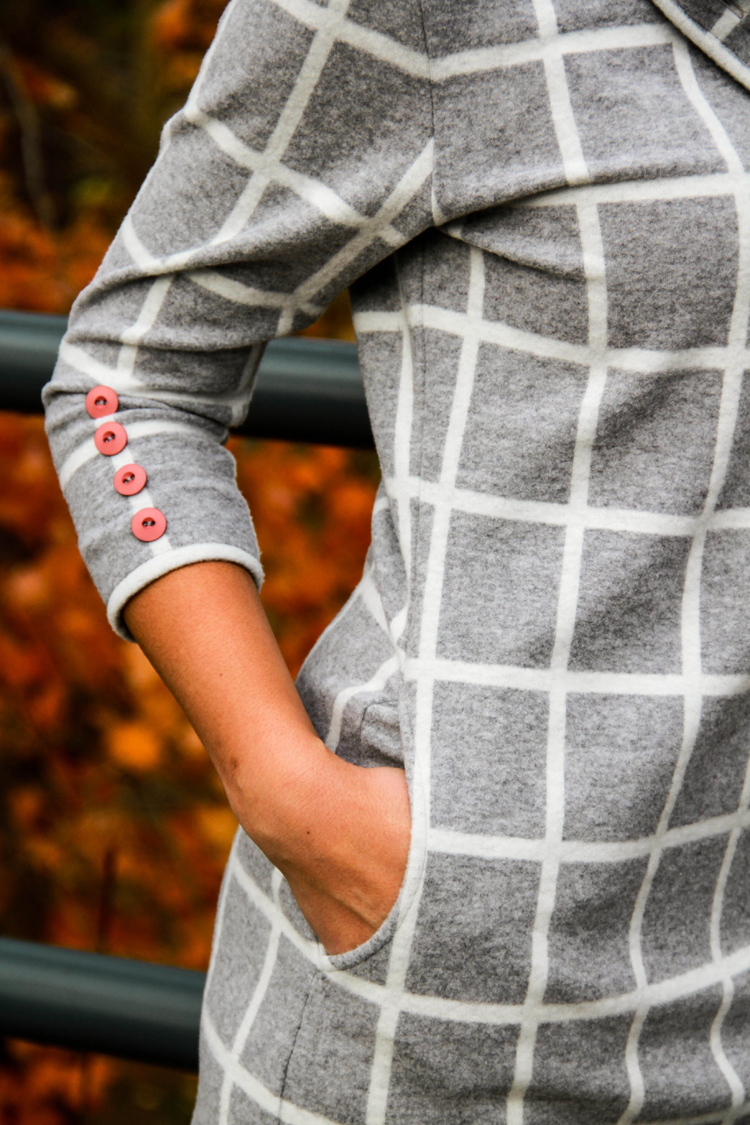
You can (but you don’t have to) put buttons on the collar. I’ve used four 2 cm (3/4") wide buttons. Buttons on the sleeves are purely decorative. I recommend using eight 1.5 cm (5/8") wide buttons.

You will also need a one-sided fusible facing to reinforce the collar and pockets. You can add thinner shoulder pads if you plan to sew a dress with lining (a great idea if you are using some stiffer fabric).
Sewing instructions for the version with lining can be found here:
Suggestion
I’ve used my overlock machine and regular sewing machine to sew this dress. But you can get great results with just a regular sewing machine. Here are some tips for you:
Sewing elastic fabrics with a regular sewing machine - 4 steps to success
Pattern layout
Prepare:
- 1x front piece (cut on fold)
- 1x back piece (cut on fold)
- 2x sleeve piece
- 1x outer collar, 1x inner collar (or just 2x collar if you are going to make both pieces from the same fabric)
- 2x whole pocket piece
- 2x pocket piece with an opening
- My tip: I like to use 4 whole pocket pieces (not 2 whole and 2 with opening). This way I can sew the pocket piece to the front piece and cut out the pocket openings (from the pocket piece and front piece) at the same time.
You will also find that the pattern files contain the bottom hem piece and cuff piece. This basic/classic version of the dress has neither of those pieces.

There are two versions (views) of this pattern - one with seam allowances outlined and one without them. You can choose the view you want, depending on what you find easier to work with. You are going to need to modify the pattern slightly If you decide to use a view with seam allowances. There are only 1 cm (3/8") wide seam allowances outlined on the sleeves and bottom hem of the dress. These allowances are there so you can connect the bottom hem and cuffs to the dress. You may want to enlarge these if you plan to sew the classic version of the dress (there are no extra pieces connected to these edges). Make the hem allowances about 3 - 4 cm (1 1/4” - 1 5/8”) wide.
Before you get into sewing, I recommend reading my article on How to position a pattern on a checkered fabric
(if you plan to use checkered fabric, of course).
Sewing instructions
First, reinforce the pocket pieces. Reinforce the pocket pieces with pocket openings using fusible interfacing. I like to use 4 whole pocket pieces (not 2 whole and 2 with pocket opening). This way I can sew the pocket piece to the front piece and cut out the pocket openings (from the pocket piece and front piece) at the same time.
I also recommend reinforcing both collar pieces if you are using some softer fabric. If you are sewing from a stiffer fabric and you want the collar to look somewhat casual or a bit messy, reinforce only the areas with buttonholes and buttons. If you have a stiff fabric and you don't want to have buttons on your collar, you don't need to reinforce it at all.
Pockets
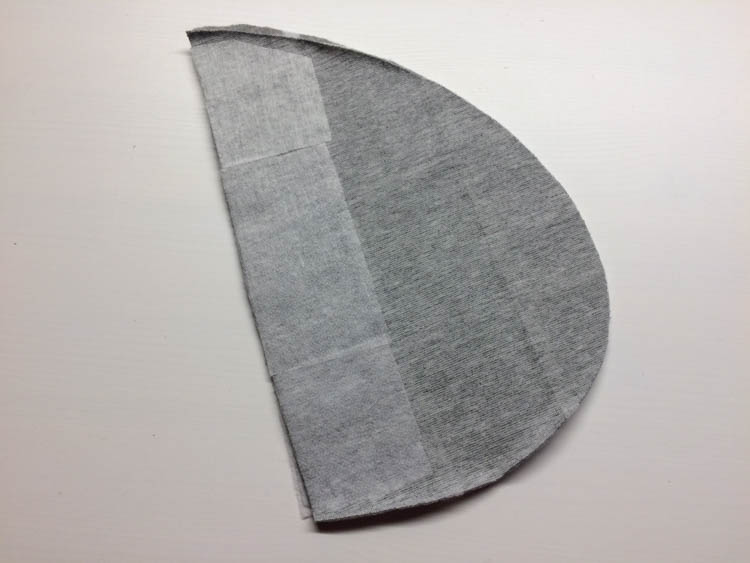
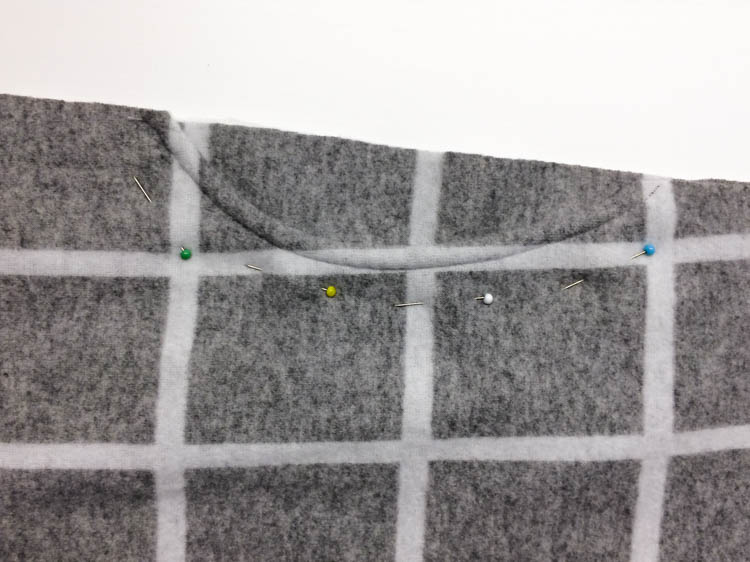
Lay the pocket piece with a pocket opening over the front piece (face side to face side).
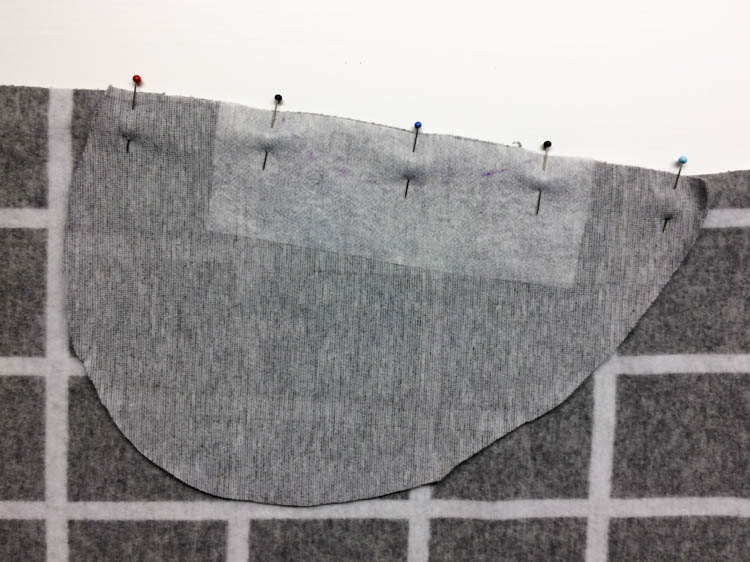
Align the print of the pieces in the side seam area.
Sew the pocket piece in and cut the seam allowances around the pocket opening to make them about 0,5 cm (0,2") wide. You can also cut these seam allowances perpendicular to the seam every centimeter (3/8") or so. This will smooth out the pocket opening. Be careful not to damage the seam itself.
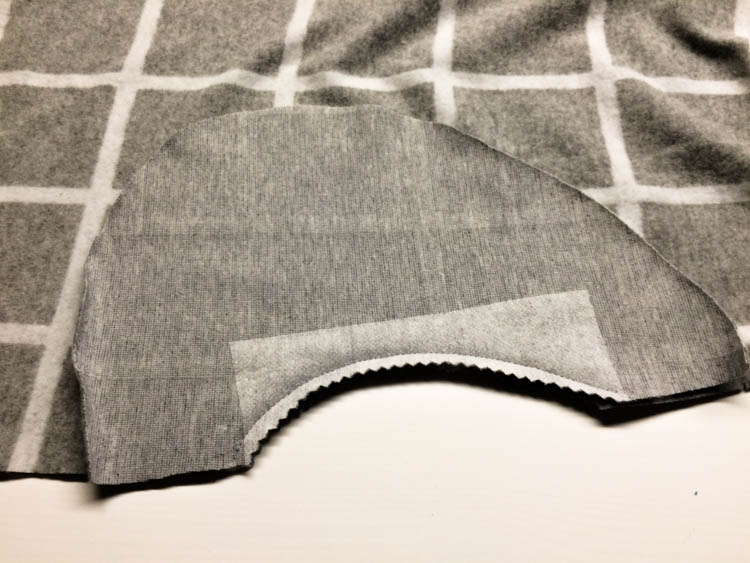
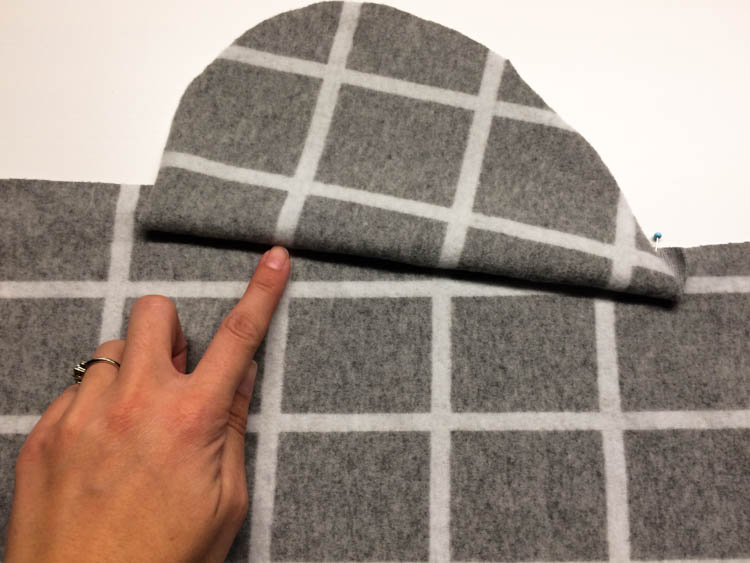
Flip the pocket piece to the side and check the print alignment.
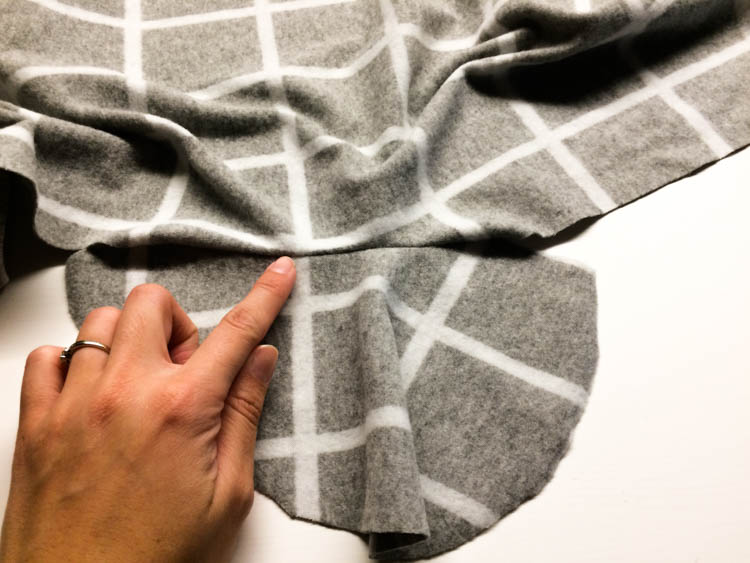
The pocket piece should be completely invisible from the front side view.
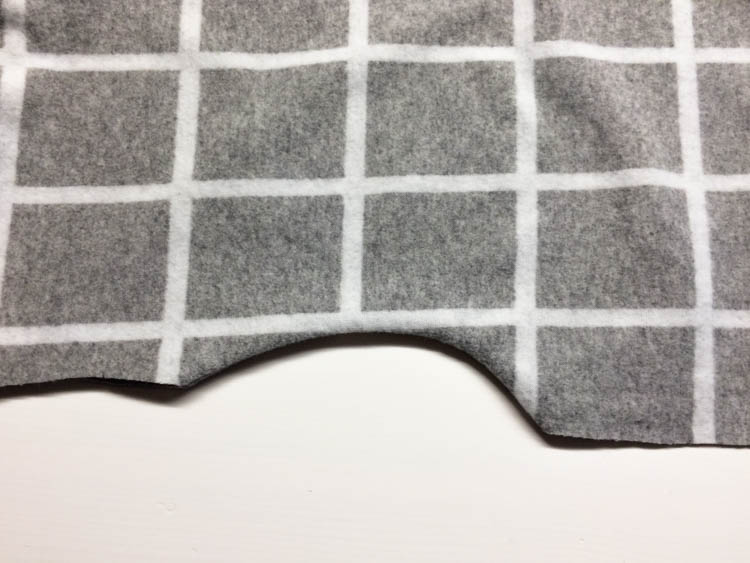
The front piece "sticks out" about 2 mm (0,08") beyond the pocket piece from the reverse side view.
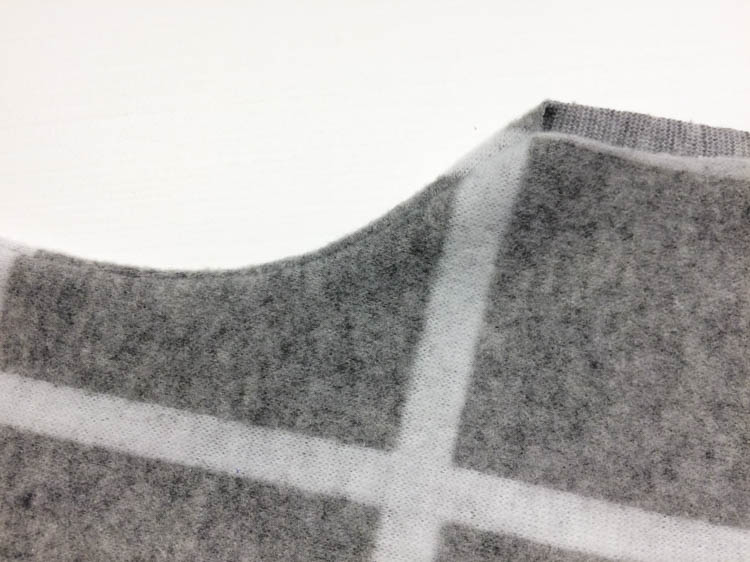
Iron the seam thoroughly. You can also topstitch the pocket opening to stabilize it further. (Use longer stitches and sew about 0,7 cm (1/4") from the edge of the pocket opening.) Iron again.
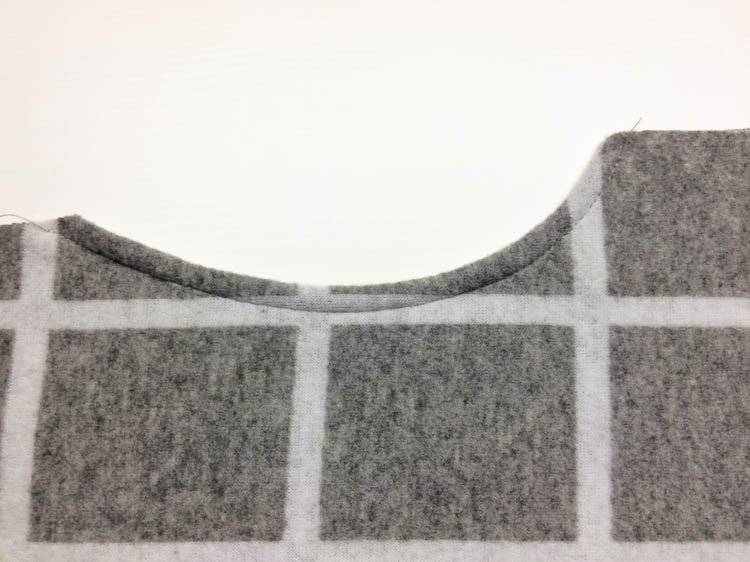
Take care to align the whole pocket piece precisely - its print should match the print on the front piece.
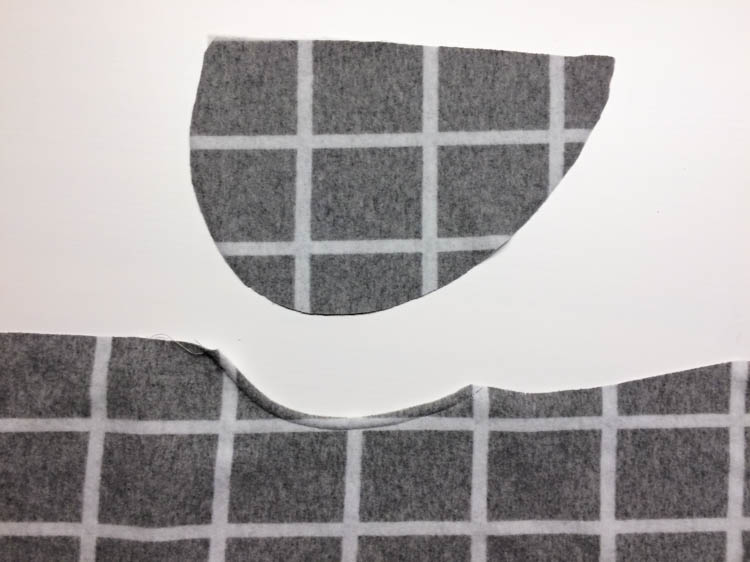
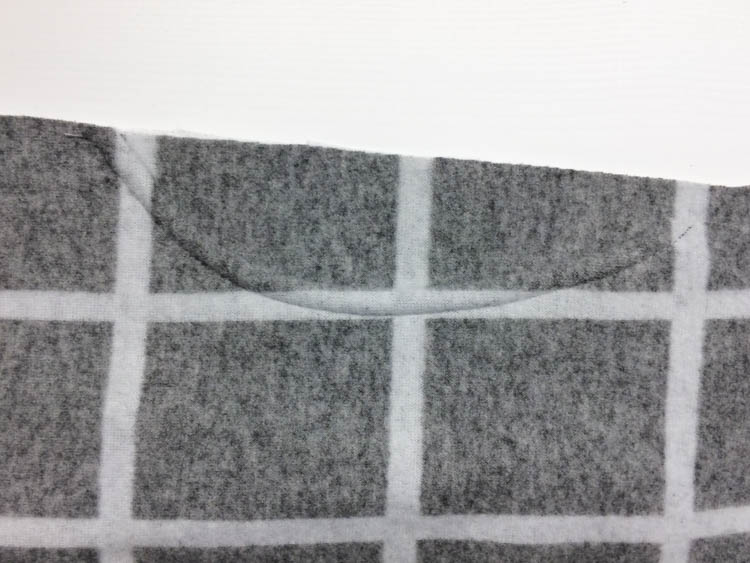
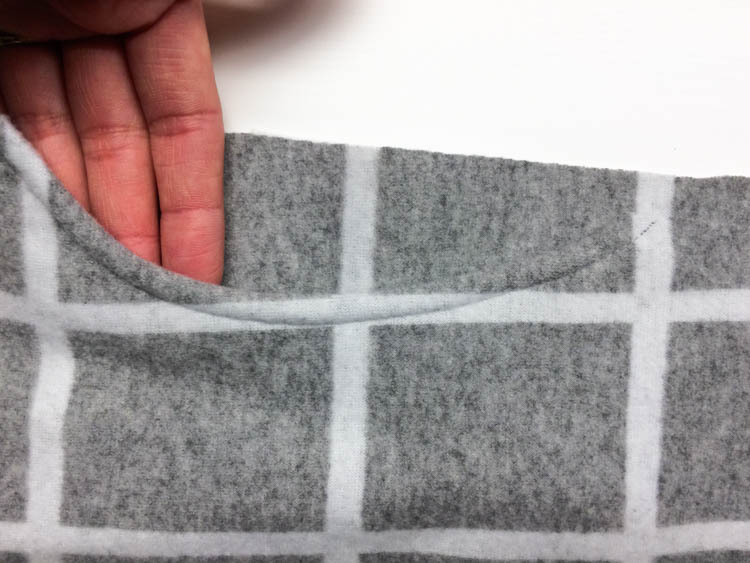
You can pin both pocket pieces to the front piece to prevent the layers from shifting.
Next pin the pocket pouch (only the pocket pieces).
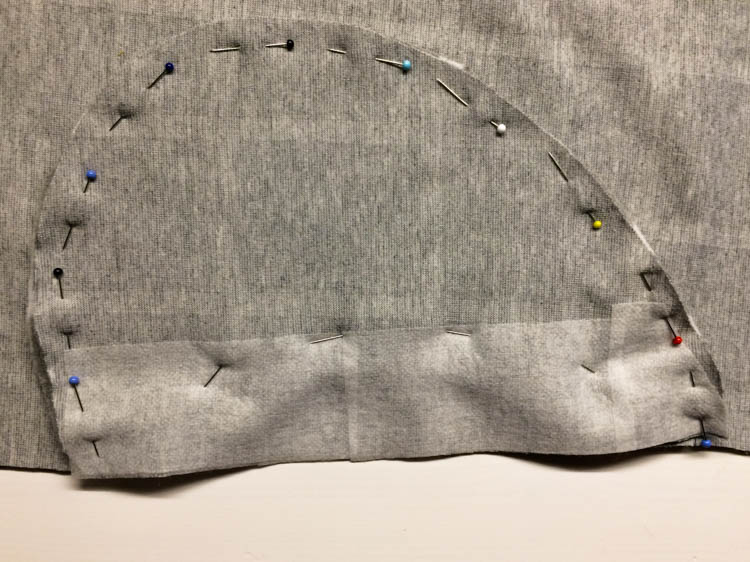
Then sew the pocket pouch and iron it thoroughly. Sew the other pocket in the same way. Keep the pocket pouches pinned to the front piece for now.
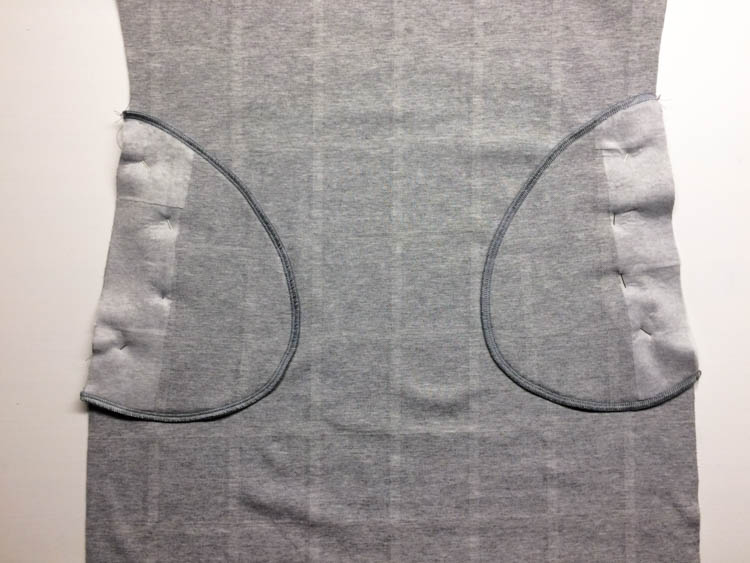
If you are having trouble with pockets, you can watch a short video to see how it’s done:
How to sew pockets to the side seam
Shoulders & Sleeves
Sew the shoulder seams. Print on the front and back piece should match up.
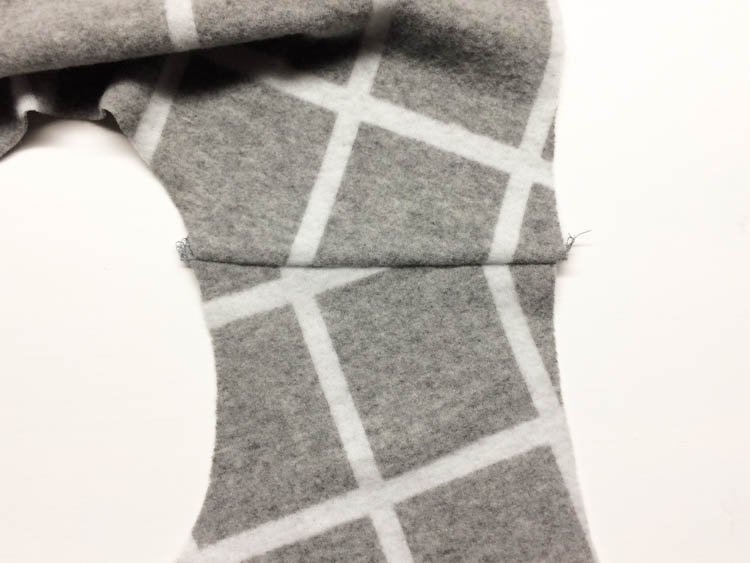
Pin the sleeve piece into the open armhole. The sleeve should be easestitched a bit. But you are probably not going to need to easestitch the sleeve classically with most fabrics, because the difference in circumferences (armhole/sleeve) is small... However, you should take care to sew the sleeve in correctly - make it looser around the top and in the back. It should not be loosened at all in the armpit area.
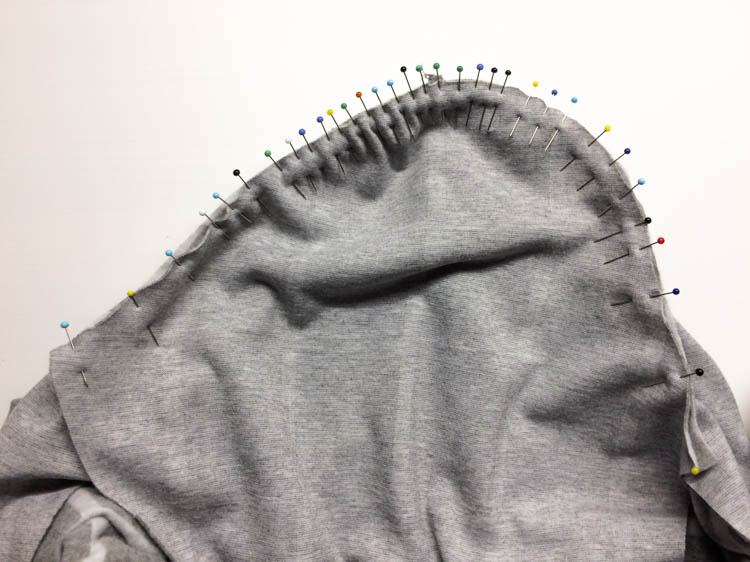
If you do not want to waste time with piles of pins, or if you have a fabric that needs a classic easestitching, you can try to loosen up the sleeve with a double-threaded needle.
(I described this procedure here: How to sew a winter dress)

After pinning the sleeve into the armhole, turn the dress face side out and check the print alignment - it should be aligned in the chest area. It doesn't matter if it's not aligned in the armpits area and it's nearly impossible to align the print near the top of the sleeve.
You can make changes by adjusting the “easestitching" of the sleeve. But keep in mind that comfort is more important than absolutely perfect print alignment.
Sleeve (front side):

Sleeve (back side):
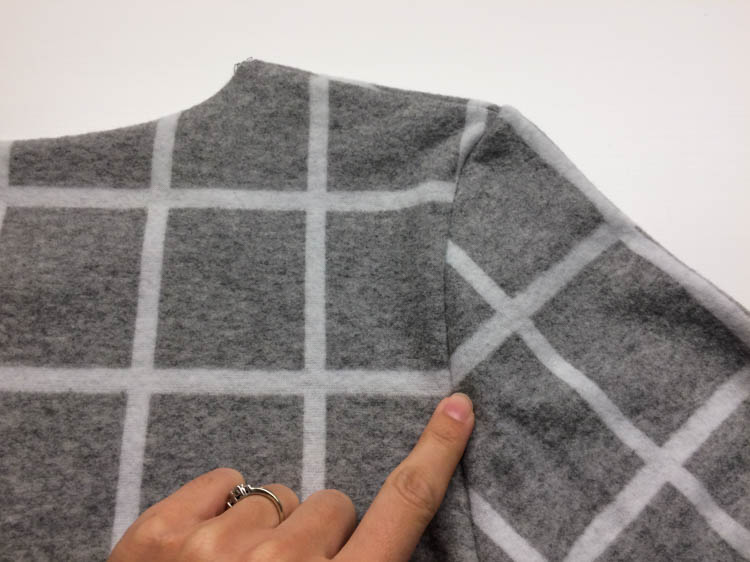
It’s important to align the top of the sleeve (center of the print) with the shoulder seam.
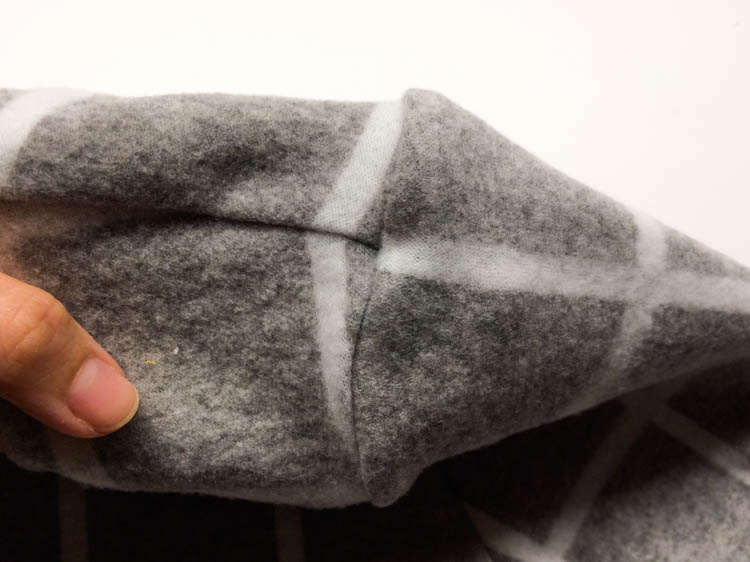
Side seams & Sleeve seams
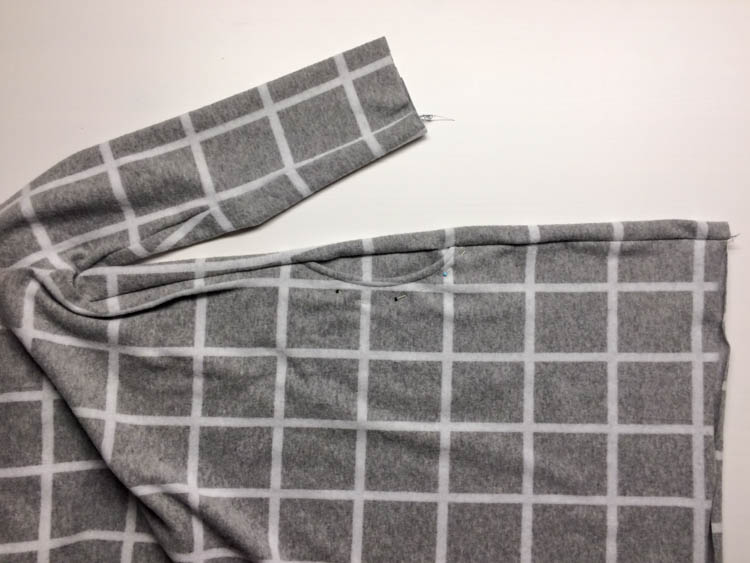
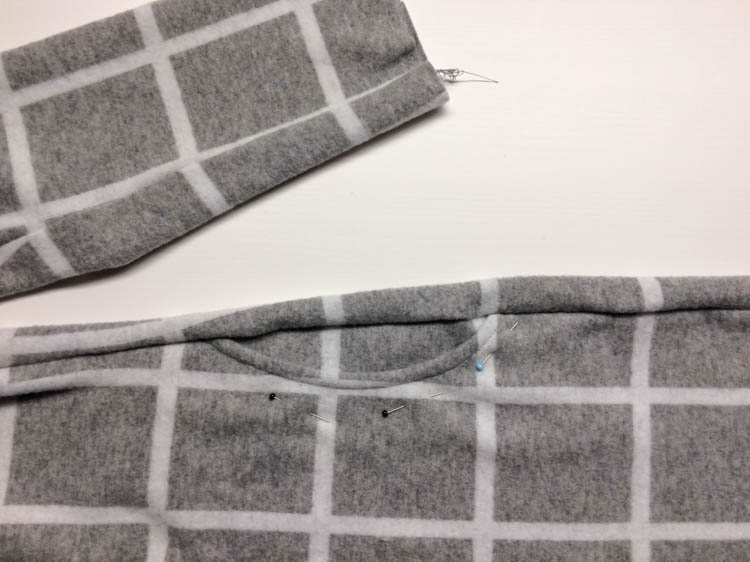
Now is the time to work on the side seams and the sleeve seams. Pin the seams and sew each side of the dress in one go. Try to align the print as best as you can. I’ve marked stripes between the squares with pins to remind myself that I need to be extra careful in these areas.
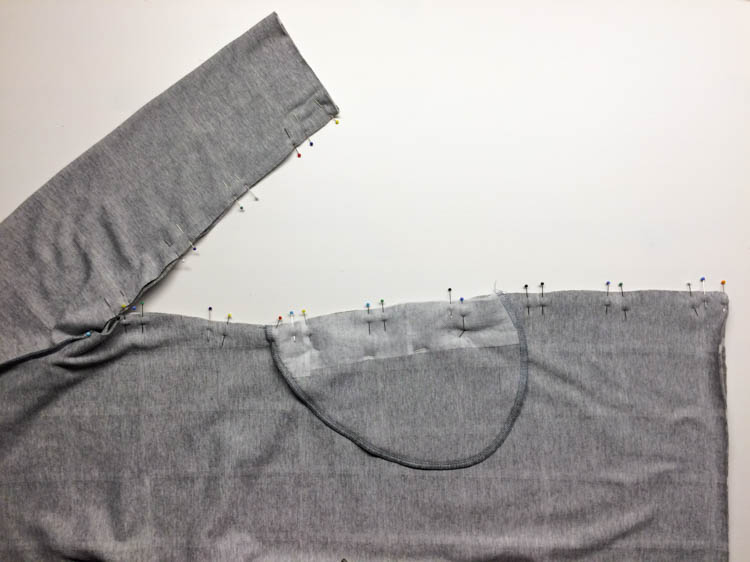
Check the print alignment again. Iron the fold.
Collar
Sew both short sides of the collar and one of the long sides. When positioning the collar pieces on the fabric, make sure that the print is placed correctly (symmetrically or in some other way that makes sense). I’ve centered my collar on one of the narrow stripes again.
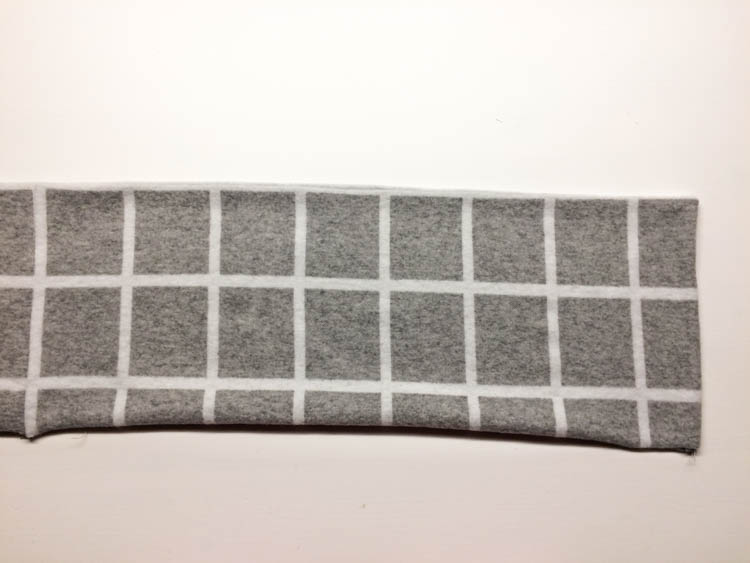
Cut off the corners of the seam allowances near the already sewed longer side and turn the collar face side out. Iron it and topstitch along the seams.
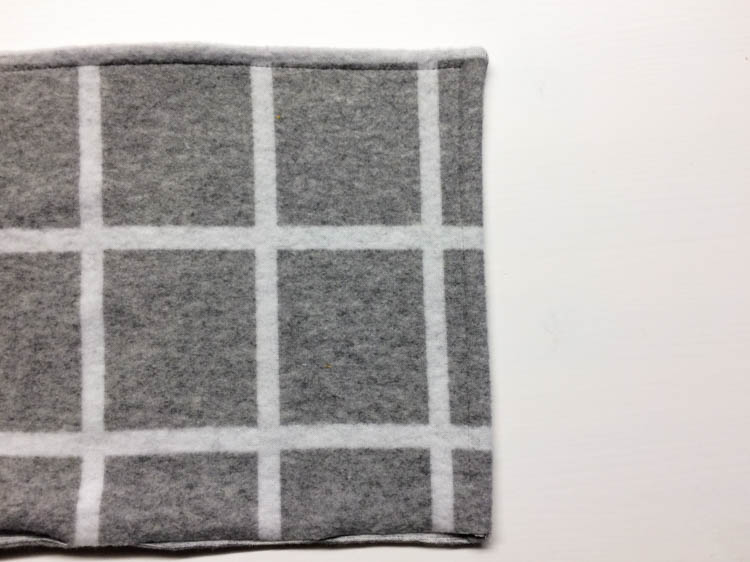
Do not topstitch the last 2 centimeters of the shorter sides.
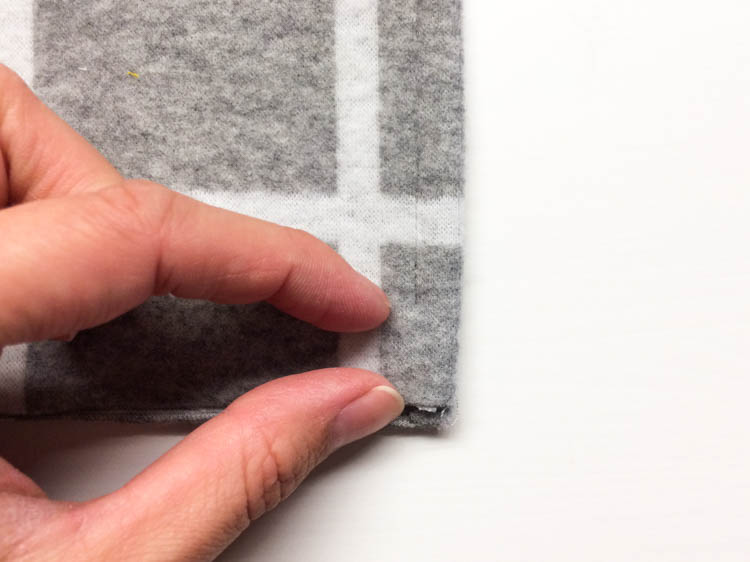
Face the top side (that is the side that will be on top when wearing the dress) of the collar.
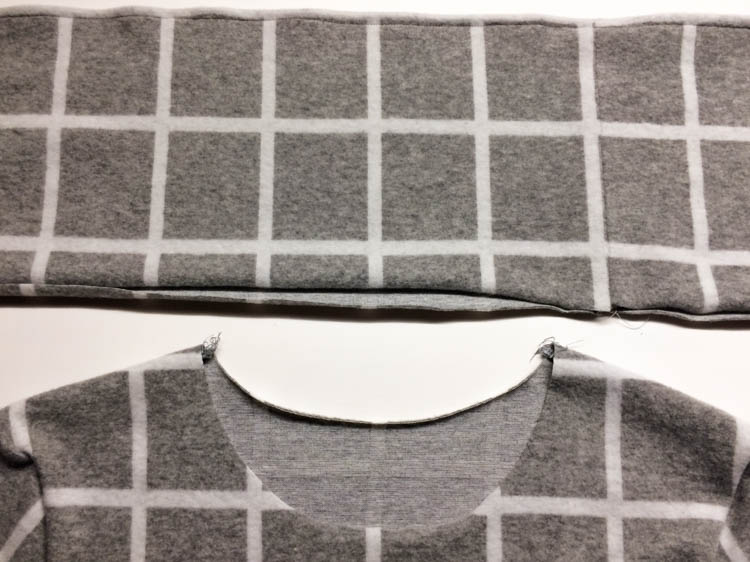
It’s important to align the print in both the front and back sections as best as possible, and sew the collar in evenly.
Start pining the bottom collar to the back piece of the dress (start in the middle).
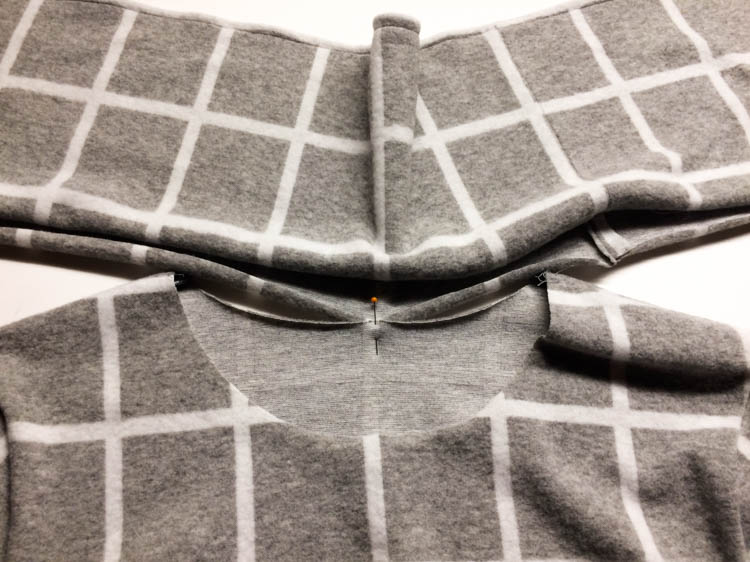
Pin the entire bottom collar to the neck opening evenly.
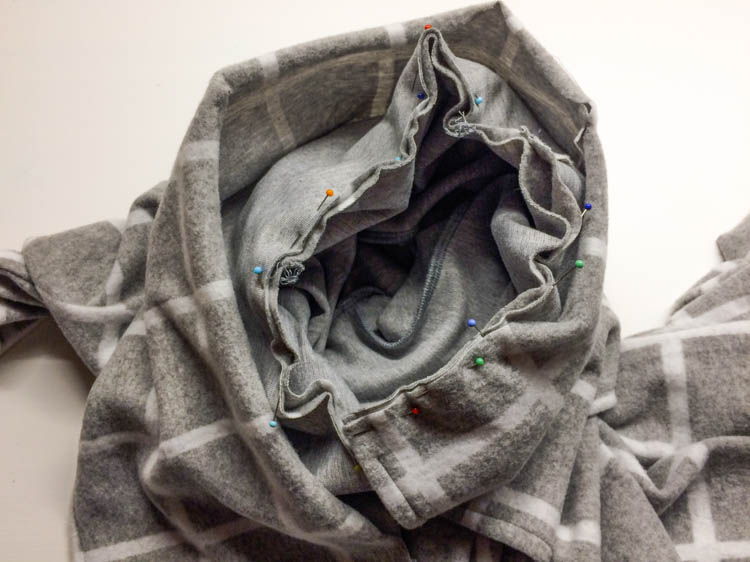
Pin part of the left side (when worn) of the top collar to the neck opening too.
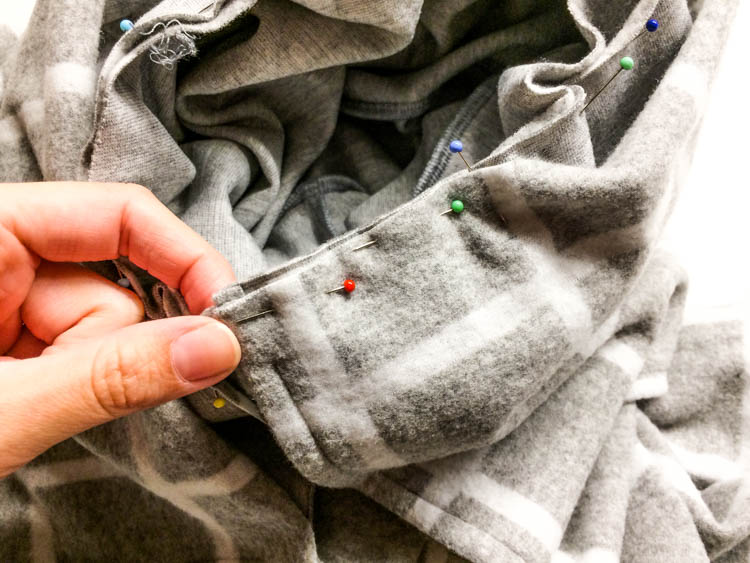
Then overlay this section with the right side of the collar and pin all layers together.
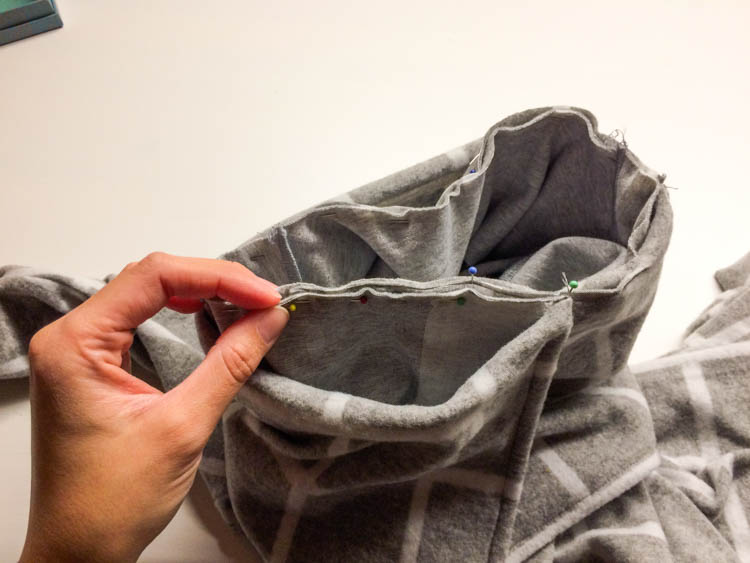
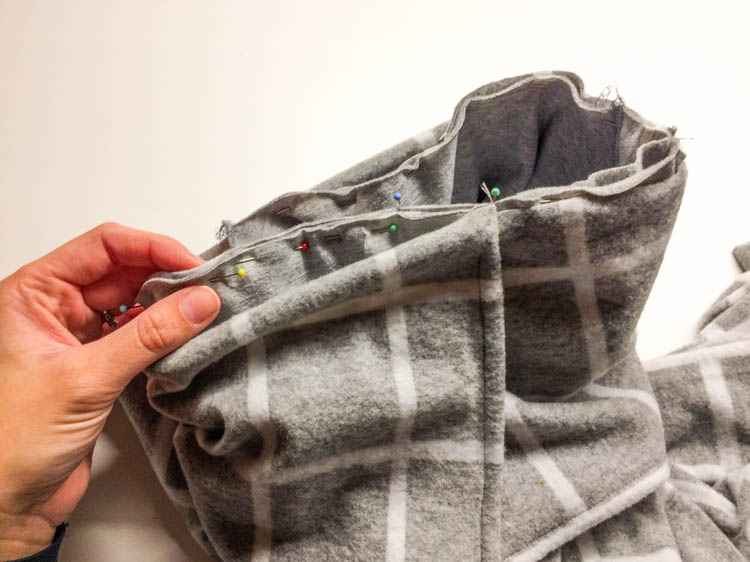
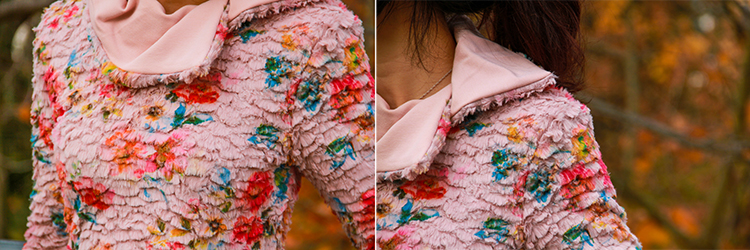
Now I recommend trying the dress on to test (and adjust) the placement of the collar. Take a good look at how the print feels overall and check that there are no “awkward” areas. Simply whether it looks good or not. It is also possible to sew the collar asymmetrically:
Sew in the collar if everything seems alright. Sew only the bottom layer of the collar. You are now sewing only the bottom layer of the collar (except where the two sides overlap).

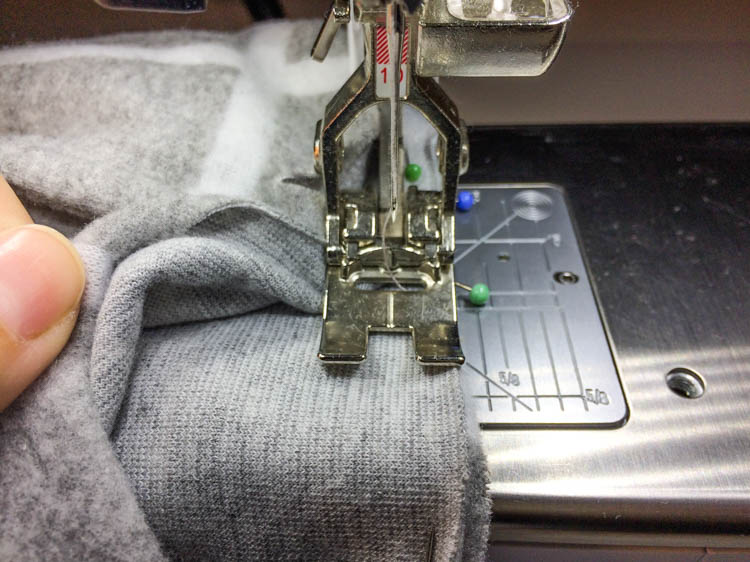
Sew the bottom collar, but leave out about 2 cm (3/4") at the end. Cut the seam allowances of all three layers (bottom/top collar + front piece of the dress) perpendicular to the cutting edges.
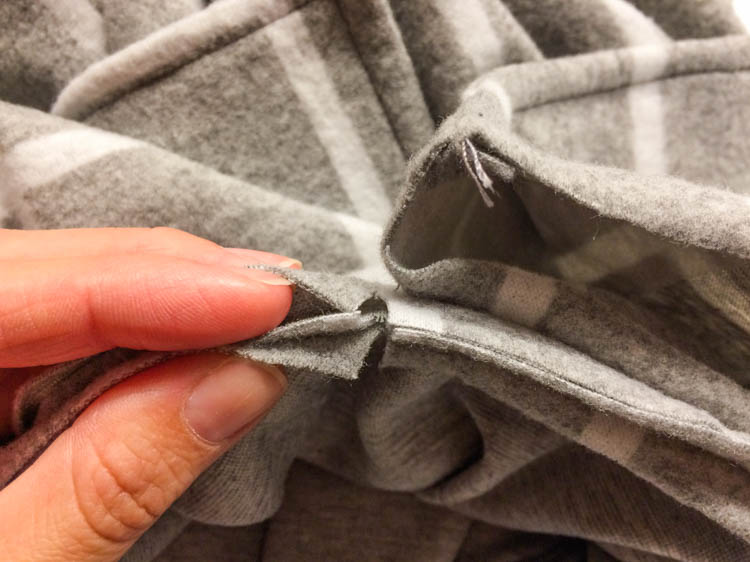
Fold seam allowances down - towards the bottom collar.
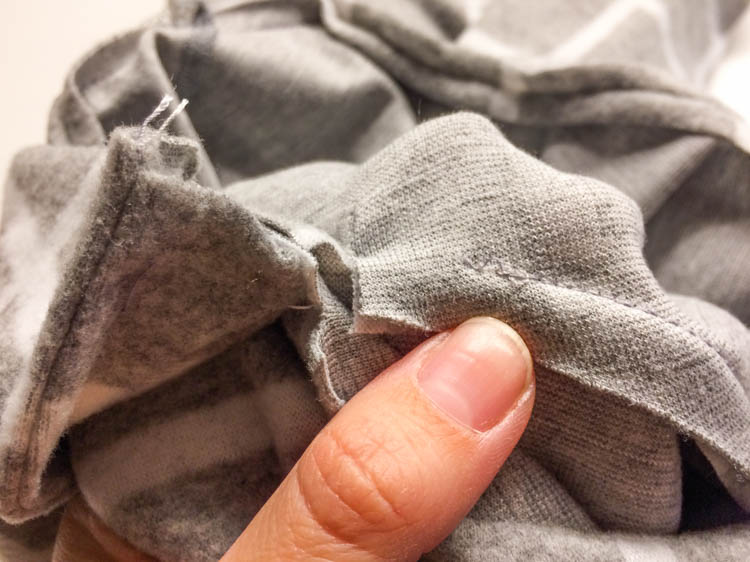
Fold 1 cm of the top collar seam allowance and pin it to the seam.
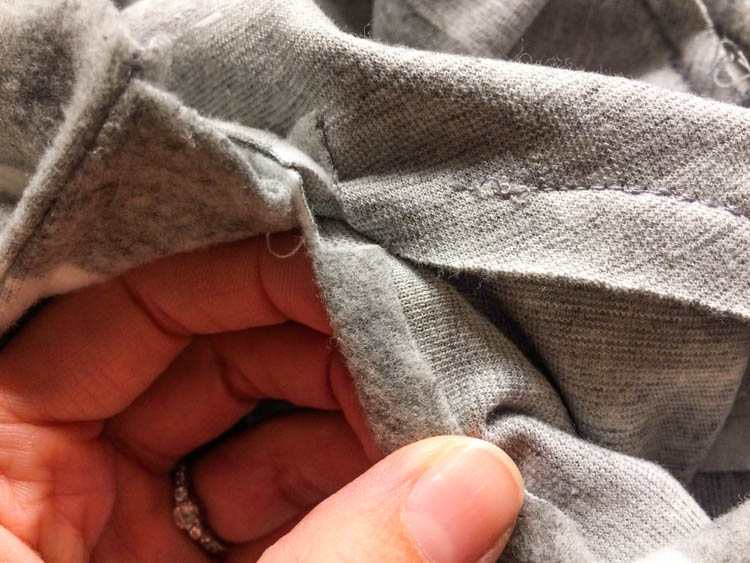
The top collar should cover the seam.
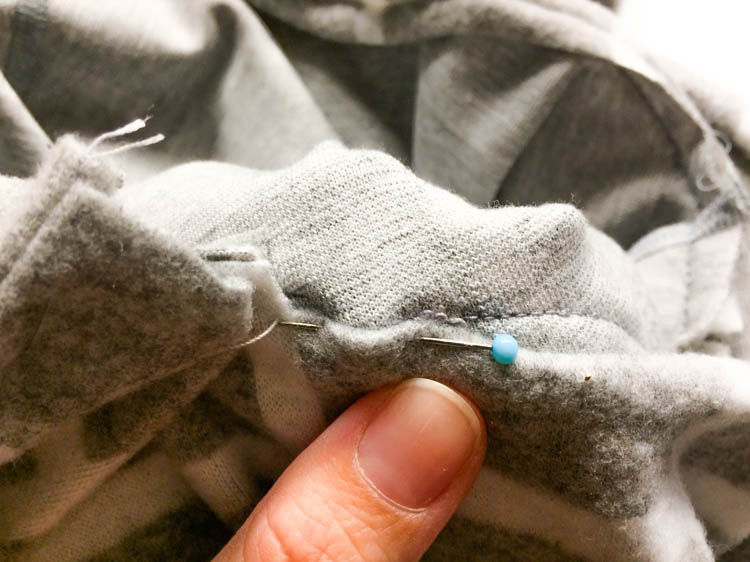
Pin the entire circumference of the collar in this way.
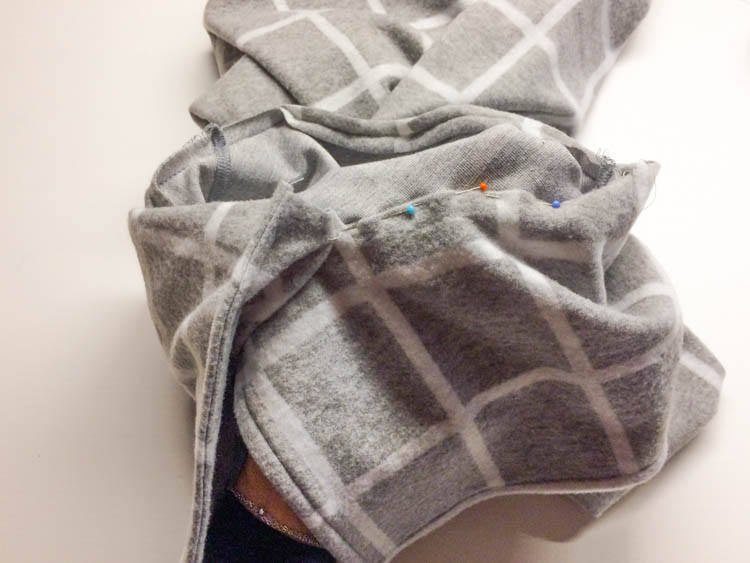
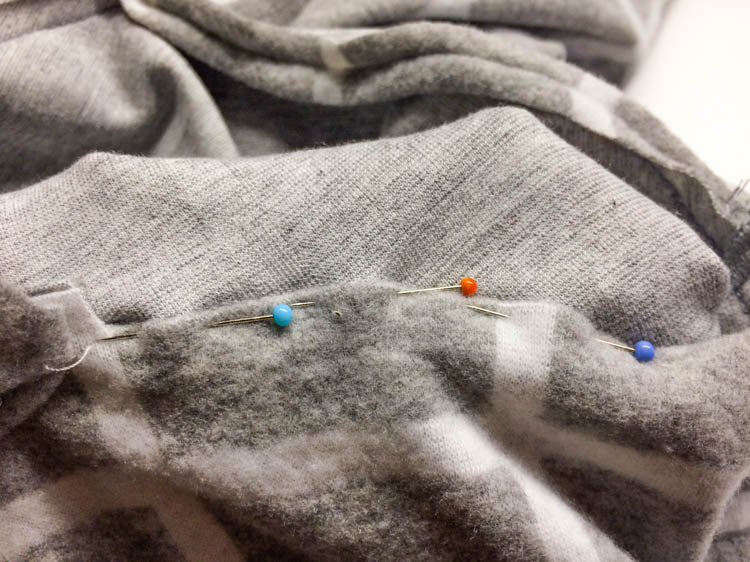
Fold the corner of the top collar (covering the other side of the collar) 1 cm to the reverse side and attach it over the side under it with a few stitches.
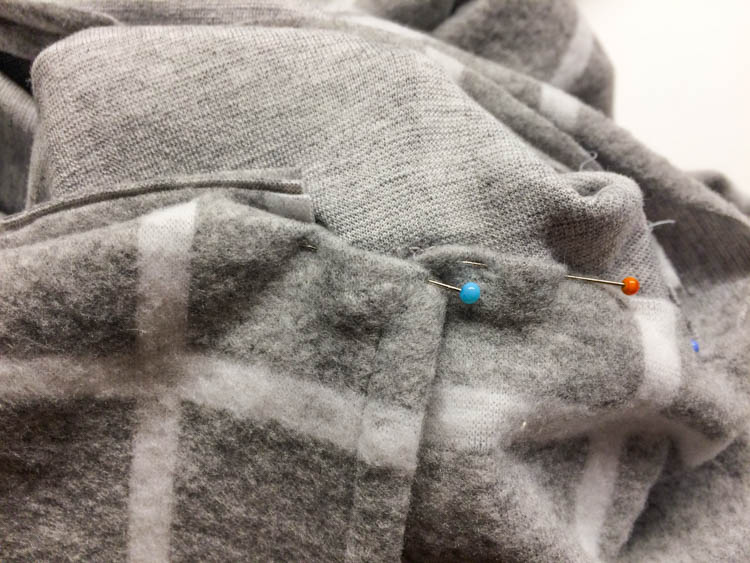
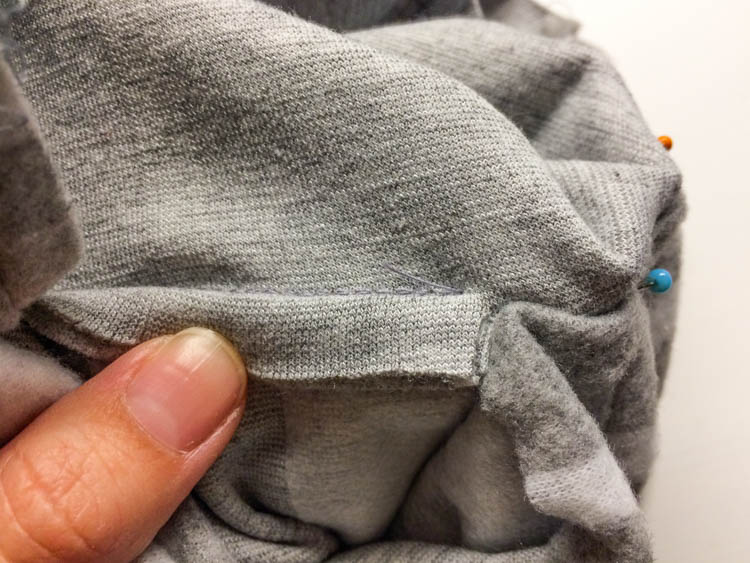
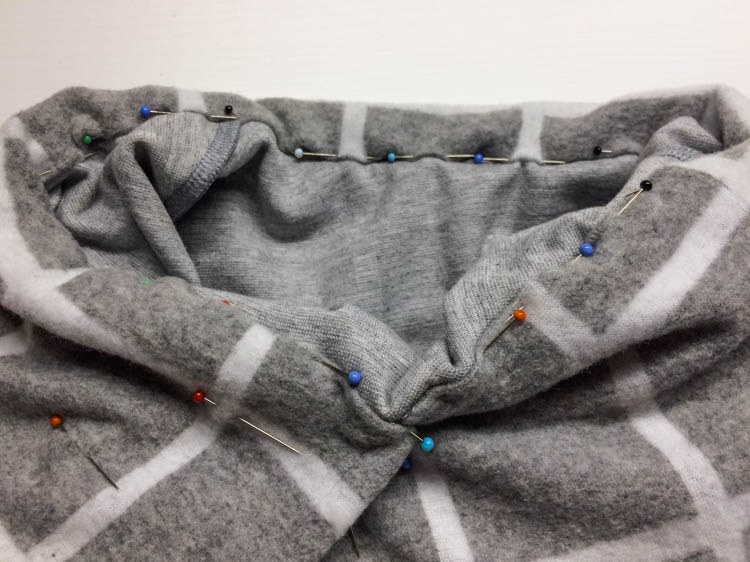
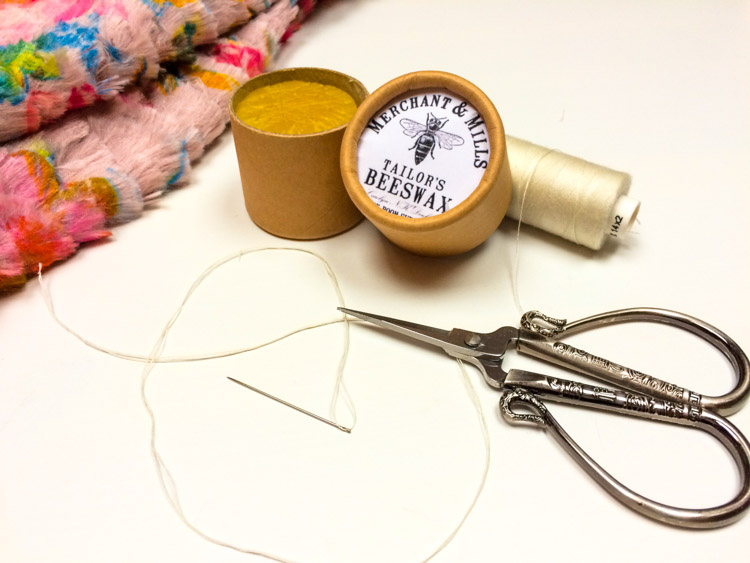
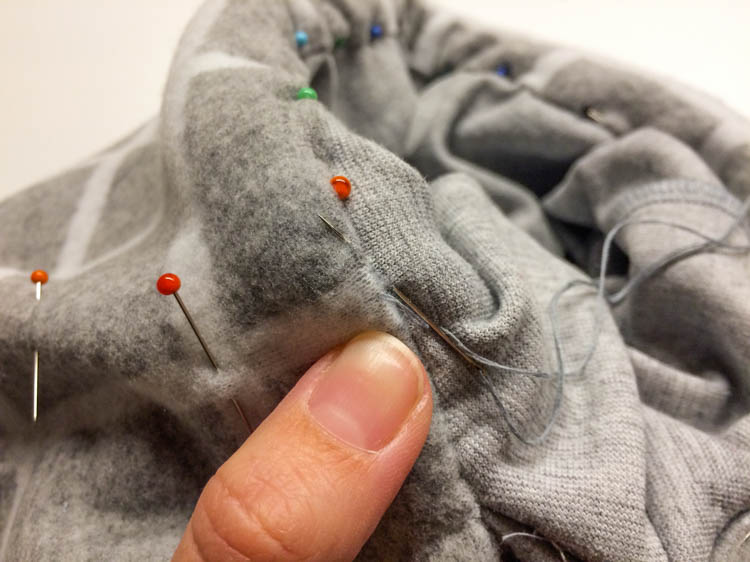
Now sew the top collar to the neck opening (by hand). I recommend double-threading the needle and covering the thread with beeswax to prevent it from tangling. You can get the beeswax in haberdasheries various arts & craft stores. Mine is from Merchant & Mills, here: Beeswax for threads.
Your stitch should be strong and a bit elastic at the same time. You can use a backstitch or pearl stitch. I like the pearl stitch very much and I use it, for example, to sew the lining of luxury pieces. Your stitch should be about 0,7 cm (1/4") long. Sew through the two lower layers and a bit of the top collar. Pull the needle through.
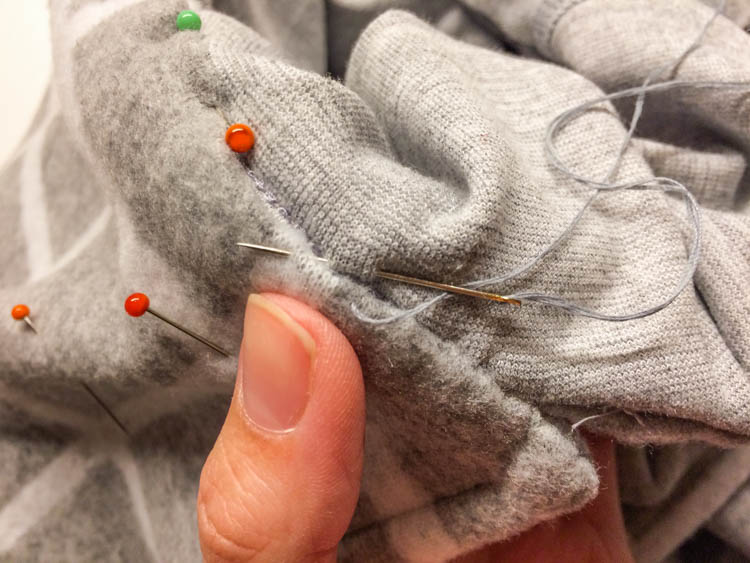
Start the next stitch where the thread exits the top collar and end it through the top collar again. This type of stitch is very strong and nearly invisible at the same time.
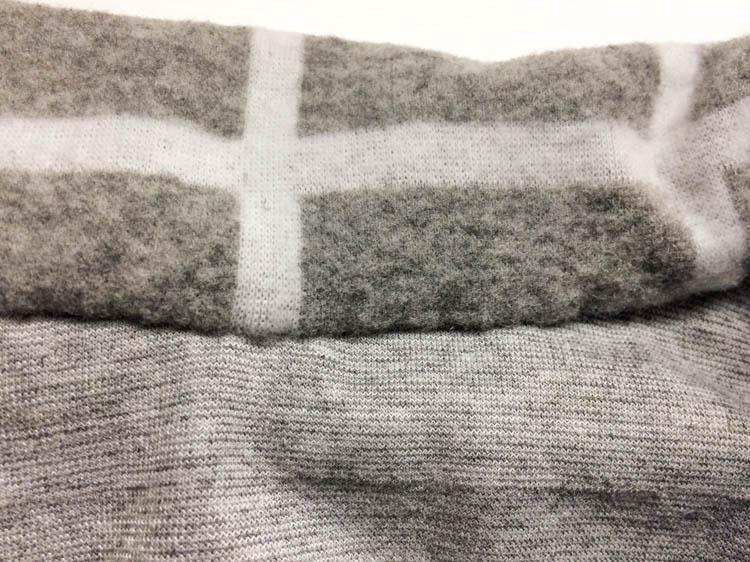
Bottom hem & Sleeve hems
Clean all hems and fold them 3-4 cm to the reverse side. Folds should be aligned with some element of your print and they should be of the same size along the entire circumference. Sew through the folded hems. Use some type of elastic seam to preserve the properties of your fabric.
Buttons & Buttonholes
Buttons are the last step of today’s sewing tutorial. The approximate positions of the buttonholes are marked in your pattern - this layout is suitable for four 2 cm (3/4") wide buttons. You are (of course) free to choose whatever buttons you want and place them however you want. Make your buttonholes horizontal.
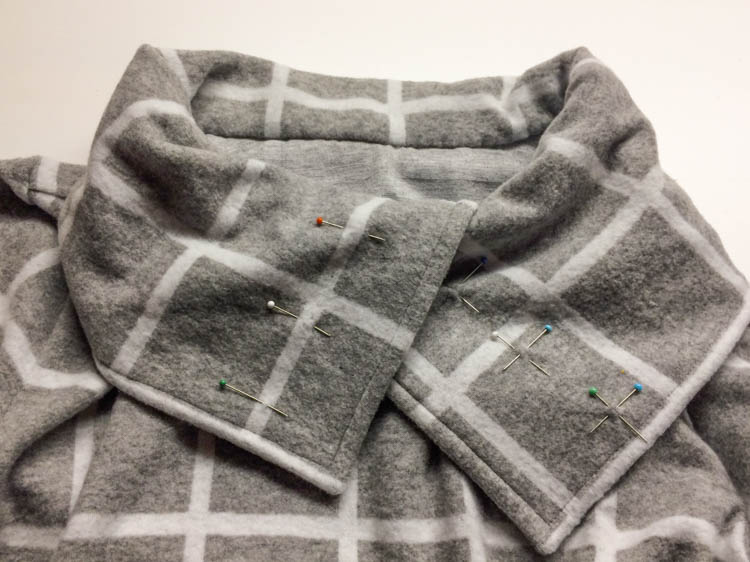
Mark the positions of your buttons according to the buttonholes and sew the buttons to the dress. I recommend sewing the buttons a bit lose and wrapping the thread below the button to create your own "foot" (if you have classic buttons with holes). You can use a toothpick to create some space between the button and the fabric when sewing and then wrap the thread around threads connecting the button with fabric.
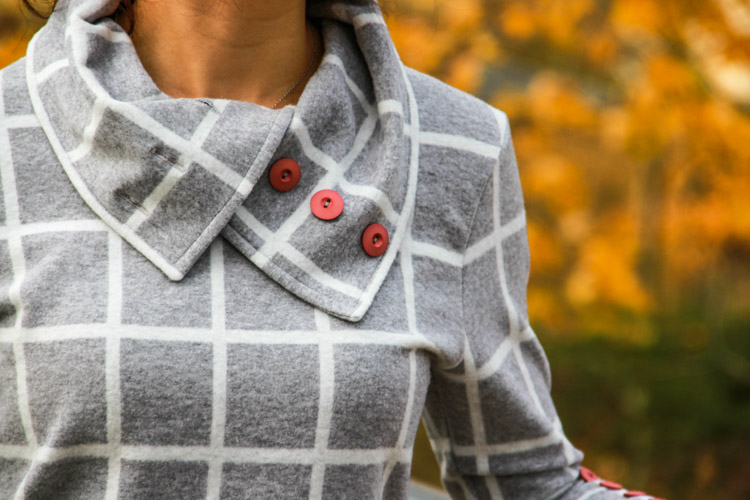
Decorative buttons can be a bit smaller (about 1,5 cm / 5/8"). You can add those to your sleeves.

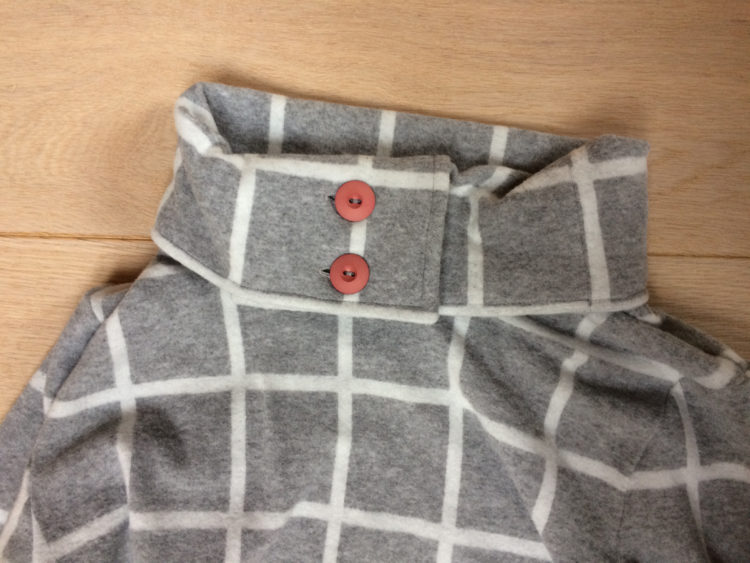
This is how the ideal collar - back piece transition looks like:

And this is the end of today’s looong article. Congratulations and thank you if you're still reading this! That was something, wasn't it? :)
Tell me how you like today's instructions and the new pattern in the comments. I hope that you learned something new today.
And if you missed my previous article about different (sweatshirt)dress made according to this pattern, you can check it out here:
How to sew women’s (sweatshirt)dress
Have a nice day, Petra
Don't forget to share your joy with others!
Do you like this article? If so, share it with your friends and tell me about it in the comments section below. I will be glad for any feedback! ♥
PS: Did you know that there are FREE PATTERNS available on my blog?


