Pattern for children’s dress LADYBUG with long sleeves, pockets and pleated skirt (sewing instructions)
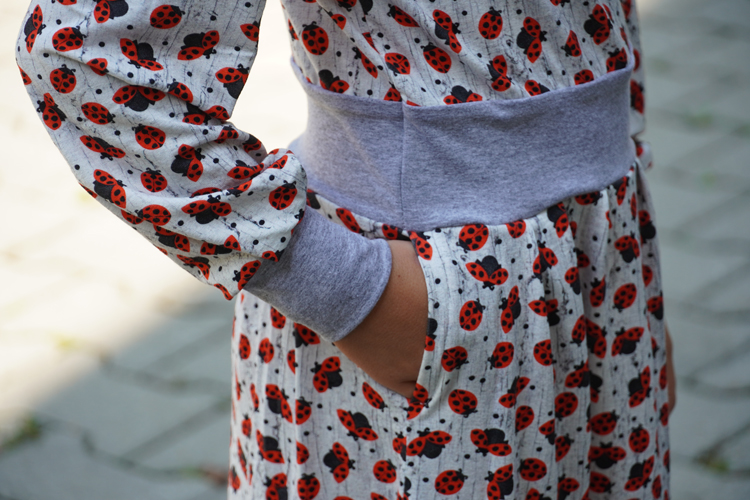
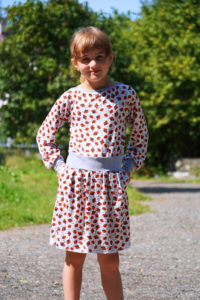
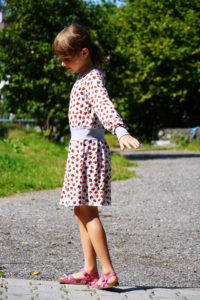
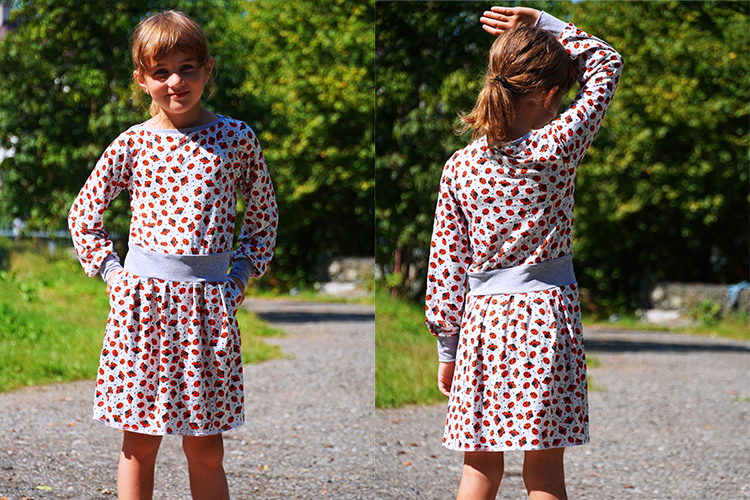
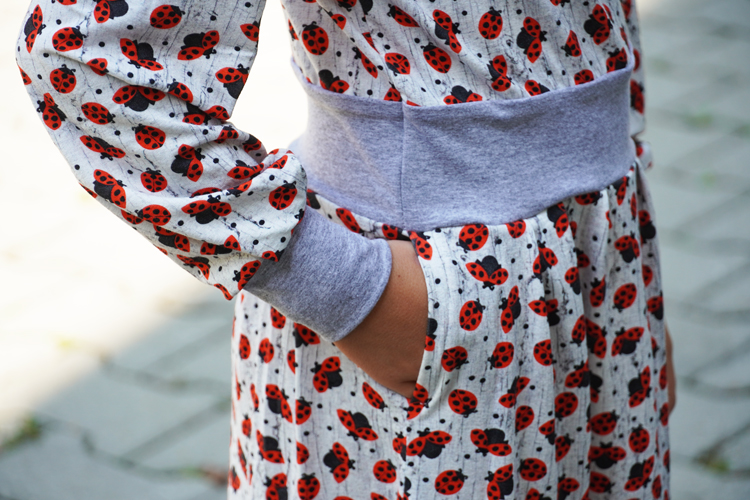
I included this new pattern for children’s dress with long sleeves, pockets and pleated skirt to my autumn patterns. This pattern is fairly simple so I can recommend it even to the daring beginners. The dress has a close-fitting silhouette with a boat neck, wider sleeves with knit hems, a double layered waistline which serves as a “belt”, a simple pleated skirt, and pockets in side seams.
Pattern for children’s dress is now available in our online store:
Pattern for children's dress LADYBUG
Recommended material
I recommend using thin or medium knits – elastic fabrics (ideally cotton knit with elastane, viscose knit, etc.). It depends on whether you want to sew a lighter version for autumn or late summer, or a downright winter dress. My fabric with small ladybug print is from Tufka.cz and you can get it here: Viscose knit with ladybugs
Required amount of material
(for fabric width of 140 cm)
- sizes 80 - 122: 80 cm
- sizes 128 - 140: 100 cm
- sizes 146 - 164: 150 cm

Suggestion
You can sew the dress on overlock or regular sewing machine. Before you start sewing, I recommend reading this article:
Sewing elastic fabrics on regular sewing machine – 4 steps to success
How to sew the children’s dress LADYBUG step-by-step
Cuts preparation
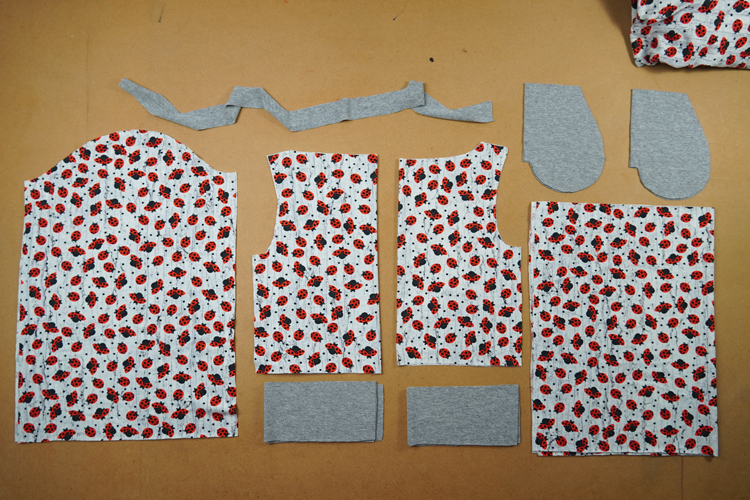
According to the paper pattern prepare:
Prepare following pieces from the main fabric (If you are using two contrasting fabrics):
- 1x back bodice piece (folded fabric cut)
- 1x front bodice piece (folded fabric cut)
- 2x sleeve piece
- 2x skirt piece
From secondary fabric:
- 4x belt piece
- 4x pocket piece
- Knit strip for neck opening hem (about 3 cm wide)
- Also prepare rectangles for sleeve hems for later
Bodice
Do the hems of the neck opening on both bodice pieces first. Since it is the boat neck and children's clothes are smaller than the women's clothes, I recommend sewing the hems on the front and back piece separately.
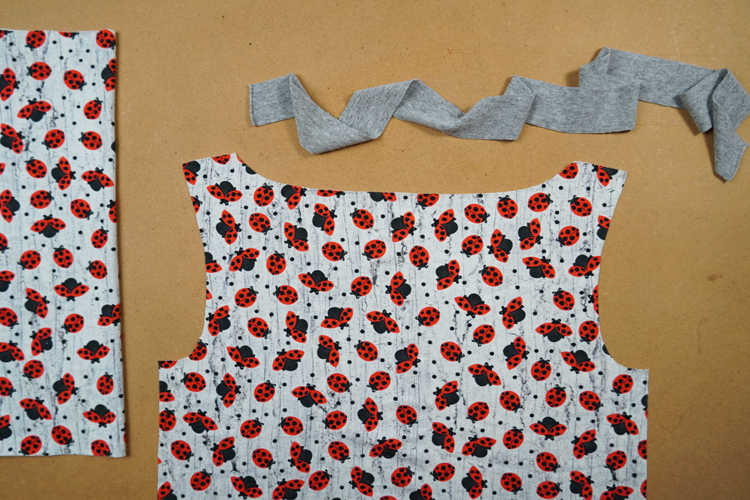
Fold the knit strip in half lengthwise (face side out) and sew it to the face side of the neck opening. I recommend doing this on overlock, but you can do it with elastic seam on regular sewing machine too. Do not stretch the knit strip too much to prevent the neck opening deformation. Since it is a boat neck, the hem tension is minimal. Iron the seam.
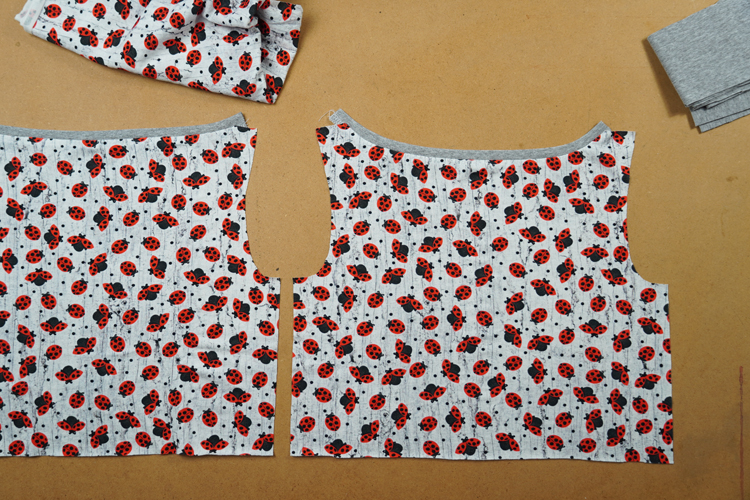
Do the neck opening of the other bodice piece in the same way.
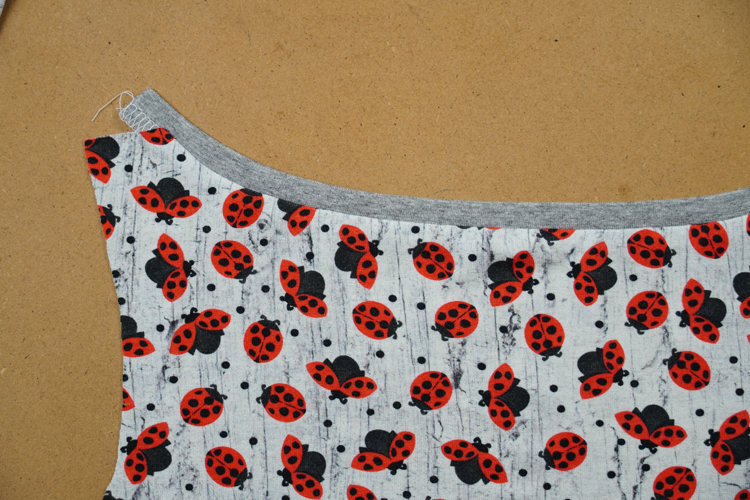
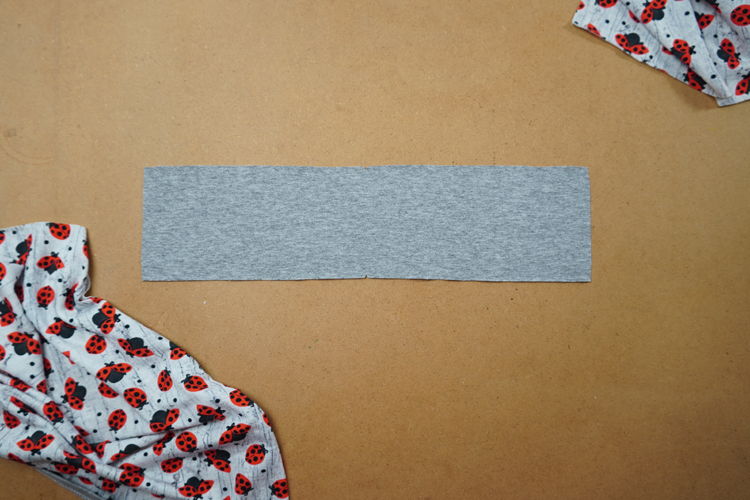
Now lay one of the belt pieces down (face side up)
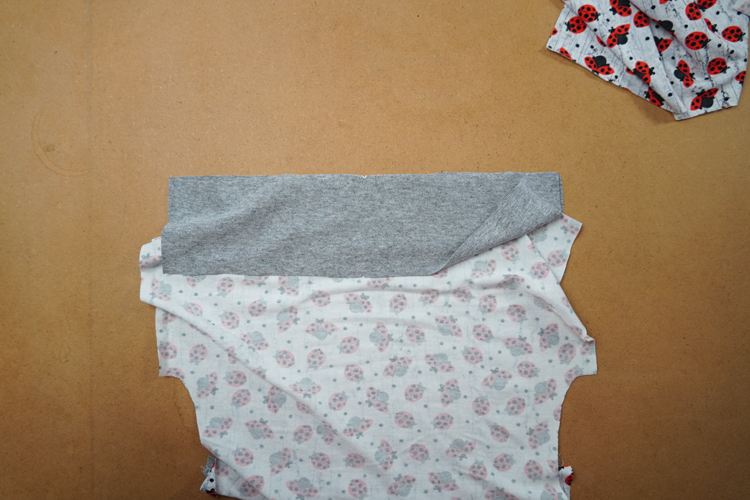
Lay front bodice piece over it (face side down). It is important to align centers of both pieces.

Now place second belt piece over the front bodice piece, face side down this time. Align its center too.
Pin the center of all three pieces and then pin their sides.
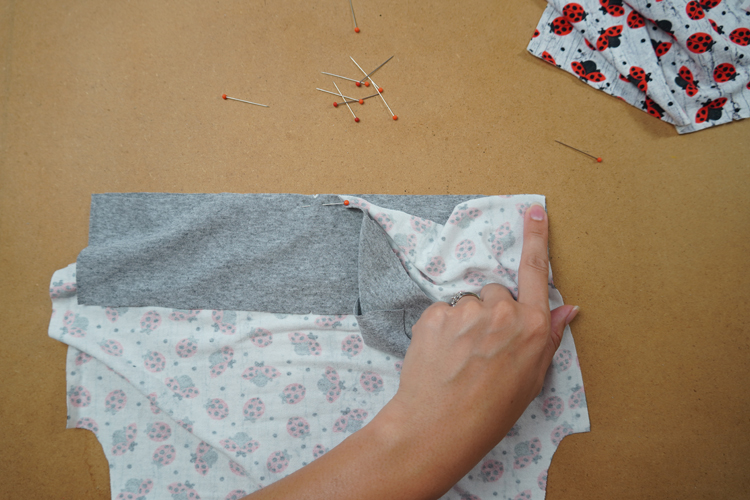
Pieces should be connected by one side only. Here is the longer front bodice piece between two belt pieces.
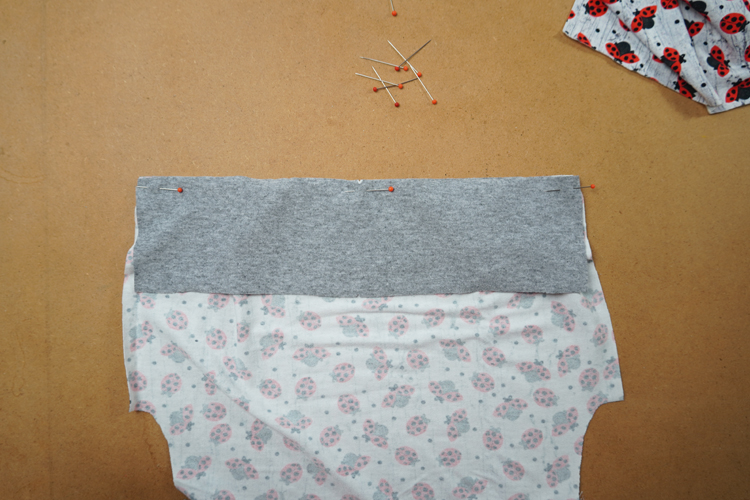
Sew through all three layers. You will need to stretch the belt pieces a little to sew them to the bodice evenly and continuously. Bodice piece should become a little wavy along the waistline.
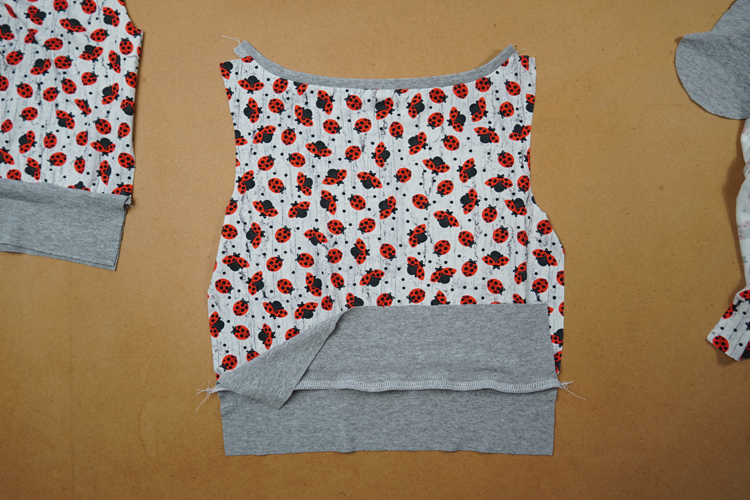
Seam stays hidden in between the belt pieces.

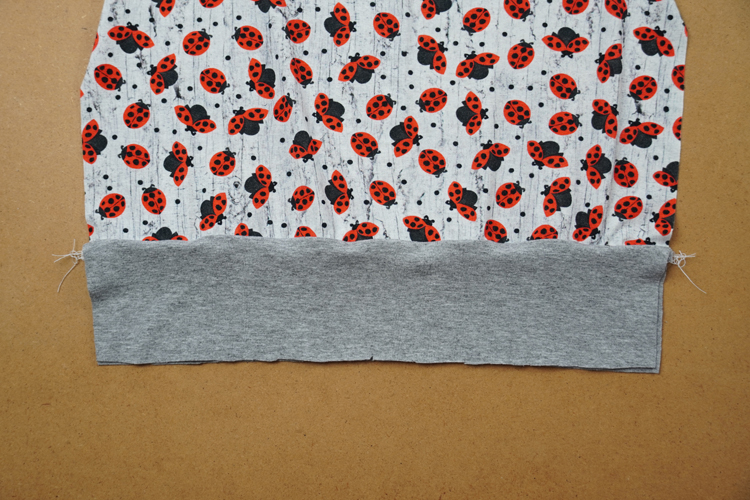
Work on the back bodice piece in the same way.
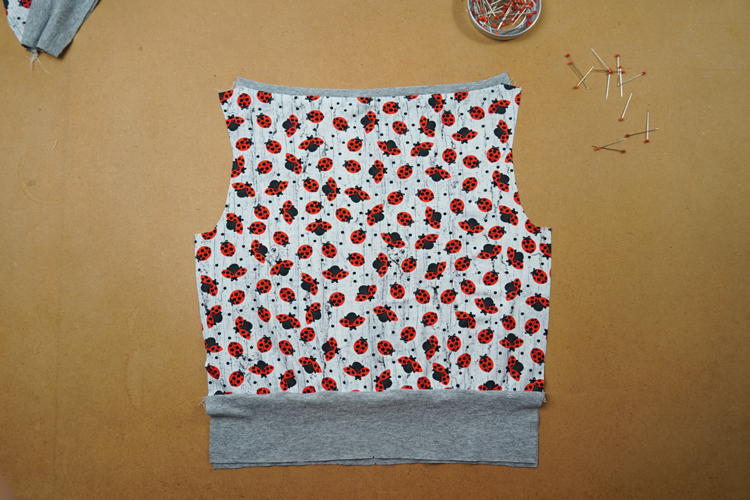
Now lay front piece over the back piece (face side to face side) and pin the shoulder seams. You will need to play with the shape of the neck opening hem a little to align it nicely. I recommend pinning the seams and then checking the dress from face side to see if it looks fine, adjusting the seams if needed, and sewing only after that. Do the shoulders with elastic seam on the regular sewing machine first (even if you are sewing on overlock). You will be much more precise this way, because it is very hard to keep multiple layers (4+) aligned under the overlock foot. So, sew the shoulder seams on the regular sewing machine...
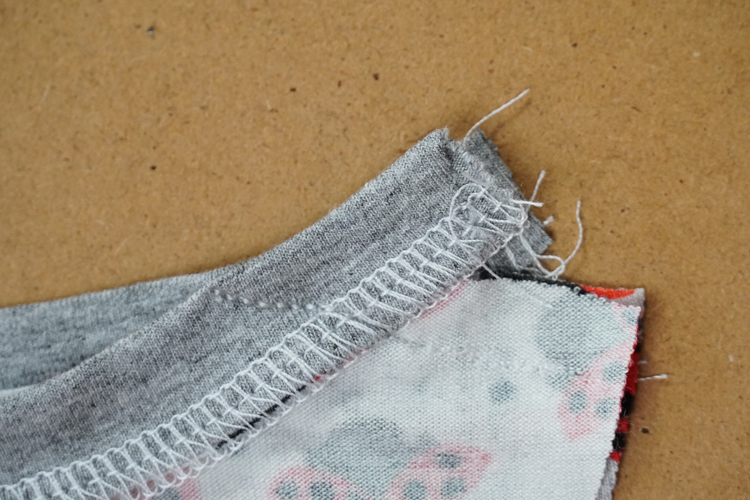
...check the face side once again and concentrate on correct alignment of both edges of the neck opening hem...
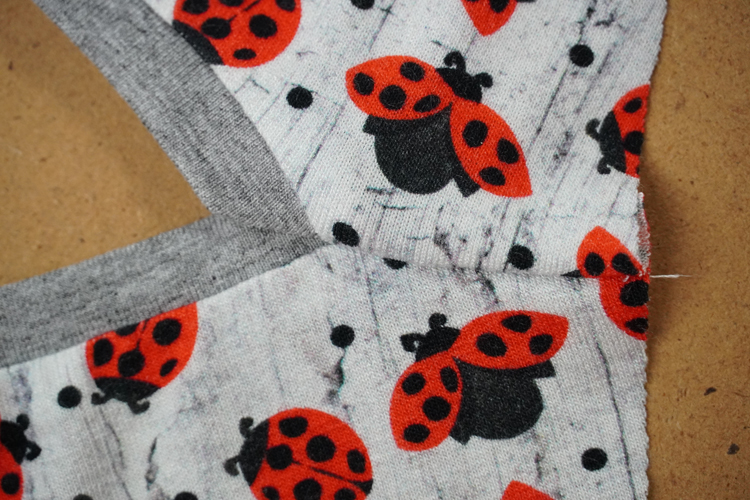
...and only after that sew the shoulder seam on overlock. Pull free end of thread chain under the loops.
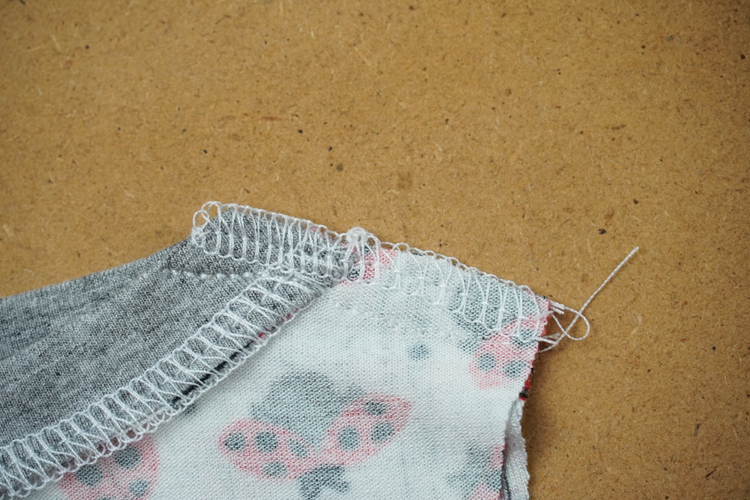
Do the other shoulder seam in the same way. Fold the seam allowances towards the back piece and use pins to temporarily fix them in place. Iron the seam allowances.
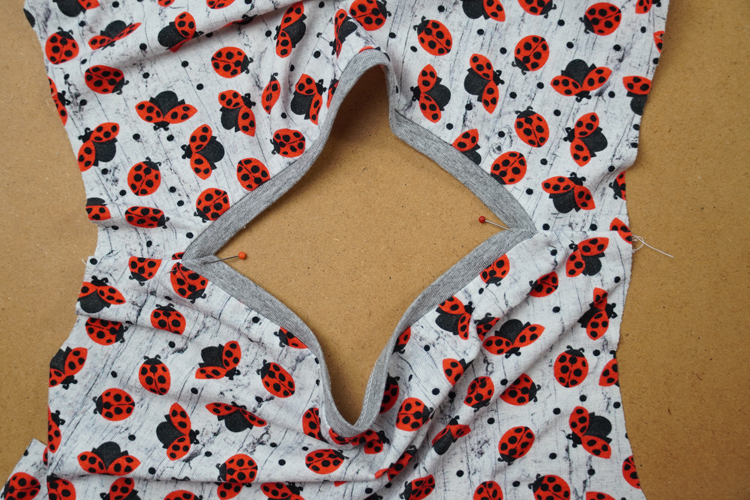
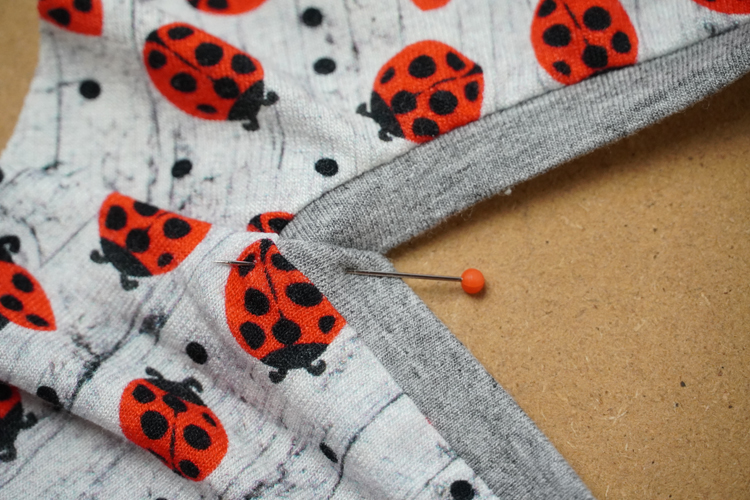
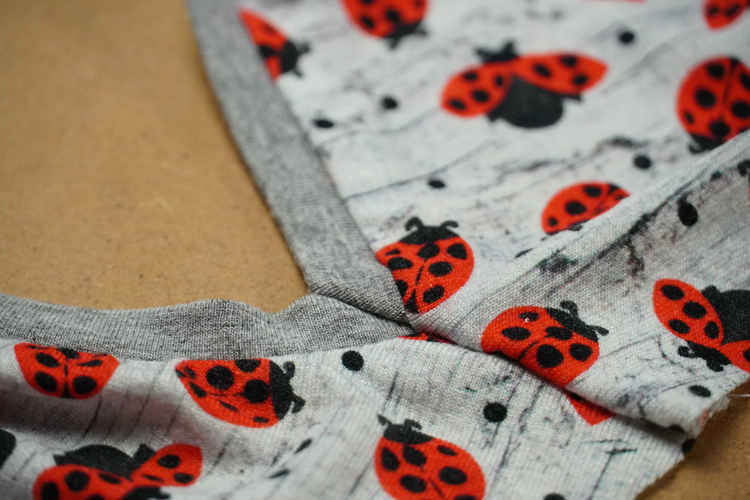
I recommend fixing the seam allowances in place with a few small hand stitches (from the reverse side). Shoulder seam allowances should stay as flat as possible not to raise the neck opening when the dress is worn.
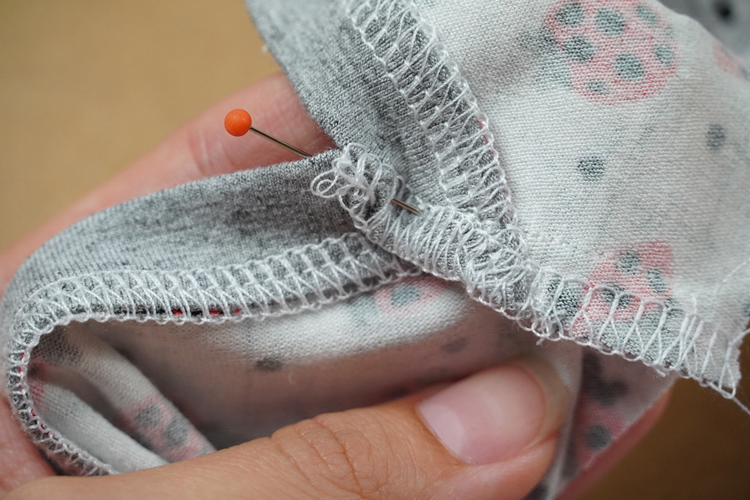
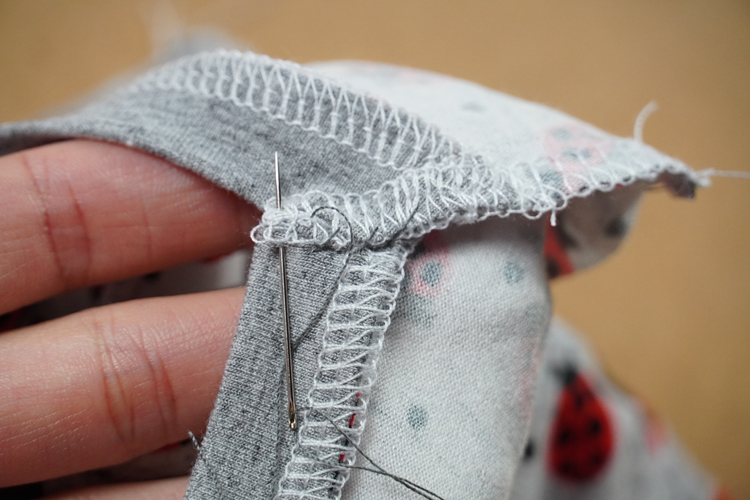
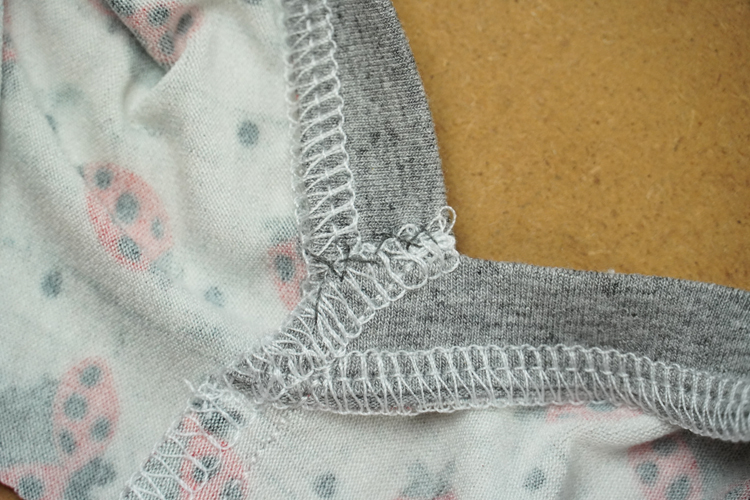
The result should look something like to this:
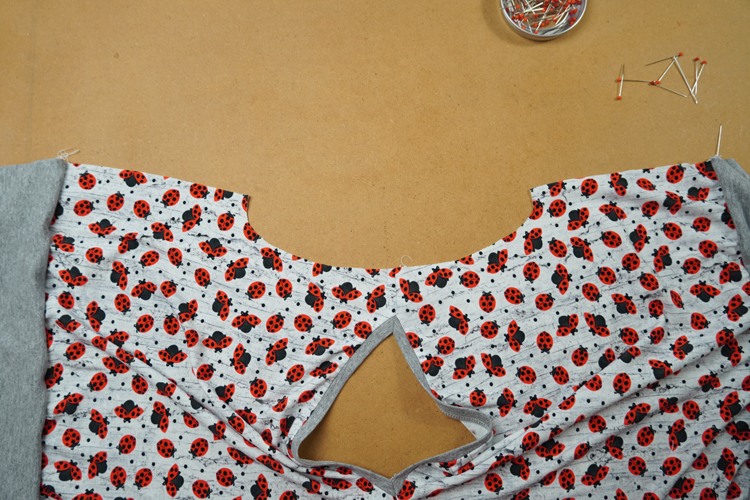
Now take the bodice and spread it “face sides up” so you can get to the arm openings easily.
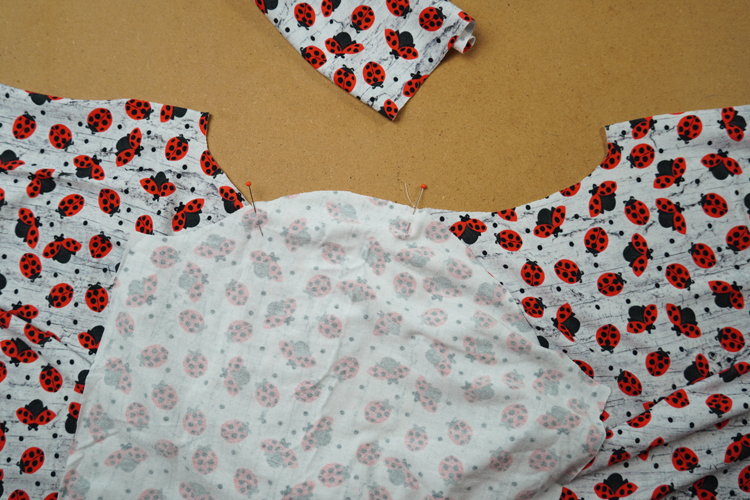
Pin one of the sleeve pieces to the bodice (face side to face side). There is a mark in the front piece of the bodice, align it precisely with the mark on the sleeve piece. You must align marks on the pieces and top of the sleeve with shoulder seam of the bodice. Pin these two places first...
...then pin the rest of the sleeve to the open arm opening.
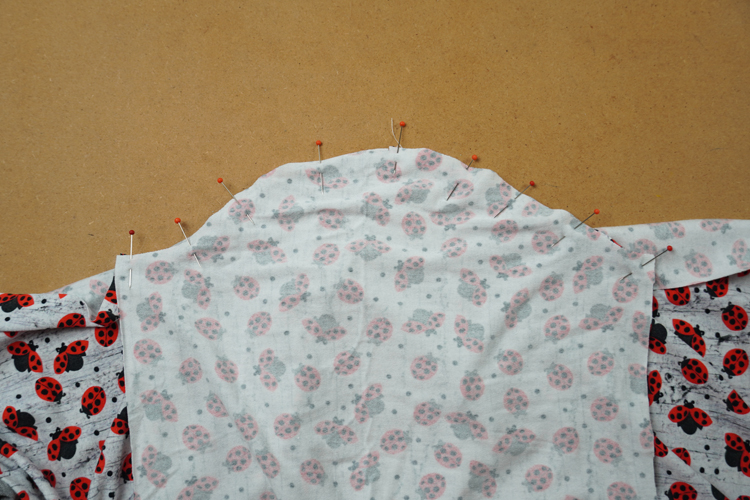
Pin and sew the other sleeve in the same way.
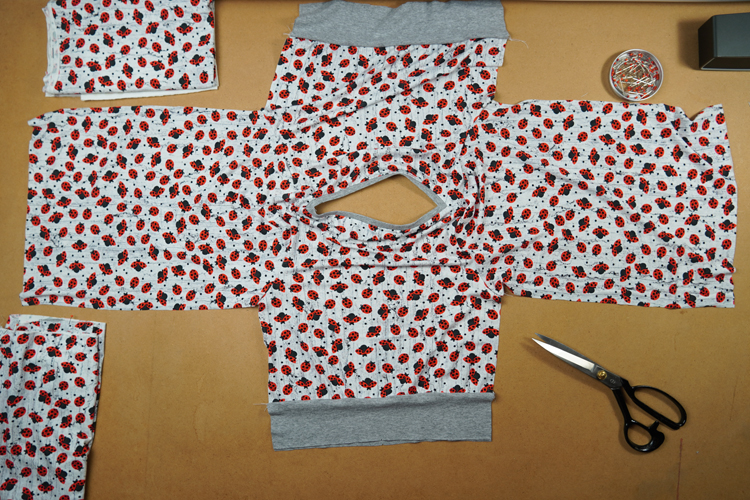
Now fold the bodice so that the face sides are facing in. Back piece is on top of the front piece and sleeves are folded on themselves so that you can pin the side seams and sleeve seams in one go. Take care to align belt seams of both pieces perfectly. You are going to sew through many layers at once in the waistline area. It may be good idea to sew this part of the seam on regular sewing machine first (or hand stitch it) so that all the layers stay where they should.

Pin side seams and sleeve seams.
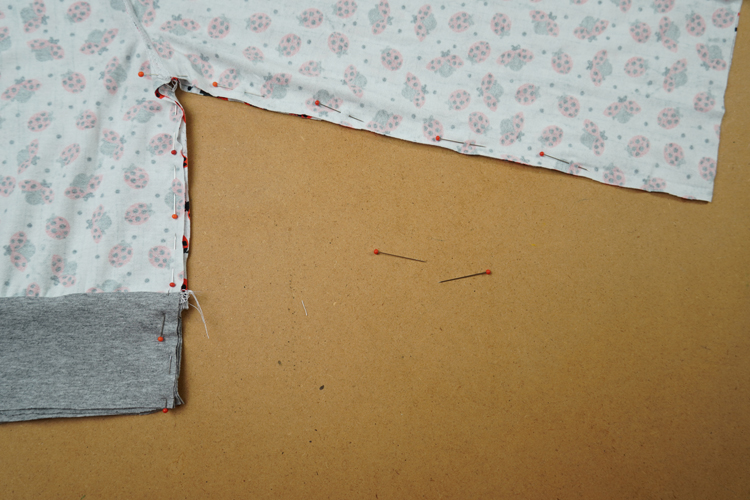
Then sew. Do the seams on both sides of the bodice.
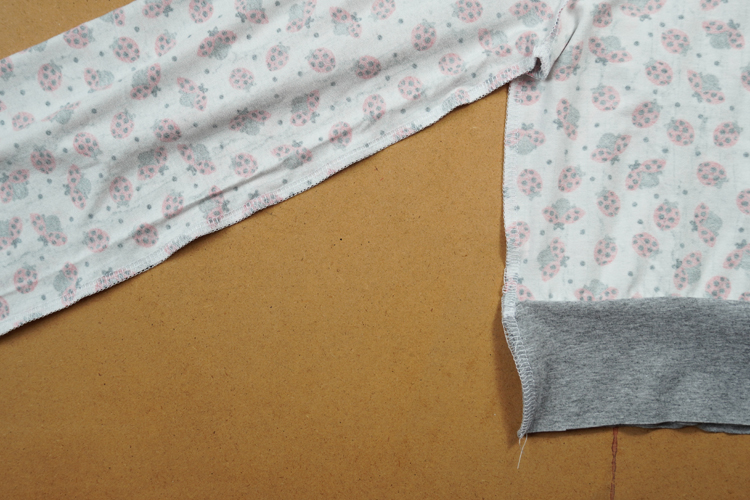
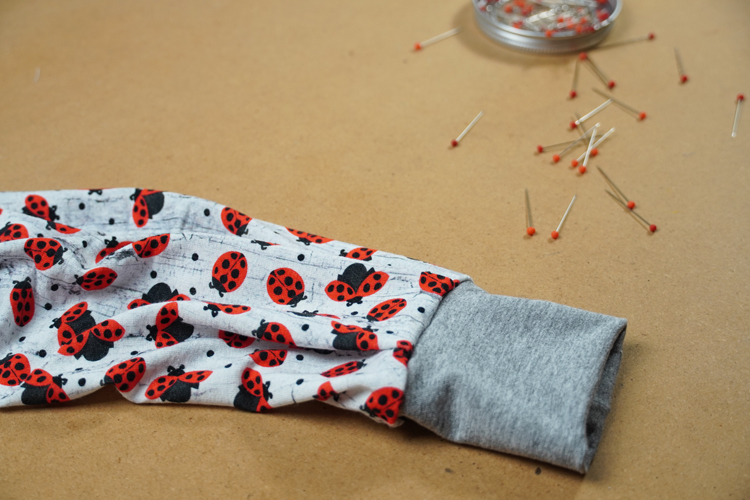
Now is the time to do sleeve hems. Final width of the cuff should be:
- 4 cm for sizes 80 – 98
- 5 cm for sizes 104 – 122
- 6 cm for sizes 128 – 164
Width of the unfolded hem piece should be two times the final width + 2 cm for the seam allowances, in other words:
- 10 cm for sizes 80 – 98
- 12 cm for sizes 104 – 122
- 14 cm for sizes 128 – 164
Length of these pieces depends on thickness and elasticity of the material. It should be about the child's wrist circumference (without seam allow.) for very elastic and thin materials. And wrist circumference + up to 5 cm (for seams and freedom of movement) for thick and inelastic materials.
I used two pieces with width of 14 cm and length of 16 cm for Terula (dress SLIM, size 128). My hems are made from thin cotton knit with elastane and Terulka has a wrist circumference of 13 cm.
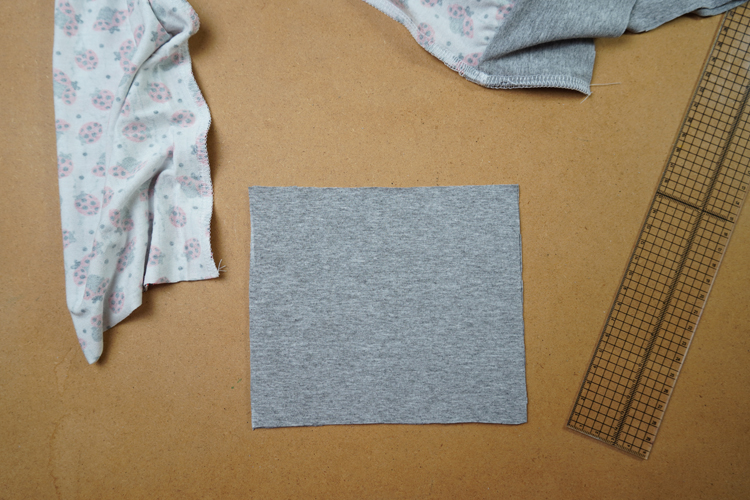
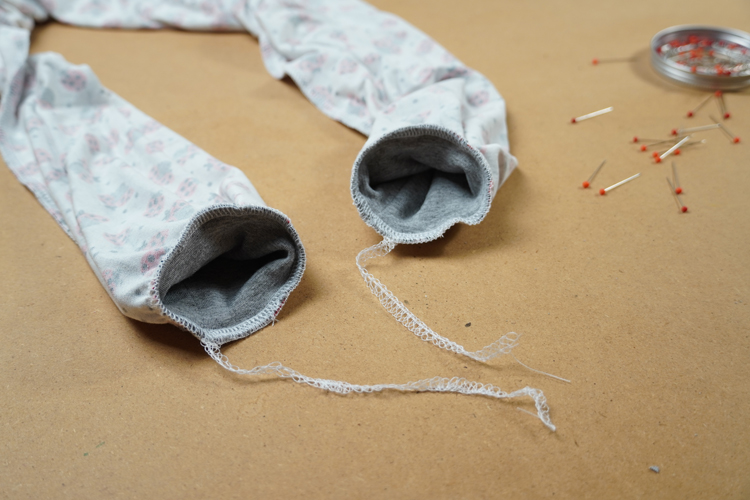
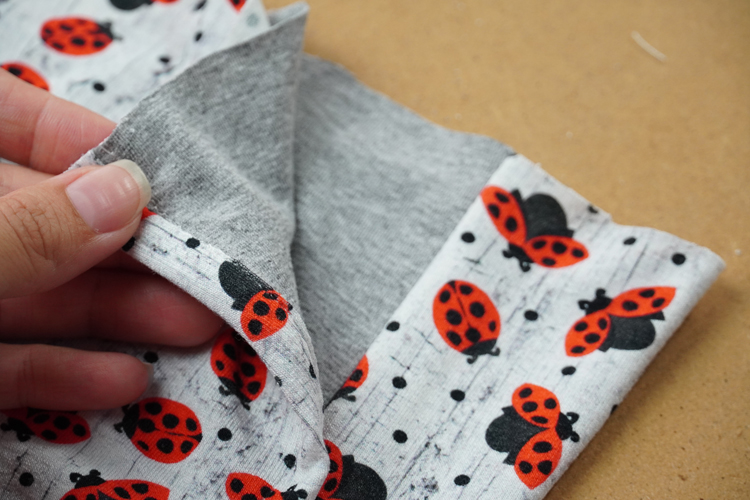
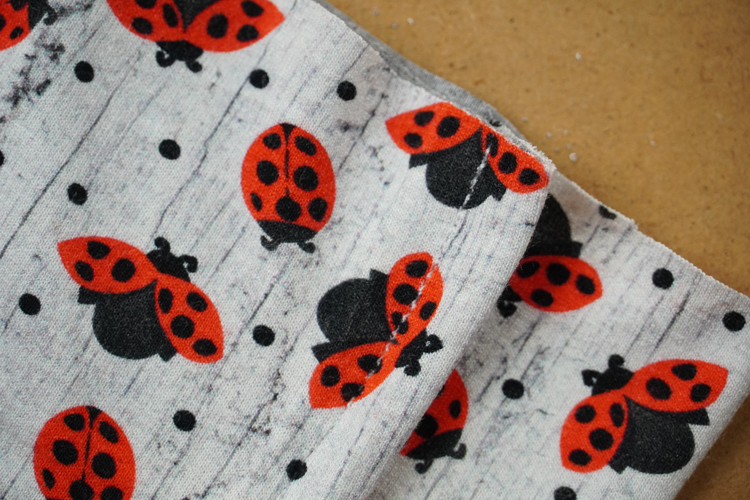
Fold the cuff pieces in half (face side in) and sew their “sleeve seams”.
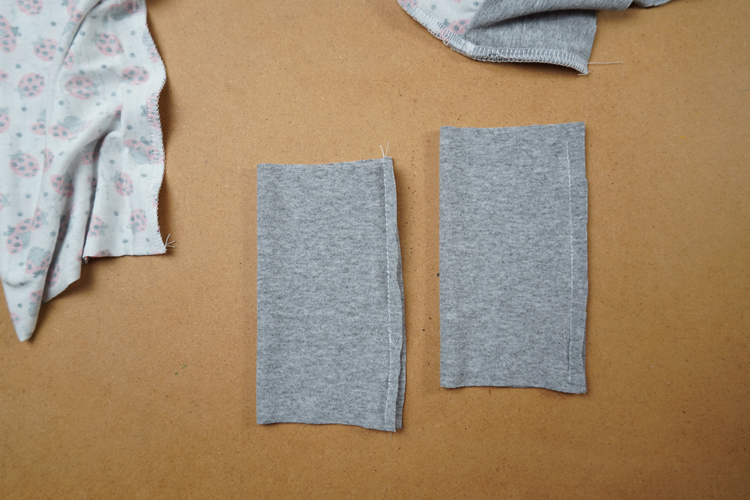
Then fold the pieces in half (face side out) and pin them into the sleeves.
As the sleeves are quite wide and the cuffs are narrow, I recommend counter-folding the sleeve(s). Pin the “sleeve” seam of the cuff to the sleeve seam first, then pin the points directly across from the seams. These points need to be aligned. Then I put a third pin to the sleeve and cuff (far left on the picture). It is 2 cm away from the center pin.
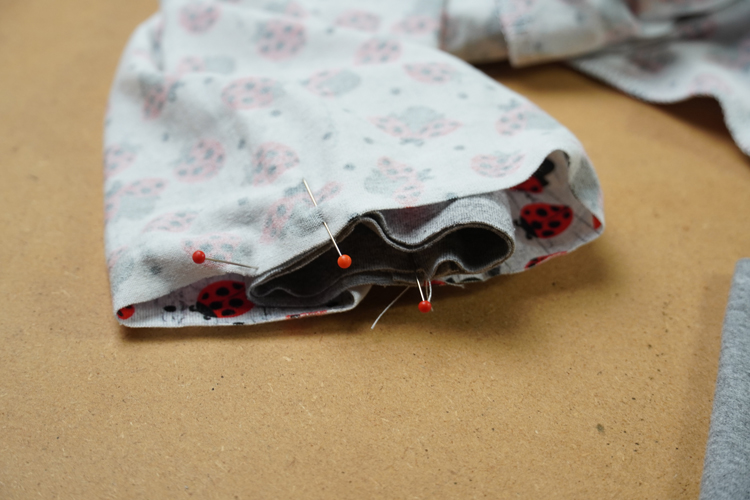
Far right on this picture.
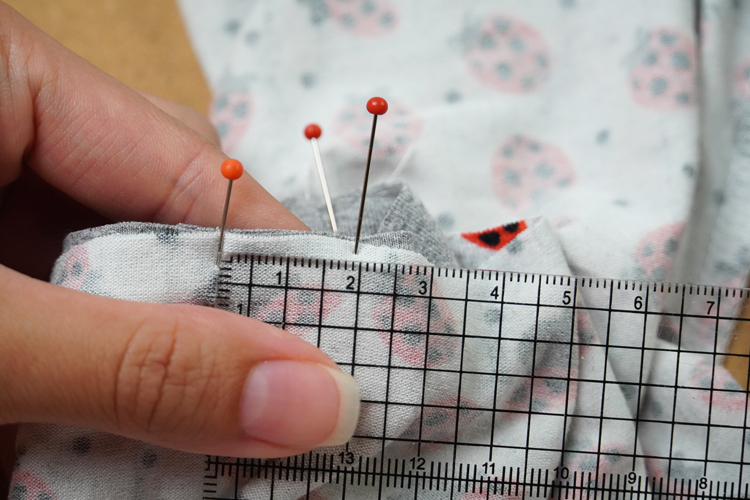
I made the first half of the counter-folding from this pin - I folded the sleeve from this pin and led it towards the center pin, where I folded it again and guided it in the original direction. There are now two layers of the cuff and three layers of the sleeve in this area.
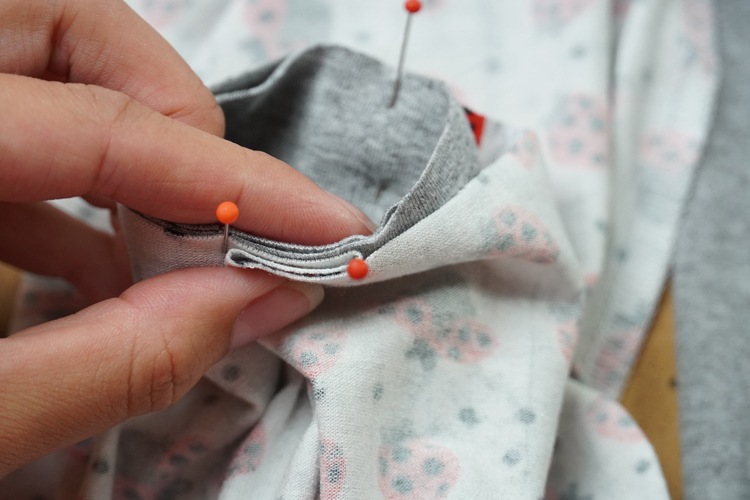
I did the other side of the sleeve in the same way (folding from the local center pin). That is the second half of the counter-folding.

I left the rest of the sleeve unpinned. You will need to stretch the cuff a little to sew it to the rest of the sleeve evenly.
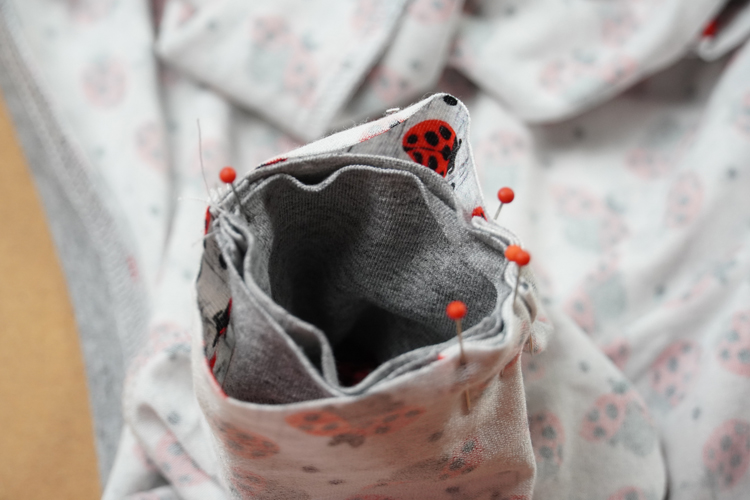
I did the other cuff in the same way. I did it on overlock, so I had to pull free ends of thread chains under the loops afterwards.
Skirt
We need to prepare pockets before sewing the skirt itself. Take back or front skirt piece and lay it face side up. There are marks in the top part of the piece (according to the paper pattern) telling us where the pleating will be. So, we will be working on this top part of the skirt. Prepare pocket piece too.
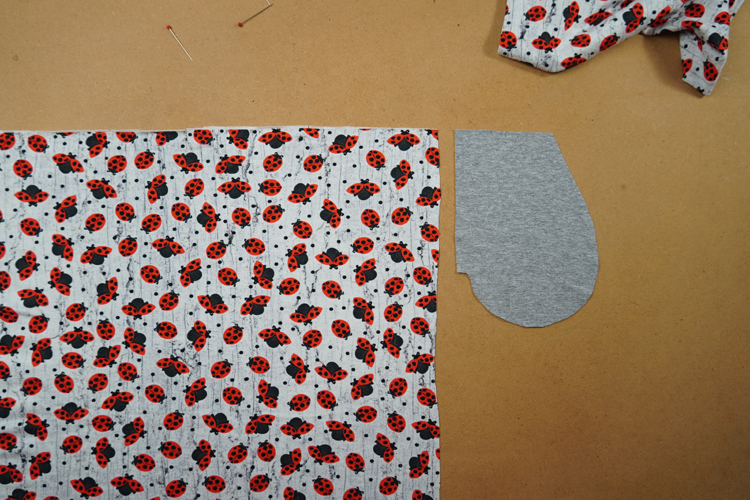
Pin the pocket piece to the skirt piece (face side to face side) in the side seam area.
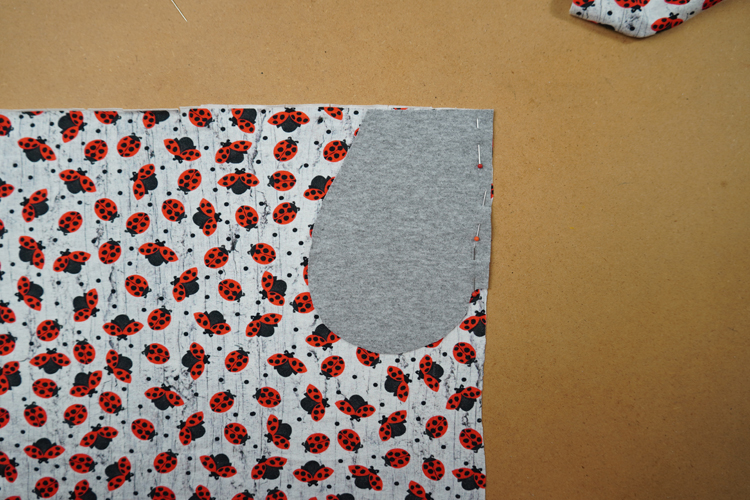
Sew pieces together Do the same on both the other side of the skirt piece.
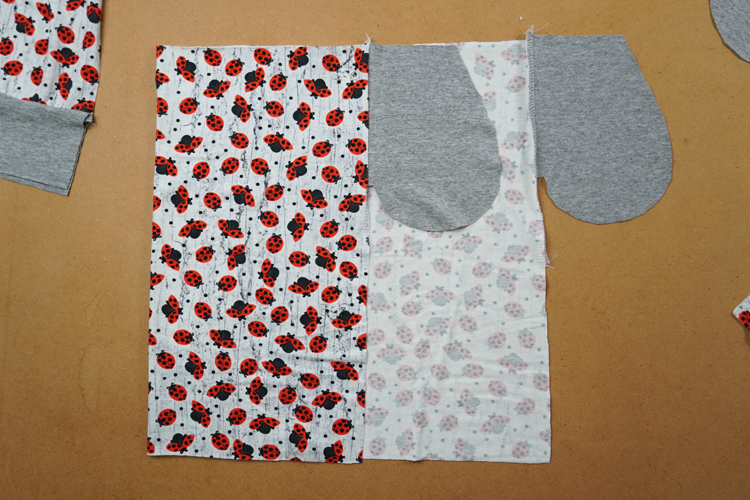
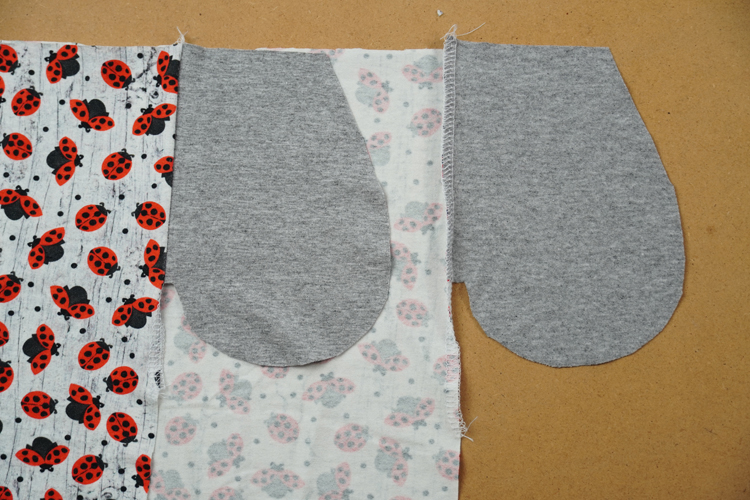
Now do the other skirt piece in the same way.
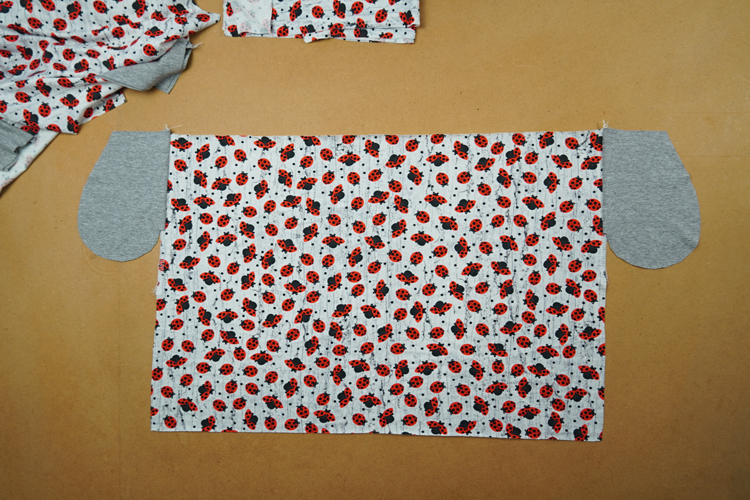
Lay skirt pieces with pocket pieces on top of each other (face sides to face sides), then pin side seams of the skirt and pocket pouches.
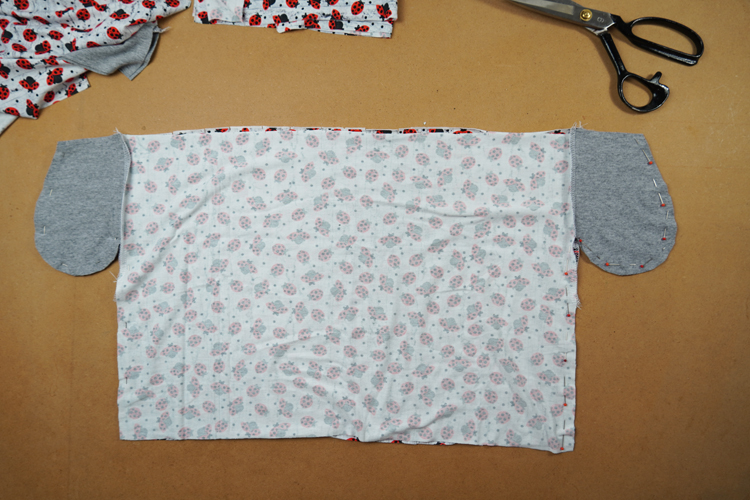
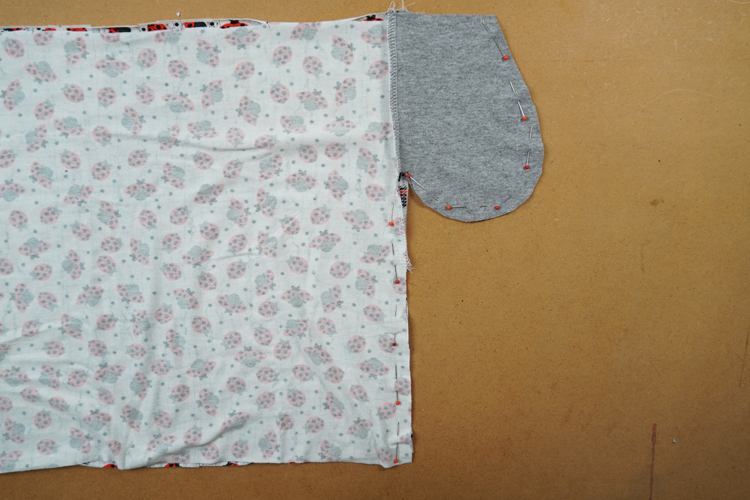
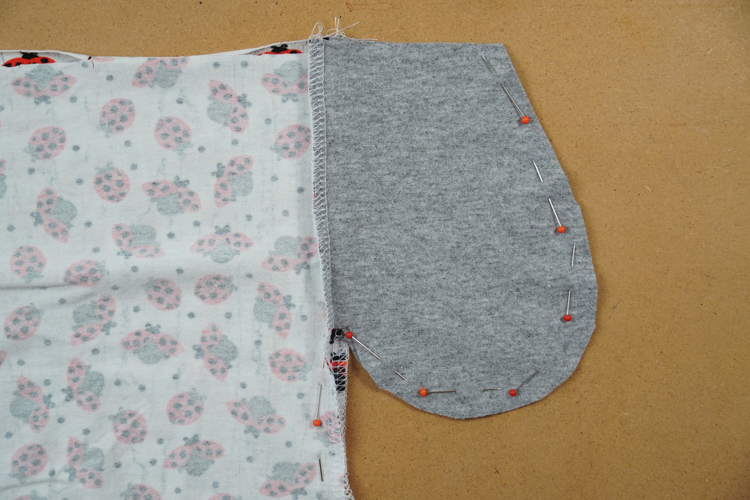
And sew. Sew the pocket pouches slowly to get the curve right.
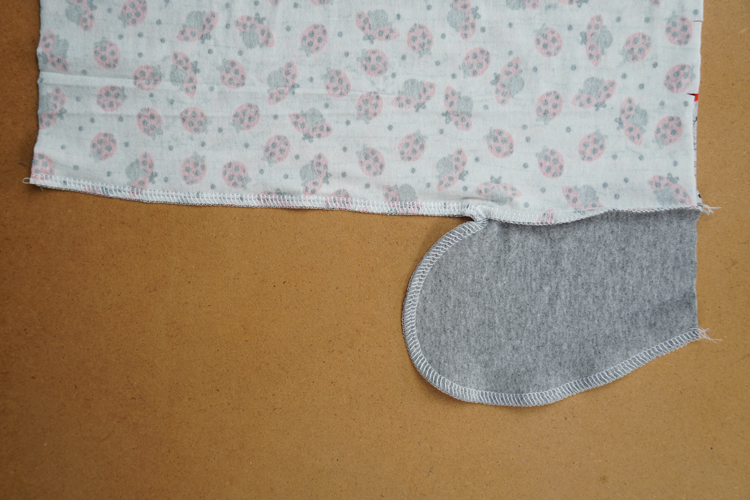
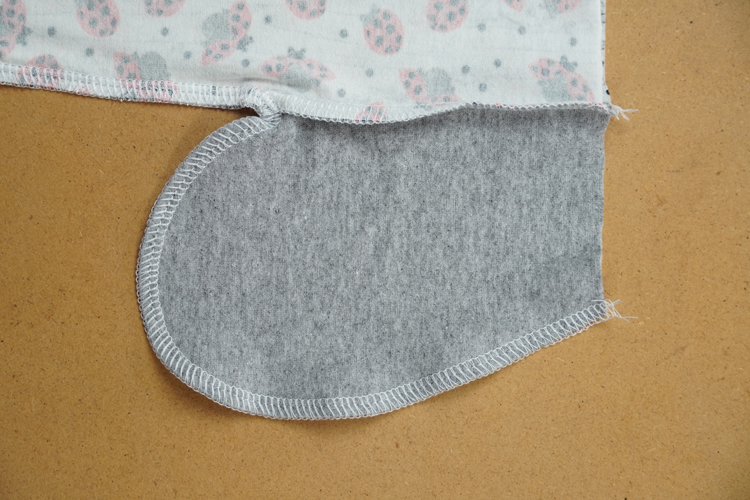
Now you need to sew through skirt pieces a little bit further away from the side seam. Mark the sewing line with pins, it should end about 1 cm away from the place where pocket piece meets the side seam. Lead the line from the upper endpoint (near the pocket) towards the side seam. You can drag this sewing line almost up to the bottom hem of the skirt or connect it with the side seam somewhere higher at shallow angle.
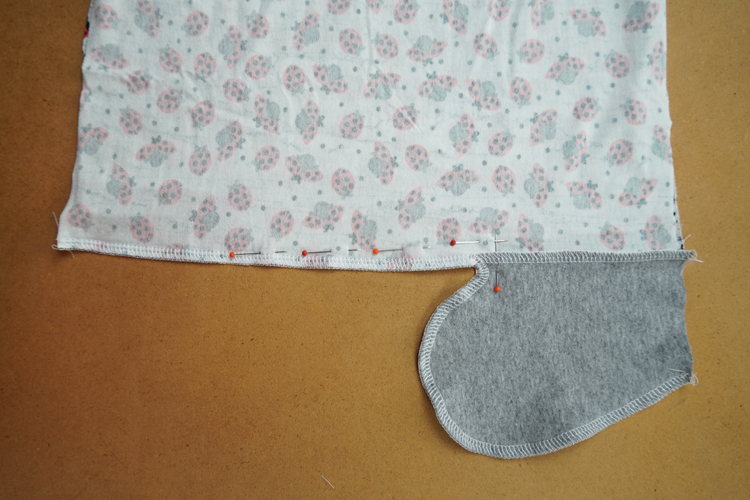

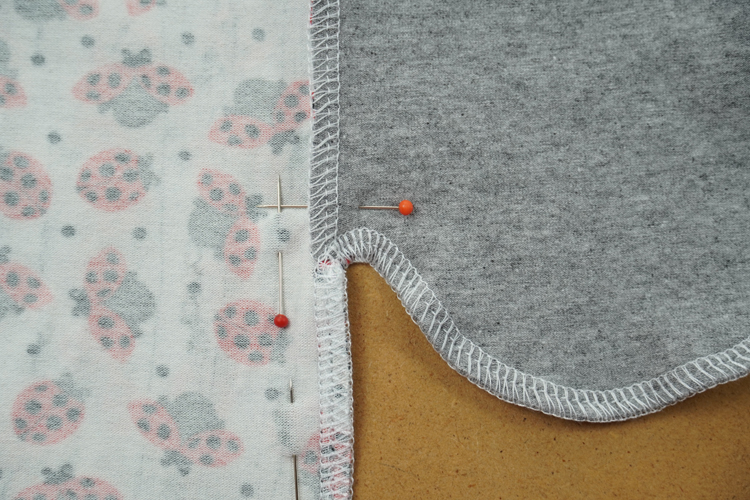
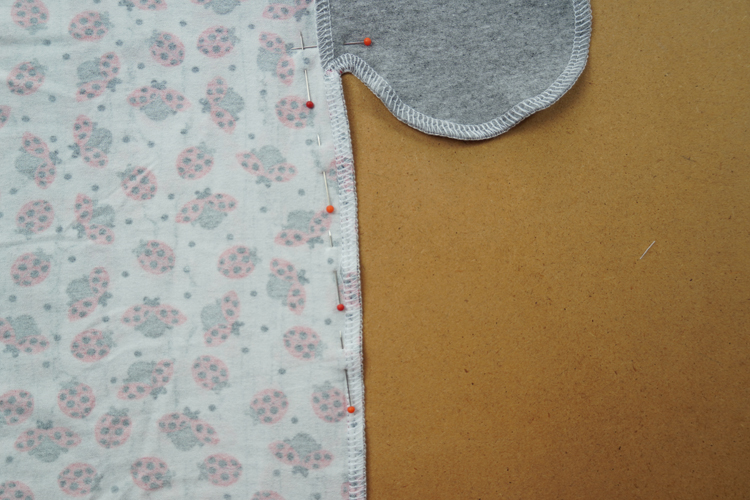
Sew along the line with straight elastic seam.
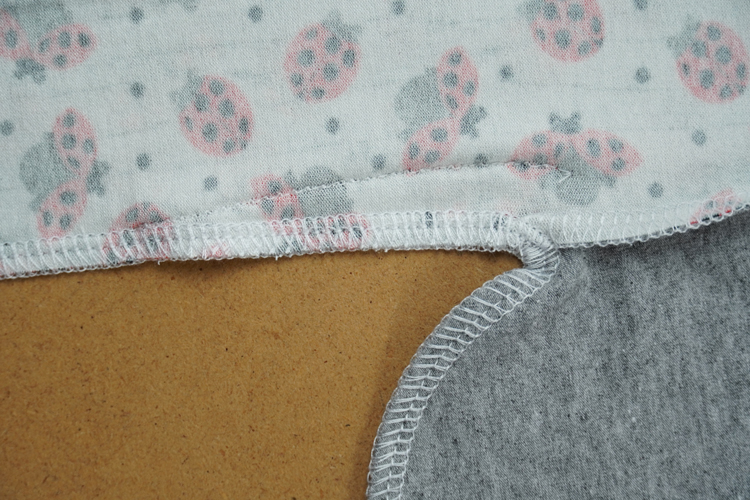
This is the side seam from the face side of the skirt:
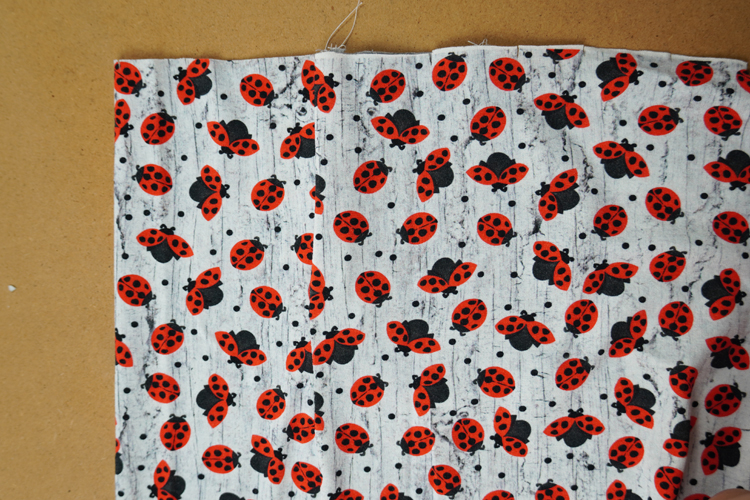
There is a pocket pouch inside.
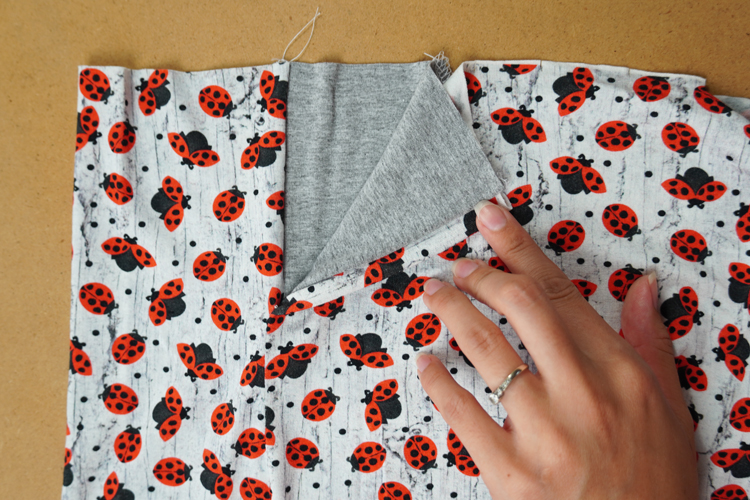
Wrap the skirt (front piece) around the seam allowance of the pocket in this way:
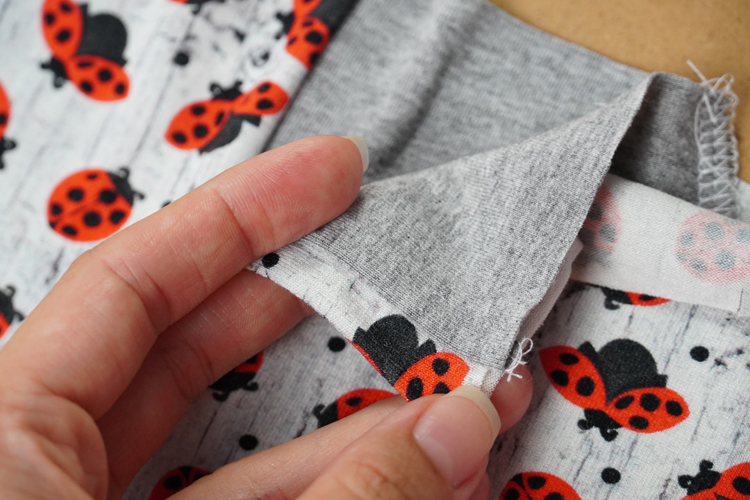
Pin the pocket opening.
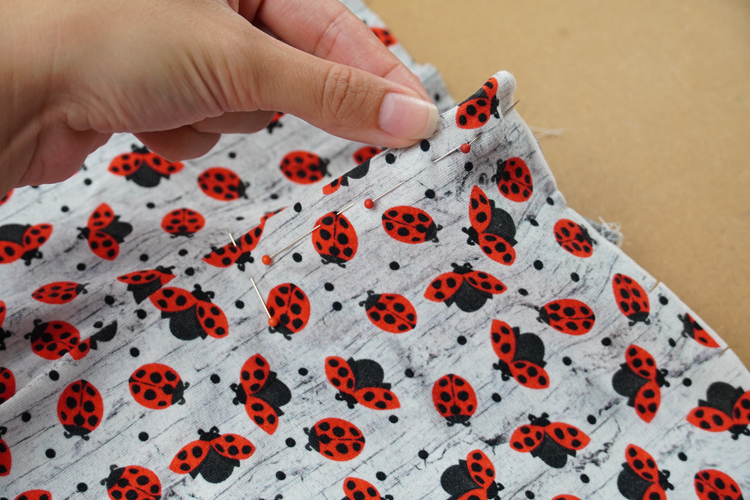
Sew through the front skirt piece along the pocket opening.
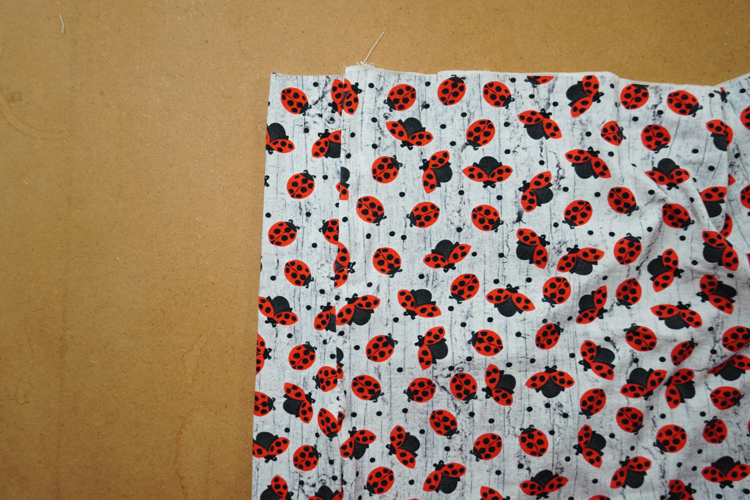
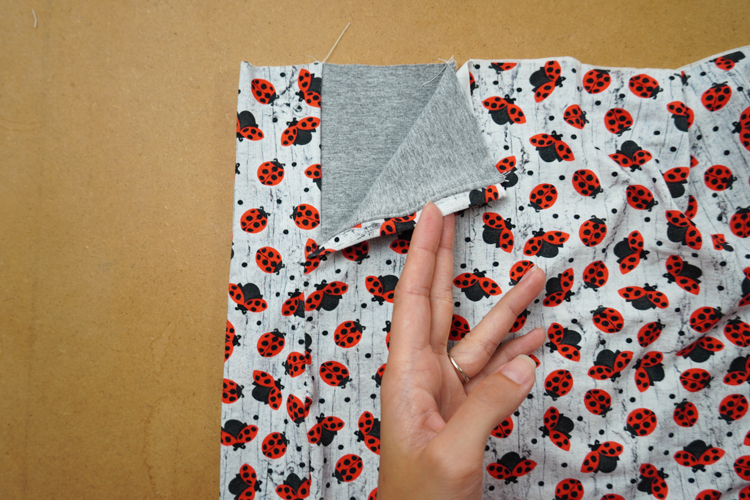
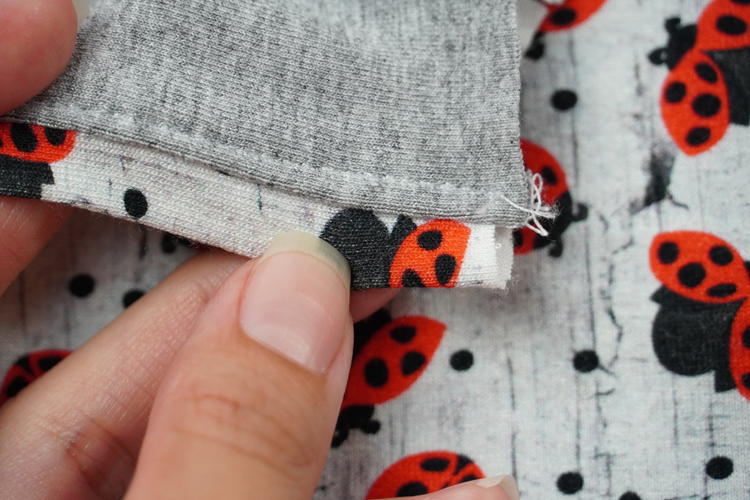
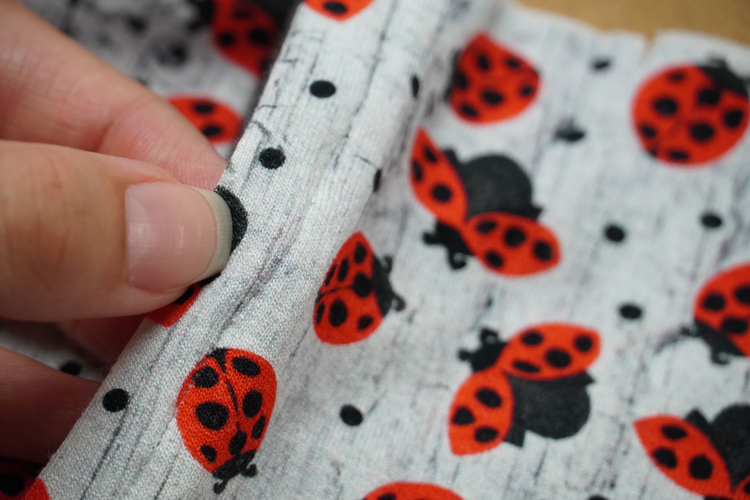
Pin the pocket pouch to the front skirt piece in the waistline area. We are doing this avoid any mistakes involving the pocket pouch when sewing other parts of the dress.
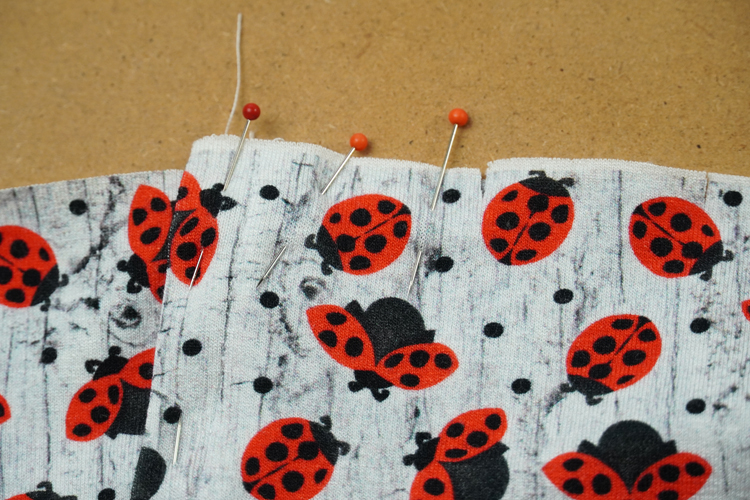
Do the pocket on the other side in the same way.
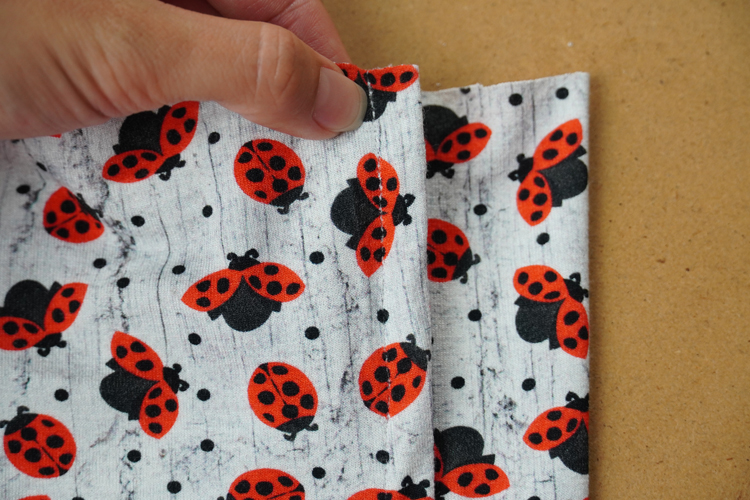
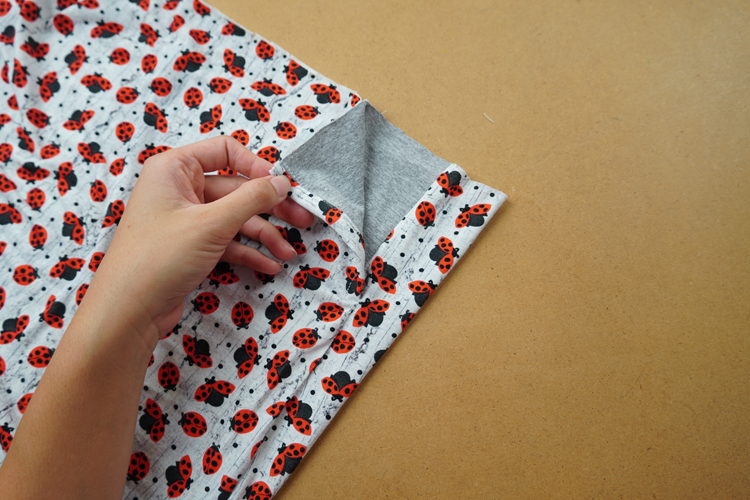
Bodice and skirt connection - completing the dress
We are now going to connect the bodice with the skirt.
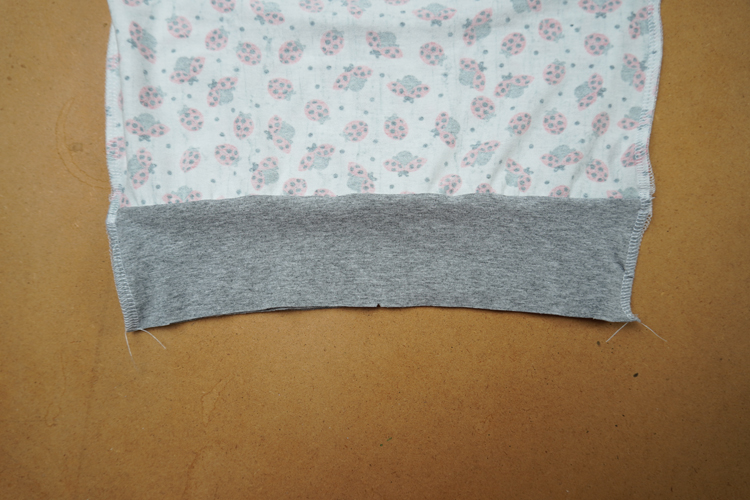
Mark the middle of the belt with a small cut. Do this in both the front and the back of the bodice. There are other marks on the paper pattern, they are telling us where to fold (pleat) the skirt. However, since there are a lot of marks on both skirt and belt, it can be unnecessarily confusing. If you are worried about them, then mark and use only the one in the middle of the belt.
Mark the middle of the skirt too. Other marks on the skirt are there to show us where and how much to fold the skirt to create pleating.
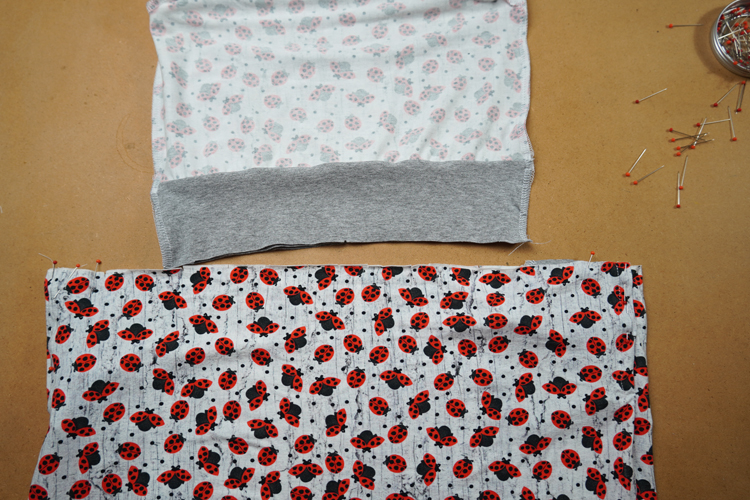
Slide the bodice inside the skirt (face side to face side) Make sure that the front pieces and the back pieces lie on top of each other. Don’t sew the front part of the bodice to the back part of the skirt by mistake.
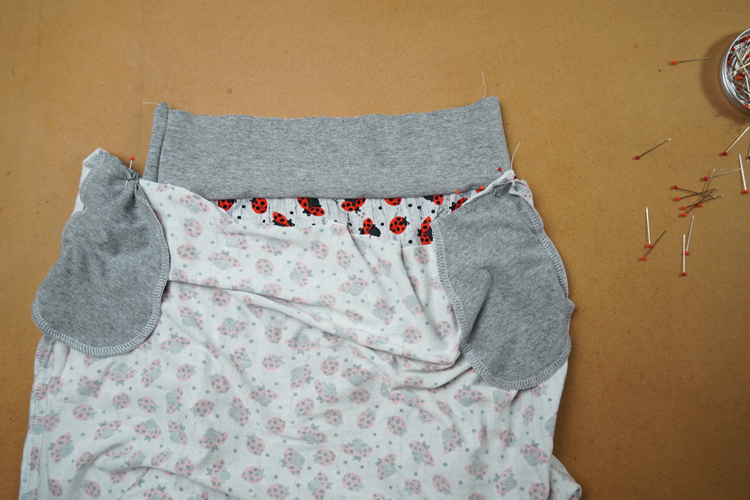
Connect the skirt to the bodice in the side seams first.
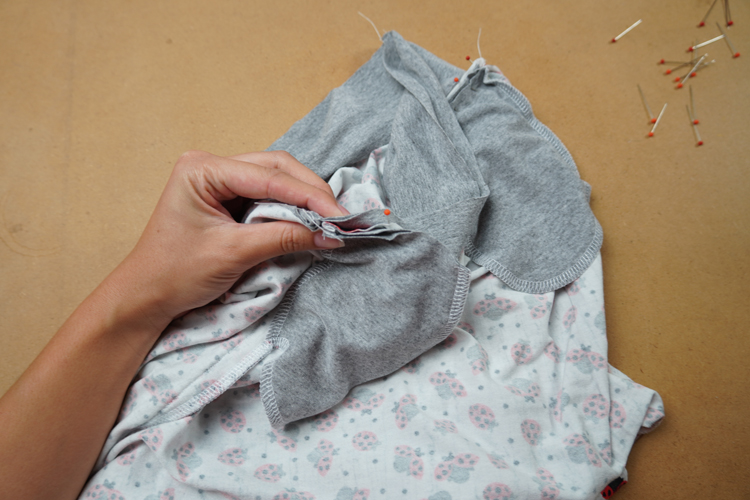
It’s a good idea to fold the seam allowances of the pieces towards different directions to avoid bulging.
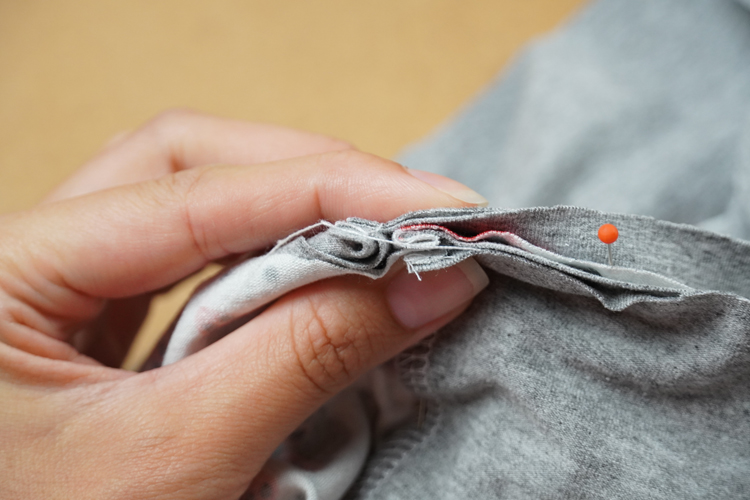
Pin the skirt to the bodice evenly. Pin through the pocket pouch too (in the front piece).
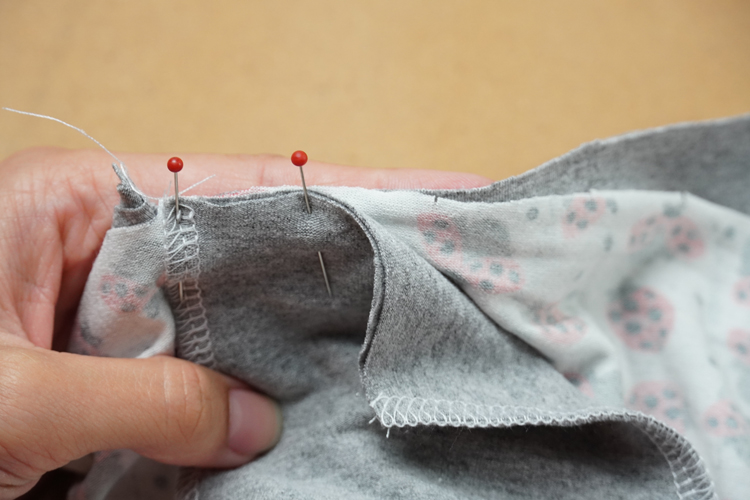
Once you hit the first mark you need to create the fold. These marks are on the left side of the skirt.
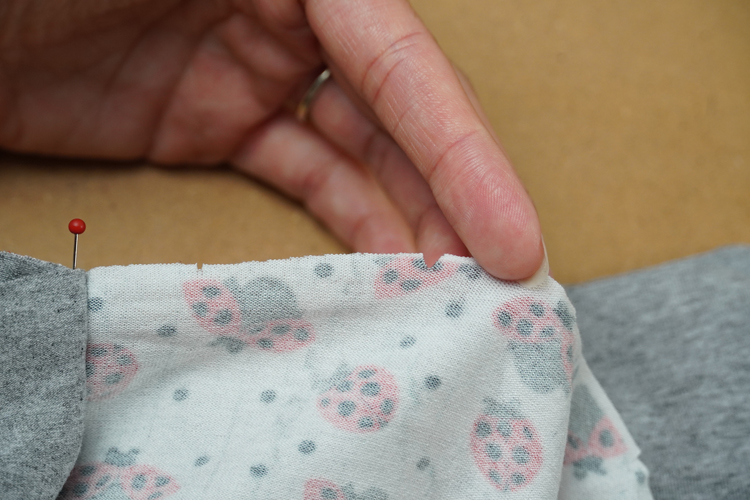
Folds of this part of the skirt will point to the left (from the reverse side). Fold the marks on top of each other...
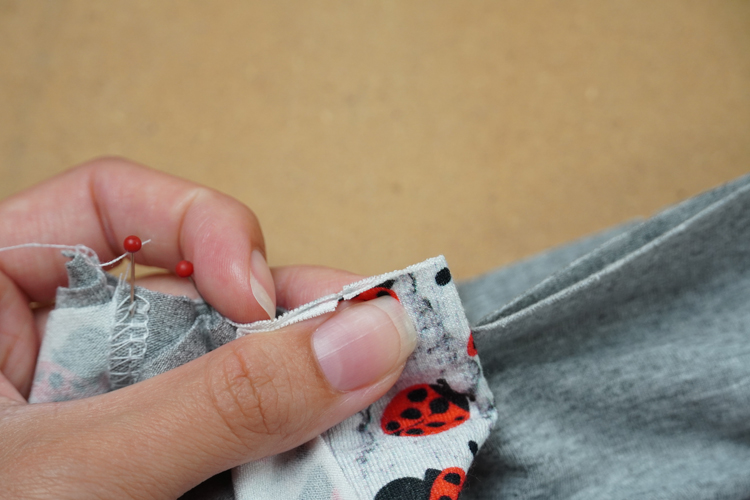
...and fold them to the belt evenly.
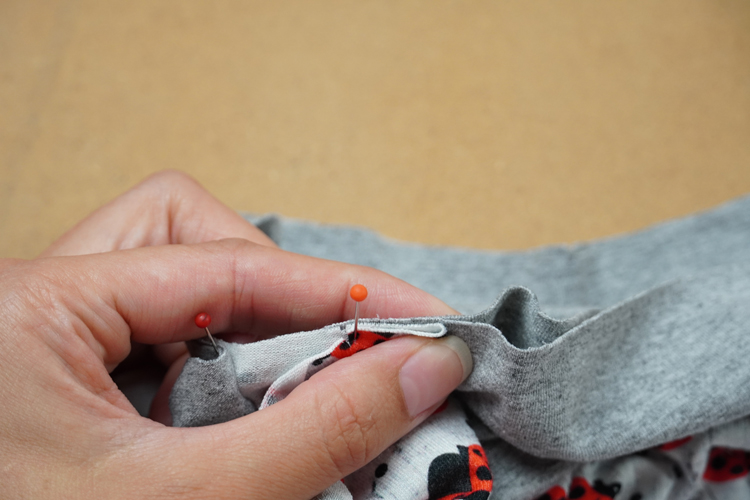
Then fold following part of the skirt towards the original direction. That is how you get the first fold, which points to the left (from the reverse side).
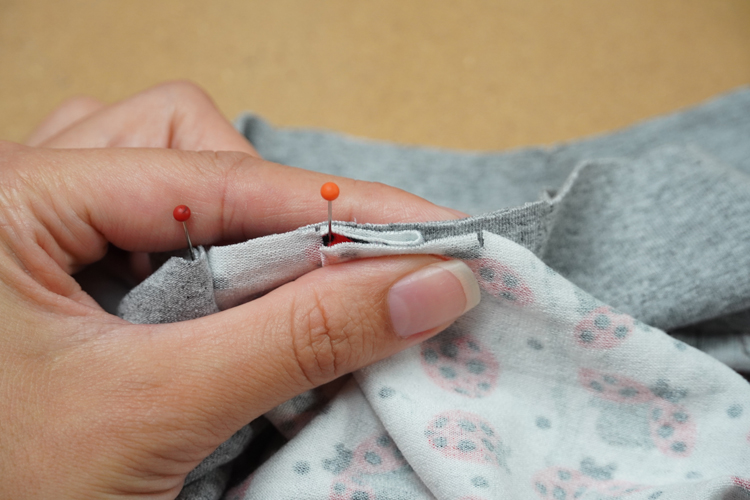
There are now two layers of the belt and three layers of the skirt piece in this area.
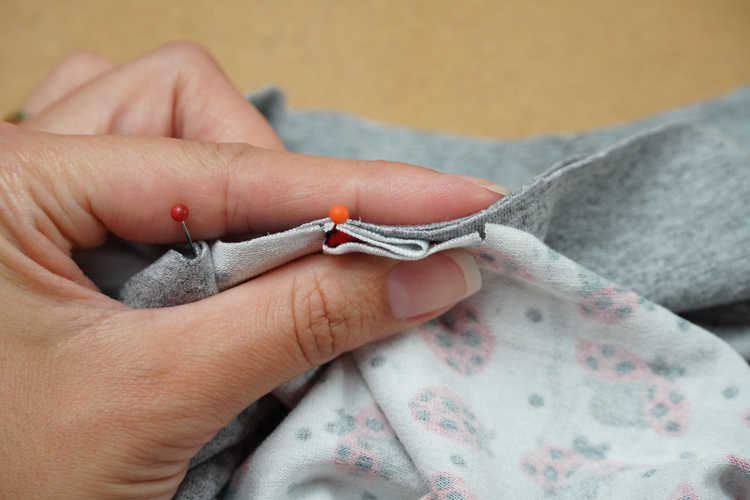
Pin the fold...
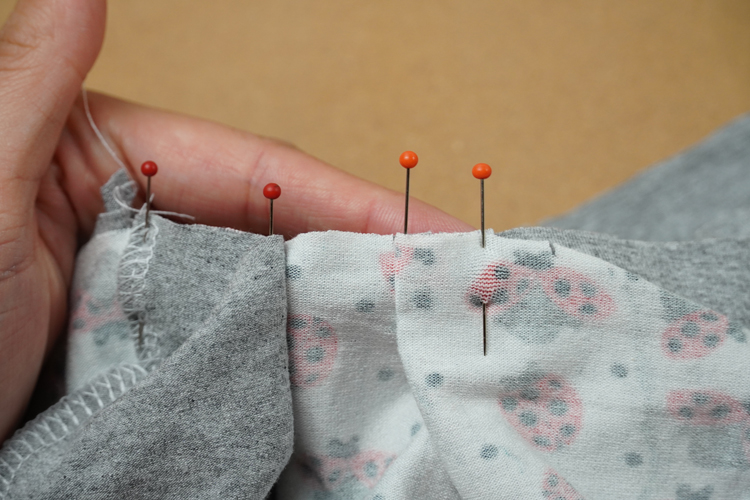
...and fold the rest of the pocket pouch over it. Pocket pouch should not be creased in any way.
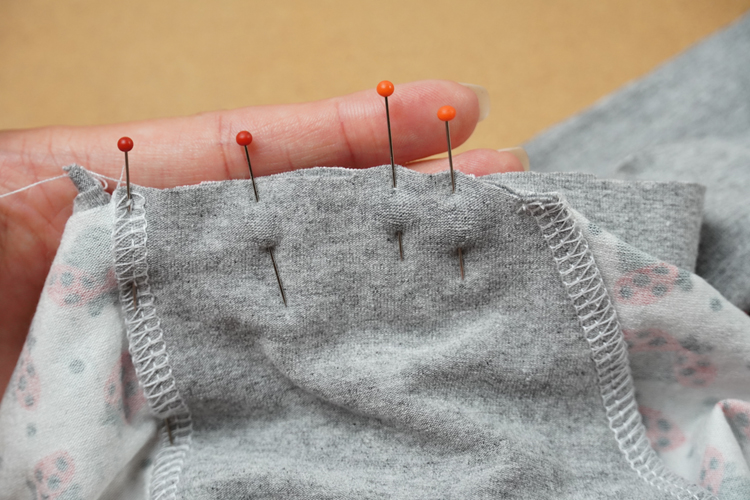
Now there are two layers of the belt, three layers of the skirt and two layers of the pocket.
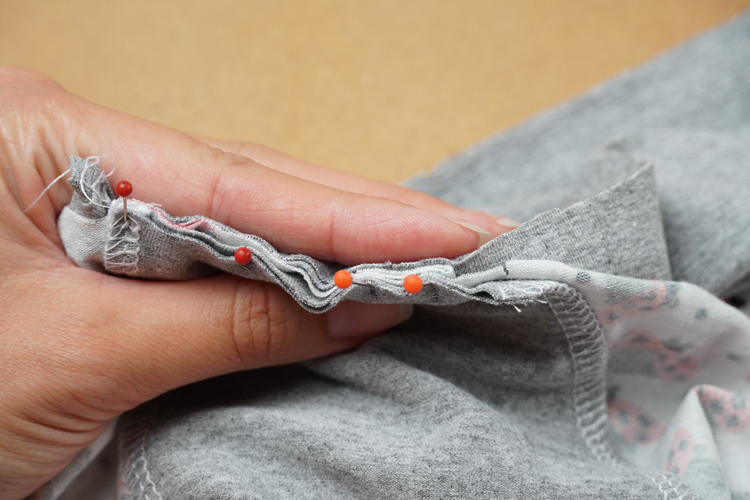
Continue towards the center of the skirt and keep doing the folds in the same way.
Every duo of the marks represents one fold pointed towards the left.
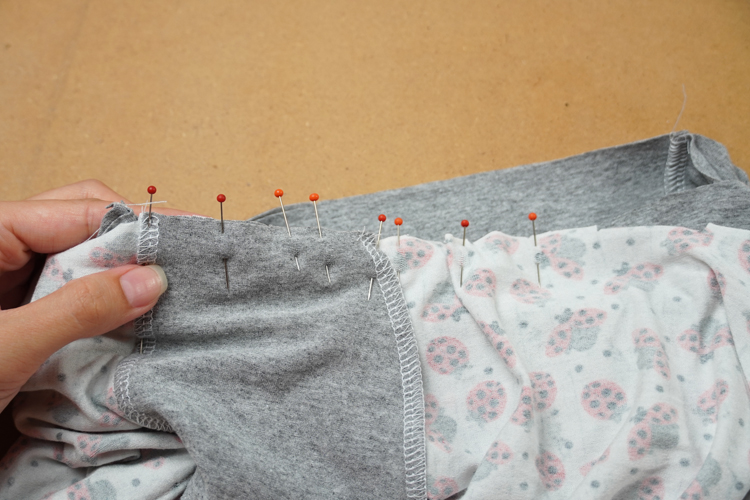
Here we got to the middle of the skirt and belt. Midpoints are aligned.
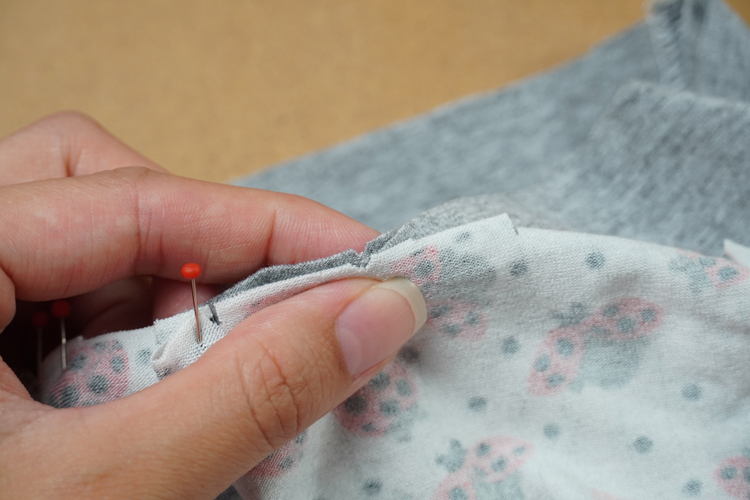
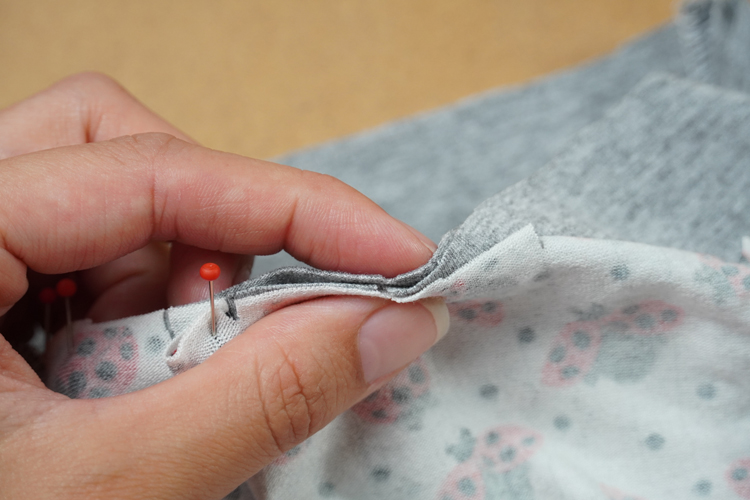
These are folds on the left side of the front piece. Folds are now pointed towards the middle of the skirt, because the dress is not inside out on this picture (middle of the dress is on the left side on the picture and side seam is on the right side)
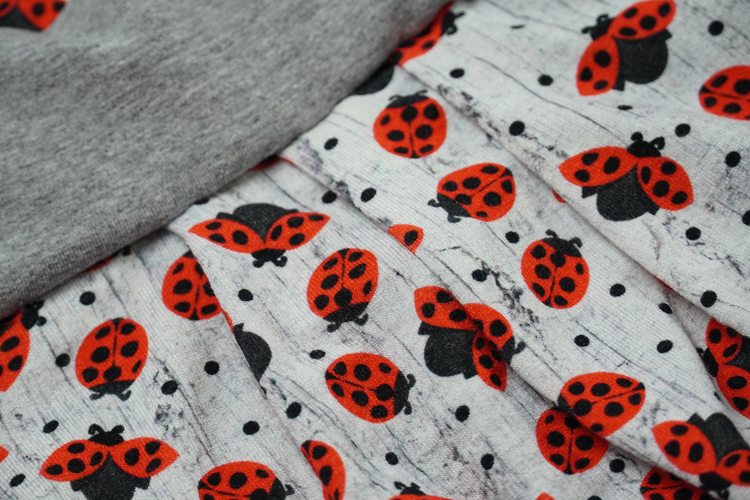
Continue from the center of the skirt towards the right-side seam. Proceed in the same way, with the difference that the folds are now pointing to the right (from the reverse side). Do not forget, the skirt is not only pleated, but also slightly draped near the belt (same as the bodice). This means that you will need to stretch the belt slightly when sewing. Marks on the belt (if you have them there) should help you determine how much exactly you need to stretch it. If you do not have the marks on the belt, then make the folds only according to the marks on the skirt and, if necessary, slightly adjust them so that they are spaced evenly. What is important is that the folds on the right and left side of the dress are symmetrical so that the dress does not look "crooked".
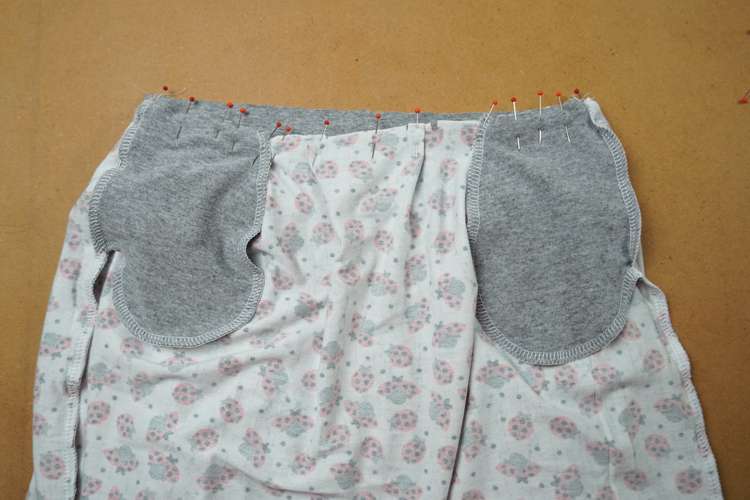
Next do the folds on the back piece of the skirt in similar way.
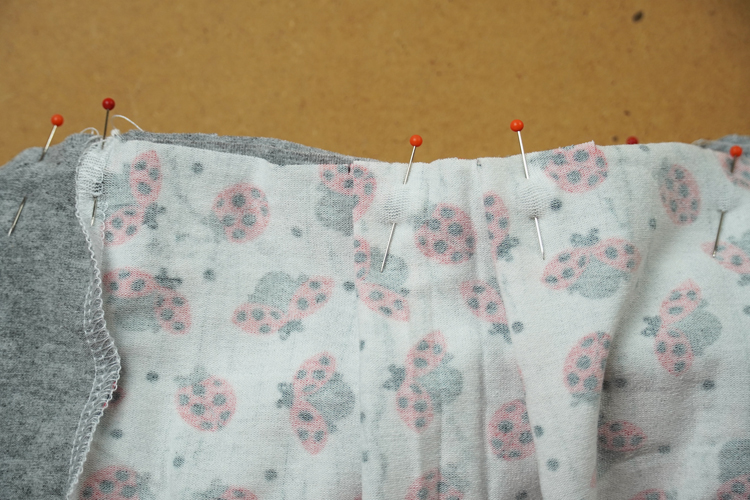
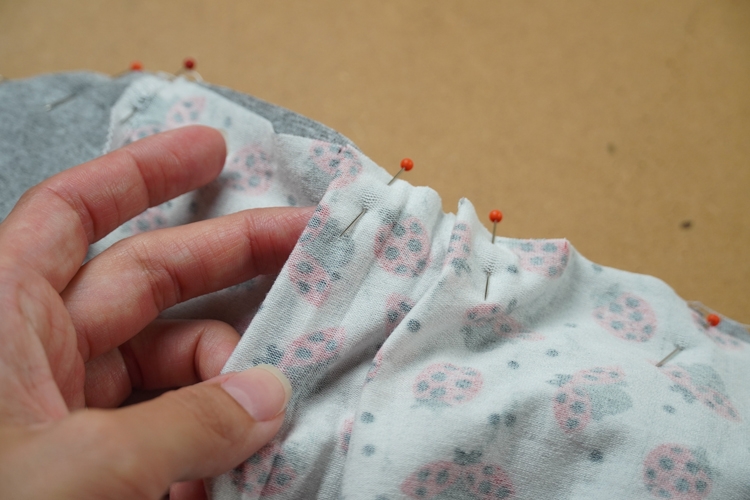
Folds are pointed towards the sides (from the reverse side).

Sew the skirt to the belt along the circumference. Pull free ends of thread chain under the loops when sewing on the overlock.
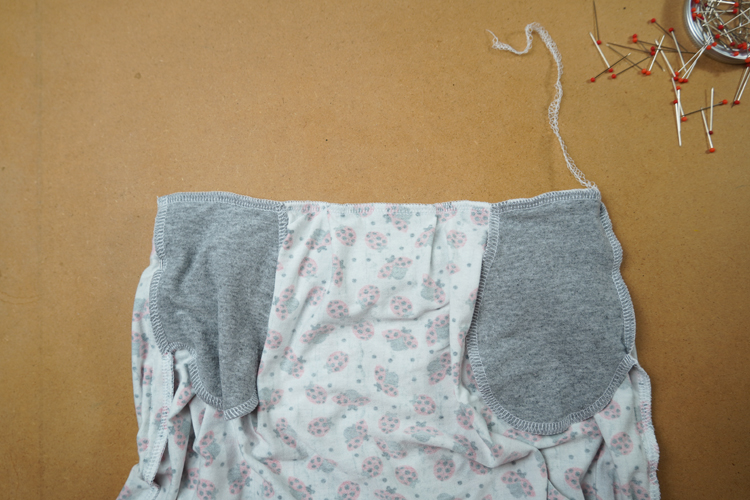
Folds are pointed towards the center of the skirt (from the face side).
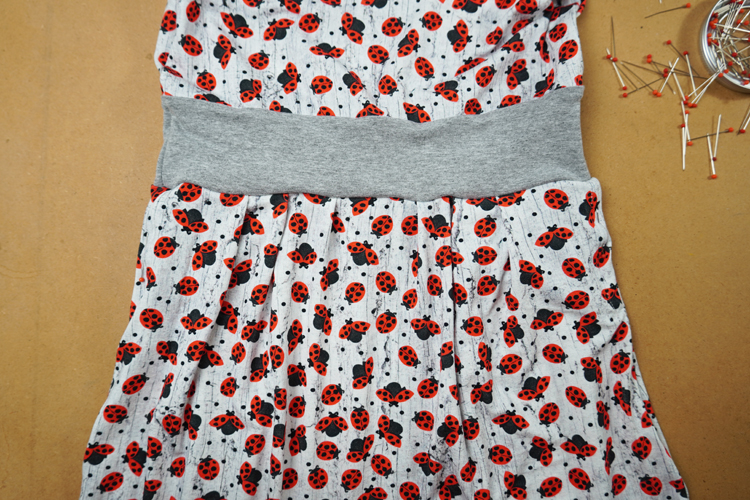
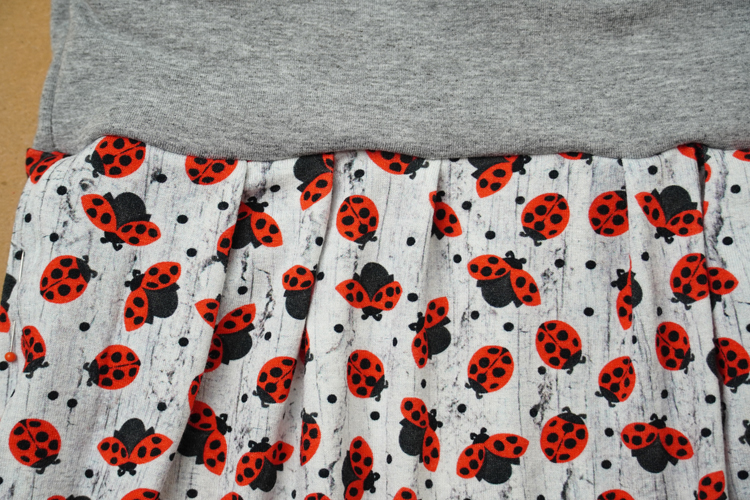
Check the pocket position and that it really is in the front piece of the skirt and not in the back one.
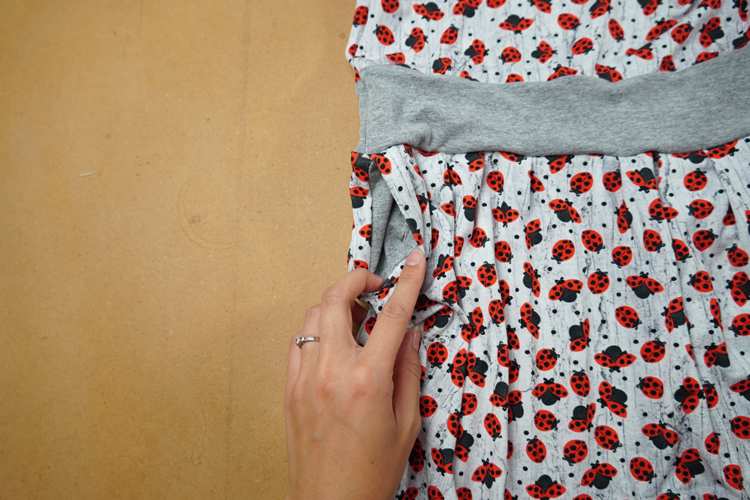
Now we just need to do the bottom hem of the skirt. Clean the bottom hem and fold it about 3 cm to the inside of the skirt, sew through it with the elastic seam.
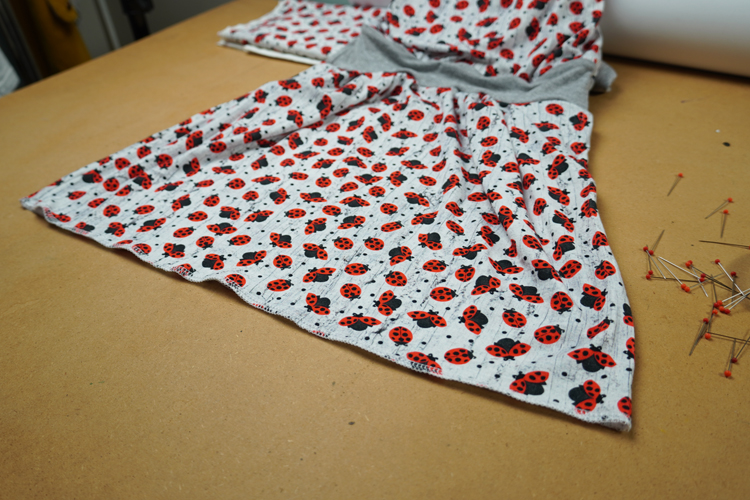
Terulka told me that she would like to have the skirt like this, with the overlock seam on the bottom, so I didn’t have to fold the hem to the inside.
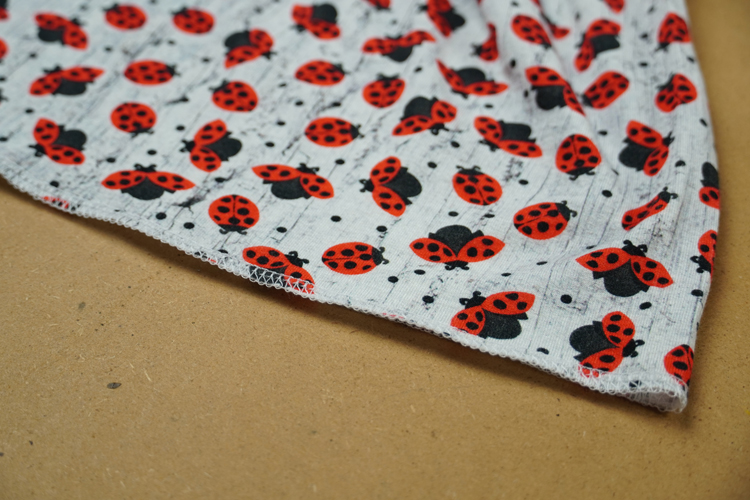
And now your dress is ready.
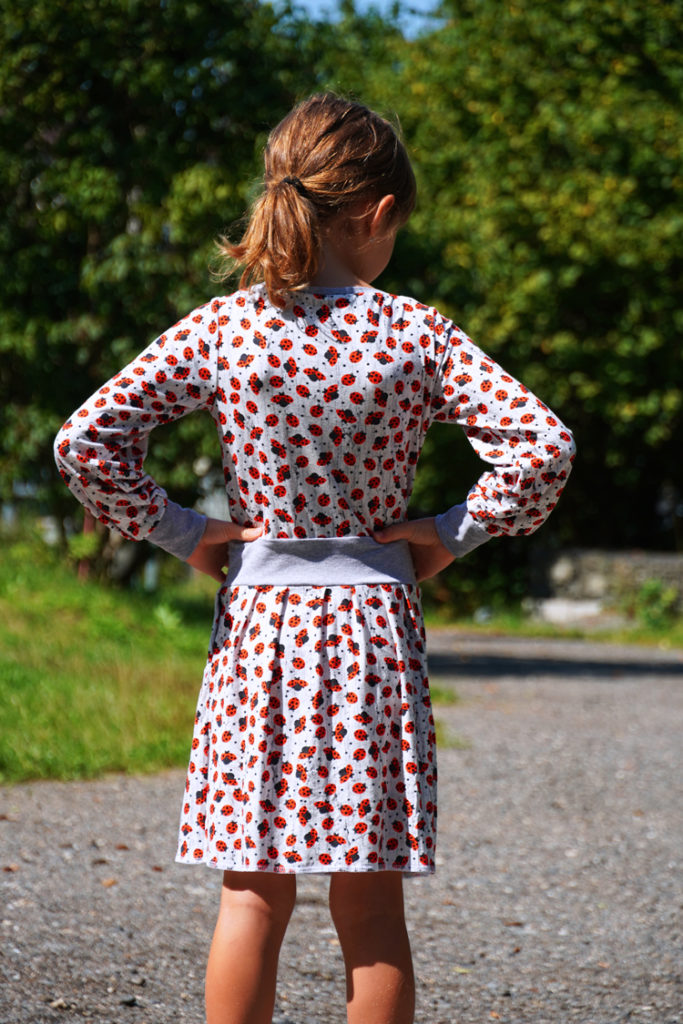
This pattern is really easy to sew, the only tricky part is the skirt pleating. If you find it too complicated, you can easily drape the skirt to the belt. You can read more about how to drape the fabric in this article:
Have a nice day, Peťa
PS: Did you know there are also free patterns on my blog? You can find free to download patterns here:
Free pattern - Women’s skirt SWING Free pattern - Women’s T-shirt

