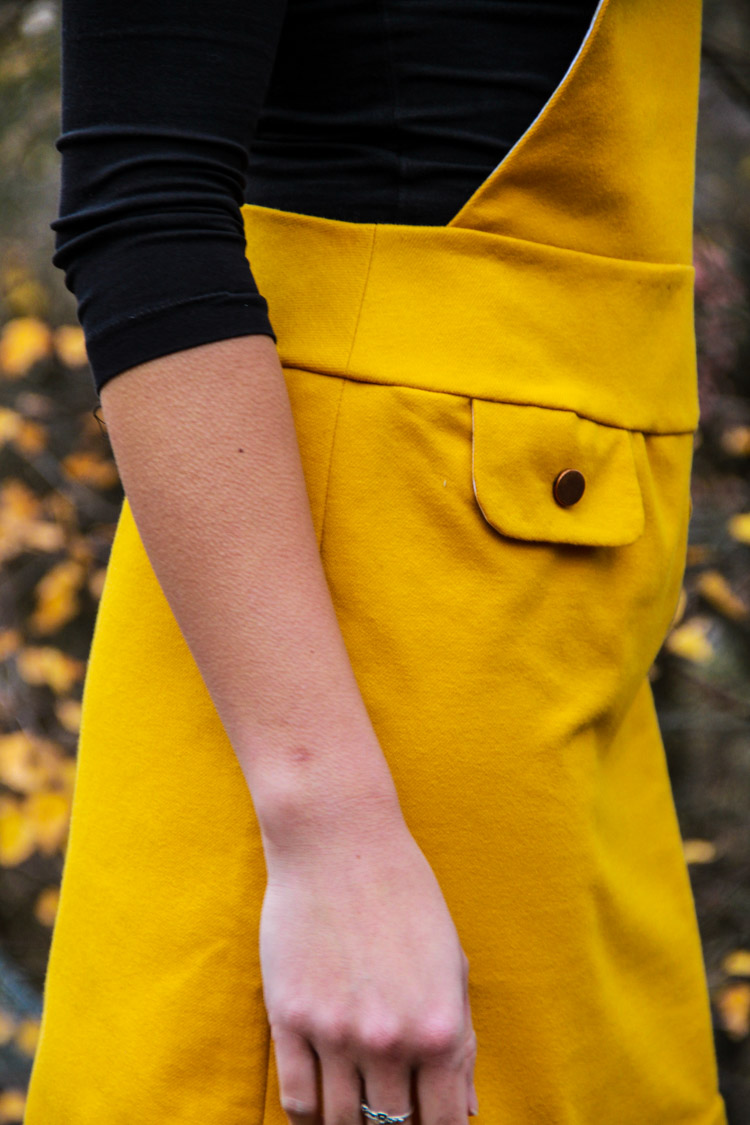
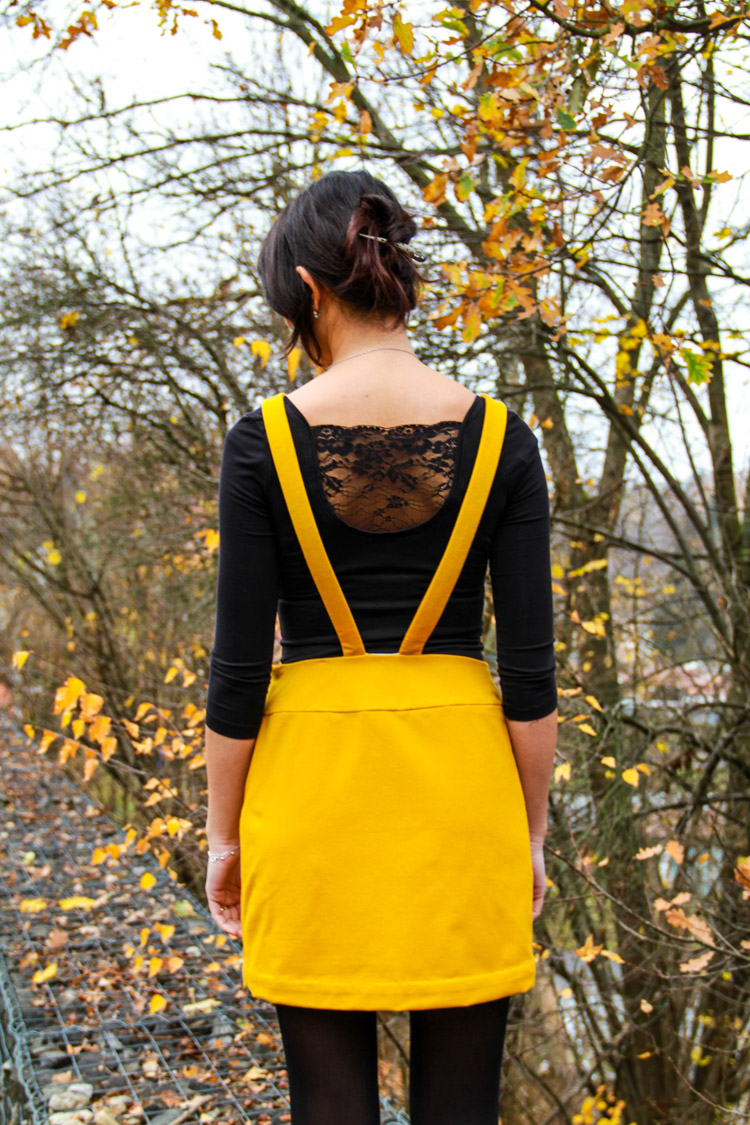
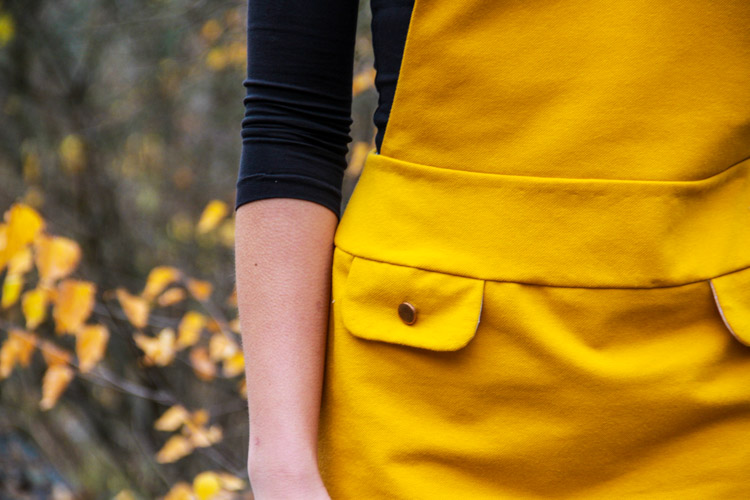
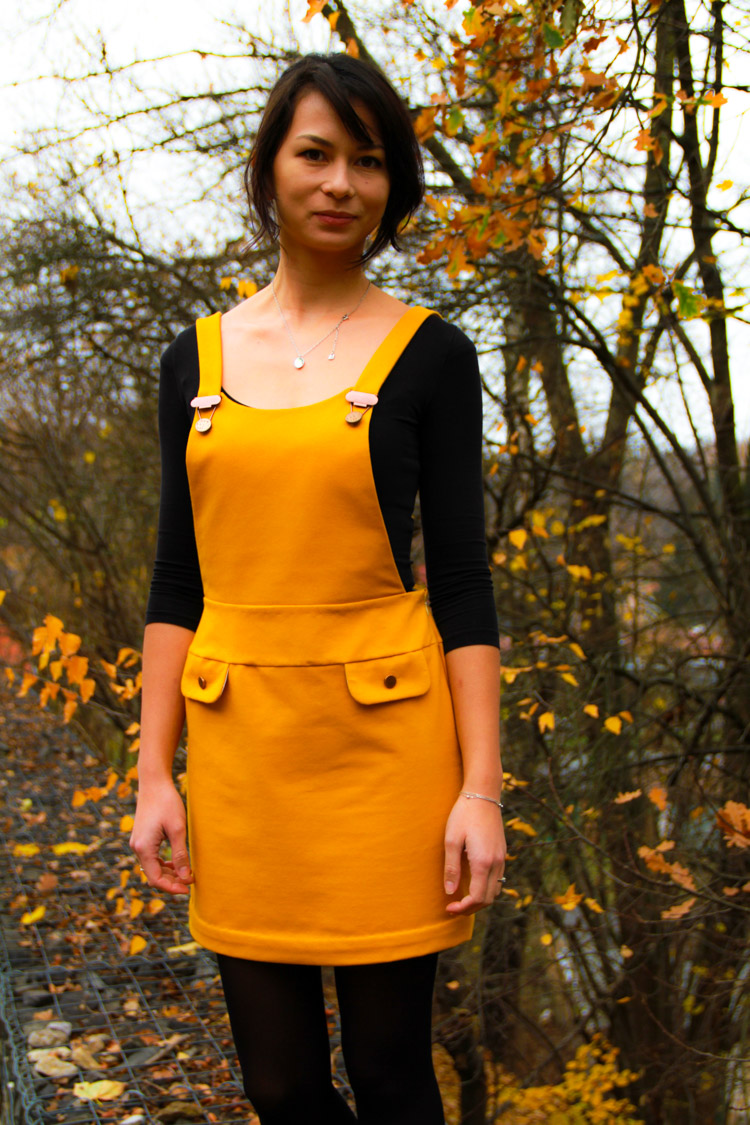
It's been some time since I added a skirt pattern to the e-shop. But today you can find a new one here; It’s a pattern for women’s dungaree skirt HAVE FUN You can sew it with or without suspenders (and front panel). This skirt was a riddle - I wanted the skirt to be playful, cheerful and at the same time I wanted to avoid it looking too childish… I hope I succeeded. I did a few essential things to achieve the desired result. I chose a denim-like fabric, which is not in the classic light/dark blue color. And I designed the pattern to be more elegant than sporty - I avoided adding typical kangaroo pocket to the chest or abdomen. I also added a pocket flaps, which are typical for formal/business skirts.
You can use this pattern to sew a simple skirt (without suspenders and front panel). You can find instructions for that version of the skirt (sewed in quicker and more modern style) here:
Pattern for women’s (dungaree) skirt
You can get pattern for this skirt here: Pattern for women’s skirt HAVE FUN
Recommended material
The pattern is designed for knits of medium thickness and other elastic fabrics. I used thicker, denim-like knit from Dumlatek.cz store. They have it in many different colors and shades. I like that Burgundy one a lot :)
You can also use:
- Stretchy cotton fabric (also great for a pair of pants):
- Stretchy cotton fabrics - With prints (I especially like these: Stretchy cotton fabric - Flowers, Stretchy cotton fabric - Flowers and Birds)
- Elastic blazer fabrics
- I like this black one with an elegant print: Blazer fabric - Black
- Thin sweater fabric
- elastic tracksuit fabrics (make sure it really is elastic - some combed tracksuit fabrics aren’t)
I sewed lining of the front panel, inner waist band and undersides of the pocket flaps from a contrasting fabric. I used American Cotton Canvas, which is great due to its high quality and soft surface. It’s also quite hard to crease it and it flows nicely.
You also need a zipper (18 - 22 cm long, depends on the size of the skirt).
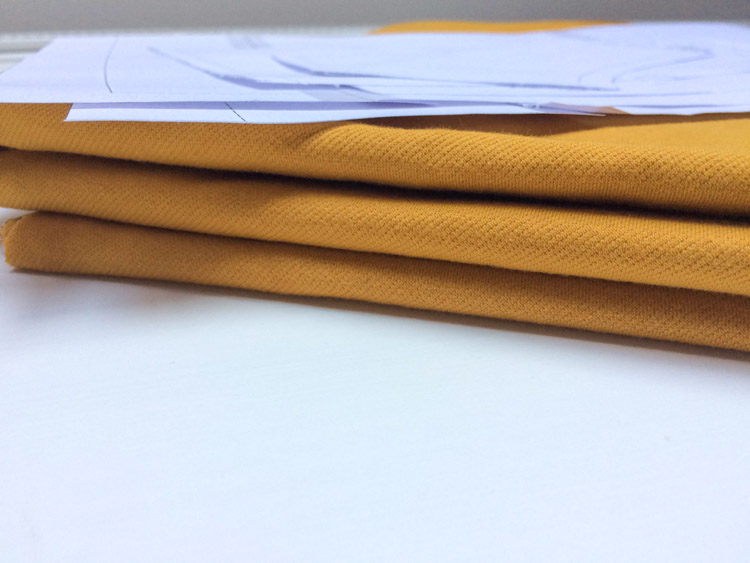
Suggestion:
I only used an ordinary sewing machine (no overlock cleaning here). But you can’t do it differently, it’s up to you. I wanted to sew this skirt as a classic tailoring piece, so all seam tabs are finished with a bias tape. But you can (of course) use your overlock if you want to speed up the process.
♥ Traditional tailoring tips:
This tutorial contains some tips and tricks concerning methods used in traditional tailoring. Some of these methods are, for example, grading seam allowances so that they are not visible from the face side or attaching the seam allowances by hand (herringbone stitch), attaching the inner waist band by hand (pearl stitch) and cleaning the seam allowances with a bas tape. All these techniques are described in sufficient detail for you to be able to apply them. But you don’t have to apply them. It is just a demonstration of other possibilities that many sewers miss. Work on your skirt any way you want, make it yours. If you have favorite methods that you like to use and don't want to change them, you don't have to. Sew for fun and so that you can enjoy the process.
Cuts preparation
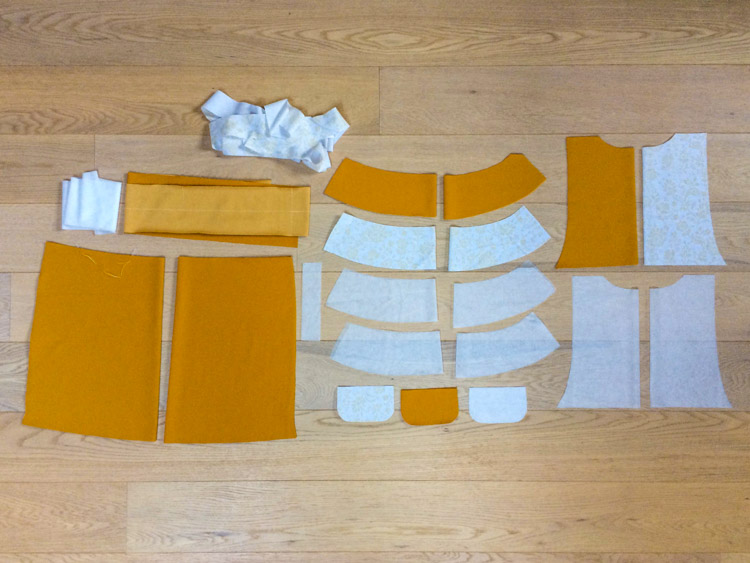
Unless stated otherwise, use 1 cm wide seam allowances and position the pieces along the grain. Prepare the following pieces:
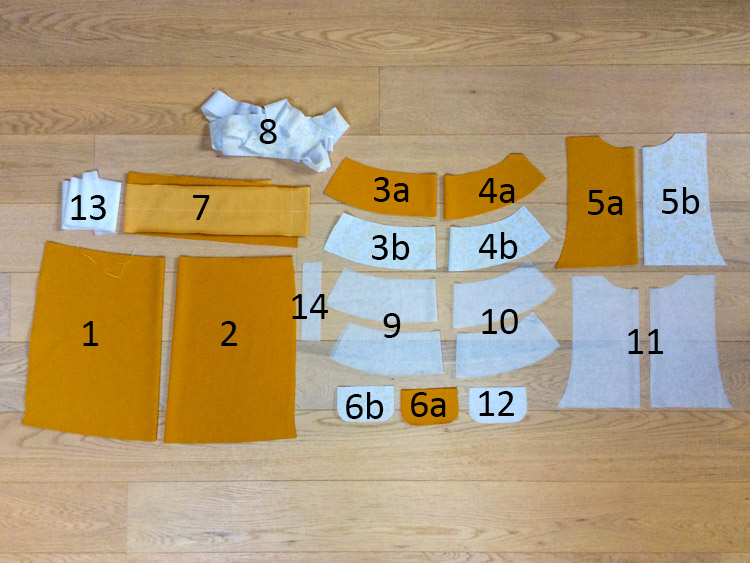
- (1) 1x front piece - folded fabric cut (make the side seam allowances 2 cm wide, seam tab at the bottom should be 3-4 centimeters wide)
- (2) 1x back piece - folded fabric cut (make the side seam allowances 2 cm wide, seam tab at the bottom should be 3-4 centimeters wide)
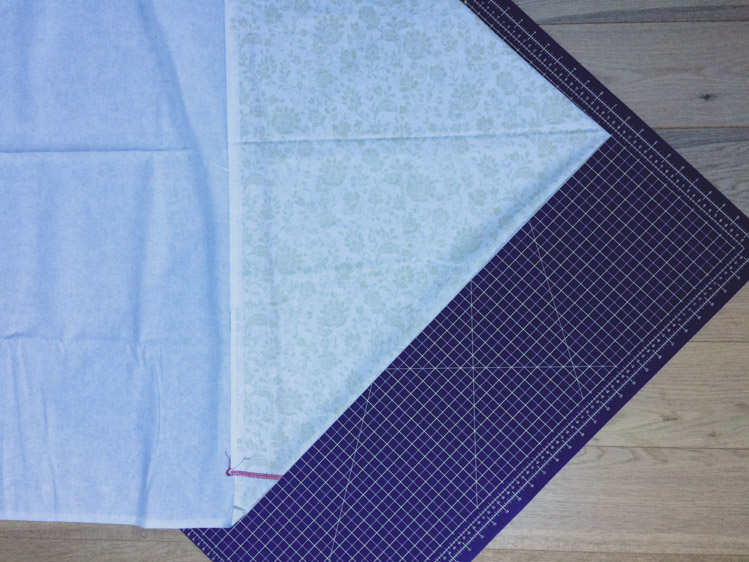
- (3a) 2x front waist band - folded fabric cut ( (3b) one of them can be made from contrasting fabric – if you are making it from the cotton canvas – inflexible fabric – cut it at 45° angle)
- (add 2 cm wide seam allowances to the side seams)
- (4a) 2x back waist band ( (4b) one of them can be made from contrasting fabric – if you are making it from the cotton canvas – inflexible fabric – cut it at a 45° angle)
- (add 2 cm wide seam allowances to the side seams)
- (5a) 2x front panel - folded fabric cut ( (5b) one of them can be made from contrasting fabric)
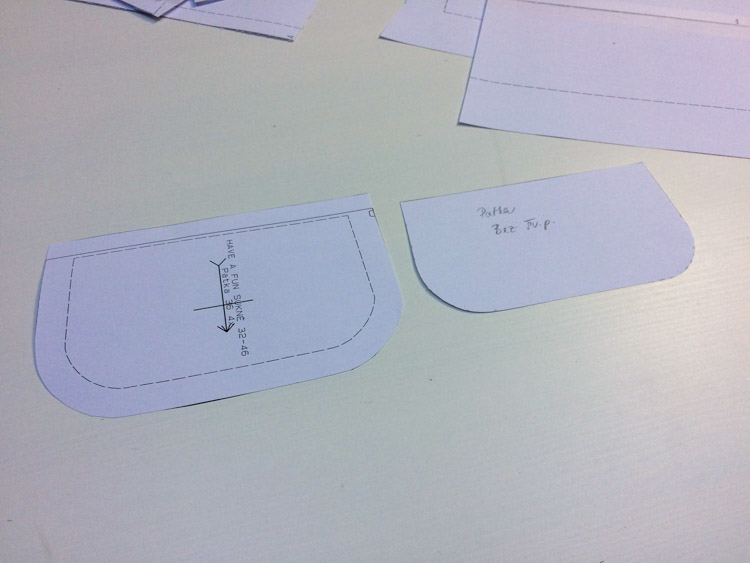
- (6a) 4x pocket flap ( (6b) two of them can be made from contrasting fabric)
- If you are using a pattern with already marked seam allowances, then copy the pocket flaps piece - this time without seam allowances.
- 7) 4x strips of fabric for suspenders (5 cm wide and 70 – 80 cm long - length depends on size of the skirt) The width of these strips is: “width of the suspender buckles + 2 cm” My buckles are 3 cm wide and I’m adding 2 cm for the seam allowances = 5 cm wide strips
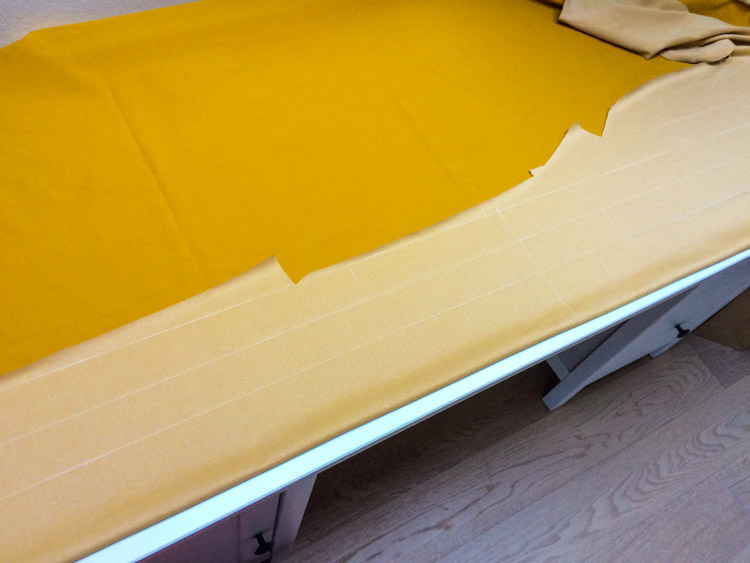
- 8) Prepare a bias tape if you want to use it to clean the seam allowances (I did that in this tutorial) Bias tape is also used on the bottom hem of the skirt, on the inner waist band and side seams of the front/back skirt pieces. Always cut your bias tape at a 45° angle.
Reinforcing pieces
Some parts need to be reinforced with a fusible facing.
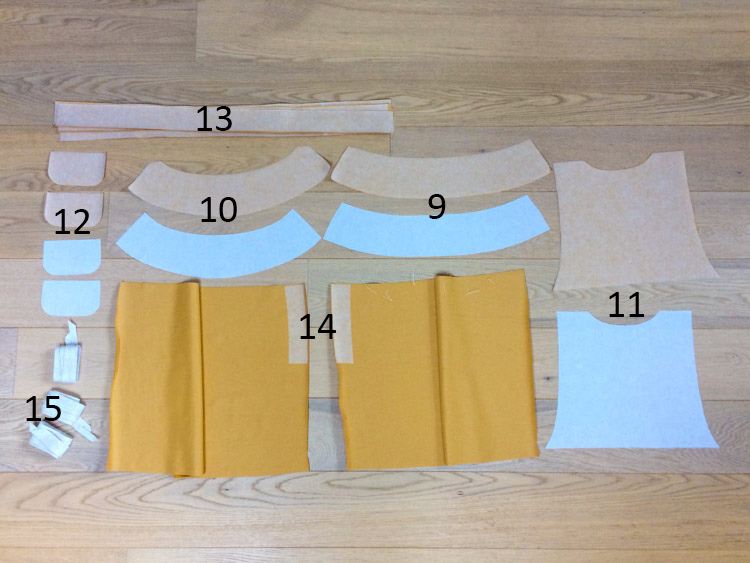
- (9) Front waist band pieces – reinforce both of them everywhere
- (10) Back waist band pieces – reinforce both of them everywhere
- (11) Front panel pieces – reinforce both of them everywhere
- (12) Pocket flaps – all of them everywhere
- (13) Suspenders – all of them everywhere
- (14) Front/back pieces - in one of the side seams - the one with the zipper. There are different rules for placing a zipper on the left or right side. I like to respect laterality. So, if you are right-handed, place the zipper on the left side so that you can open it comfortably with your right hand. If you are left-handed, then you place the zipper on the right side. This is how I do it, but you can place the zipper according to your own preferences. I'm right-handed, so I'll have a zipper on the left side. I’m reinforcing the left side seam of the front piece and the corresponding side of the back piece. I’m placing the fusible facing about 15 centimeters below the upper edges. The width of the facing is about 4 cm.
When I already had an iron in my hand, I also ironed my bias tapes.
First fitting test
You should perform the first fitting test before touching your sewing machine. Focus on whether your skirt fits or not, on size and position of the pocket flaps and so on. Make sure everything is to your liking.
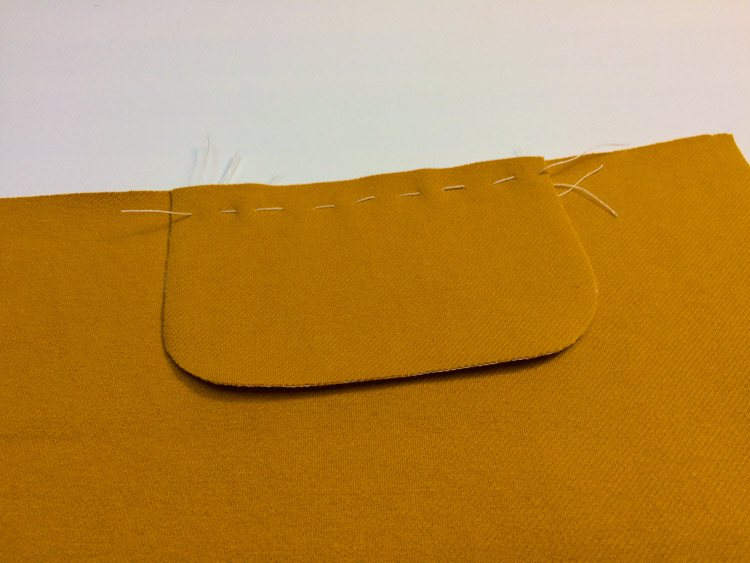
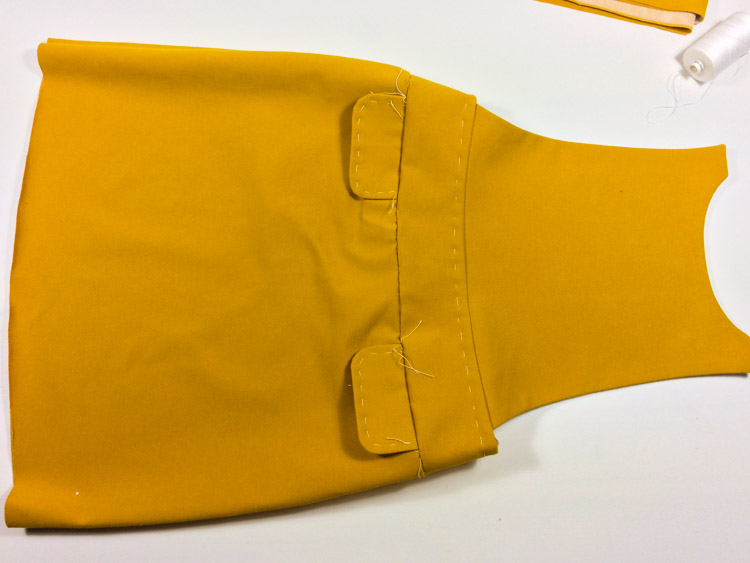
Transfer marks from the paper pattern and stitch the pocket flaps to the skirt. You can do this with just one layer (don’t sew the flaps yet).
Stitch the waistband over the front piece with pocket flaps and then stitch the front panel over the waist band.
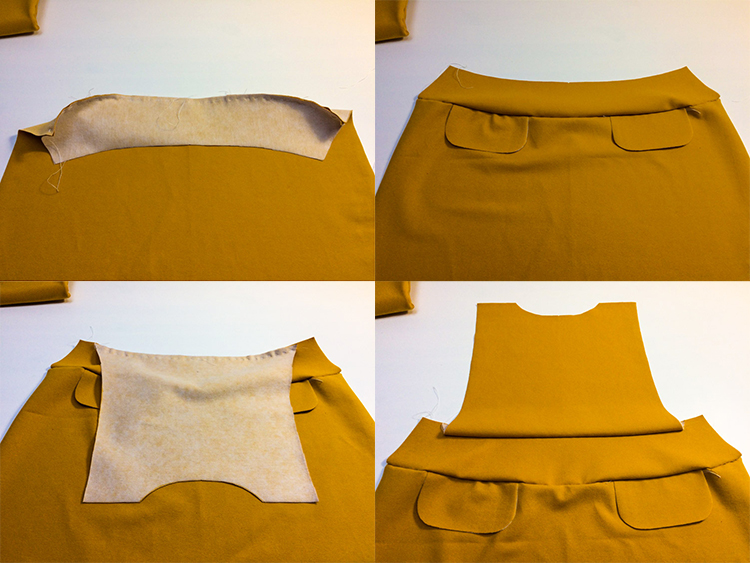
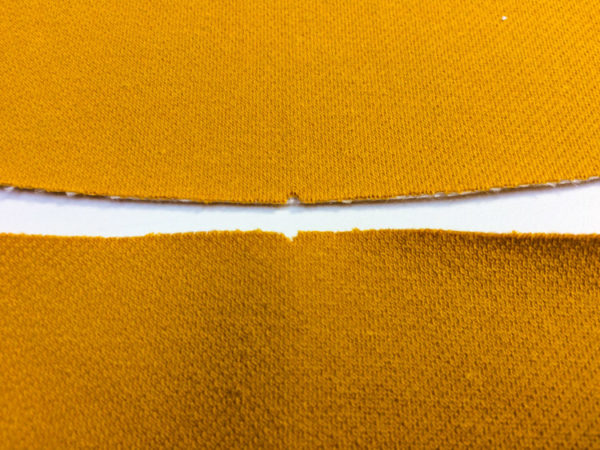
Transfer (and use) all relevant marks. In the case of this pattern, the marks are on the folds of the fabric - on the centerlines of the pieces.
Also stitch the back waist band piece to the back piece.
Then stitch back and front parts together.
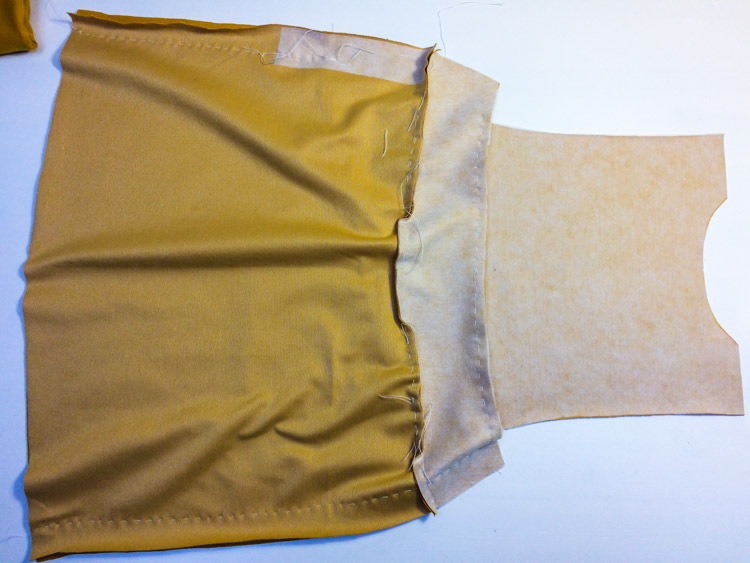
Leave out the part of the side seam where the zipper should be (so you can put the skirt on).
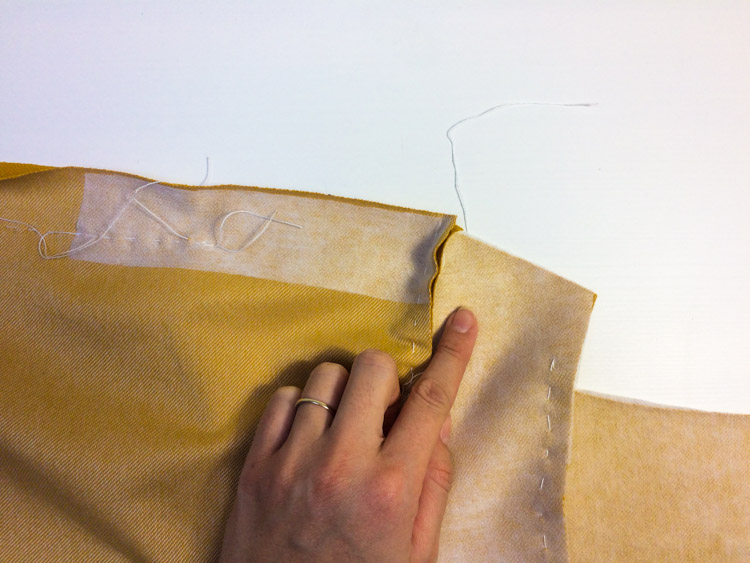
Try the skirt on. Pin the rest of the side seam and attach the suspenders with pins. Now you can also find the correct length of your suspenders.
TraTraditional tailoring tip No. 1: Test piece / Muslin
If you are sewing according to a new pattern (new to you), you should test it first and by that I mean you should sew a test piece (muslin). Yes, I said it - it's a good idea to sew something that you certainly won't wear. Sewing such a piece will help you find out exactly what you are working with. I sew test pieces from calico or from a single-faced knit, depending on the specific pattern (whether it is intended for woven fabrics or knits). Muslin (test piece) will help you avoid wasting a beautiful fabric on something not so beautiful. Such imperfect pieces usually end up at the bottom of the cabinet never to be worn again. So, if you are asking if it is worth buying some fabric just for a test piece and then spending some time sewing it, then my answer is yes, it will pay off. The test piece will usually cost you less than €7, but it can potentially save you a lot of money on wasted fabrics. You will also be less stressed when you know that you are off to a good start. Just use your test piece to adjust the pattern according to your ideas and sew final piece to your adjusted pattern. It can also happen that you decide not to use the pattern at all. You may find that particular pattern does not suit your style/age/figure or the way you spend your time (whether skiing or in the theater), and that it does not work well with your original idea. That's just the way it is sometimes, and it's not your fault or the fault of the designer. It means that you know what you want, and you also know what you don't want. Sometimes it is better to decide not to use a certain pattern, because then it does not happen that you just stop sewing the piece or do not wear it when it’s done. This must have happened to you once or twice.
You may find that you need to adjust the waist/hips circumference... No problem - seam allowances of the side seams are wide enough for the skirt to be widened.
Traditional tailoring tip No. 2: Varying sizes of seam allowances
The test piece alone does not ensure a smooth sewing process. What works great with one fabric may not work on another. Therefore, when you use one pattern to sew several models from different fabrics, you will always come across something different, something new. In traditional tailoring, seam allowances of different widths are used when sewing one garment. Modern sewers usually use 1 cm wide allowances for seams and 3 or 4 cm wide tabs for hems. However, I recommend that you learn a little about seam allowances from traditional tailoring. For example, the fact that it is beneficial to use wider seam allowances for the side seams (especially when dealing with pieces from woven fabrics). If you have a garment with sleeves and you choose to use larger seam allowances in the side seams, it is necessary to make the seam allowances of the sleeve seams the same width, so you can align the seams neatly in the armpit area. If you have a skirt with front/back pieces connected to the waist bands or yokes, you also need to increase the size of the seam allowances in the side seams of these parts. Wider seam allowances make it easier to adjust the width of the garment (if it is too tight, for example). It can also happen that you realize that you want to wear some inner layers under your piece (which you forget about at the beginning), such as a T-shirt and leggings under the dress. Larger seam allowances allow you to deal with these problems.
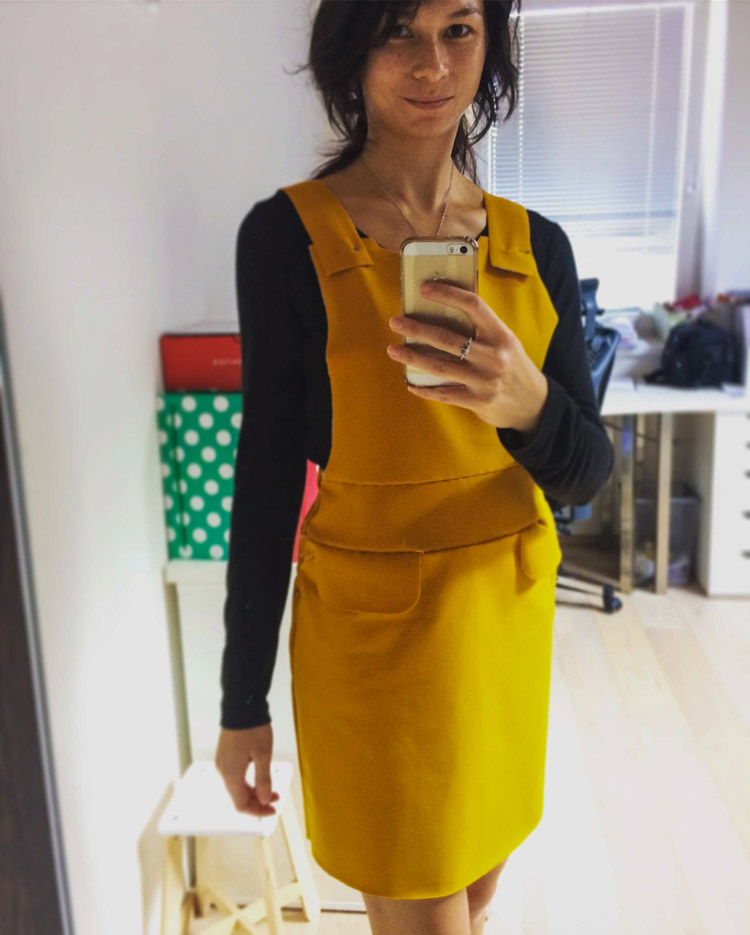
If you want to adjust your pattern in any way, now is the time to do that. If everything seems fine, you can start sewing.
Sewing
Front panel
Overlay the front panel pieces (face side to face side). Pin/stitch them and then sew them together.
Don’t forget to cut the corners of the seam allowances, so there are no bulges when you turn this piece face side out.
Traditional tailoring tip No. 3: Grading seam allowances
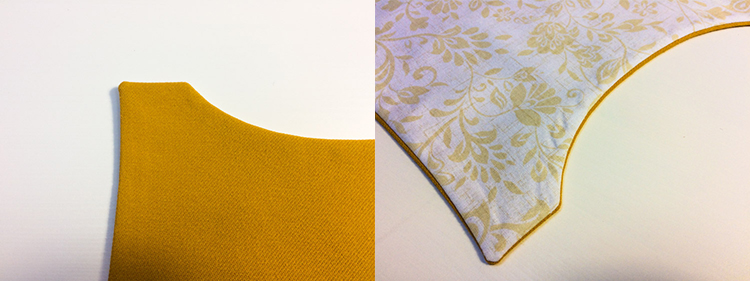
Cut the seam allowance of the lining in half along the seam. When you turn the piece face side out, seam allowances won’t be apparent. This also helps to make the edges thinner overall, which translates to more comfortable garment. Grading smoothes the transition from the seam to the center of the piece.
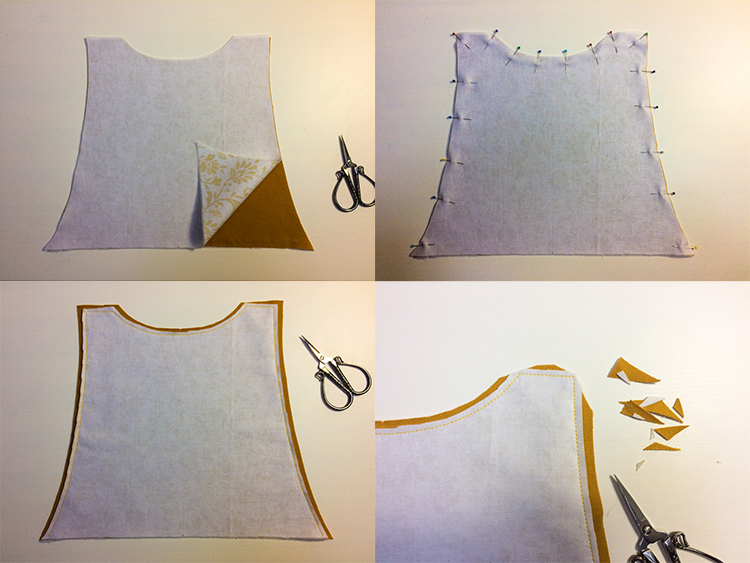
It is also necessary to cut the curved parts of the seam allowances. If you do not do this, the seams will curl after turning the piece face side out.
Traditional tailoring tip No. 4: Cutting the seam allowances in the curved parts
If you sew along a curved path, then it is necessary to process the seam allowances in some way so that the curved part of the piece looks good from the face side. If you sew concave curves (“hollowed inward” - typically at neck openings, armholes, etc.), it is necessary to cut the seam allowances so that the seam does not curl due to stretched seam allowances. No need to cut out triangles like I did. It's a habit and I process almost all seam allowances like this.
Cut carefully - don’t cut the seam itself. It is necessary to have really sharp scissors that cut well even at the tips of the blades.
But if you have some convex curves (“bulging out” - you will see that below, when we get to the pocket flaps), you need to cut out parts of the seam allowances. This method frees up space between the layers and prevents the formation of small bumps around the curved part of the seam.
I believe you already know this technique, it’s really important.
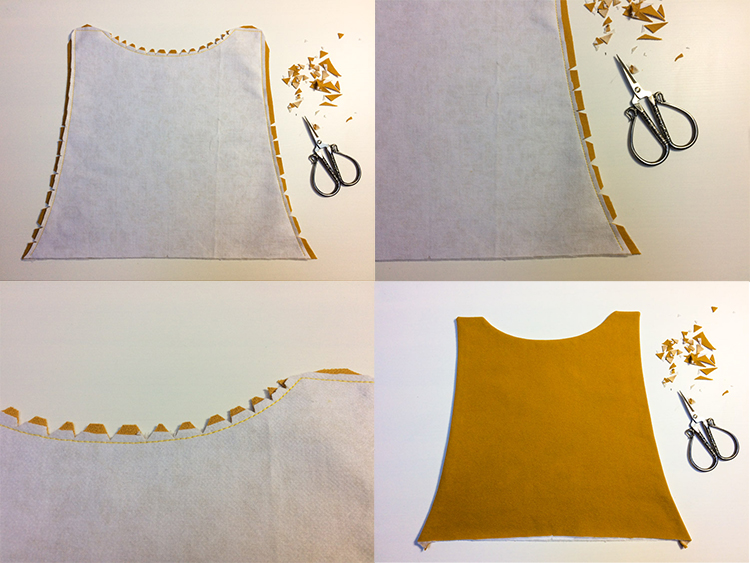
This is what the front panel should look like. There are no bumps around the corners and curved seams are smooth. Lining should remain hidden - fold (and iron) the seams so you can see a little piece of the top fabric from the reverse side (about 1 mm) and none of the lining from the face side.
Waist band
Sew one side seam on both waist bands (top fabric one and lining one). I’m sewing the right-side seams, because my zipper will be on the left side. Think about this step and if you are not sure which side to sew, simply pin one side, wrap the piece around your waist to see.
Sew the inner waist band in the same way.
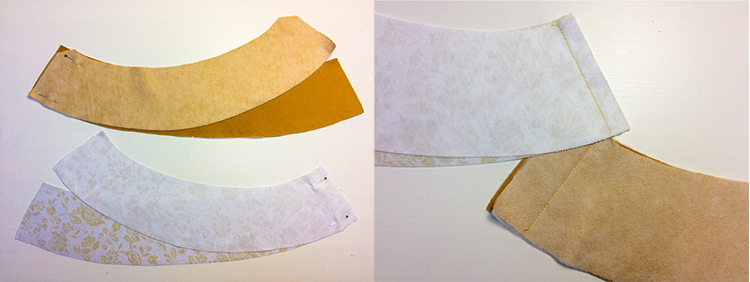
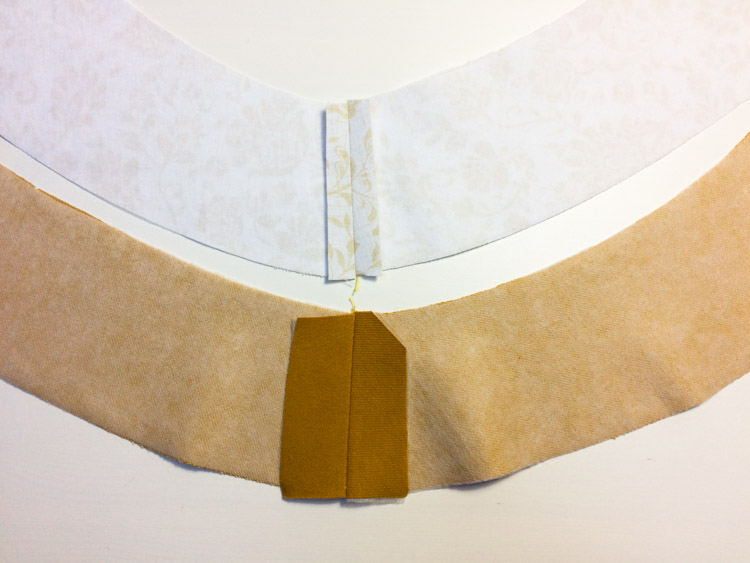
Grade the seam allowances of the inner waist band (as explained in the Tip No. 3). Don’t grade/cut the seam allowances of the outer band. My skewed corner is due to lack of fabric, it wasn’t my intention to do it like this. :)
Suspenders
If you have already measured the correct length of the suspenders during the first fitting test (and if you are sure that they will work with your buckles), you can now sew them.
I must admit that I sewed the suspenders much later, because I have a specific buckle and I wanted the suspenders to have the exact length, which I was only able to find out during the final fitting test...
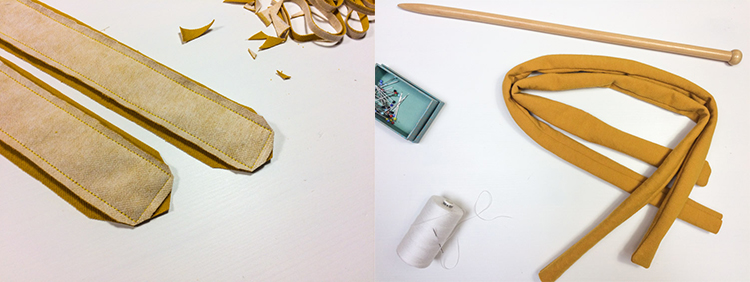
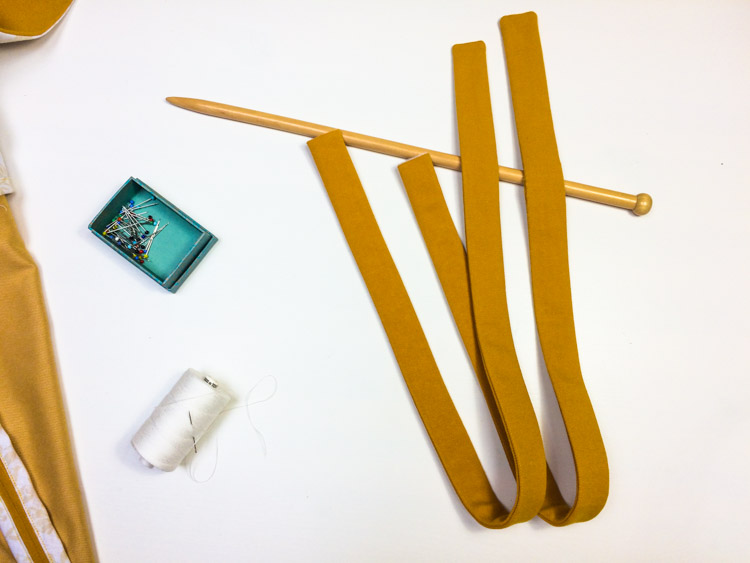
Overlay two suspender pieces (face side to face side) and sew both long sides and one of the short sides. If you want to be sure that the seams do not tear when you turn the stripe on the face side, you can run second seam 1 mm away from the original seam. Grade the seam allowances and cut off their corners. Use a blunt knitting needle or wooden cooking spoon to turn the suspender face side out. Work on the second suspender in the same way and iron both thoroughly.
Skirt
Lay the front panel over the front waist band - the top fabric one (face side to face side). Align the pieces correctly using the centerline marks.
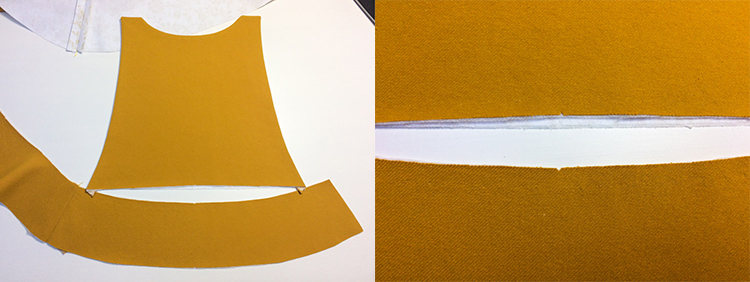
Pin and stitch the front panel to the waist band.
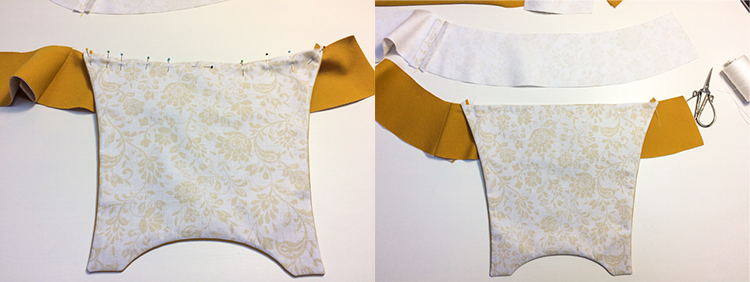
Pin the lining waist band over the top fabric waist band with the front panel (face side to face side). If you want to sew the suspenders now (you have an adjustable buckle), insert the buckles between the layers of the back waist band (between top fabric and lining). Suspenders need to be the same distance from the center of the piece. This is another reason why I did this later - I wasn’t exactly sure where I wanted them to be.
Sew top fabric and lining waist bands together along the entire circumference (sew through the front panel too). Cut the corners of the seam allowances.
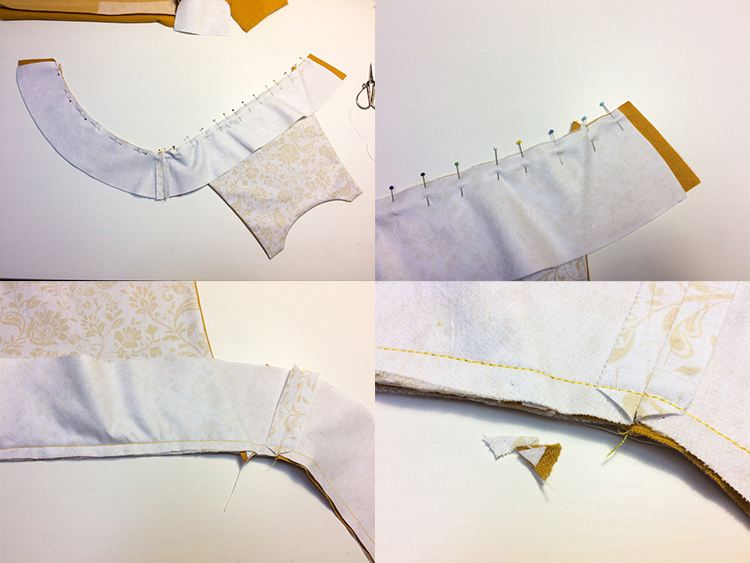
Cut the seam allowance of the lining waist band to about one third of its width...
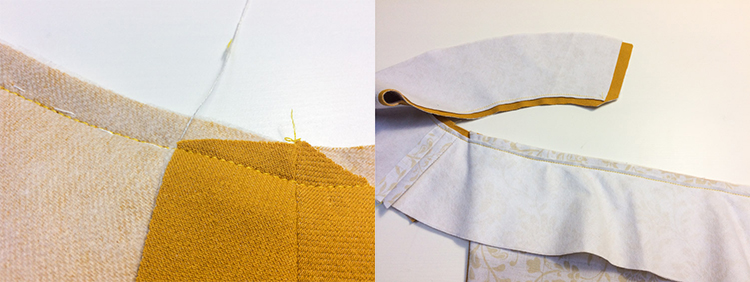
...and cut the seam allowance of the front panel to about two thirds of its width. There are now seam allowances of three different widths.
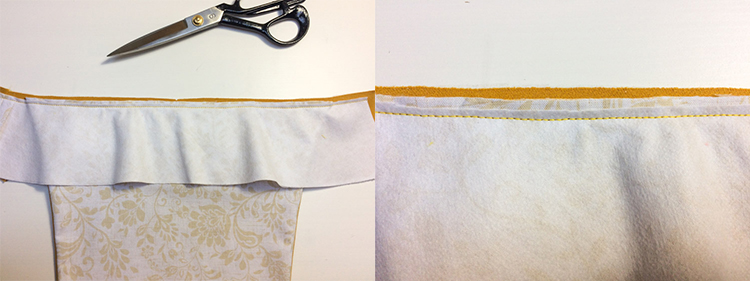
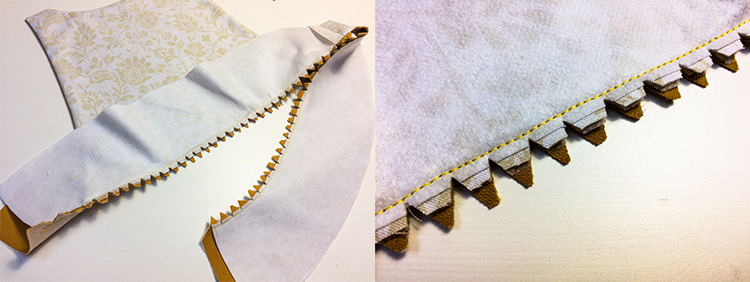
Now cut all three layers of the seam allowances perpendicular to the seam (every centimeter or so), you don’t have to cut out the triangles like I did.
Turn the pieces on the face side and fold (and iron) the waist band to keep its lining from peeking out.
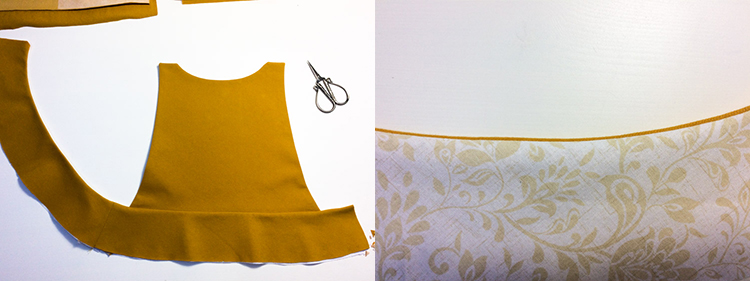
I recommend temporarily stitching the waist band, so it stays folded like that.
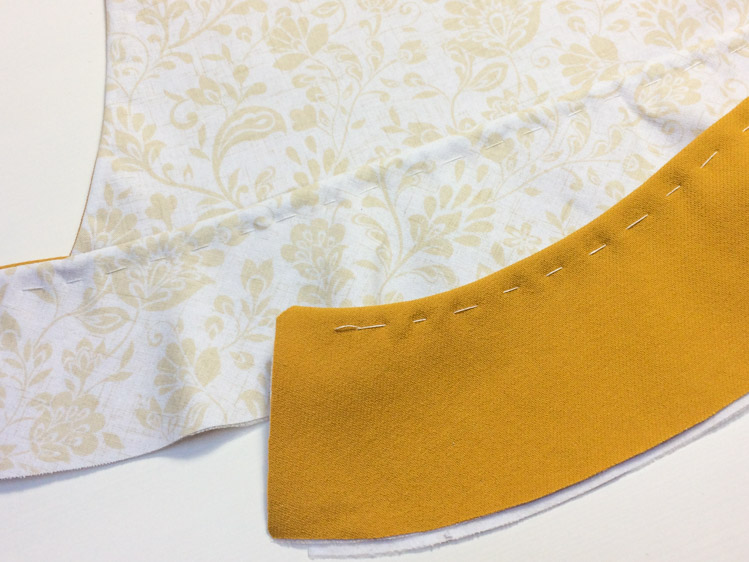
Hemming with a bias tape
Clean the lining waist band on your overlock or with a bias tape. You can also leave it for now and later sew it to the skirt by hand, it’s up to you.
Open up your bias tape (if you want to use it) and place its face side to the reverse side of your piece. Sew the tape to the piece along the fold. Then turn the piece face side up and fold the bias tape over its edge. Fold the tape under itself and sew it to the face side of the piece. Sew about 1 mm away from the edge of the tape.
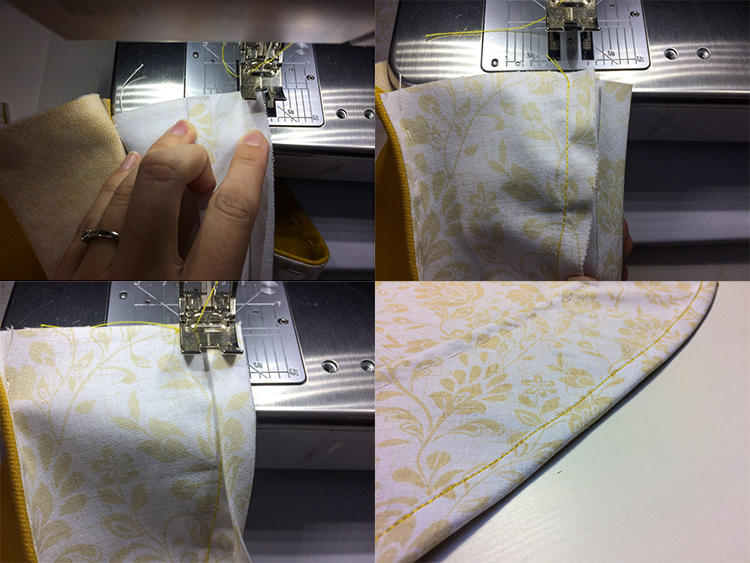
You can use this technique to clean the edges of the waist band.
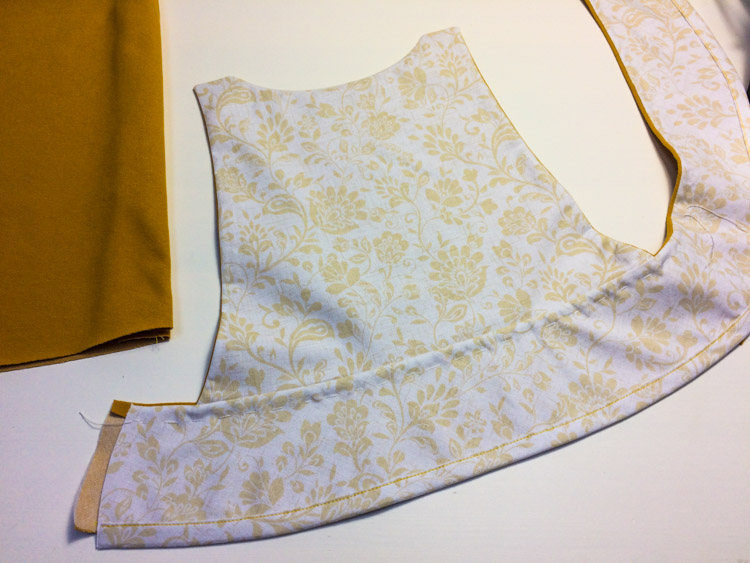
Pocket flaps
Prepare your pocket flaps before sewing the waist band to other pieces. Overlay the pieces (face side to face side) and use the paper pattern piece (without seam allowances) to outline the shape of the flaps. Make sure that both flaps have the same shape. Sew the pieces together and grade the seam allowances of the lining piece. Now it is necessary to cut little triangles to the seam allowances (see tip No. 4), so there is no excess fabric between the layers after you turn the pieces on the face side.
Turn the flaps on the face side and iron them carefully. Fold the edges so that the lining parts do not peek out, and temporarily stitch the edges so that they keep their shape.
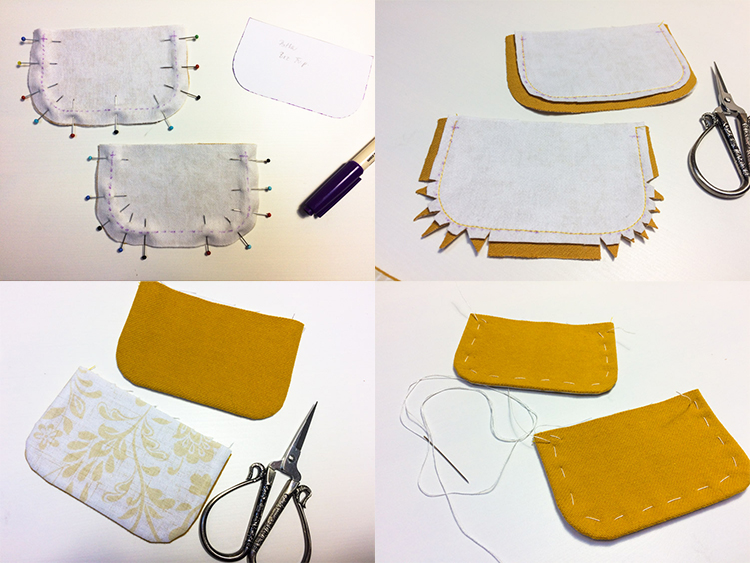
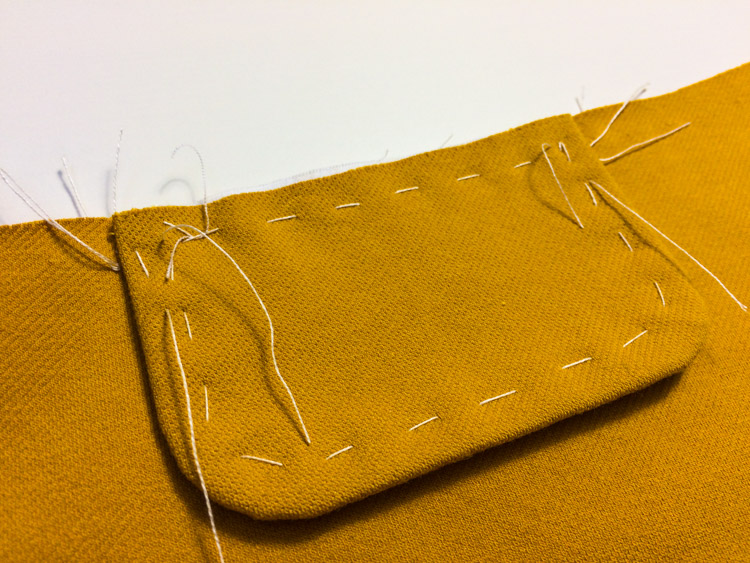
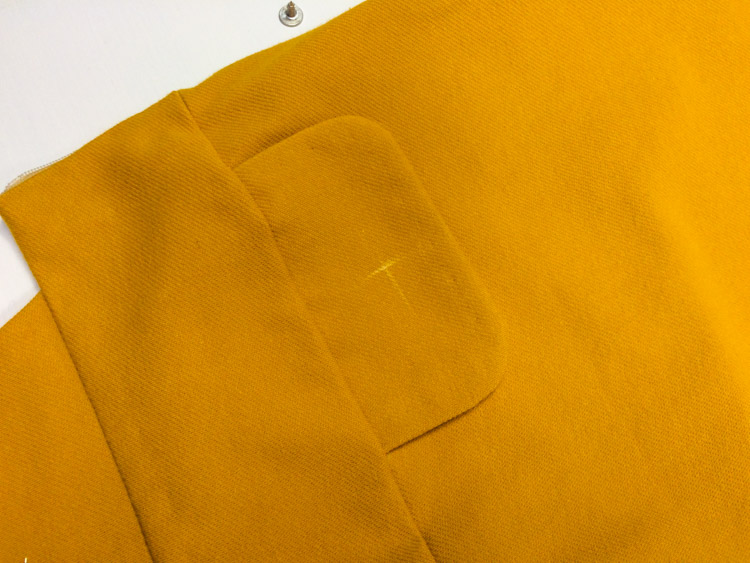
Stitch the flaps to the front piece. Make sure they are positioned correctly.
Side seams
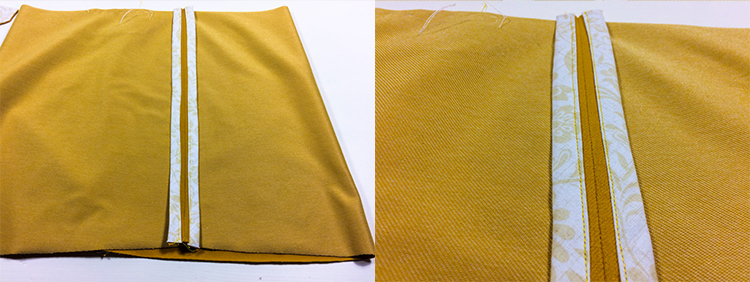
Place the front and back pieces on top of each other and prepare to sew the side seams. Don’t forget to leave space (10-13 cm) for the zipper - don’t sew to the end of the seam on one side (left side in my case).
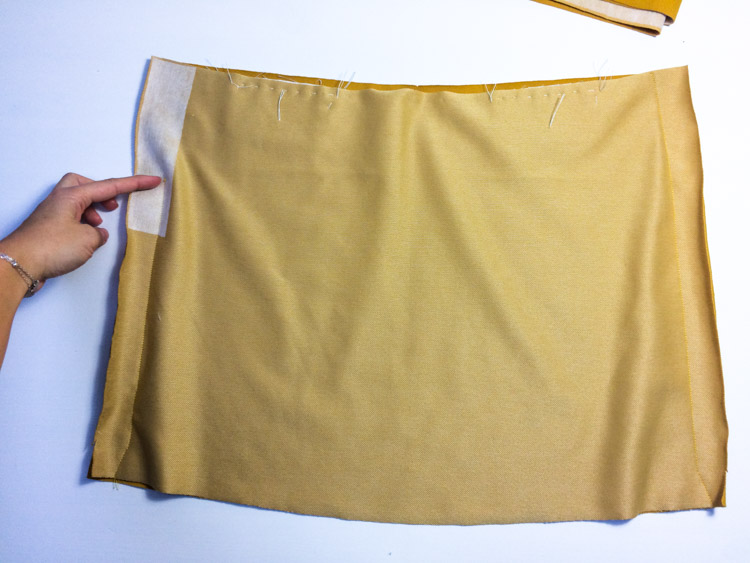
Clean the seams on your overlock or with a bias tape. Proceed in the same way as when cleaning the lining waist band - left the zipper side free for now.
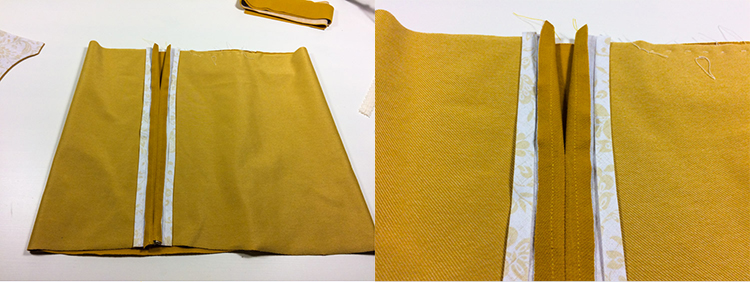
Don't forget to iron the seams.
Connecting the waist band
Lay the waist band over the skirt (face side to face side). First align the marks in the centers of the pieces.
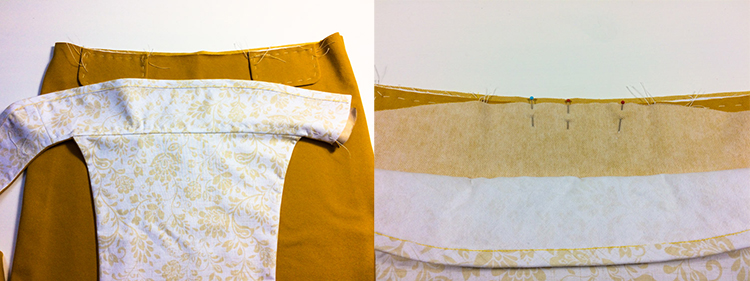
Stitch the top fabric waist band to the skirt.
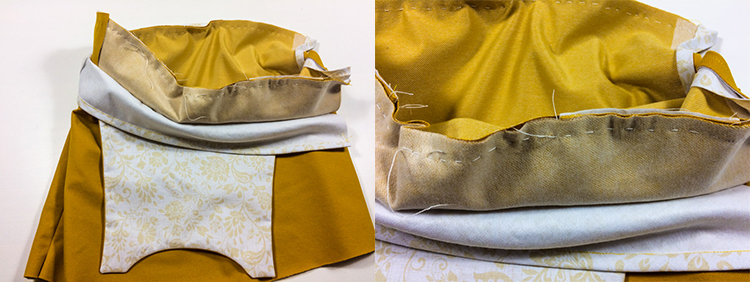
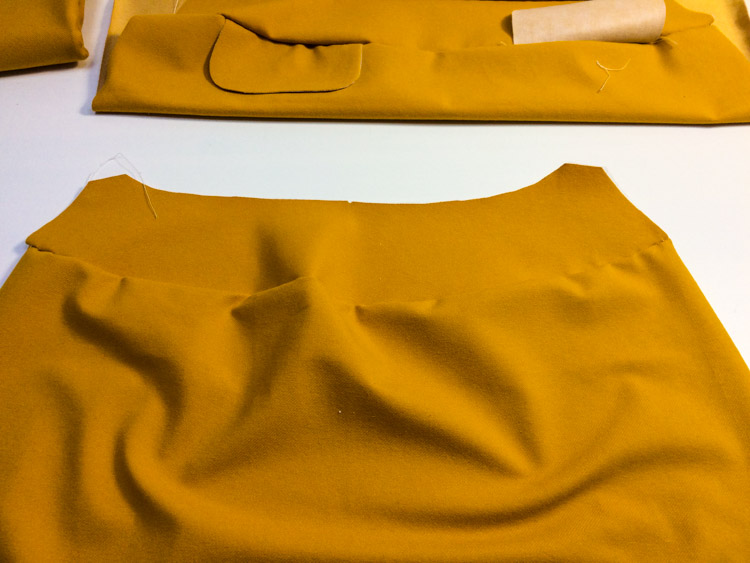
Area near the left side of my skirt (you can see unfinished bias tape hem):
Second fitting test
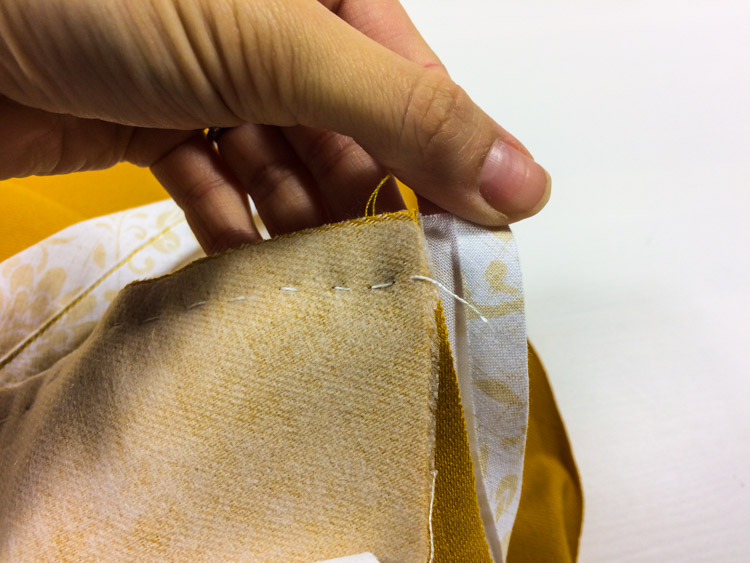
Now you should perform a second fitting test. Adjust (if you need to) before sewing the waist band and zipper.
Connecting the waist band - Zipper
Sew the waist band to the skirt. Grade and cut the seam allowances perpendicular to the seam (see tip No. 4).
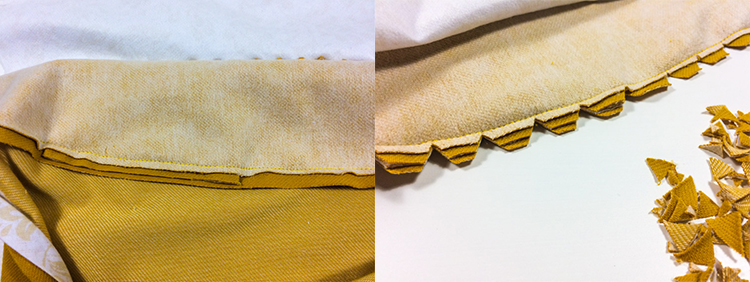
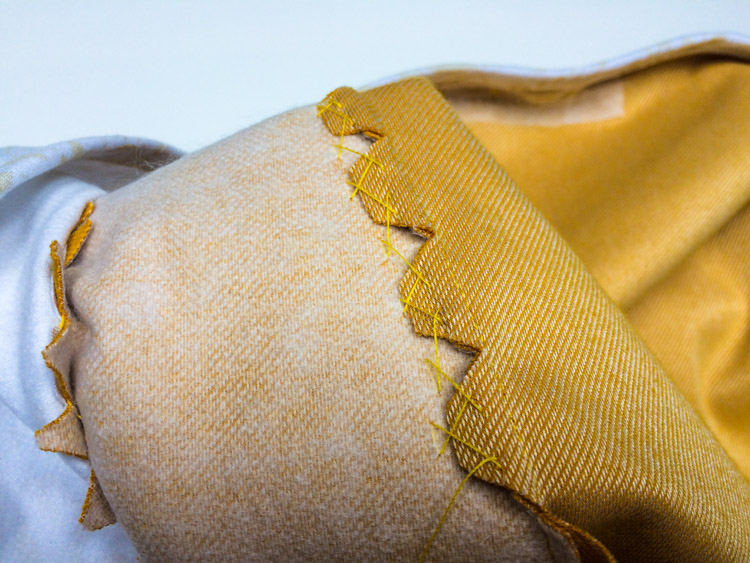
Attach the seam allowances to the waist band using a herringbone stitch.
TTraditional tailoring tip No. 5: Herringbone stitch
Herringbone stitch is the most commonly used hand stitch in traditional tailoring. It is used to attach layers - it’s not particularly strong, but it is very flexible. Herringbone stitch is used to attach seam allowances in the haute couture. This helps flatten the seam, which then retains its nice shape. It’s commonly used when processing various hems - especially “bottom hems” of skirts, jackets and pants. It’s usually done with a single-threaded needle.
Traditional tailoring tip No. 6: Beeswax
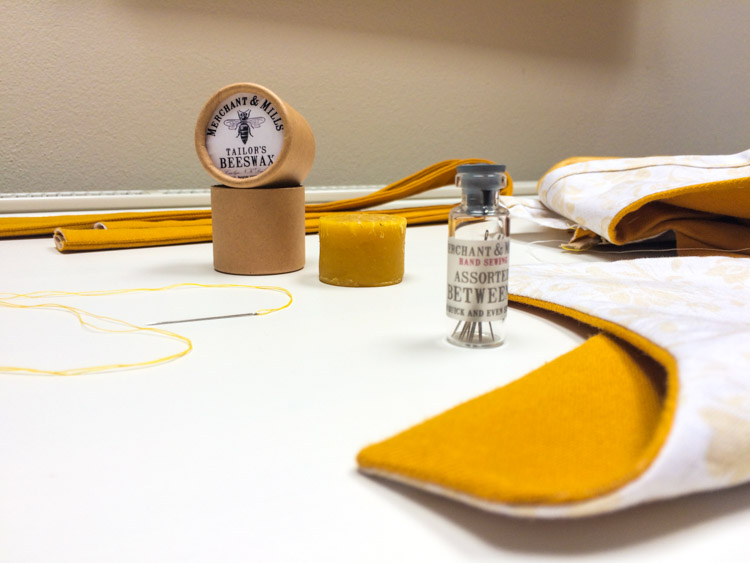
Beeswax is also widely used in tailoring, and I guarantee that if you try it once, you will no longer want to sew without it. Beeswax is used to smooth out the thread intended for hand sewing. If you don't like to sew by hand, it's probably because you're annoyed that the thread gets tangled and knotted. These problems are even worse when using a double-threaded needle. However, when you pass the thread through beeswax, the individual small fibers that "peek out" of the thread and cause it to tangle are smoothed out. Waxed thread is easier to work with. :)
Herringbone stitch:
Beeswax:
(You can get it directly from your local beekeeper, in various arts&crafts stores/haberdasheries, at farmers markets... Mine is from Merchant & Mills, here: Beeswax for threads.)
If you aren't going to attach the seam allowances to the waist band, it would be good to at least fold and iron them towards this direction.
Lay the zipper over the skirt (face side to face side). Fold the excess part of the zipper tape back on itself, pin the zipper to the skirt and sew it in.
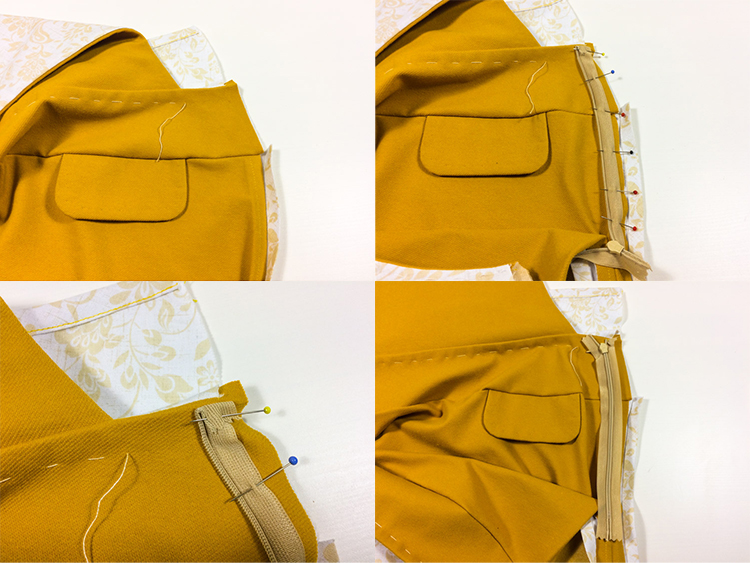
Check that the seam allowance of the waist band points towards the waist band. Zip-up the zipper and check that it is sewn correctly.
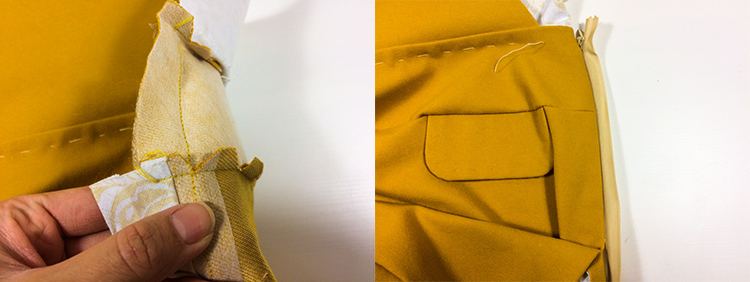
Mark the point where the zipper crosses the skirt/waist band connection. You need the zipper to be sewn evenly so that the skirt/waist band connection is aligned when you close the zipper - ends of this connecting seam need to be at the same height. Sew the other side of the zipper, close the zipper and check the whole thing again.
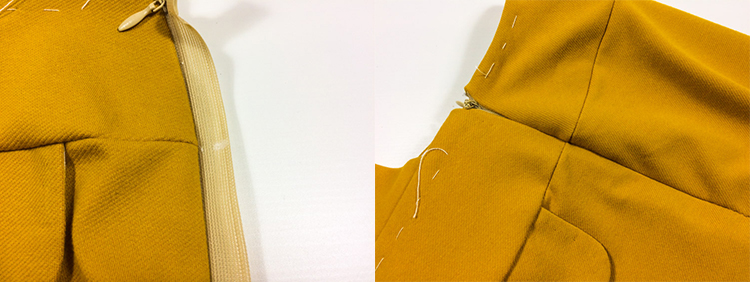
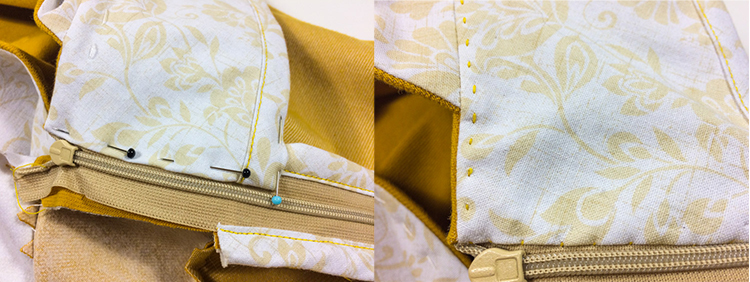
You can now finish the hems. Sew through the zipper tape to clean the whole area in one go.
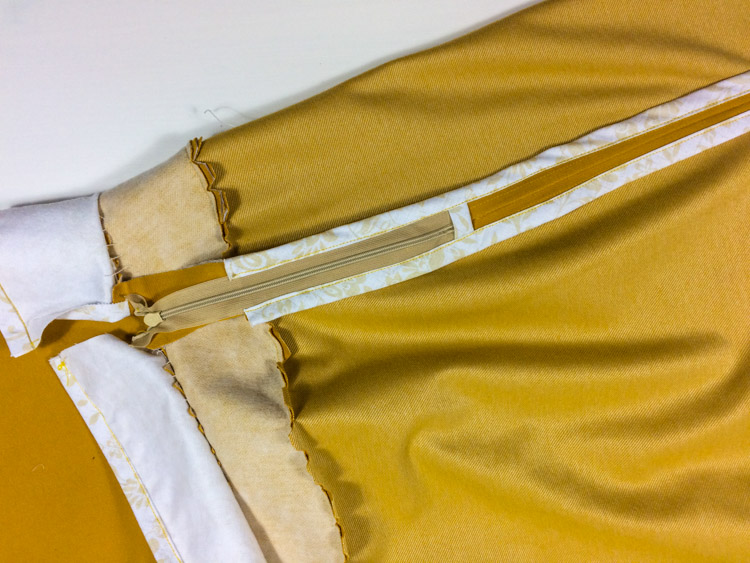
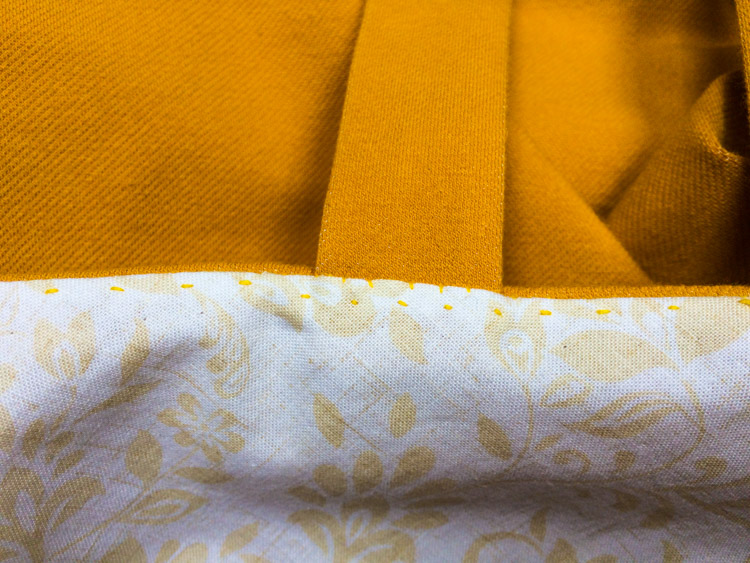
Next fold the lining waist band over the zipper tape and attach it with a few small stitches. I also recommend attaching the lining waist band with a pearl stitch so that it stays in place and does not peek out. If you aren’t using traditional tailoring methods, you can simply topstitch the waist band from the face side.
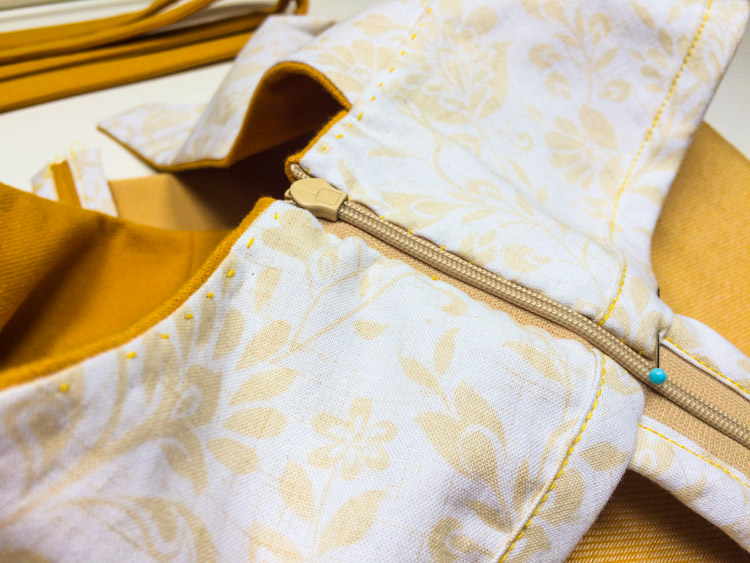
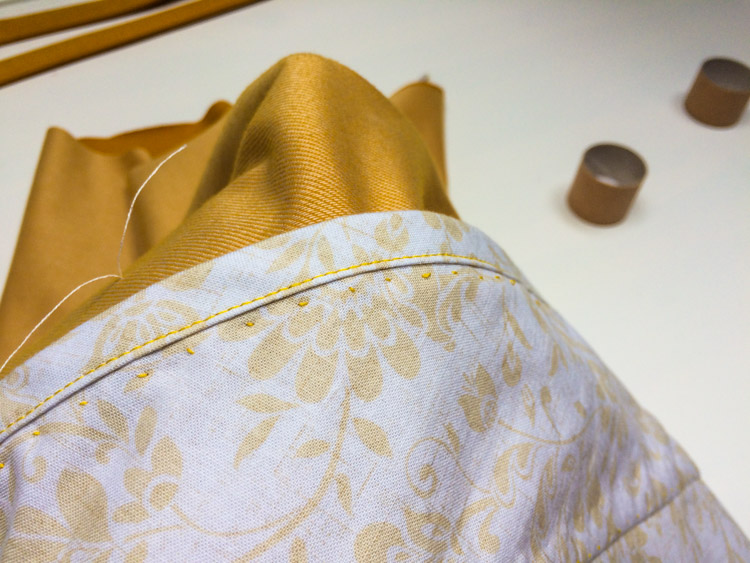
You can also attach the free edge of the lining waist band to the seam allowances along the entire waistline.
Third fitting test & suspenders
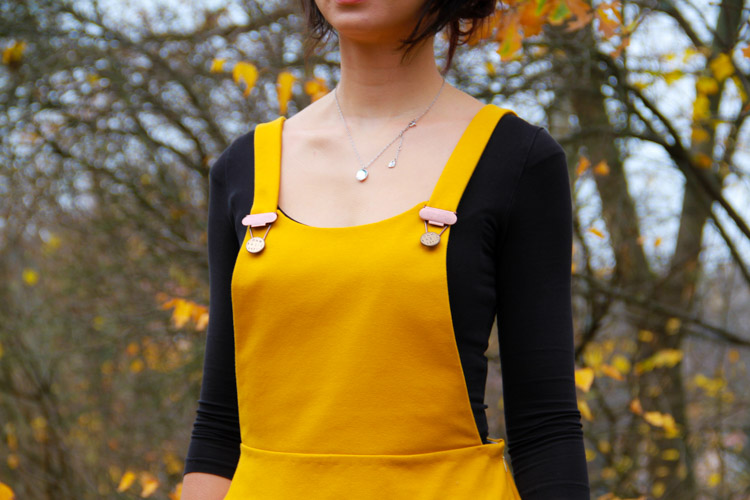
Now is the time to add suspenders. Skirt is almost finished (you just need to sew the bottom hem), so it's time for the third fitting test. Just check that everything is as it should be and indicate the final length of the skirt. You can shorten it a little if necessary. I also measured the exact length of the suspenders. I have a buckle which allows me to regulate the length of the suspenders, but unnecessarily long suspenders would hide those beautiful buttons. :)
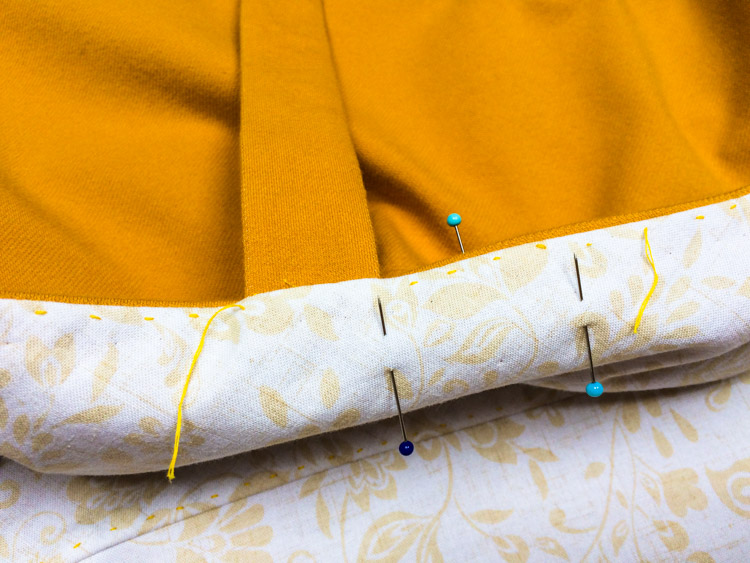
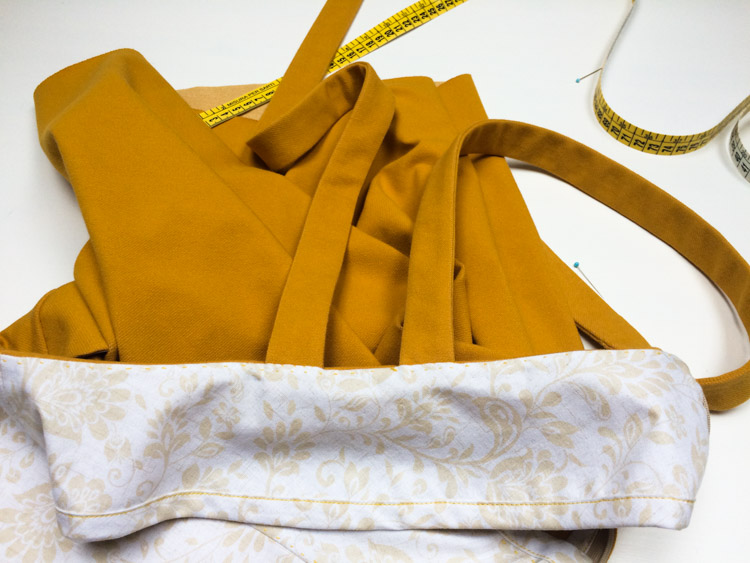
I shortened the suspenders to the required length and sewed them into the back waist band by hand - I needed to rip parts of the seam to do this. This is not a typical procedure, but you probably won't avoid it if you need to find out the exact length of the suspenders before sewing them in. I sewed the suspenders by hand and added parts of the pearl stitch (attaching the lining waist collar) back in.
Length of the skirt
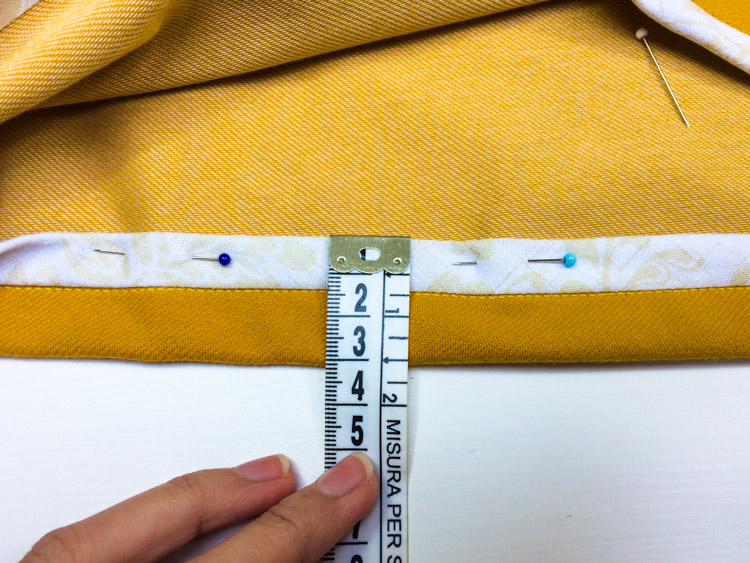
And lastly, there is the bottom hem. I will use a bias tape, but in a slightly different way, so that the hem is not too thick. Start sewing at the face side of the skirt. Then fold the tape over the seam allowance into the reverse side of the skirt, but do not make another fold there so that there isn’t another layer of fabric.
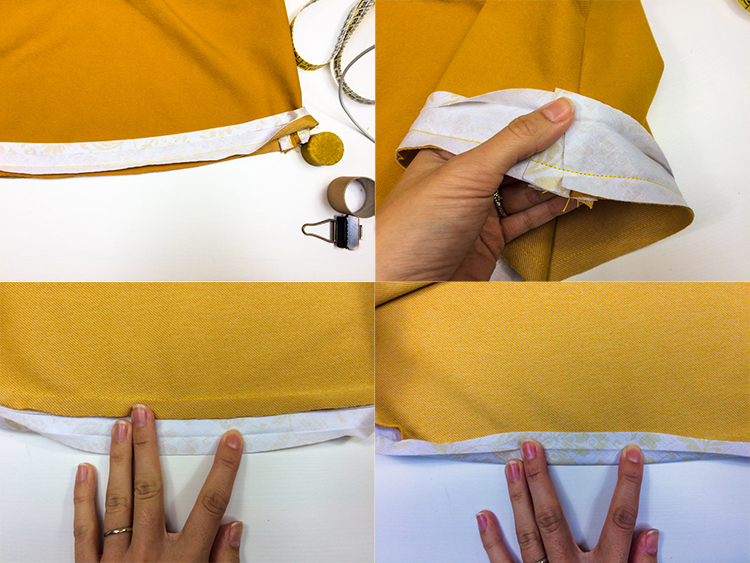
Sew the second half of the tape to the skirt from the face side (sew in the original seam). Cut the corners of the seam allowances at the side seams to further reduce the thickness of the bottom hem.
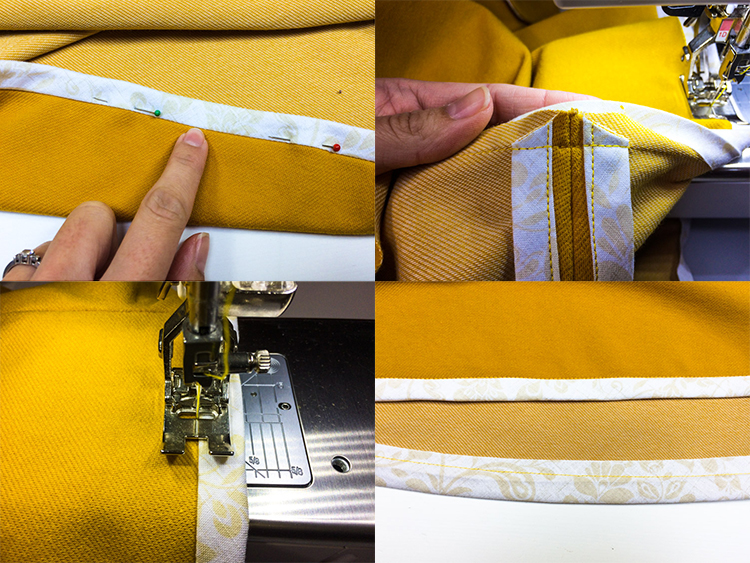
Now fold the whole hem of the skirt to the reverse side, depending on the chosen width of the seam tab (3 cm in my case).
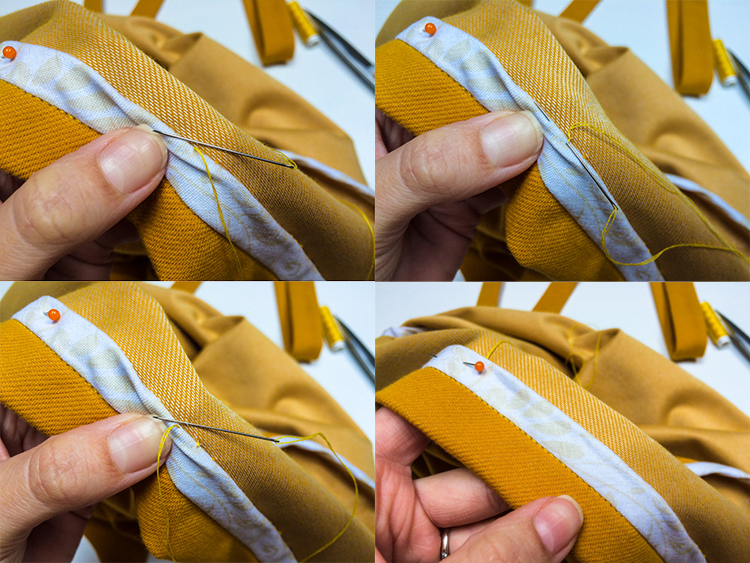
And attach the hem to the skirt by hand. Always take just one thread of the skirt (you want this seam to be invisible from the face side) and sew about 0.5 cm long stitches. Use a double-threaded needle to make the seam stronger.
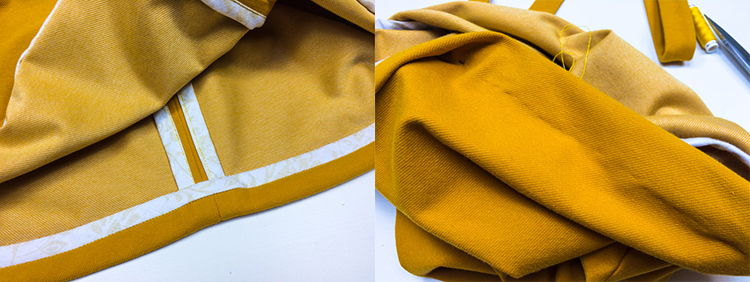
You can see that there is "something is going on there” from the face side, but these traces will disappear after ironing. Be careful when ironing the areas near the side seams - outlines of the seam allowances will become visible from the face side if you press too hard. Use a lot of steam and just lightly touch the fabric with the tip of the iron. It’s about bringing the iron close to the fabric and steaming a lot. No pressure is needed.
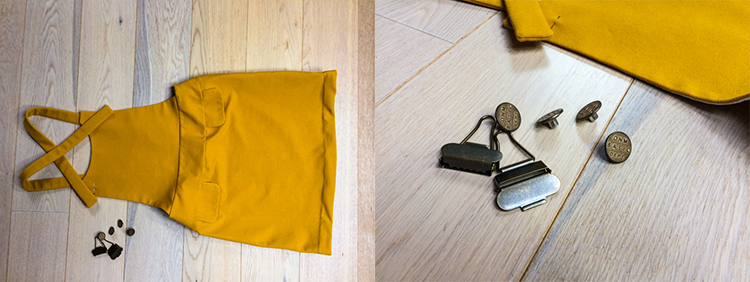
Buttons
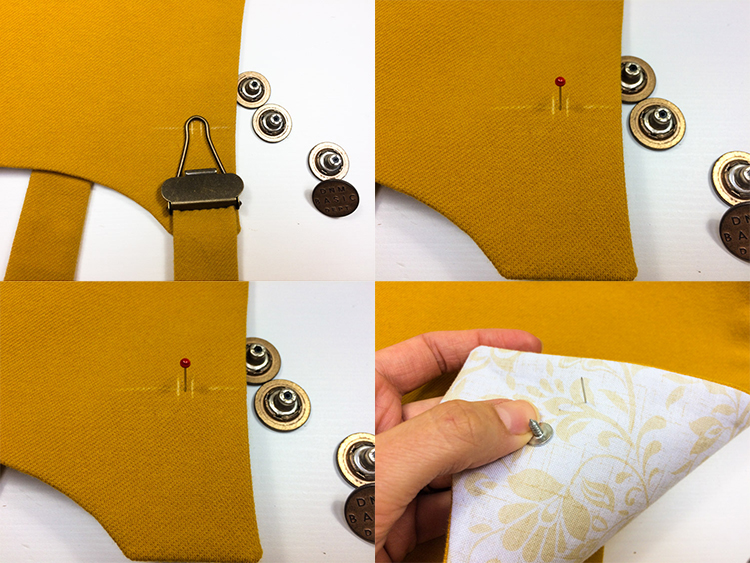
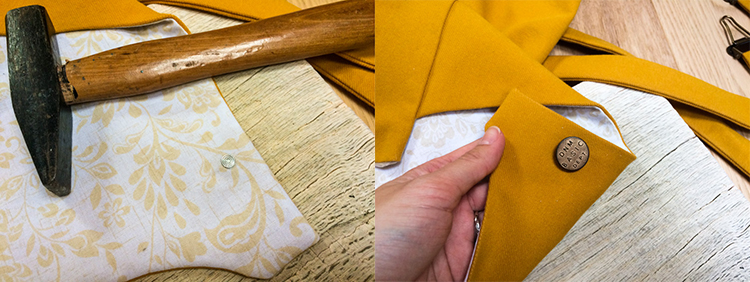
Finally, sew (or hammer) the buttons and that's it. Be sure to measure so that all the buttons are evenly spaced on both sides of the skirt.
And that's it, the skirt is finished. Do you like it? Is it too complicated or not? Please let me know below the article how you like these traditional methods, so that I know how to break down next time and what topics are you interested in. Are you more into traditional tailoring or do you prefer a faster and more modern way of sewing?
I look forward to your comments!
Have a nice day, Peťa
You can get pattern for this skirt here: Pattern for women’s skirt HAVE FUN
