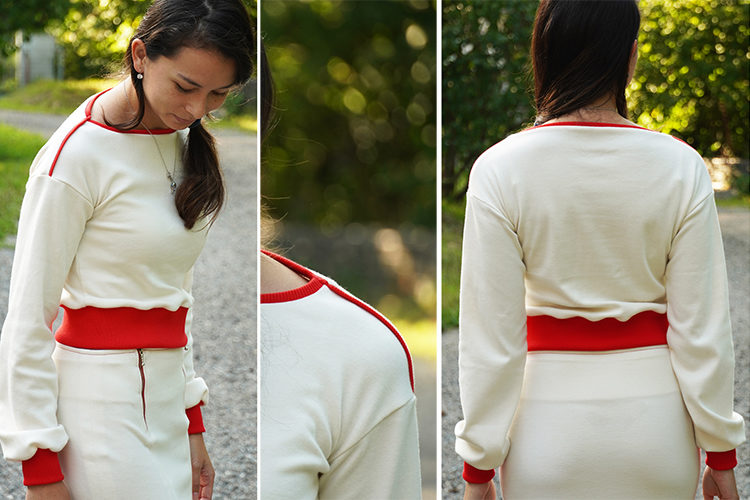
This article contains instructions for sewing a women's T-shirt/Sweatshirt TO THE CITY. You can use this pattern to sew both a long-sleeved T-shirt and a thinner sweatshirt, depending on the material you use. This pattern has dropped shoulders (armscyes are further away from the torso) and boat neck. Lines for sewing the so-called crop top style and for the full-length version are marked in the pattern files. There are also two types of sleeves in the pattern files - for classic semi-tight sleeves and then for sleeves with a frilly bottom part (balloon effect). In this article, you will find some tips for sewing T-shirts and sweatshirts TO THE CITY and a gallery of clothes made according to this pattern.
UPDATE: This article is the result of merging three original articles about the TO THE CITY pattern. All sewing instructions related to the pattern can now be found at one spot - here. I believe it is less complicated... :)
The pattern for women’s T-shirt/Sweatshirt
You can get the pattern for this T-shirt (or sweatshirt) in my online store:
The pattern for women’s T-shirt/Sweatshirt TO THE CITY
You can get this pattern as part of a set that also includes a skirt:
Pattern set - Women's suit TO THE CITY
Even though this is a T-shirt of a classic-length, you can wear it tucked-in to show your waistline. Or you can, of course, wear it untucked, as is usual today…
I’ve also used the pattern to sew these two T-shirts:
![]()
women's lace t-shirt with dropped shoulders ![]()
pattern fro a comfortable women's suit - T-shirt + skirt
✂My tip: I’ve used my overlock to sew this T-shirt, but don’t worry if you do not have an overlock at home. It can easily be sewn on a regular sewing machine too. Just follow a few simple rules from this article: How to sew elastic fabrics on a regular sewing machine - 4 steps to success
Recommended material
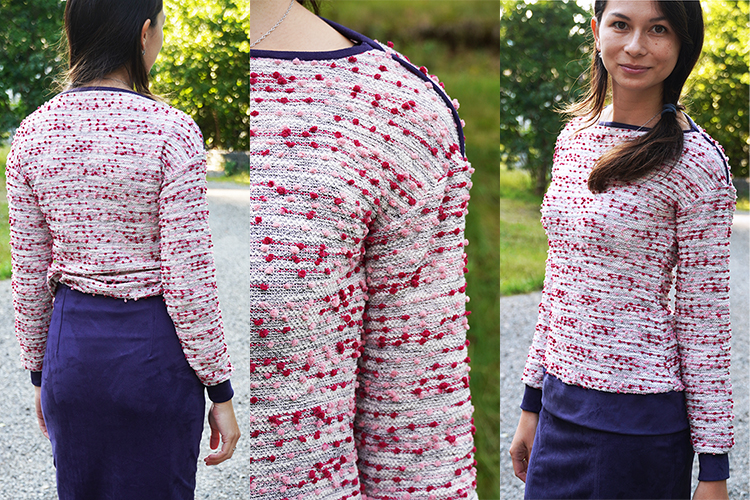
I used a thin sweater knit for my sweatshirt. You can get it here: Sweater knit with naps
I need to tell you that the fabric is rather thin - do not imagine a fluffy sweater, but rather a lighter elegant piece ideal for spring/autumn days.
Hems (bottom, sleeves, and neck opening) are finished with strips of elastic material. I used this material for dark blue hems: Stretch suede - Dark blue
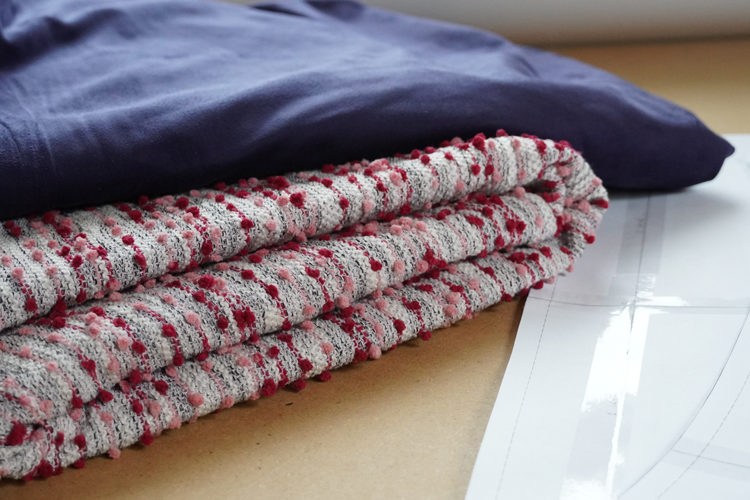
You can use almost any type of knit to sew this T-shirt/Sweatshirt. Depending on the thickness of the material (its weight), you will get either a T-shirt or a sweatshirt. You can buy a variety of suitable fabrics here: Důmlátek.cz
You can use something like this for a comfortable T-shirt:
- Monochromatic cotton knits
- Cotton knits with prints
- Monochromatic mixture knits
- Mixture knits with prints
- Modal fabrics
And these materials are a good choice for a sweatshirt:
- Thinner sweater knits and other knits
- Monochromatic French Terry
- French Terry with prints
- Monochromatic laid-in knits with elastane
- Laid-in knits with prints
- Stretch Nicky velour
The required amount of material
(for 140 cm / 55” wide fabric)
- Sizes 32 - 36: 0.7 m (28”)
- Sizes 38 - 46: 1.4 m (28”)
- Sizes 48 - 60: 1.5 m (60”)
Other materials
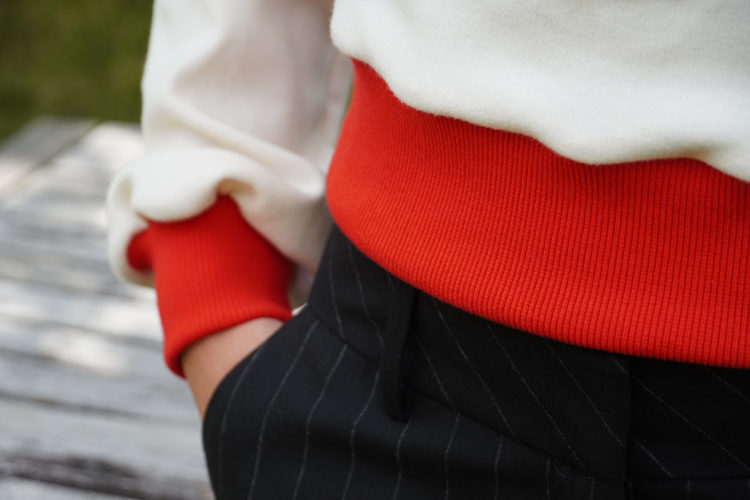
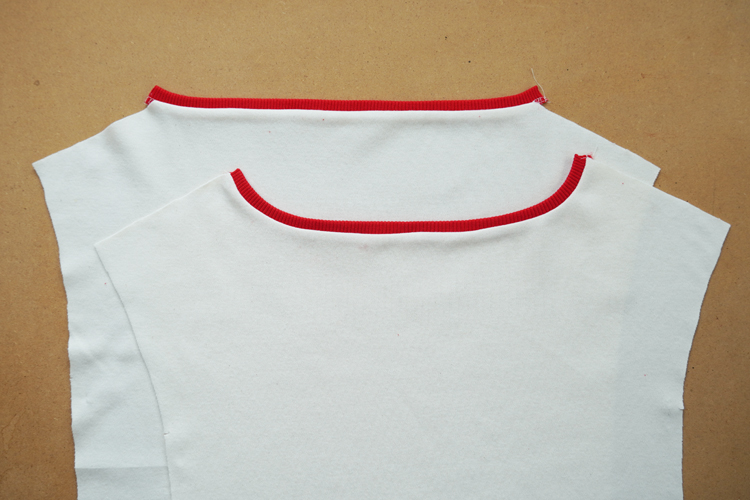
Hems (bottom, sleeves, and neck opening) are finished with strips of elastic material. T-shirt with contrasting red hems is finished with a ribbed hem knit: Hem knits
Because sleeves are draped to their hems quite a lot, it is necessary to choose really elastic material for the hems. Ribbed hem knits are an ideal choice.
Sewing instructions:
1 - Pattern layout
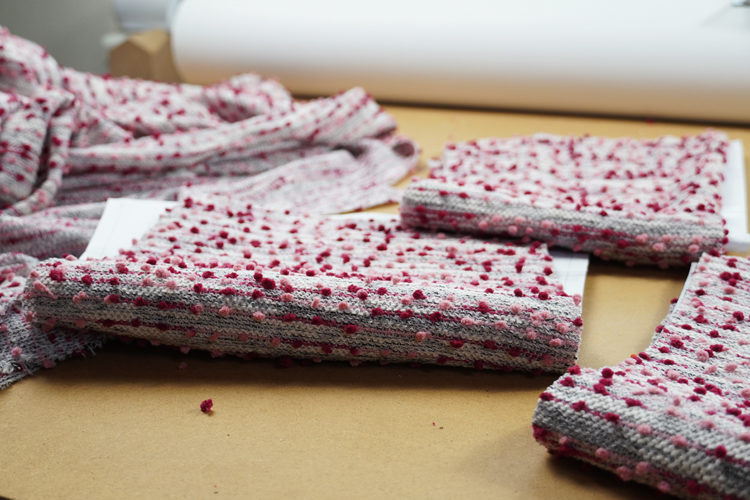
Do not forget to add seam allowances to all pieces (excluding hems). If you are using the pattern version with the seam allowances already outlined (“individual sizes view”), you don’t need to add anything, just cut the fabric according to the paper pieces. If you decide to use the pattern without seam allowances outlined ("all sizes view"), add them yourself
✂My tip: If you are going to sew with similar material, I recommend you make the seam allowances 2 cm (3/4") wide everywhere except neck opening and armscye. Because this type of fabric tends to shed fibers from the cutting edges. Once you clean the pieces on your overlock, you don’t have to worry that something will unravel somewhere, but in the meantime, it might be a bit difficult to work with small seam allowances.
Prepare:
- 1x front piece (cut on the fold)
- 1x back piece (cut on the fold)
- 2x sleeve piece
- bottom hem:
- The bottom hem of the classic version - width is 14 cm (5 1/2") (but you can make it wider or narrower) and its length is the length of bottom cutting edge (circumference) x 0.9.
- The bottom hem of the crop top version - its width is 14 cm (5 1/2") (but you can make it wider or narrower) and length is the waist circumference + 4 cm (1 5/8").
- sleeve hems
- The length of the hems should be about wrist circumference + 3 cm (1.18") in the case of narrow sleeves (if you want to use less elastic materials for the hems). Don’t add anything for slack and seam allowances If you are going to use ribbed hem knit (which is very elastic). The width of the sleeve hem is 16 cm ( 6 / 1/4") (again, you can choose a larger or smaller width, but make sure the sleeve is not too long or short).
- Two knit strips for neck opening hem - width should be about 3 cm (1.18") and length is the length of the neck opening of the corresponding piece (front or back) x 0.9.
Neckline
2 - Neckline hem
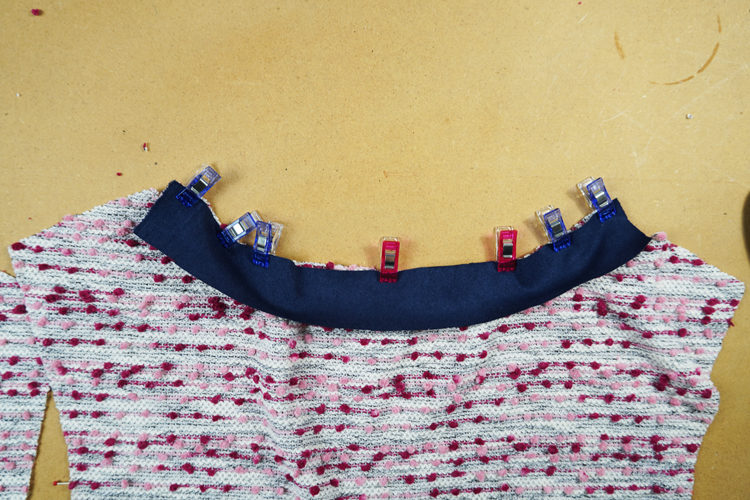
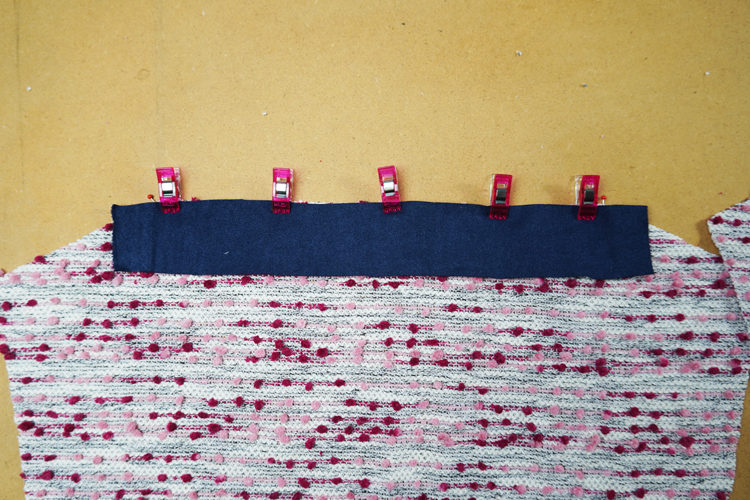
Work on the neck opening hems first, do both back and front pieces. My hemming material is quite rigid, so I’ve determined the strip length as 0.95 x the length of the neck opening of the corresponding piece.
I’ve done the hems with the stripe folded in quarters (similar to the bias tape hemming).
If you do not know how to hem with bias tape, a simple video tutorial can be found here:
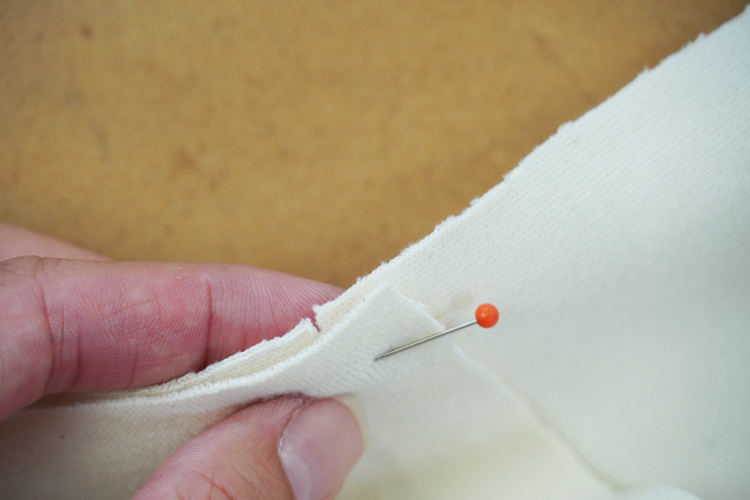
It is very important that the stitching stays hidden from the face side view.
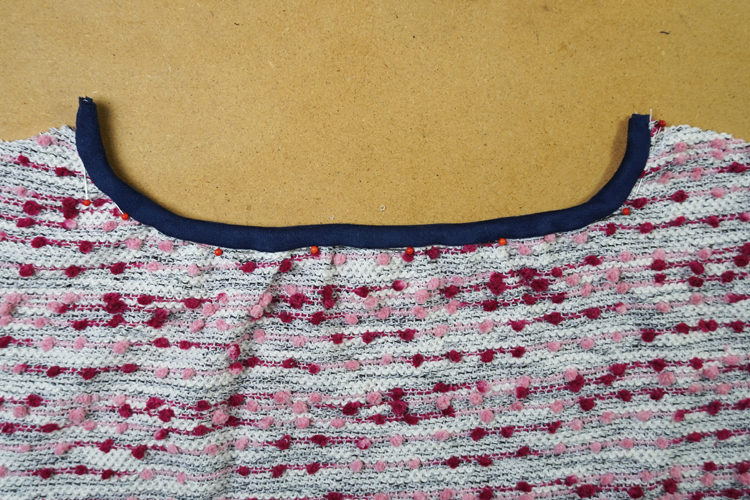
The key is to pin or baste the strip so that you are sewing outside the strip itself (from the face side)…
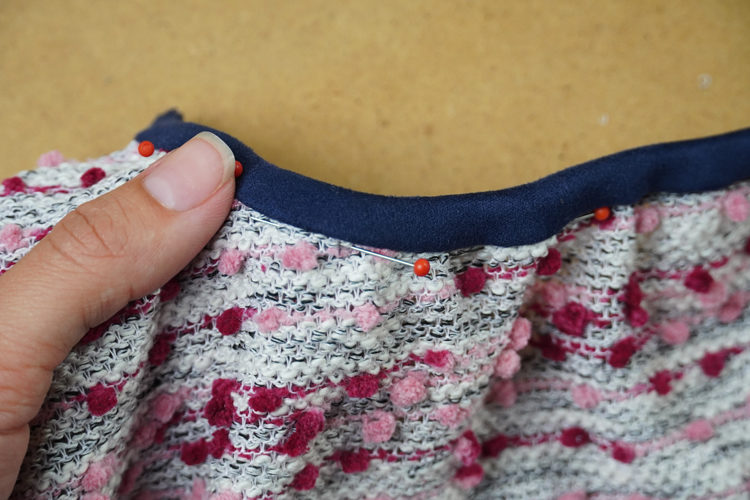
...while on the reverse side, you are sewing through the fold of the strip.
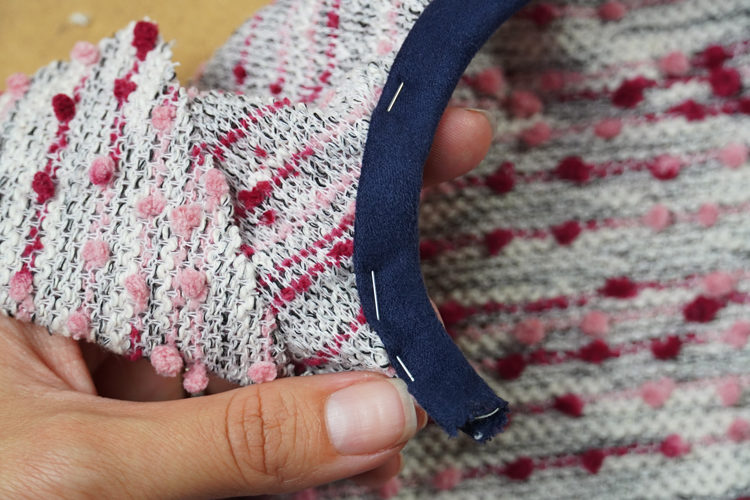
This ensures that you can sew exactly along the original seam - the new seam is not visible from the face side…
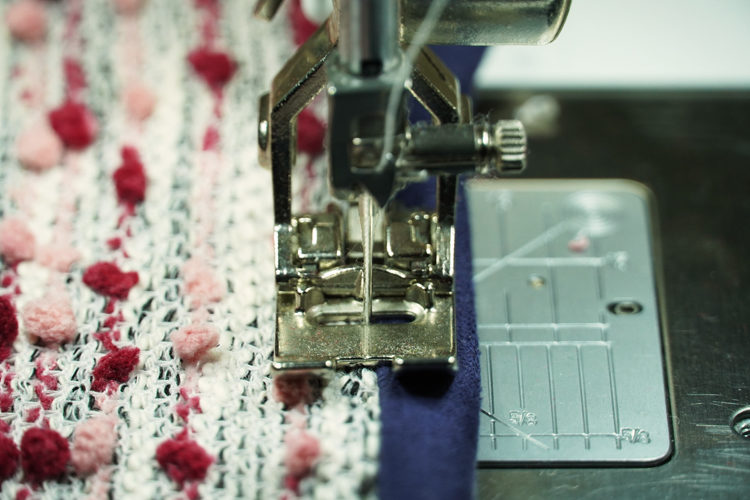
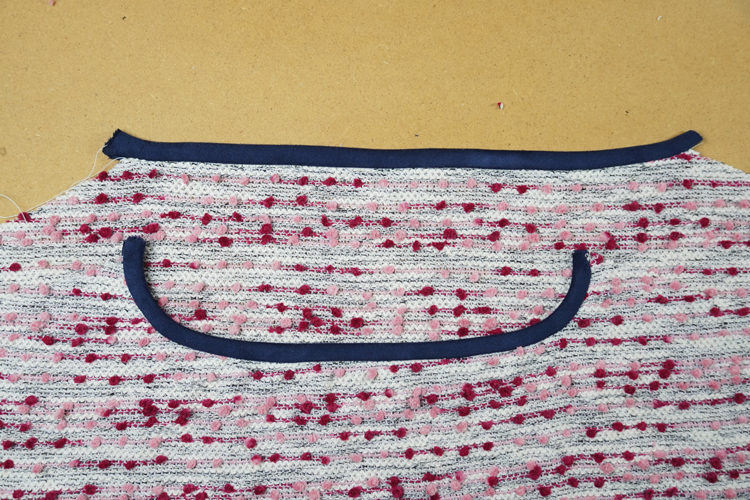
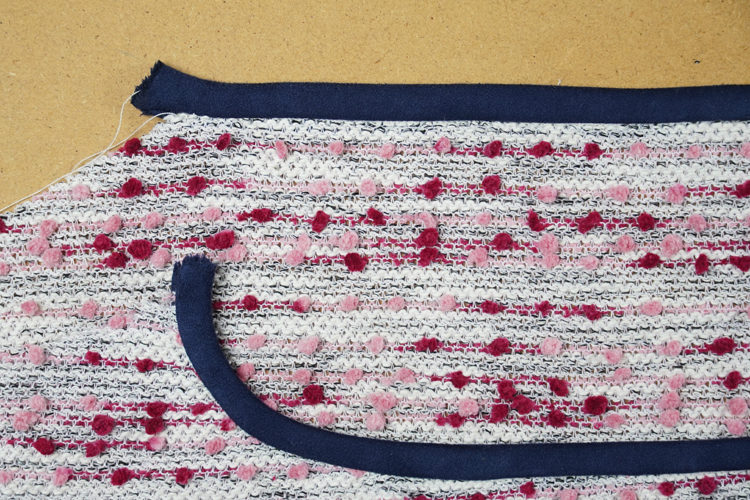
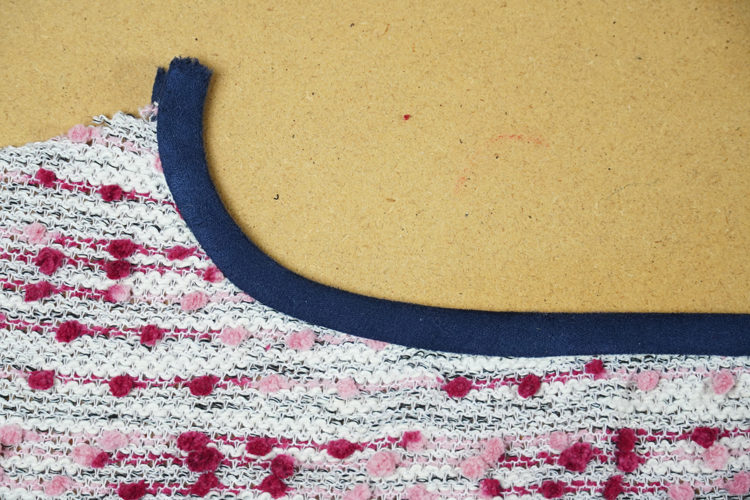
…although you have a strip attached nicely from the reverse side.
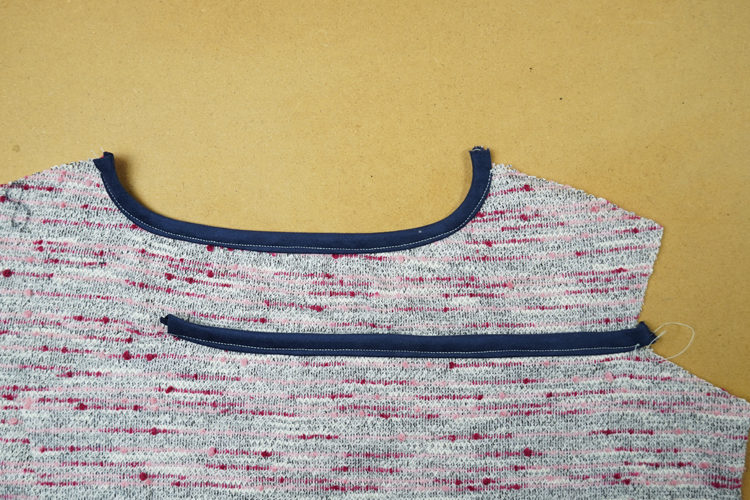
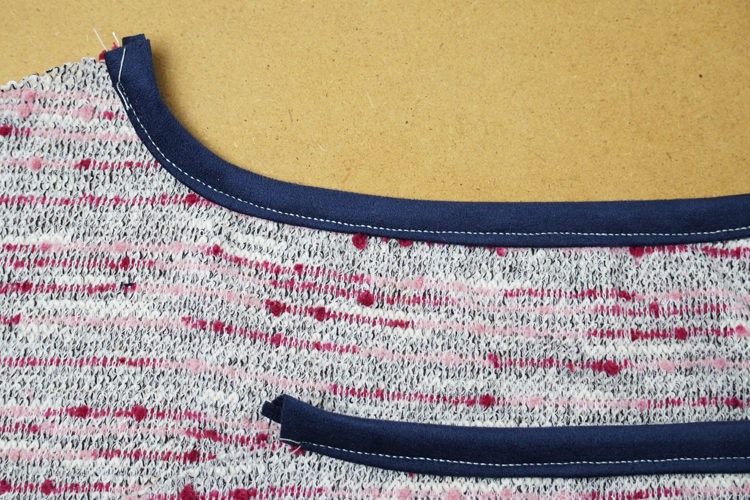
Hems of the sweatshirt made of the thick knit are knit strip lengthwise folded in half. I used my overlock machine to sew them.
Shoulders
3 - Decorative seam cover
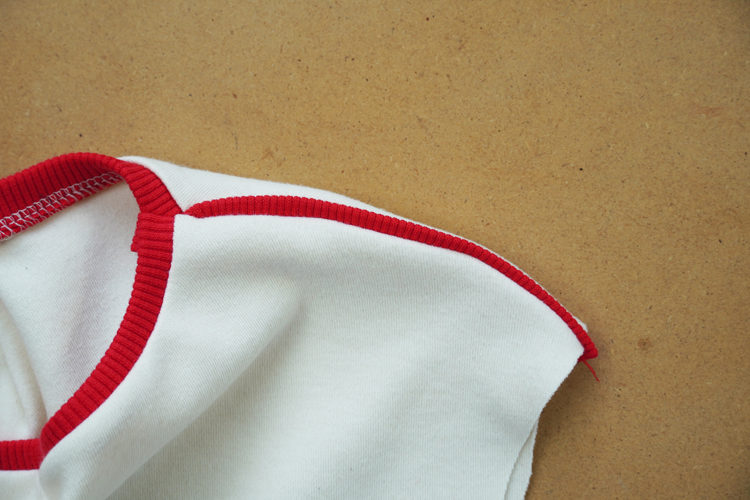
At this point, you can sew a decorative stripe into the shoulder seams. I’ve done this with the same fabric as the neck opening hem.
Prepare two strips about 3 cm (1.18") wide and exactly the length of the shoulder seams (although they may be a little longer than that). Fold the stripe in half lengthwise (face side out) and lay it over the shoulder seam of the back piece. Cutting edges are aligned, stripe lays on the back piece (face side to face side).
4 - Shoulder seams
Lay the front piece over the back piece and the stripe (face side to face side) and pin the shoulder seam.
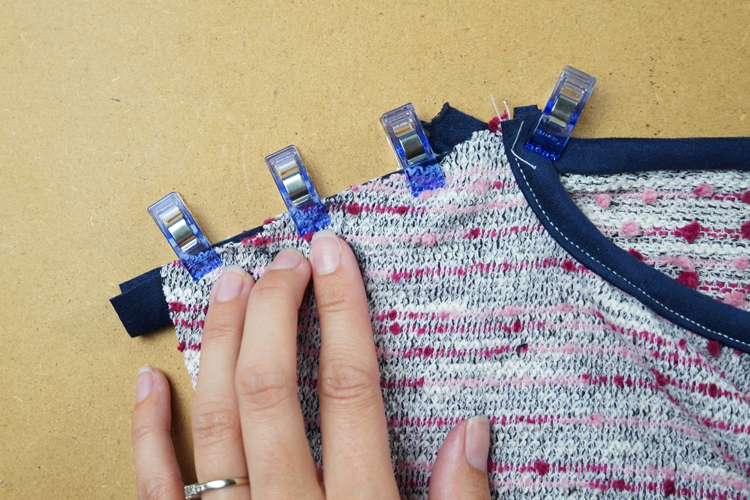
Sew the shoulder seam.
Don’t forget to clean the cutting edges of the seam allowances. You can do this on the overlock (which I highly recommend for this type of fabric), or on the regular sewing machine with some kind of overcast seam.
Fold the seam allowances towards the back piece and fix them in place in place with a few small hand stitches near the neck opening. You can also use your sewing machine set to straight stitch, but you have to be careful.
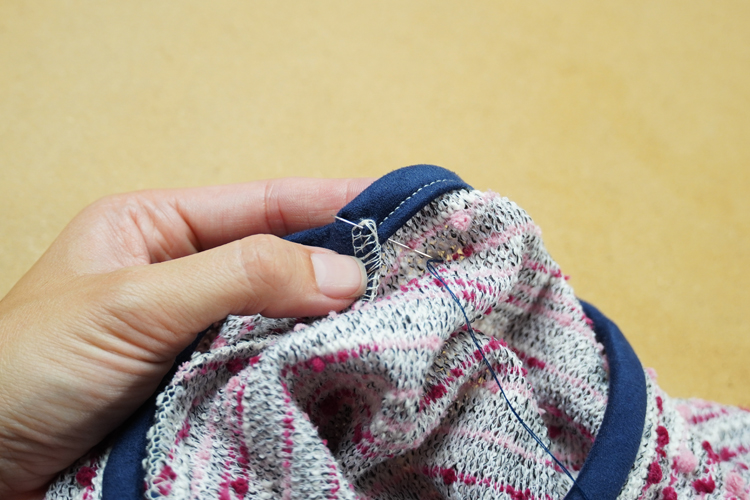
Also, attach the end of the decorative shoulder strip to the neck opening.
Do the other shoulder in the same way.
✂My tip: Regular pins with small heads can get lost in the structured fabric and it would be very unpleasant to forget the pin in the garment or even to sew it in. In a similar situation, it is advantageous to replace the pins with clamps.
Sleeves
5. Armscye
Spread torso piece face side up. You are going to sew the sleeve into the open armscye.
There are marks on the front and back pieces for correct sleeve placement. They mark the end of the side seam and the beginning of the sleeve seam.
Lay the sleeve piece over the torso part (face side to face side) Pin the sleeve to the open armhole.
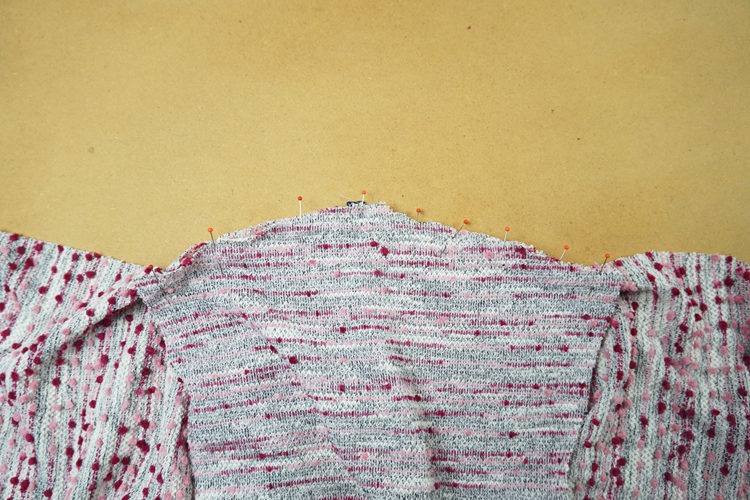
1 cm of the sleeve piece (sleeve seam allow.) should extend beyond the marks. You are not going to sew through this last centimeter. This will allow you to sew the sleeve and side seams easily.
Both seam allowances of the sleeve and shoulder seams should point towards the back piece.
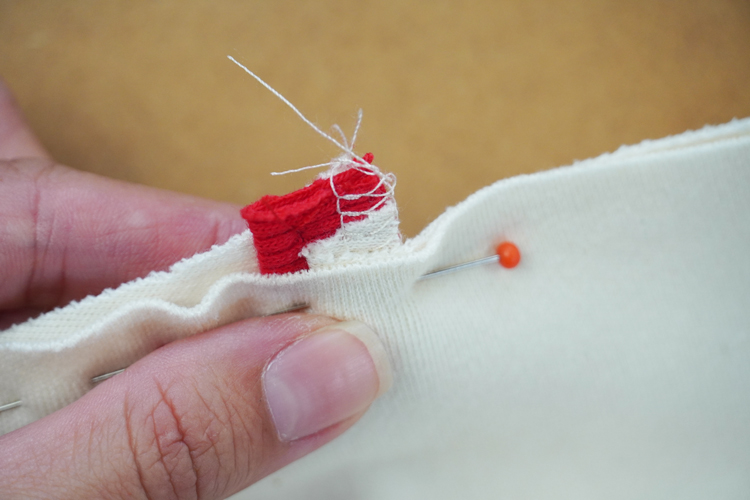
Sew in the sleeves.
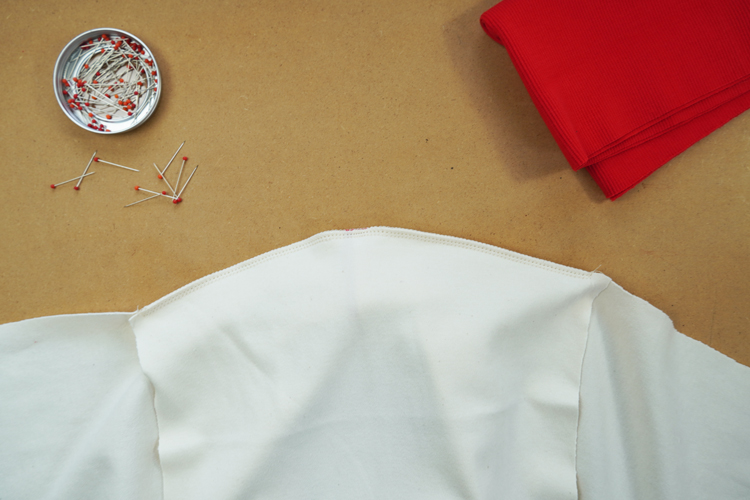
Leave the sleeve seam allowances free beyond the marks, so you can do the side seams and sleeve seams easier.
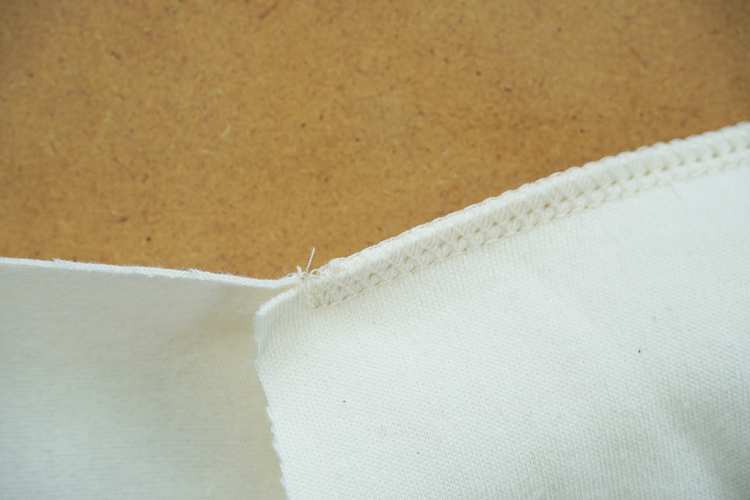
After you sewed the sleeve and cleaned the seam, you can fold the sweatshirt into a familiar shape and then do the sleeve and side seams in one go.
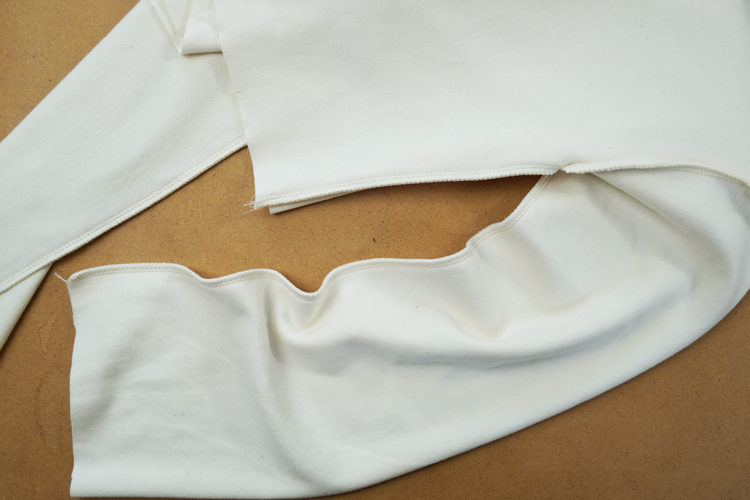
6 - Sleeve seams & side seams
Do not forget to clean the seam allowances to prevent fraying of the fabric.
Cuffs
7 - Sleeve hems & Bottom hem
Prepare hems from the contrasting fabric for the sleeves and the waistline of the sweatshirt.
Fold these pieces (face side in) to create “tunnels” and sew their shorter sides.
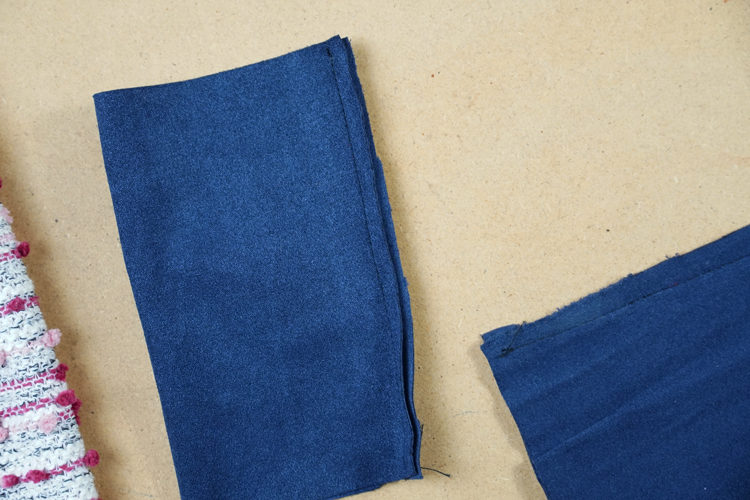
Now fold the hems in half and hem corresponding pieces. Don’t forget to pull free ends of the thread chain under the loops when sewing on the overlock.
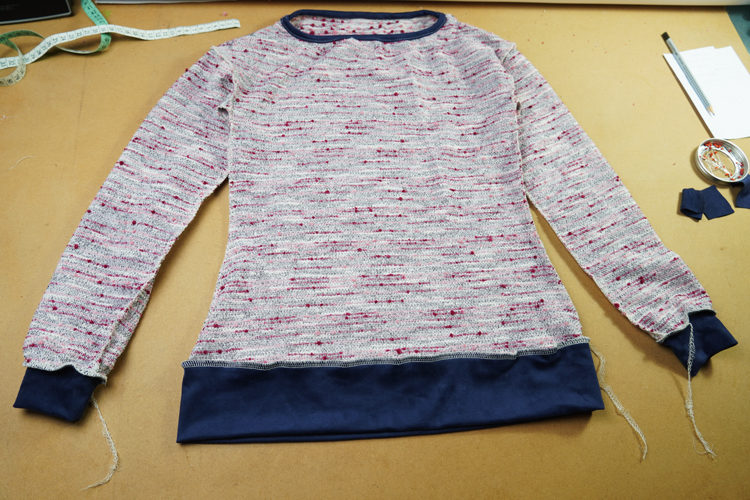
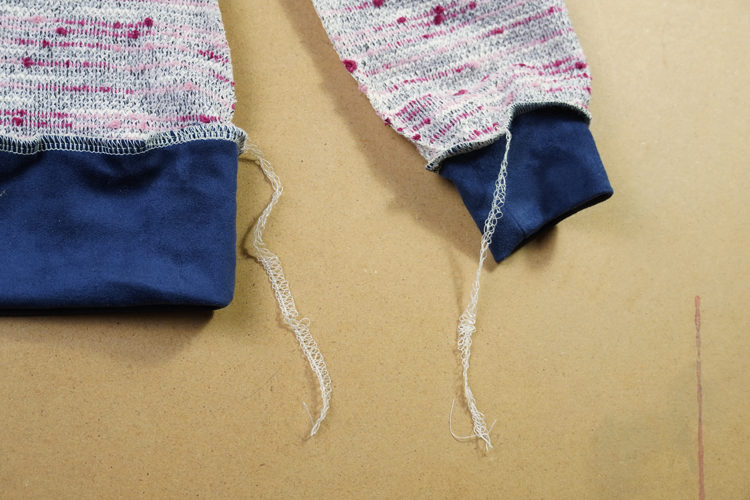
You need to drape the sleeves to their hems quite a lot when sewing the version with wider sleeves.
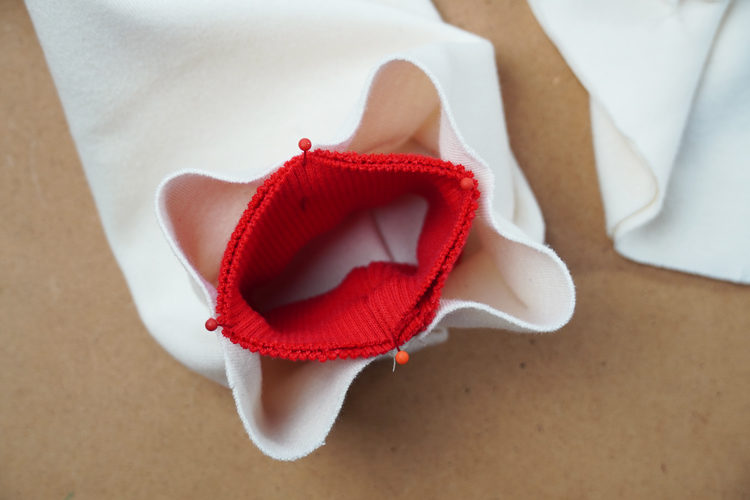
Similarly, drape the bottom hem.
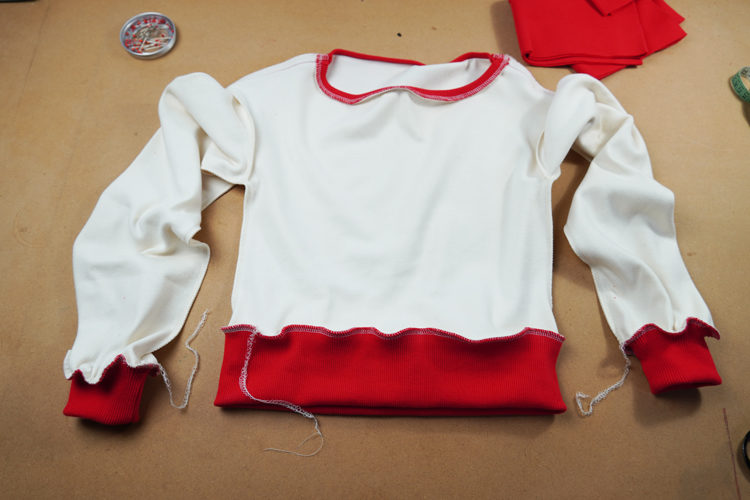
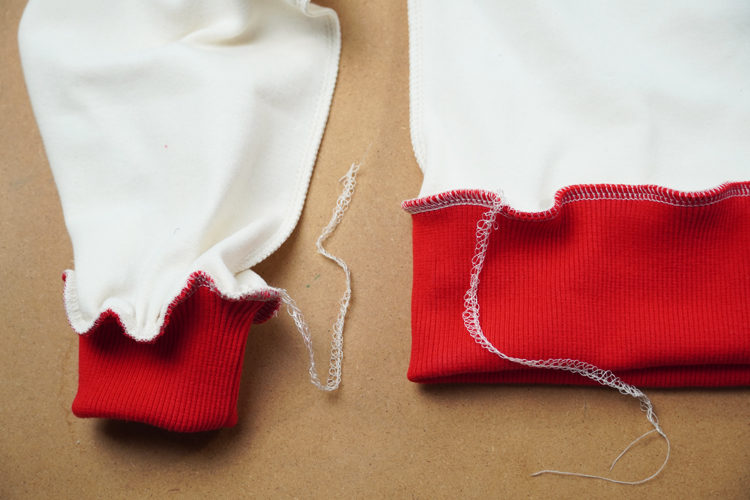
And your sweatshirt is ready!
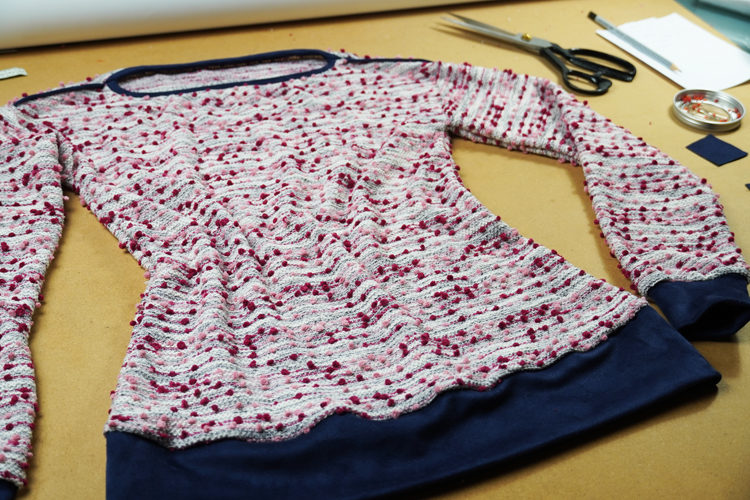
Now I would like to show you photos of various sweatshirts and T-shirts that I sewed according to this pattern.
T-shirt/sweatshirt (thin elastic sweater knit)
Elastic lace T-shirt
I really enjoy this fabric and I love how this T-shirt turned out!
There are only two differences when sewing T-shirt using the lace fabric:
- I’ve used a firm edge of the fabric for the bottom hem because the pattern of the fabric and its elasticity were oriented atypically along its length (which is the case with some elastic lace fabrics). You can use the cutting edge of your fabric in the same way if you want to. So, the bottom hem is not finished with the classic wide knit strip. I simply choose the length to suit my needs.
- The neck opening is finished with a 3 cm (1.18") wide knit strip. In contrast to the classic knit strip hems, or in contrast to the method I described in this manual, I proceeded as if I was using a bias tape. You can find video instructions here:
How to sew hems with a bias tape
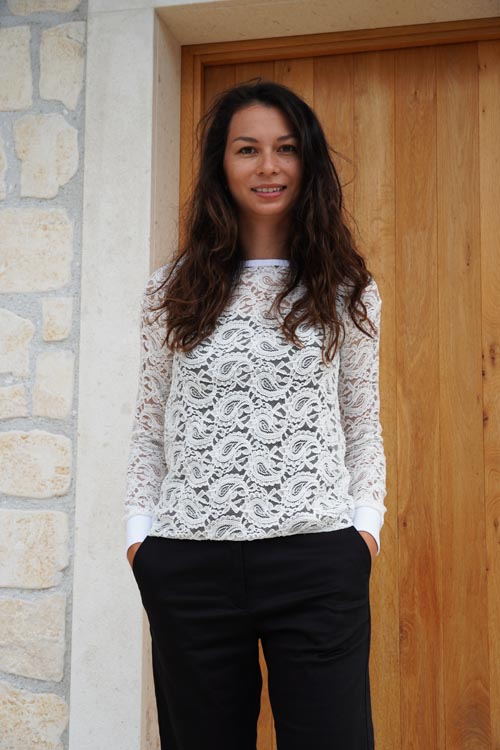
I bought this material a long time ago in the Dumlatek.cz store, unfortunately, they no longer have this particular lace in stock, however, they offer a wide range of lace, so this store is worth exploring: Lace (When choosing lace for this particular T-shirt, remember that it must be elastic.)
Crop top sweatshirt with wider sleeves
I hope that you liked today's instructions and pattern and I would be glad if you let me know about it in the comments, or maybe share this article on social networks with your friends…
You can get the pattern for this T-shirt/Sweatshirt in my online store:
The pattern for women’s T-shirt/Sweatshirt TO THE CITY
Have a nice day, Petra
Don't forget to share your joy with others!
Do you like this article? If so, share it with your friends and tell me about it in the comments section below. I will be glad for any feedback! ♥
PS: Did you know that there are FREE PATTERNS available on my blog?


