You may have already read about my universal pattern for women’s pants, which is accompanied by a video tutorial. Today's article is about sewing jeans according to the same pattern. The difference between classic version and jeans is not that big. It’s mainly about different style of topstitching and the use of sewing aids.
I’m using this pattern:
Pattern for woman’s pants ROAD

Recommended material
We are going to use denim... Who would have thought of that, huh? :) I recommend shopping at Dumlatek.cz, where you will find two basic types of denim - thin (suitable for light or summer pants, blouses and dresses) and then classic thick denim:
- Thin denim – for blouses, dresses, skirts and light pants
- Classic thick denim – for thick skirts and classic jeans
You can also get thin denim with subtle prints:
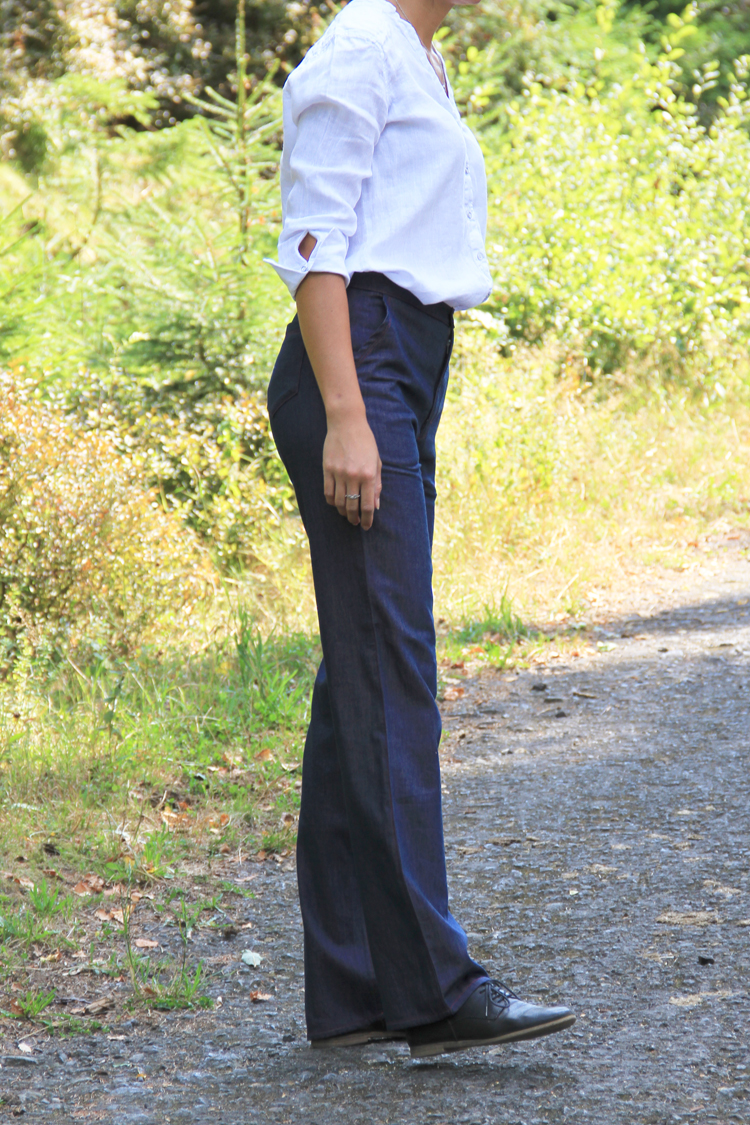
I’m using thin denim that’s perfect for spring/summer/fall pants.
What else do you need
- You will also need a metal zipper; the length should be about 12-15 cm for pants with the lower waist and a few cm more for pants with higher waist.
- Stronger (ideally denim) threads. These threads are strong and are available in the “classic jeans colors” you know from denim clothes with traditional topstitching. You can get them from Gütermann or Aspo: Denim threads.
- Needle for sewing denim – sturdy and sharp. Suitable needles are usually labeled "jeans" or “denim” – Sewing machine needles for denim.
- Reinforcement - one-sided fusible facing (for waist band & pocket openings).
- Rivets - you can decorate the pockets with studs/rivets (or metal snap buttons)
- Jeans Button - sturdy metal button for your fly
Sewing instructions
I recommend watching detailed video tutorial for a classic version of the pants before sewing jeans:
You can also find this video on my YouTube page. Consider subscribing to my channel so you don't miss any future videos and tutorials.
As I said at the beginning, the difference between jeans and classic pants is mostly in topstitching (and its style). Sports and urban clothes are usually heavily topstitched. In contrast, classic and formal garments are rarely topstitched.
Double topstitching is very common on denim. However, please do not cut corners with a twin needle. Twin needle is used to finish edges of elastic materials - that’s a completely different purpose!
Use a classic straight seam for topstitching and make your stitches a bit longer than stitches used on classic seams. Topstitching stitches are usually 3 mm long.
But topstitching is not only for decorative purposes. Topstitching on denim has an important purpose - it flattens your seams. Two parallel rows of topstitching are able to flatten even very sturdy seams.

Cleaning cutting edges
Cutting edges on denim are usually finished with red or brick orange thread. It has no special function, but it will immediately remind you of jeans. :)

Patch pockets
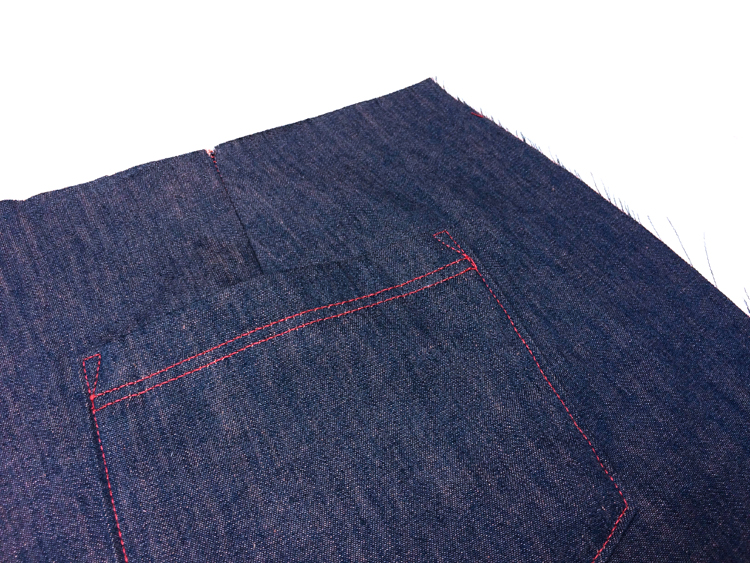
There’s usually double topstitching on back patch pockets. Topstitching on pocket opening is always doubled and it's also very commonly used around the entire circumference of the pockets.
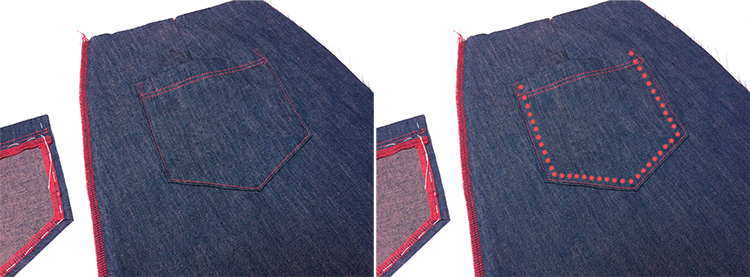
I decided to do only one row around the pocket, because I sewed a light summer pants.
Side pockets
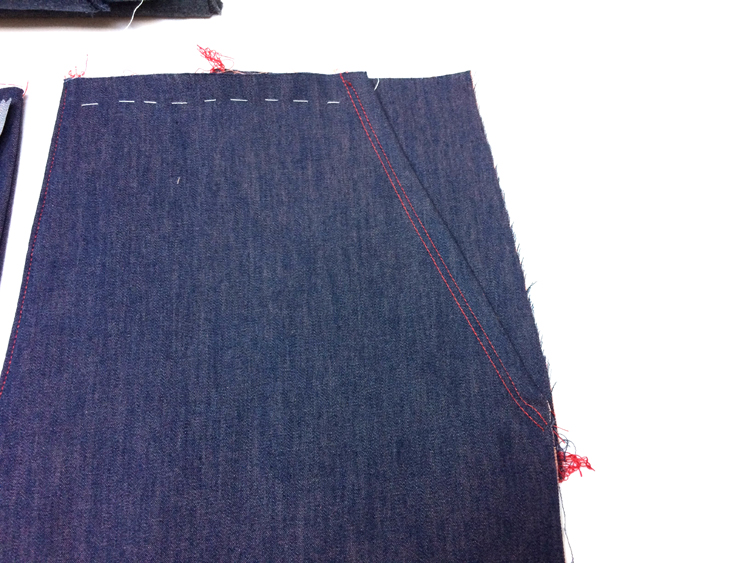
Sew two rows of topstitching around the pocket openings. You can sew first row 2 mm away from the edge of the pocket opening and second row 7 mm from the opening.
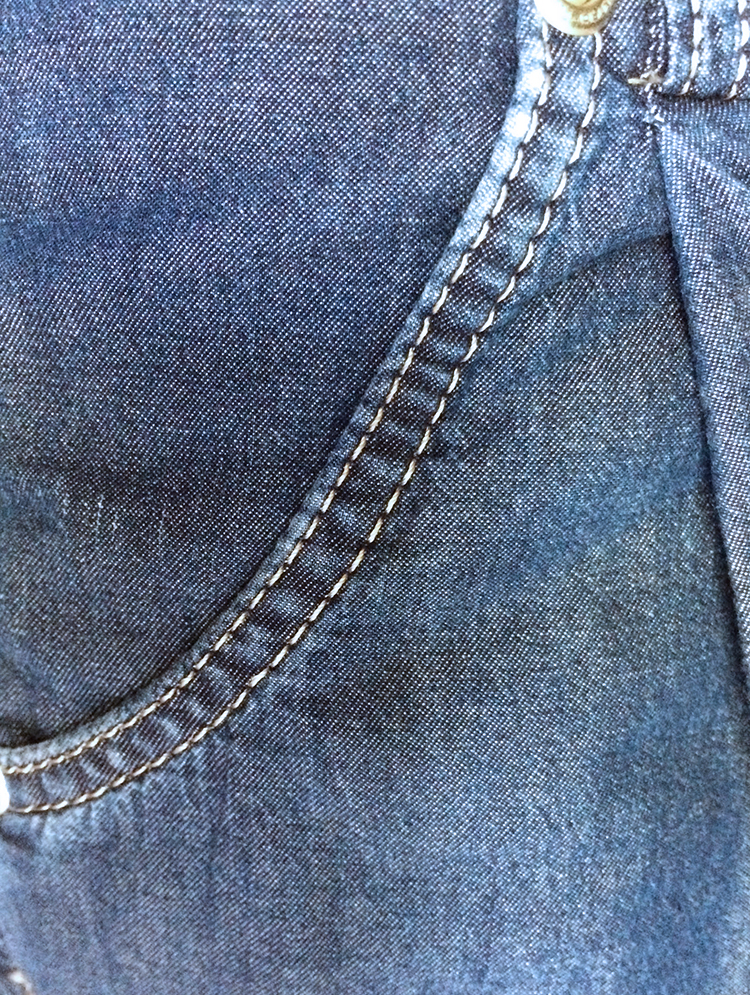
But you can also move first row 1 cm away from the edge of the pocket opening and sew second row 5 mm away from the first one (less common).
Fly
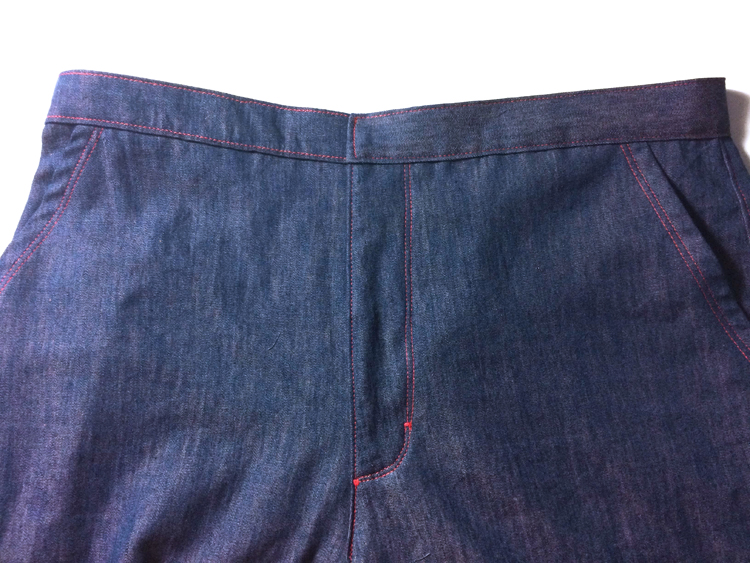
There’s also contrasting topstitching on the zipper fly (3-5 mm away from the seam).
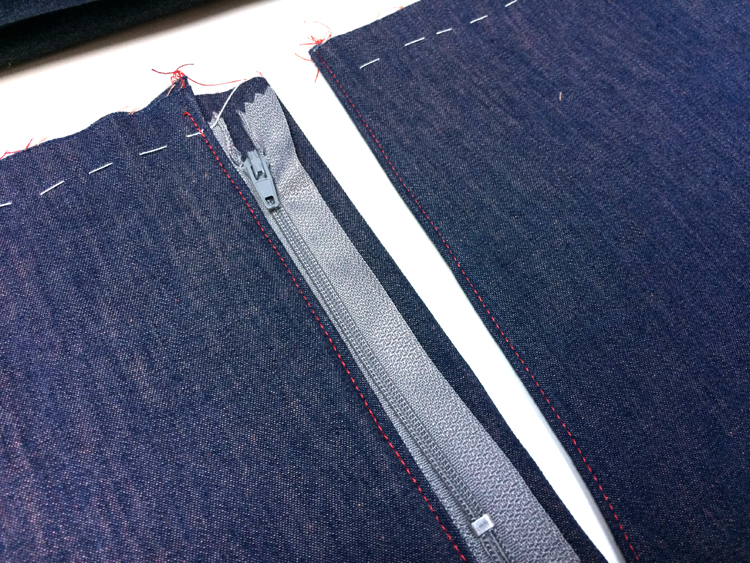
Zipper overlap should be topstitched identically to the side pockets - rows should also be 5 mm apart.
Side seams & Instep seams
You can sometimes see jeans with topstitched side seams. It’s usually one row about 3 - 5 mm away from the seam. It’s done in the back piece - seam allowances are folded towards the back piece and you want to sew through them. Sew and topstitch the side seams before moving on to the instep seams.
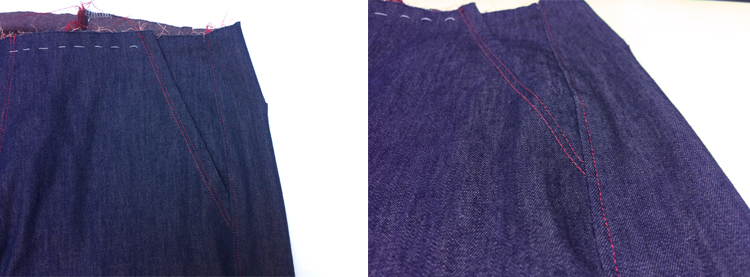
All jeans are topstitched in their instep seams. Seam allowances are folded towards the back piece and there is a single row of topstitching 5 mm away from the seam. You really need to make the seam flat in this area, so that you can wear (even thicker) jeans comfortably.
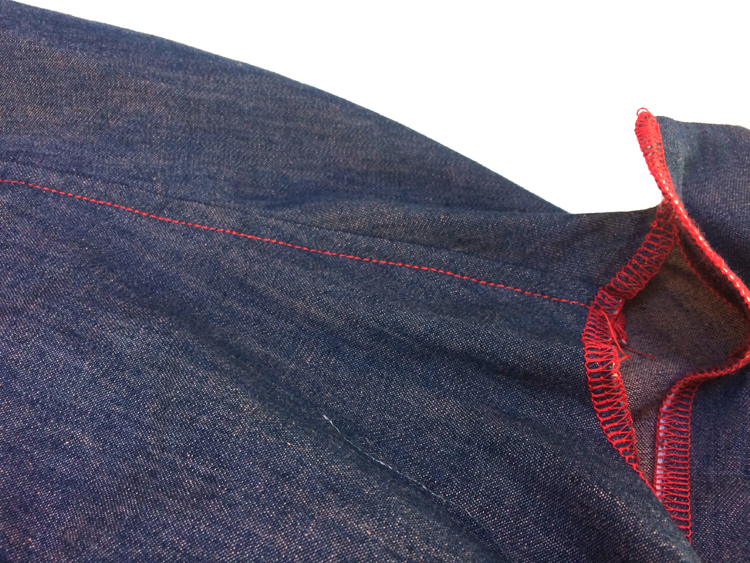
Now sew the crotch seams. Try to connect instep seams (and their topstitching) nicely.
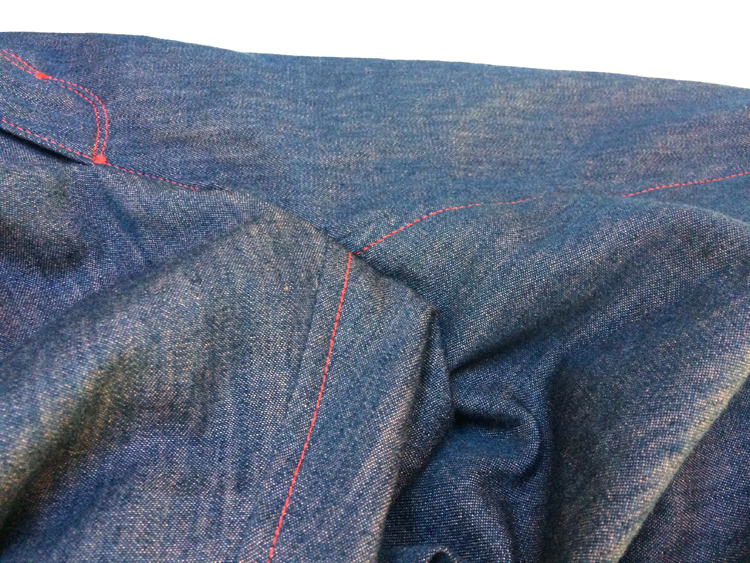
Crotch seam
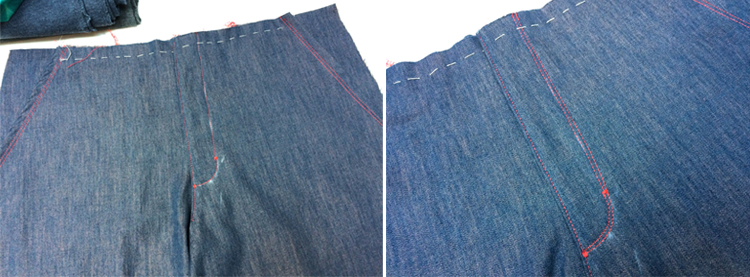
If you can’t quite get right up to the fly when sewing the front part of the crotch seam, don’t worry. Jeans are topstitched even in the crotch seam. You can close a little gap below the fly with topstitching. Topstitching of the crotch seam should start right where the topstitching of the fly ends and both parts of the crotch seam should be then topstitched in one go.
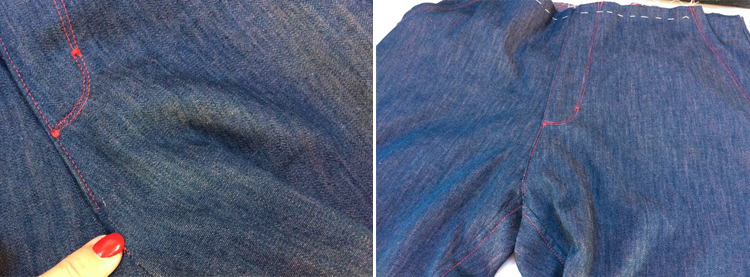
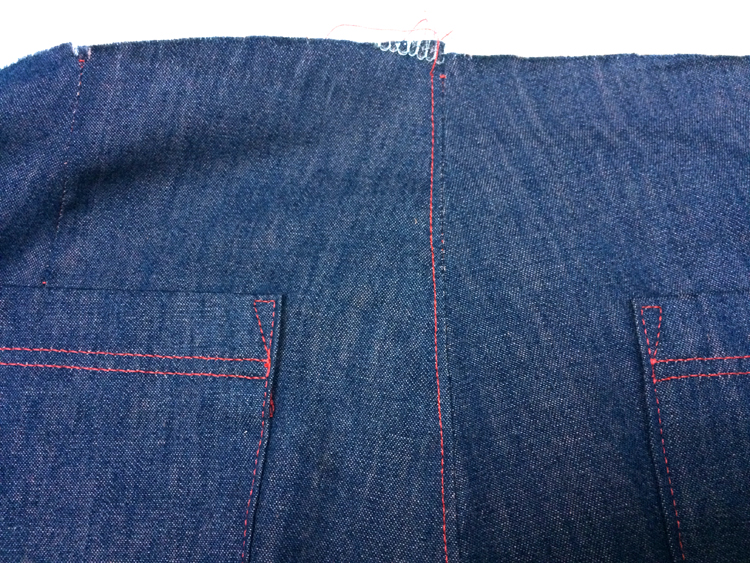
Waist band
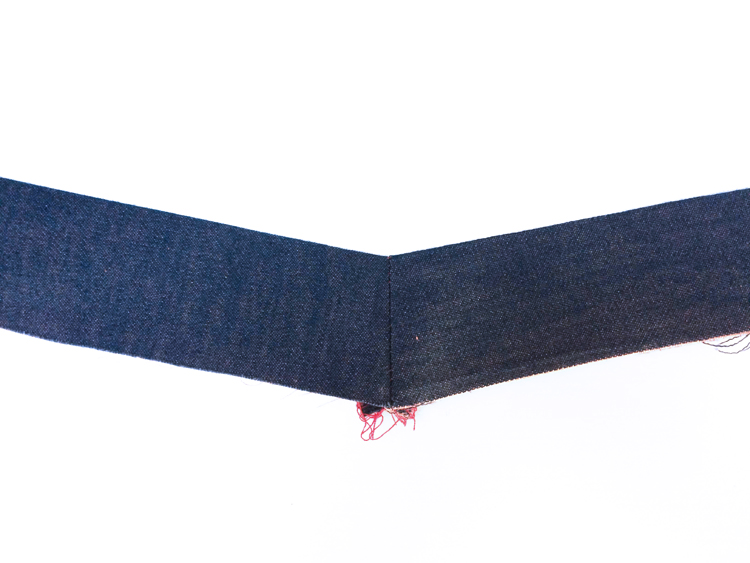
Jeans typically “peel off” around the waist. You can fix this problem with a correctly sewn waist band. Sew the waist band parts together at a slight angle, spread and iron the seam allowances to shape the band.
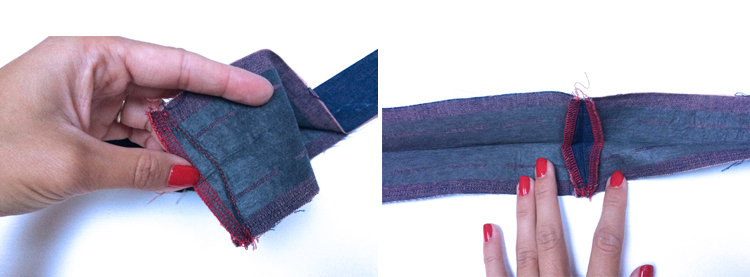
Connection may seem too sharp now, but it will be nicely rounded after you sew it to the pants.
Lay the face side of your band on the reverse side of your pants. Longer sides of the band should remain uncleaned. Fold (and iron) 1 cm of the longer side of the band to the reverse side. Pin the band to the pants and sew.
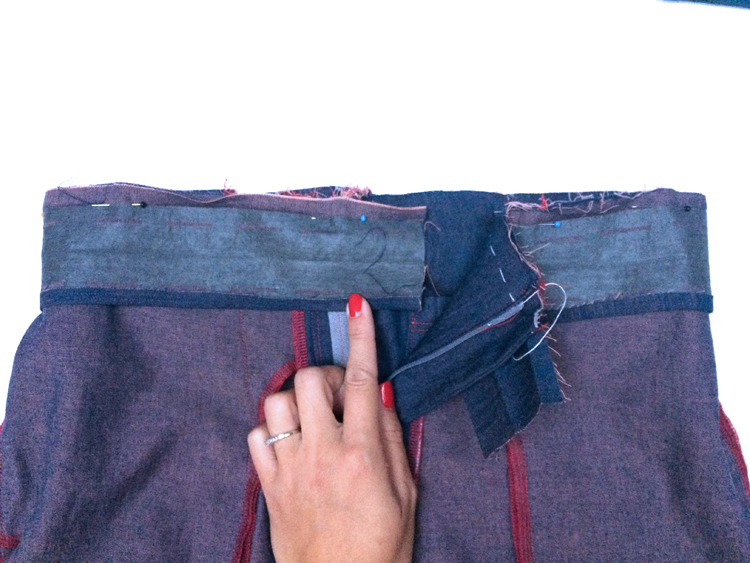
Fold the band in half (lengthwise).
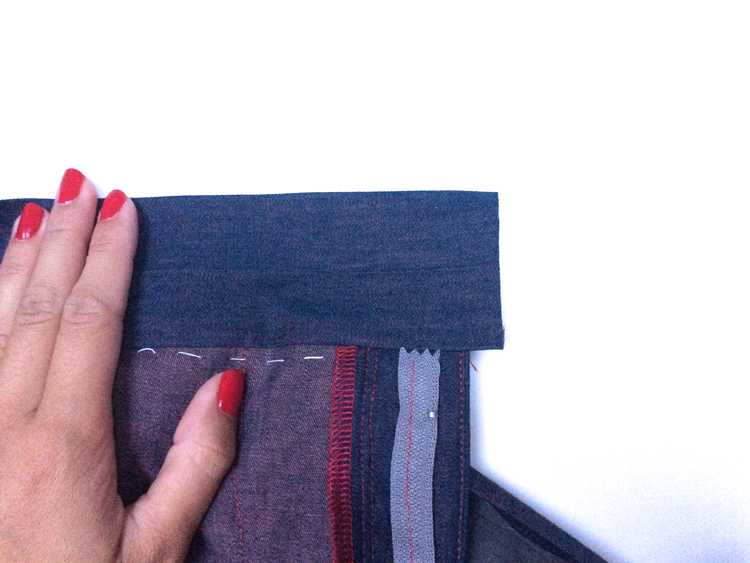
Fold its seam allowance next.
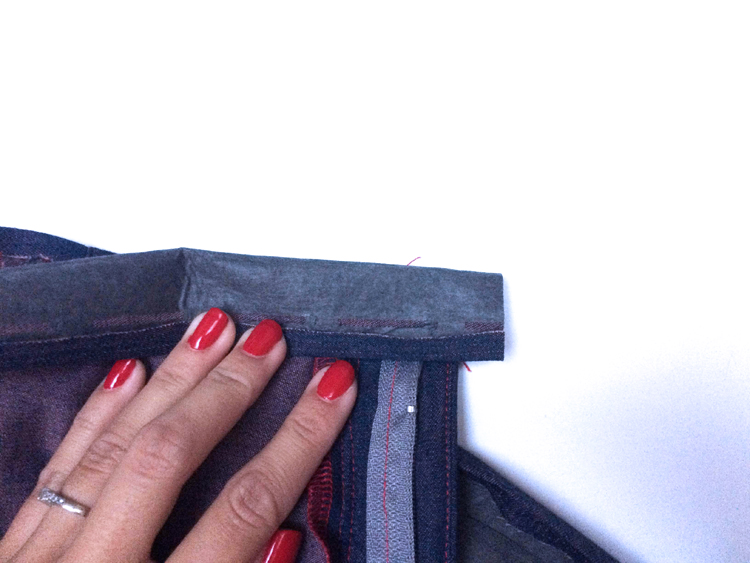
This is what it should look like.
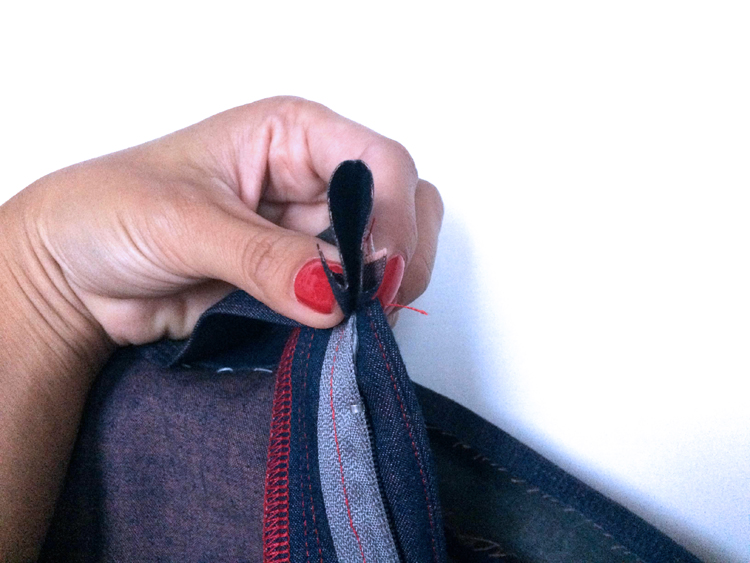
Sew short side of your waist band and cut its upper corner (don’t cut to your seam).
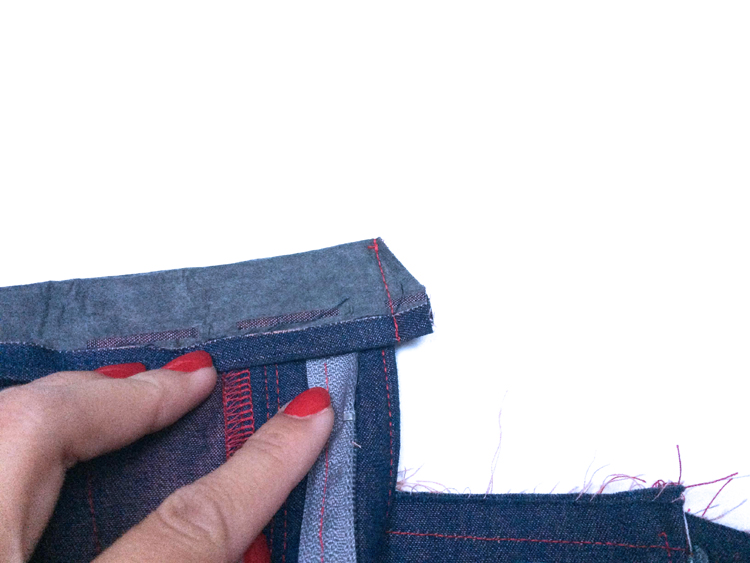
Turn the band face side out and fold it in half over the pants.
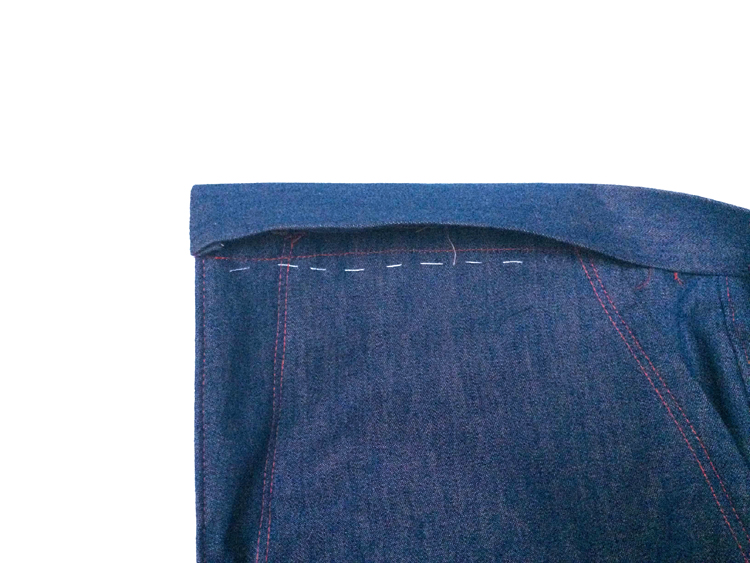
Cover the original seam with the free side of the waist band.
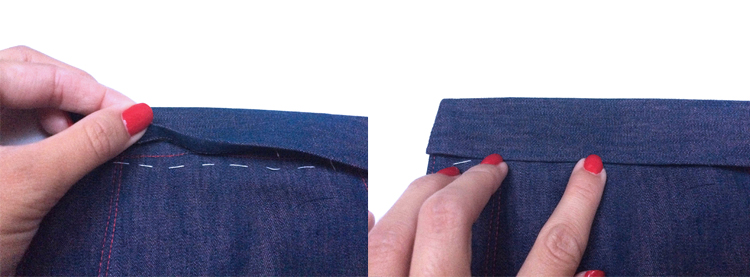
Temporarily stitch and then sew the second edge of your waist band to the pants. Sew from the face side of the pants about 3 mm above the edge (in the waist band).
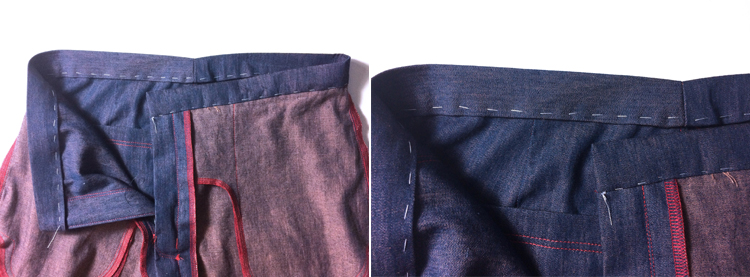
Sew along all sides of the waist band.

Button
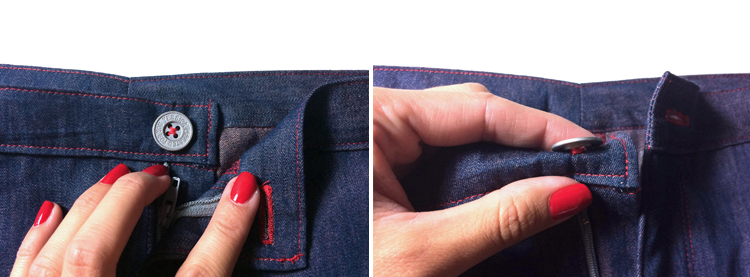
Sew buttonhole first (you will find more about this in the video tutorial). Mark the correct position of your button on the other side of the fly. I recommend using jeans buttons - they are slightly raised above the surface (thanks to their “foot”) which is great for usage with thicker materials.
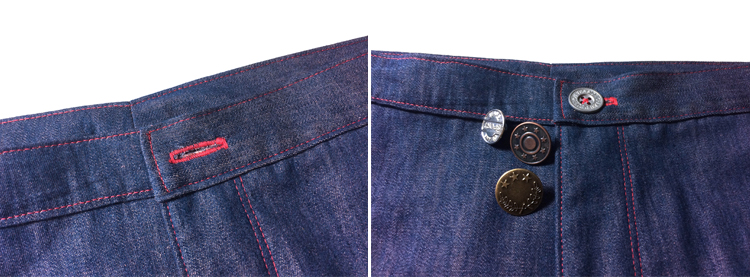
You can use regular button, just don’t forget to create your own “foot” by coiling your thread below the button. I recommend sewing the buttons a bit loose and wrapping the thread below the button to create your own “foot”. You can use toothpick to create some space between the button and the fabric when sewing and then wrap the thread around threads connecting the button with fabric
Length of the pants - bottom hems
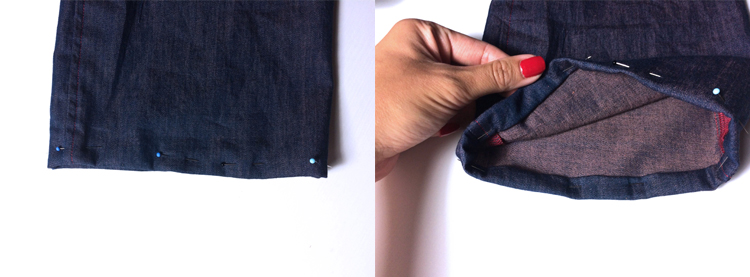
This is the last step. For jeans it’s common to use small seam tab folded twice to the reverse side. Try your jeans on, mark correct length with pins and then fold the cutting edge to the reverse side of the leg (twice). Sew through the bottom hems from the face side.
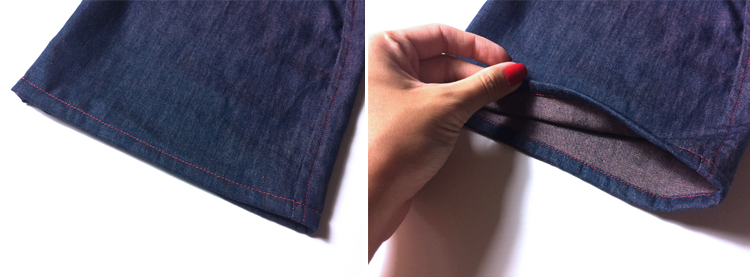
Your pants / jeans are ready! I hope that today's instructions helped you or even inspired you.
I used my pattern for pants ROAD in this article. You can get it here:
Pattern for woman’s pants ROAD
Leave me a comment below the article If you want, I'll be very happy to read it. :)
Have a nice day, Peťa


