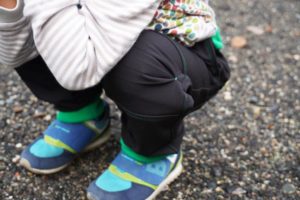
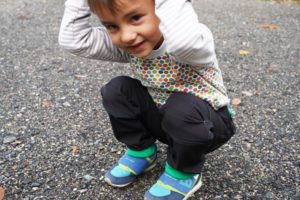
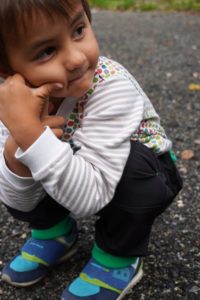
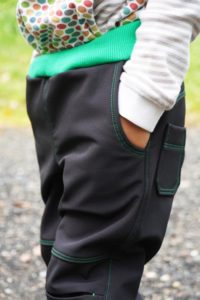
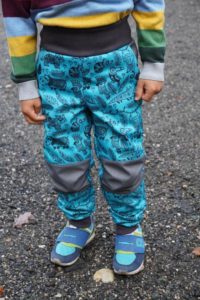
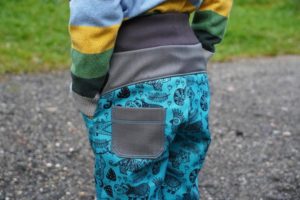
For the last two weeks I have been working on a new pattern for children's pants. And It’s not just any pattern. It’s pattern for “growing” softshell pants with shaped knee patches. The basic (hand-drawn) version of this pattern is about two years old, but until now it was available only in a few sizes. In these two years children and I have thoroughly tested this pattern. So, I thought that this autumn I will finally convert this pattern into a professional format, expand the range of available sizes and also make more detailed sewing instructions for it. This how-to article is very detailed, so I divided it into shorter chapters. You will find two ways to sew the pants in the instructions, and it is up to you to choose which one to use and whether you will sew the shaped knee patches with darts or with a counter-folds.

You can buy this pattern for children’s pants here:
Pattern for children’s softshell pants LET’S GROW – “growing” pants
The basic idea of “growing” clothes
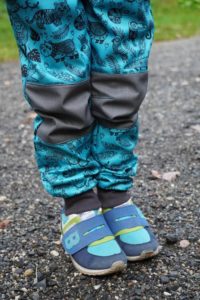
Before we get to the sewing itself, it would be good to explain what the “growing” clothes are. The basic idea of growing clothing is that a child can wear it even if it grows by one size (in the case of slimmer children even by two sizes). The pants are wide and long enough to “grow” with children over two seasons. The wide hems on the legs can be tucked inside at the beginning so that the legs are hanging over them. As the kid grows, the hems are shifting to the classic position and the pants are “extending” up to their final length.
Hem knits for legs & waist: Stretchy hem knits are great choice here, because they provide a lot of growing space. When the children are smaller, you can simply hide them inside the pants, which will prevent them from getting wet in rainy weather. They also provide an additional insulating layer. As the children grow, the hems can gradually extend from the pants. This allows the children to wear pants longer without the need to buy bigger ones…

Photo below shows maximum and minimum length of the pants. Shortened pants - hems tucked in - are for the first weeks / months of wearing.

Hem knit in the waistline works in a similar way. There is a small hole which allows you to replace the inner elastic waistband as the kid grows. You can use stronger one at the beginning, replace it with looser one later and eventually pull it out completely, so that the pants are held in place only by the hem knit itself.
If you sew the pants now, the kids will be able to wear them during the spring and probably during the next autumn too. If you have an older (bigger) kid, pants will probably serve you even longer, because larger children no longer grow as fast as the smaller ones.
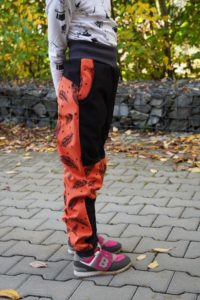
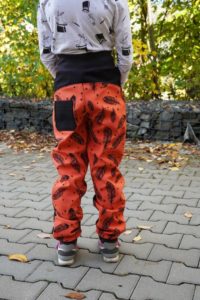
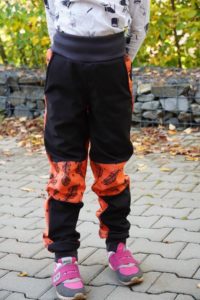
Children’s pants LET’S GROW – Overview
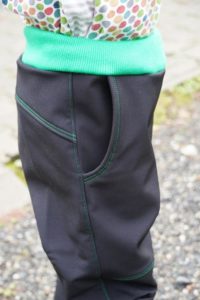
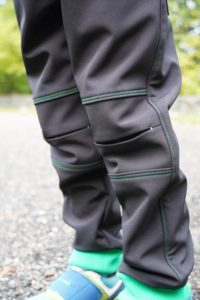
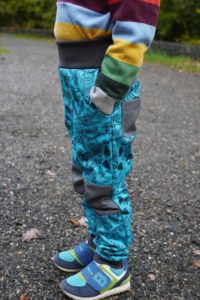
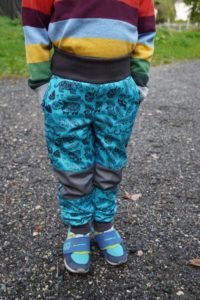
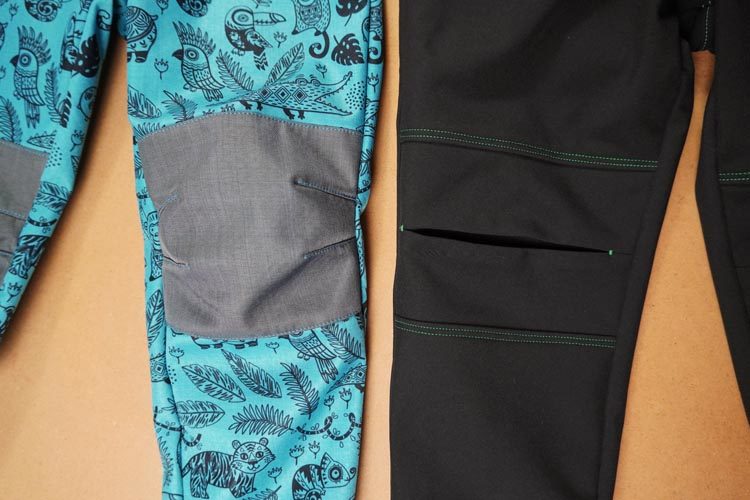
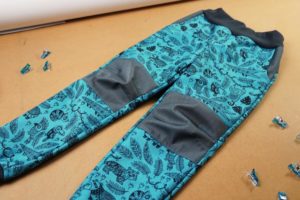
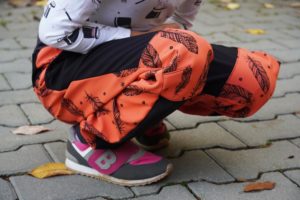
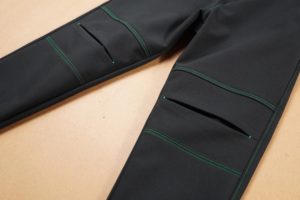
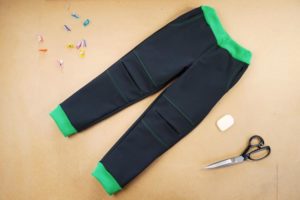
Knee patches are segmented, allowing children to play comfortably while sitting or kneeling. This also prevents knee area from becoming stretched out. You can sew the knee patches from top fabric or contrasting material, as the patches are separate part of the pattern. Knee patches can be done in two different versions (both of the same practicality and allowing for the same freedom of movement). There is the version with one counter-fold (black pants in my photos) or version with darts (two on both sides of the knee, blue and orange pants in my photos).
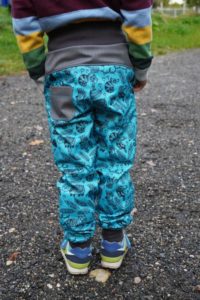
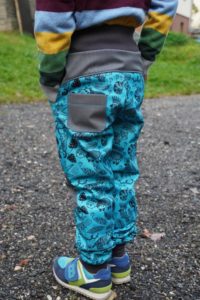
Yoke of the back piece shapes the rear part of the pants. But you can also use it to give pants more interesting look (using contrasting fabrics etc.).
There is the smaller patch pocket in the back piece. Front pieces have large side pockets, which can hold a lot of treasures.


Still can't imagine how the pants change over time? This is how they grew with Tomík - summer 2017 vs. autumn 2019 (still the same pants):

Recommended material
I recommend using medium and thick woven fabrics (inelastic materials) for these pants. Winter softshell (fleece on the reverse side) or spring softshell (knits on the reverse side) is ideal. But you can use all kinds of fabrics suitable for sewing pants. If you choose thin summer softshell, please be aware that the pants may be a bit loose.
How to sew children's pants LET’S GROW
I sewed these pants in two versions:
- First version has prominent topstitching and knee patches with counter-folds.
- Second one has less topstitching and knee patches with darts (this is the traditional version).
Use list of chapters bellow to quickly get to the part of the article you are interested in (to go straight to the last step you completed, for example). However, you can simply scroll up and down through the instructions as usual.
I’m aware that my articles are very detailed, and I am trying to find a best way to present them to you. This is a trial of this “chapter” system and will be glad if you let me know if you like it or not. Please leave me a message in the comments. Thank you in advance for any feedback!
Contents
- 1 – Cuts preparation
- 2 – Patch pocket
- 3 – Side pockets
- 4 – Knee patches:
- 5 – Sewing the front pieces
- 6 – Connecting back and front pieces:
- 6a – Version 1 (less traditional) → Pants with prominent topstitching:
- 6a I. – Back crotch seam
- 6a II. – Yoke
- 6a III. – Side seams
- 6a IV. – Front crotch seam
- 6a V. – Instep seams
- 6b – Version 2 (traditional method) → Pants with less prominent topstitching:
- 6b I. – Instep seams
- 6b II. – Crotch seam
- 6b III. – Yoke
- 6b IV. – Side seams
- 6a – Version 1 (less traditional) → Pants with prominent topstitching:
- 7 – Hem knits
1 – Cuts preparation
According to the paper pattern prepare:
- 2x back piece
- 1x yoke piece (folded fabric cut)
- 2x whole pocket piece
- 2x pocket piece with opening
- 1x patch pocket piece
- 2x upper front piece
- 2x knee patch
- 2x lower front piece
All seam allowances are 1 cm wide. The exception is the seam flap of the patch pocket - seam flap near its opening is 3 cm wide.
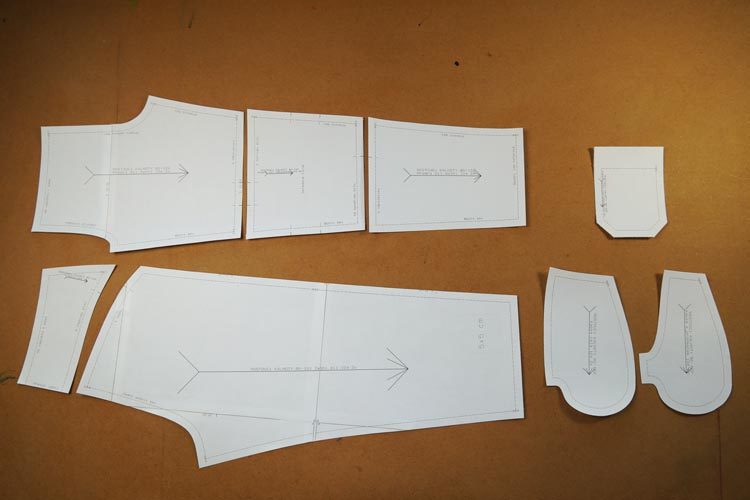
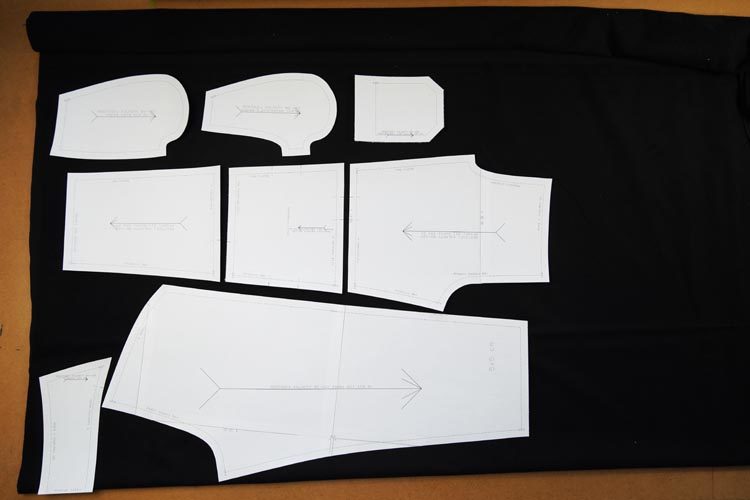
Position all parts along the grain. If you have a monochromatic fabric or fabric that does not have a specific pattern direction, you can position the front and back pieces in opposite directions to save some fabric.
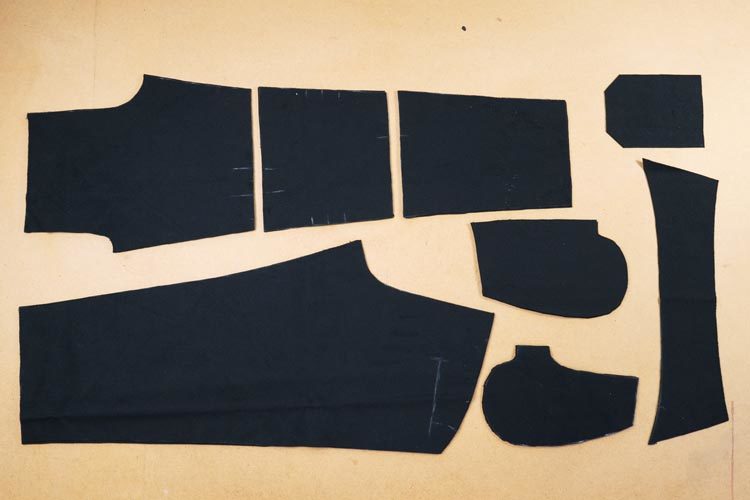
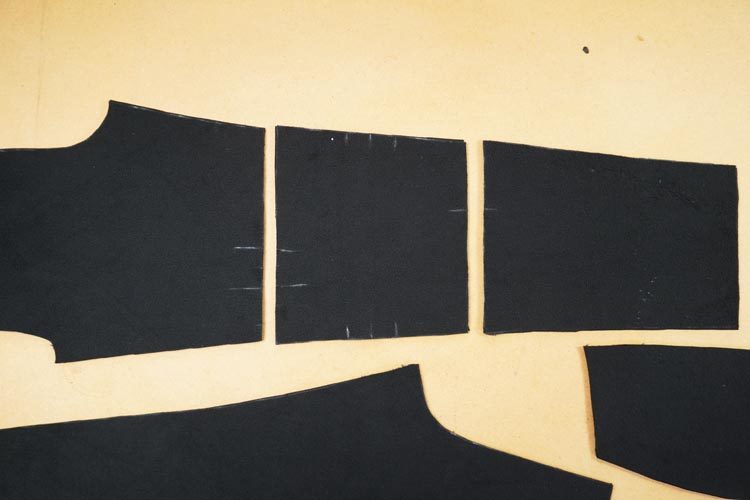
Carefully transfer marks from paper pattern. They will help you to connect pieces precisely.
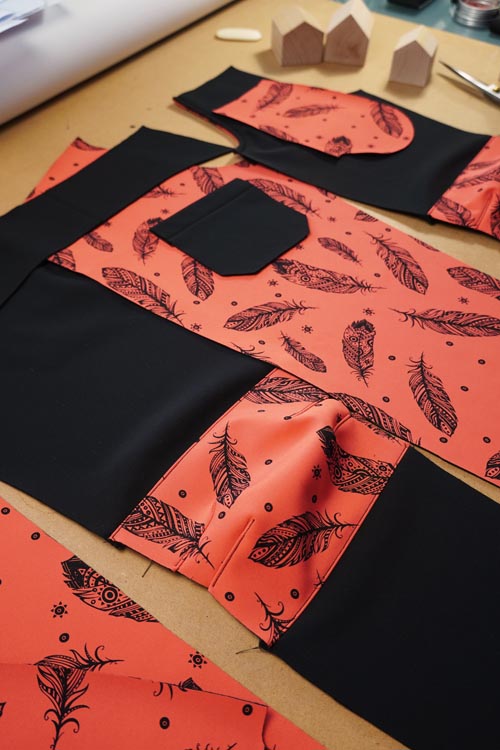
You can also cut the pieces from contrasting fabric and make use of scraps that way. There are many different possible combinations. Blue pants (bellow) have contrasting pockets, yoke, knee patches and patch pocket.

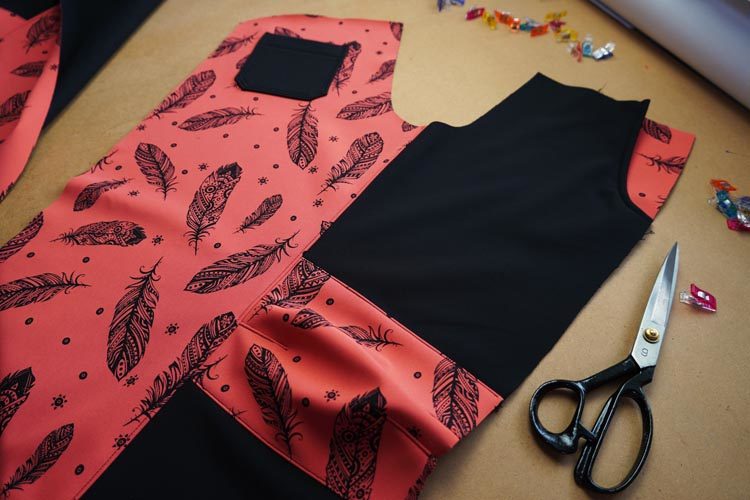
Next picture shows “wilder” pants. I wanted to use the leftover fabric as efficiently as possible, so I cut back pieces, knee patches and pockets from the contrasting fabric. The rest is black fabric.
Mark the recommended position of the patch pocket on the left back piece. Of course, it is up to you where you put the pocket, but marks on the paper pattern will help you if you are looking for a clue.
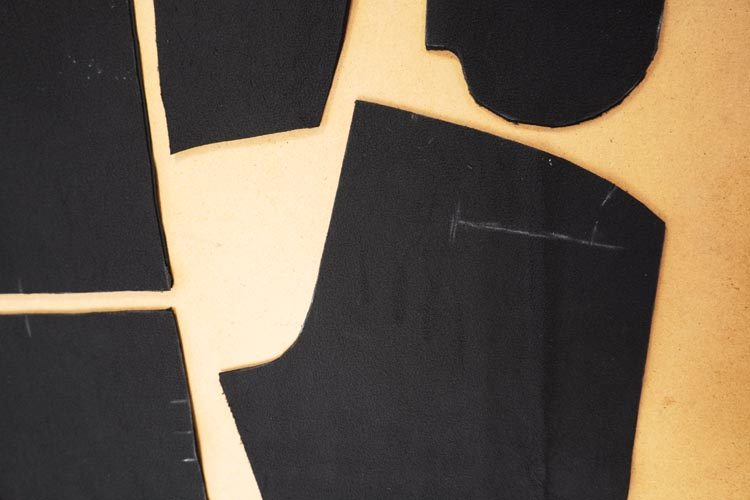
Marks on the front pieces and knee patches are very important. You will be able to determine which piece belongs to which thanks to the marks If you accidentally mix them up. Knee patches have three marks in the instep seam, two in the side connecting them with upper front pieces, and only one mark in the side adjacent to the lower front piece (this one is closer to the instep seam). Chalk and soap marks usually brush off at the least appropriate moment, so I recommend using 2 - 2.5 mm long cuts - those won’t smudge. ?
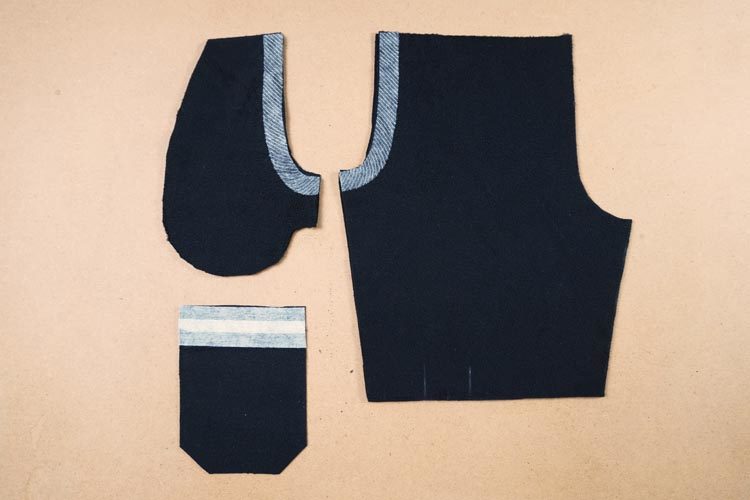
Before we get to the sewing itself, it is necessary to reinforce parts of some pieces. Winter softshell is quite sturdy, so the pockets usually don't stretch out, but I still recommend reinforcing them properly. Use strips of one-sided fusible facing to do this. Ideally form tape strip. Use it on openings of the pocket pieces and pocket openings in the front pants pieces. Reinforce seam flap of the patch pocket too (with 3 cm wide strip of fusible facing).
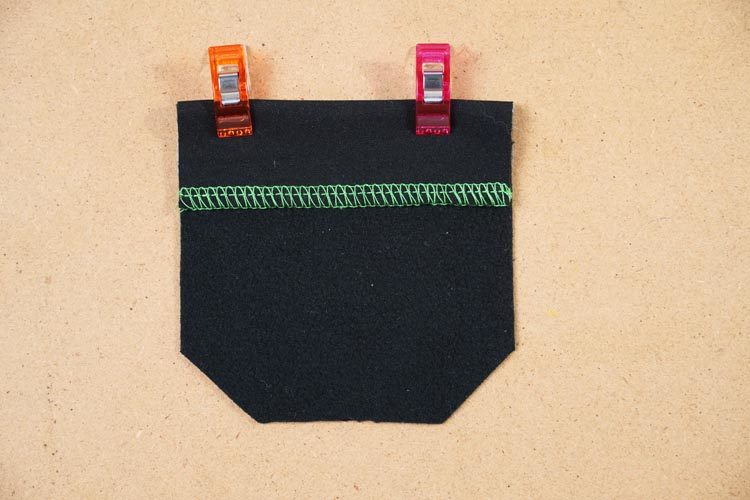
2 – Simple patch pocket (back pocket)
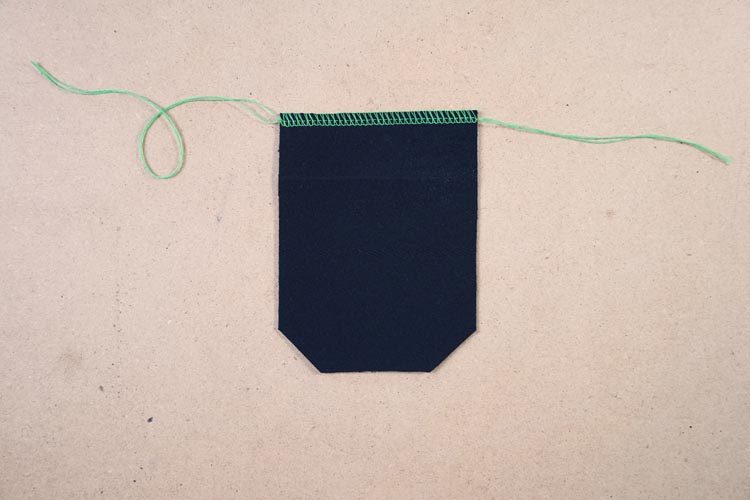
Clean the cutting edge of the seam flap of the pocket opening. Pull free ends of thread chain under the loops when sewing on the overlock.
Fold the pocket opening seam flap 3 cm to the inside and “pin” it in place.
My tip
When sewing softshell I do not use classic pins but clamps. That way I can avoid poking holes into the material, which then remain visible on the finished product.
Sew through the seam flap from the face side. You can go over it once with straight seam or decorate the pocket with two or three parallel seams.
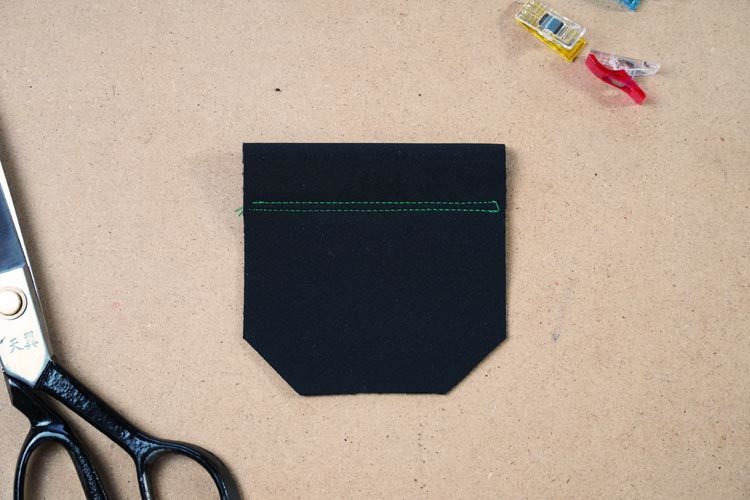
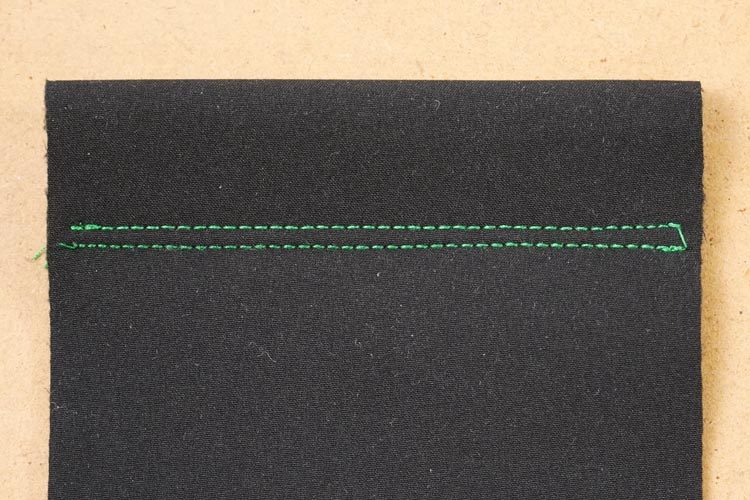
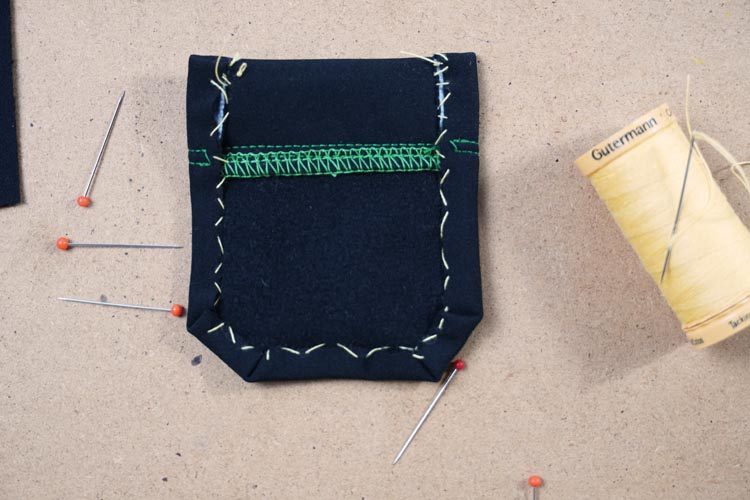
The next step will require some patience. Softshell, especially the winter softshell, is quite rigid material. You need to fold all seam allowances 1 cm to the reverse, which will not be easy. I tried to make it easier with pins, piercing only the inner layer of fleece to keep the face side of the pocket (softshell) intact.
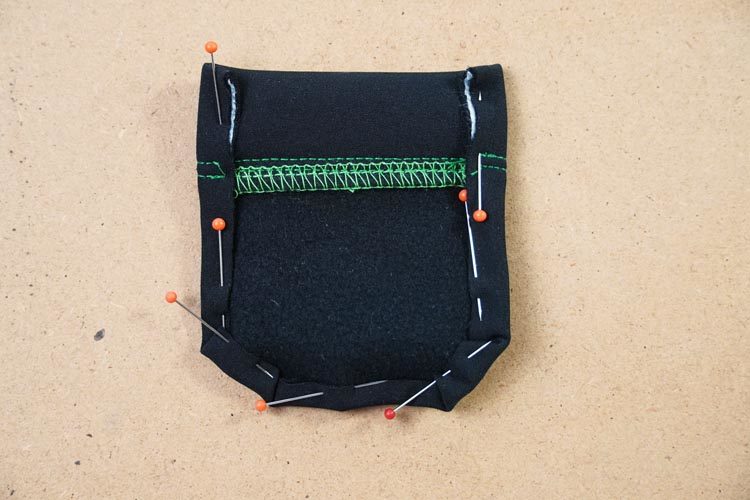
Carefully stitch the pocket in order to sew it well afterwards - again try to stitch only through the inner fleece layer.
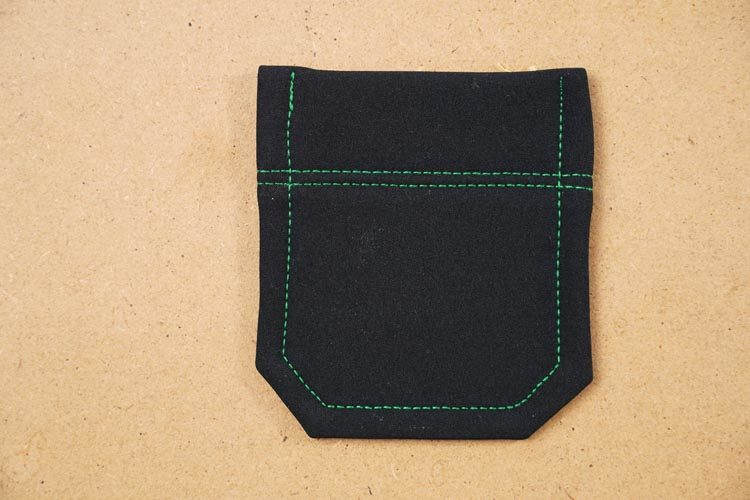
Topstitch the pocket from the face side to attach the seam allowances on the other side.

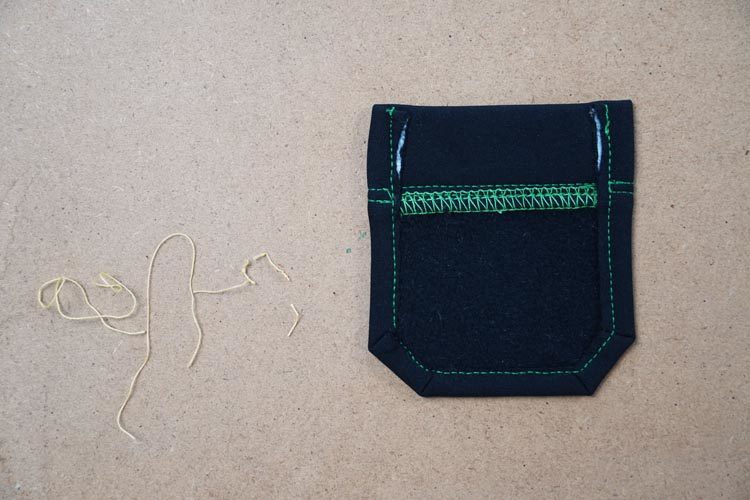
Rip out temporary stitching after sewing the seam allowances.
Placement of the pocket should be marked on the left back piece (on its face side). As I said, this is a recommendation that you do not have to follow to the tee. Simply adjust (enlarge, scale down, shift) the pocket as you wish.
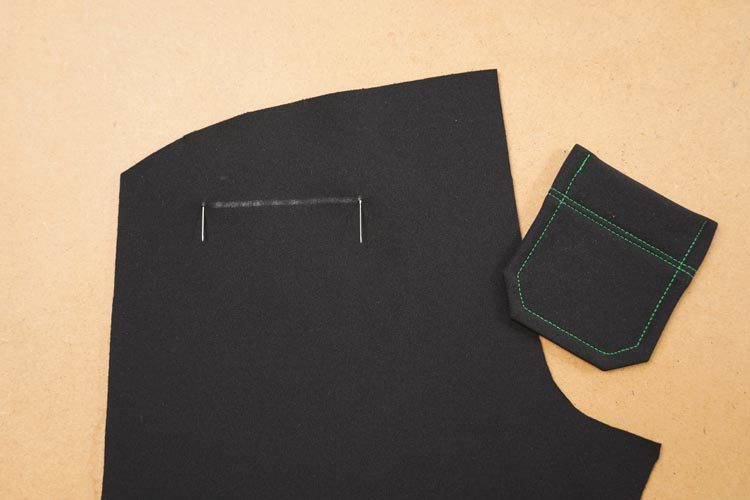
Carefully pin the pocket (through the topstitching line) to the back piece.
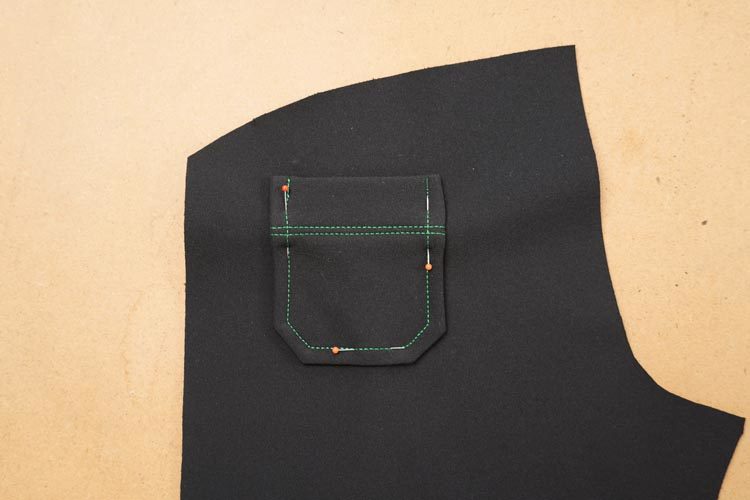
Sew the pocket along the edge.
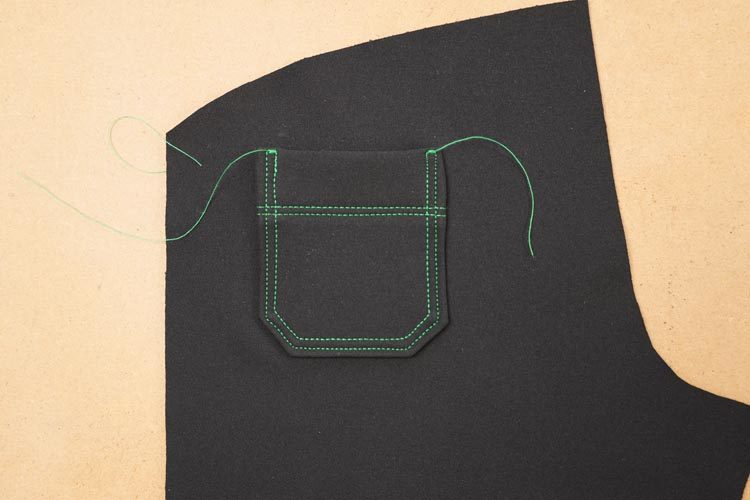
If you do not dare to sew parallel seams, do not use a contrasting thread, but one in the color of the fabric. Any inaccuracies will not be so noticeable. That doesn't mean you don't have to be careful, but if you miss, it won't be that bad.
3 – Side pockets
Lay the pocket piece with opening on the front piece (face side to face side).
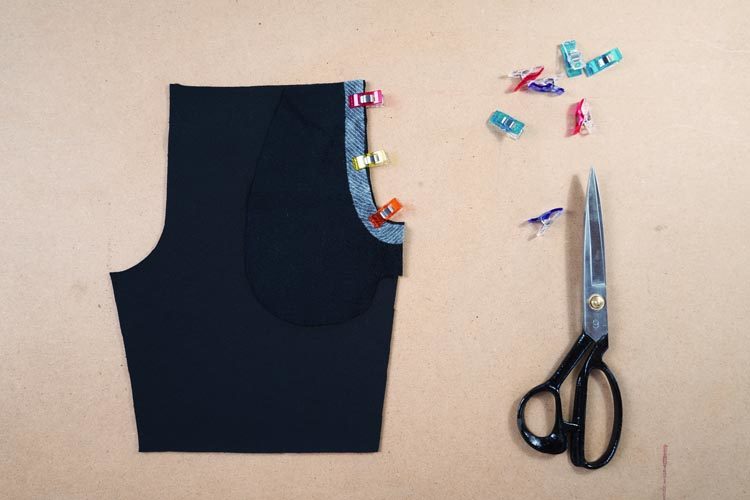
Sew the pocket opening. Do the other front piece in the same way.

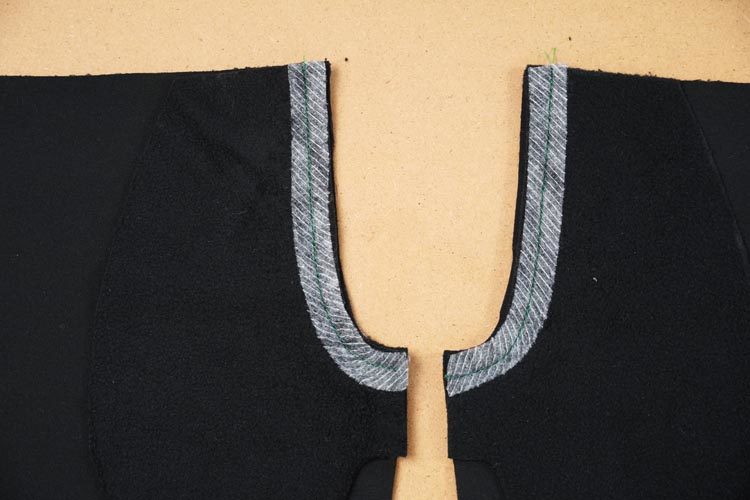
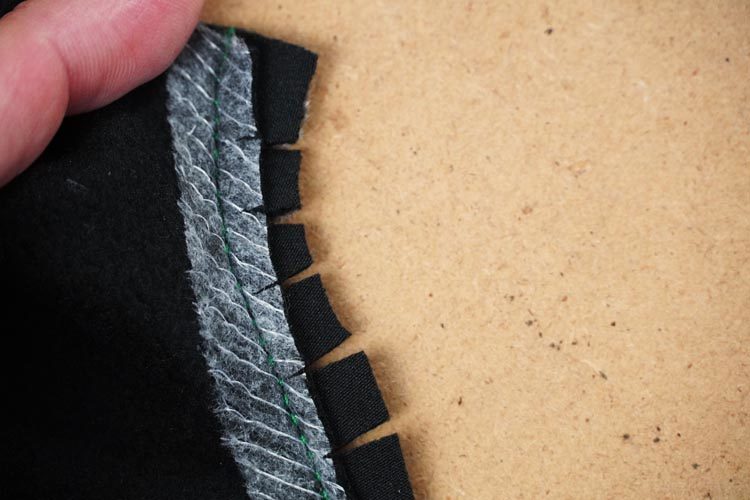
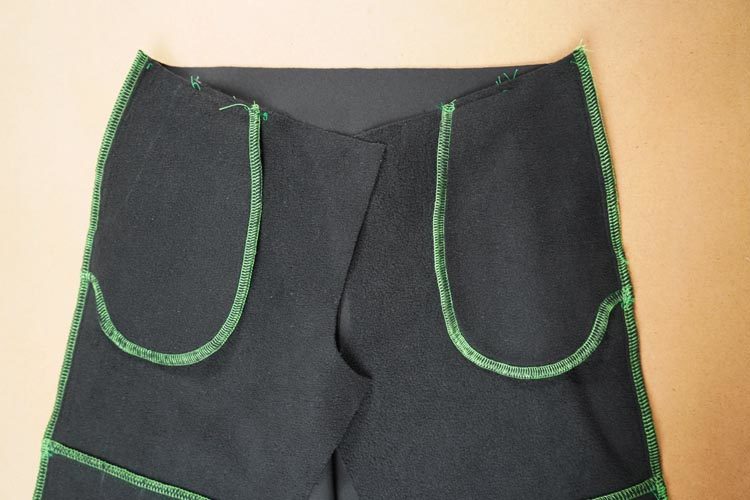
Now you need to grade the seam allowances of the pocket opening. This will reduce the number of layers in the area and help you flip the pocket to the inside of the pants. Cut the seam allowance of the pocket piece in half (lengthwise).
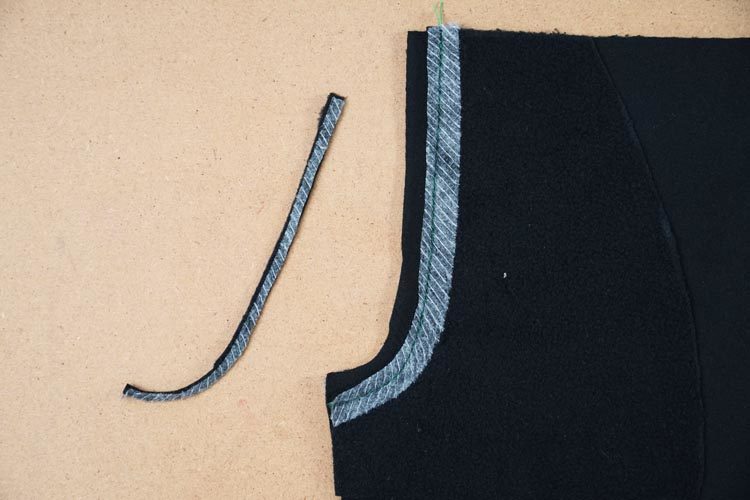
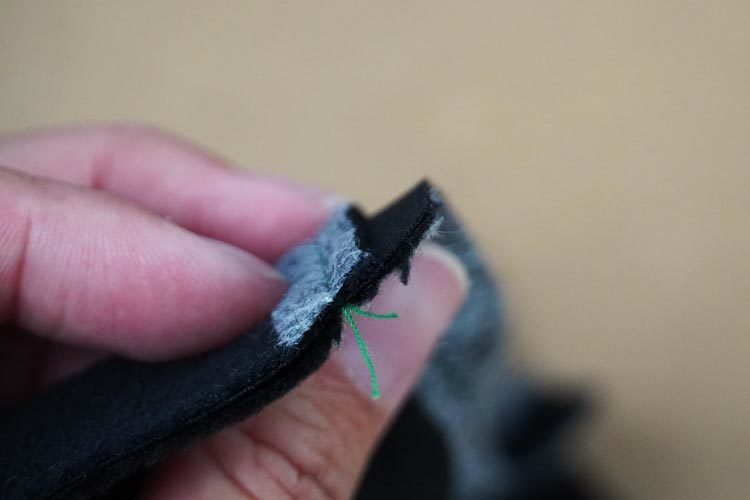
Since the pocket openings have curve to them, it is necessary to also cut the seam allowances perpendicular to the seam. Make cut every centimeter or so and try to cut up to the seam (be careful not to cut the seam itself).
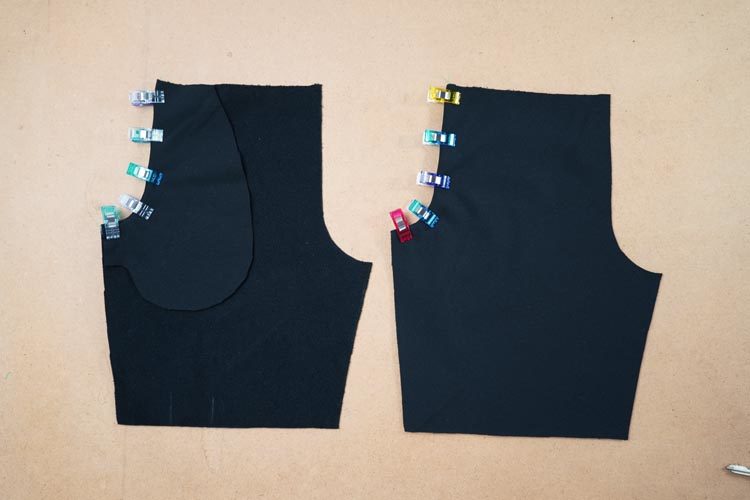
Flip the pocket pieces to the inside of the pants and fix them in place with clamps.

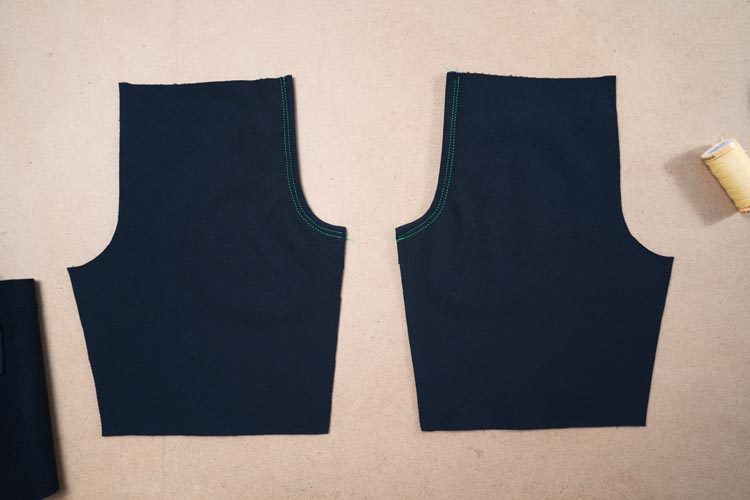
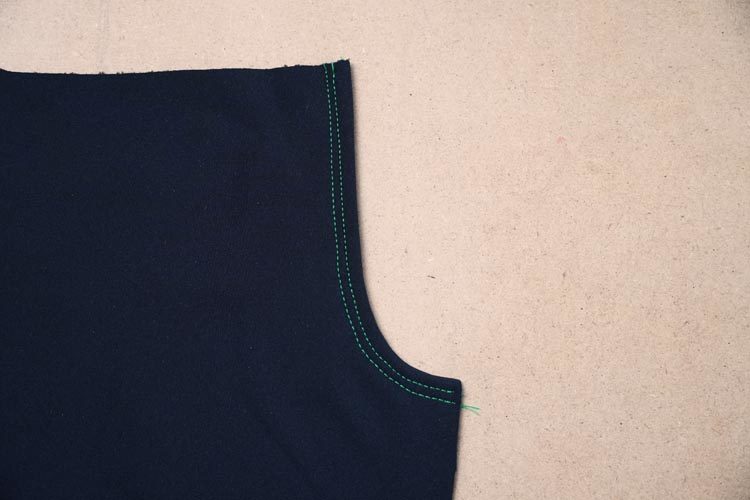
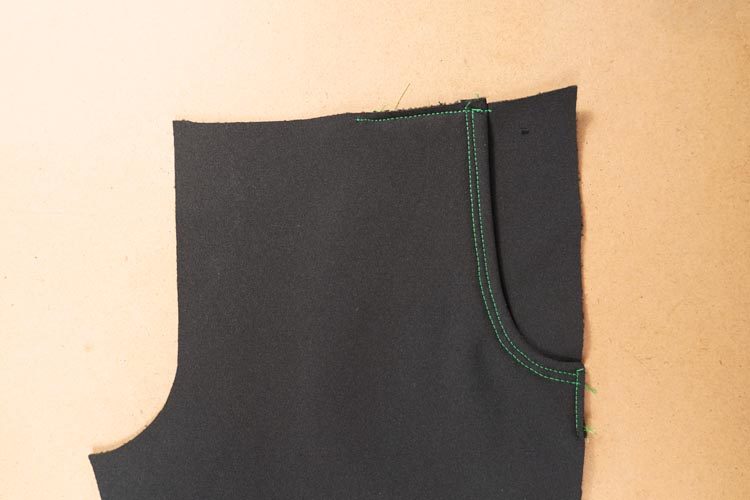
Topstitch the pocket opening. Topstitching this area is an important step, it is not just about the looks. As I mentioned, softshell is a very stiff material and topstitching will stabilize the pocket openings nicely. You can use one straight stitch (about 0.7 cm away from the edge) or two parallel stitches like I did. That is a matter of taste...
Now flip the front piece so that you are looking at the face side of the pocket piece.
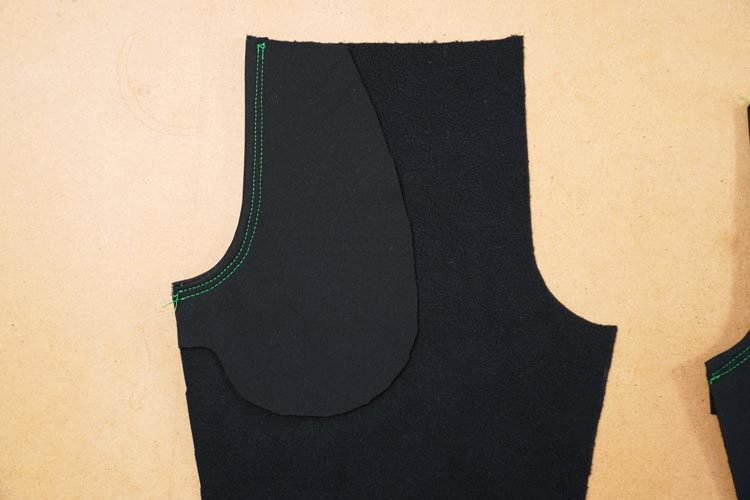
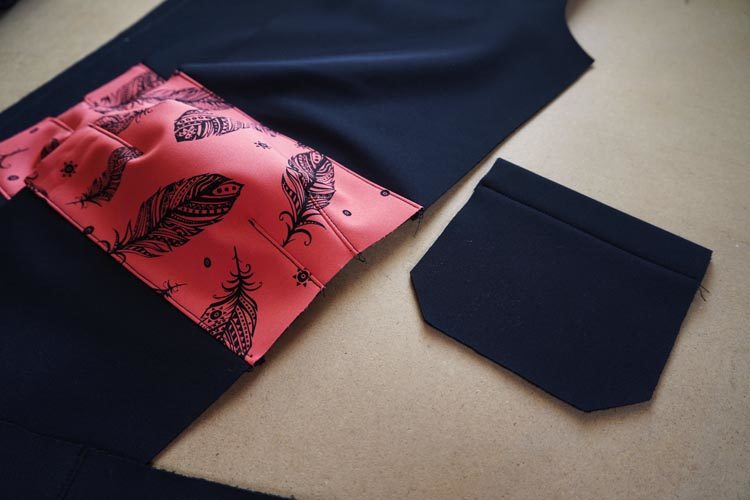
Place the whole pocket piece over the piece with the opening and sew the entire pocket pouch. Then clean the edge of the pocket pouch (with zigzag seam or on overlock).
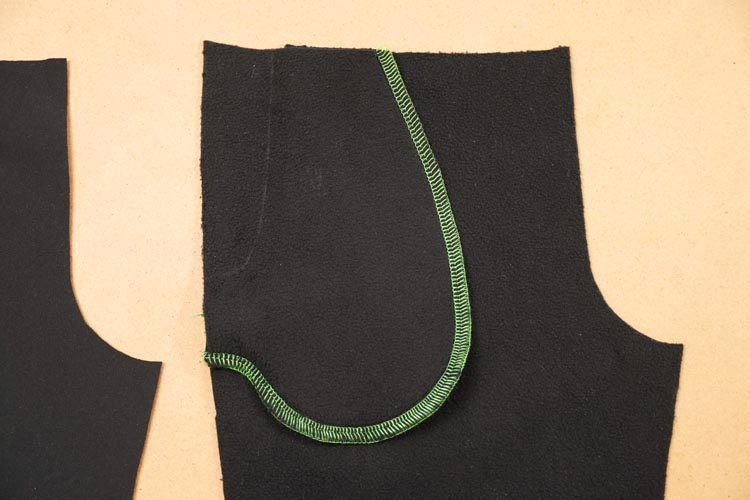
Do the other side pocket in the same way.
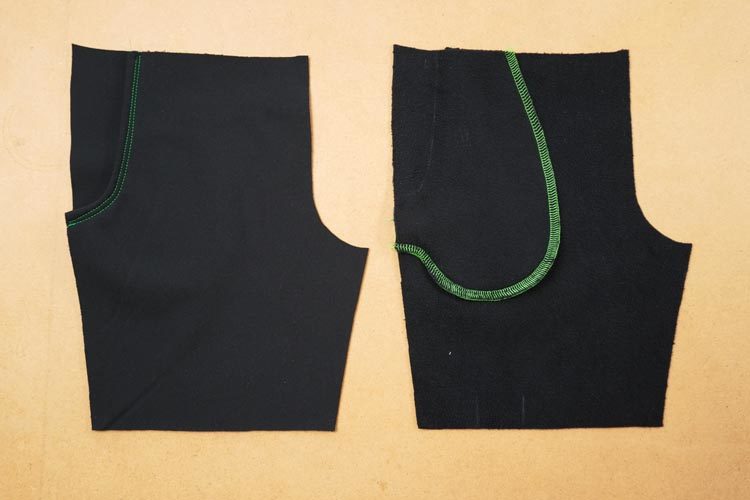
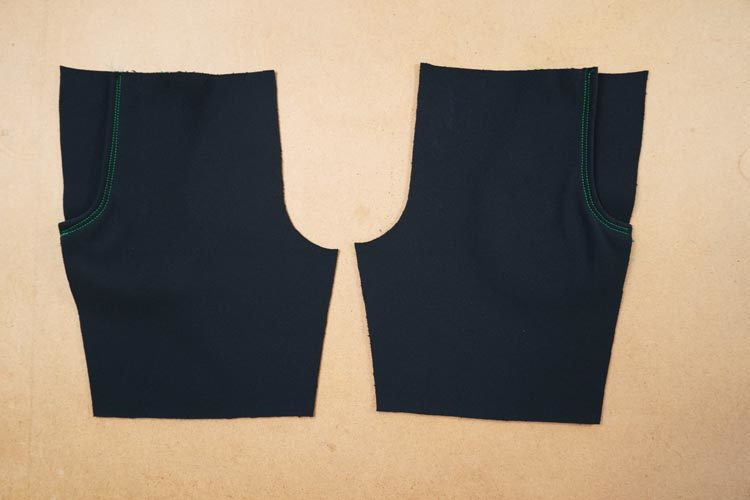
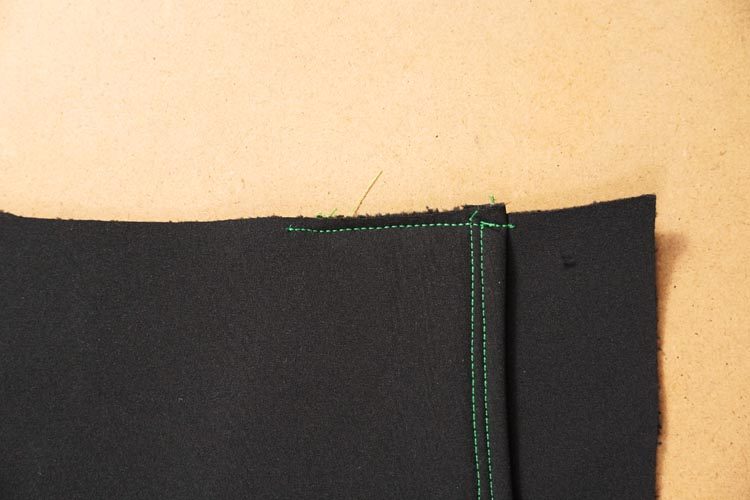
I recommend attaching the upper edge of the pocket pouch to the front piece with straight seam. Front pieces will be easier to handle. Pocket pouch won’t fold or distort accidentally, and you can (almost) forget about having to watch its correct placement when sewing.
4 – Knee patches
Now let's move on to the knee patches. There are two different ways to sew the knee pads. Their shape can be stable (darts) or a free to move (counter-fold). There is not much difference regarding the practicality and freedom of movement, so it is only a matter of taste. Choose the option that you (or your children) like more.
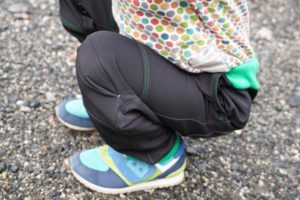
4a – Segmented knee patches with counter-folds
In this chapter, we will look at sewing shaped knee patches using the counter-fold technique.
Once again, it is necessary that you transfer all the marks from the paper pattern to the knee patches. Two marks at the top are telling you that this side will be later connected to the upper front piece. Three marks on sides are telling you where the counter-folds (or darts) will be located, and one mark at the bottom of the knee patch says that the side will later be connected to the lower front piece.
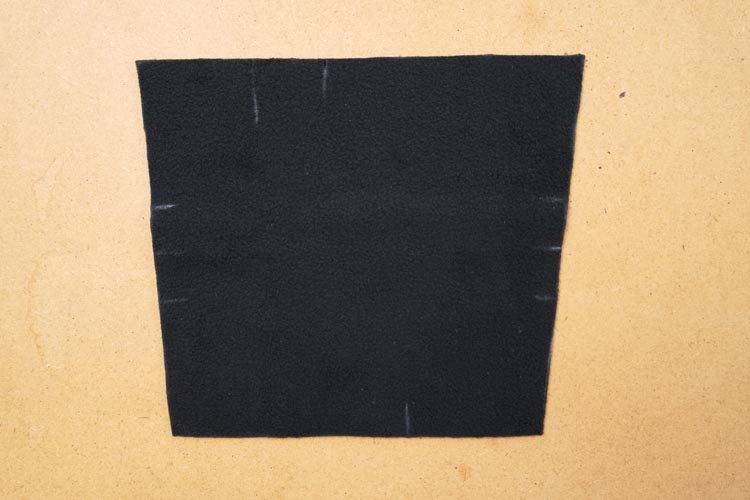
Fold the knee patch in half (face side in). Line of the fold connects middle marks on the sides of the patch. Other two side marks are on top of each other - that is where the pins are.
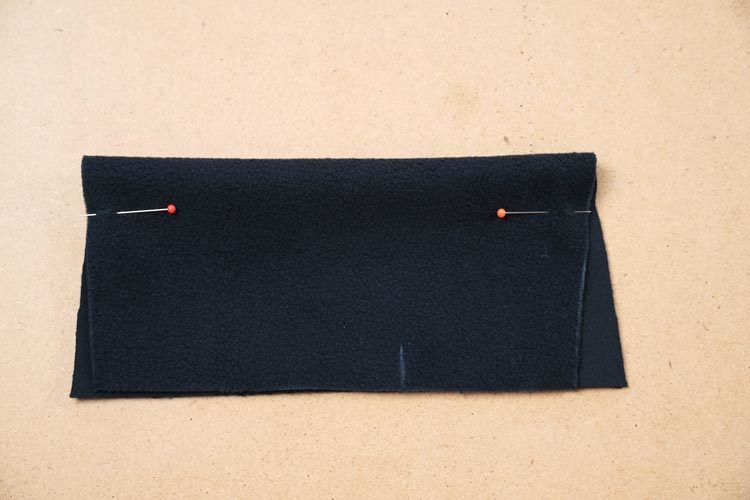
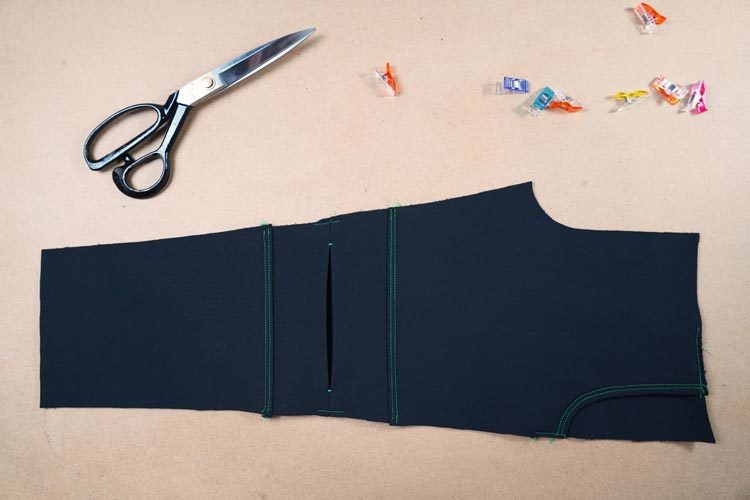
Sew through the folded knee patch below the fold - in the side marks (where the pins are on the previous picture). Seam should extend about 3 cm from the cutting edge (length of the seam depends on the size of the pants, 3 cm on size 104 in my case).


“Squish” the center fold to create counter-fold.
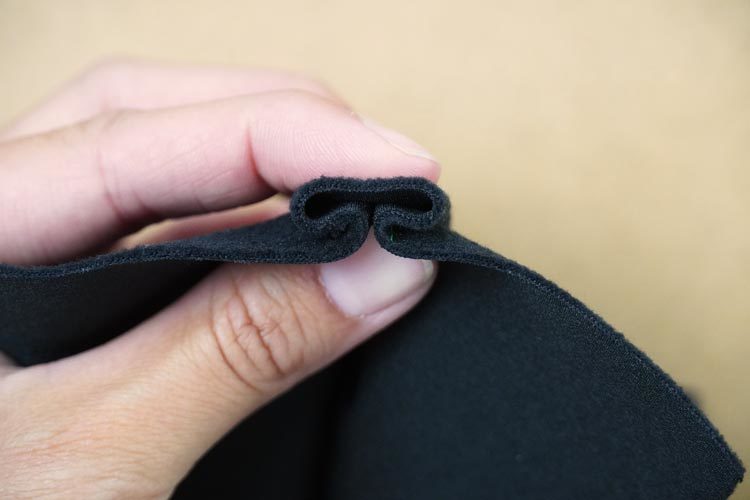
Sew through the fold in the seam allowances area (perpendicular to the fold) to stabilize the shape of the counter-fold. Sew tacks at the top of the counter-fold - wide zigzag repeated in one place. This is to prevent the seam from tearing over time.
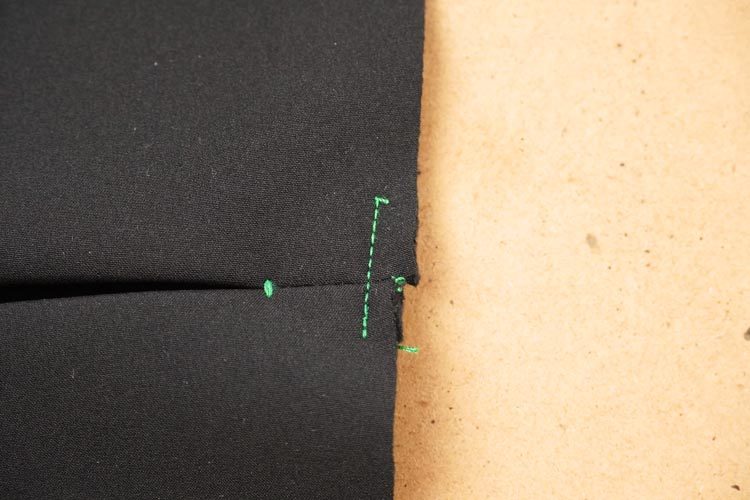
Do the other knee patch in the same way.
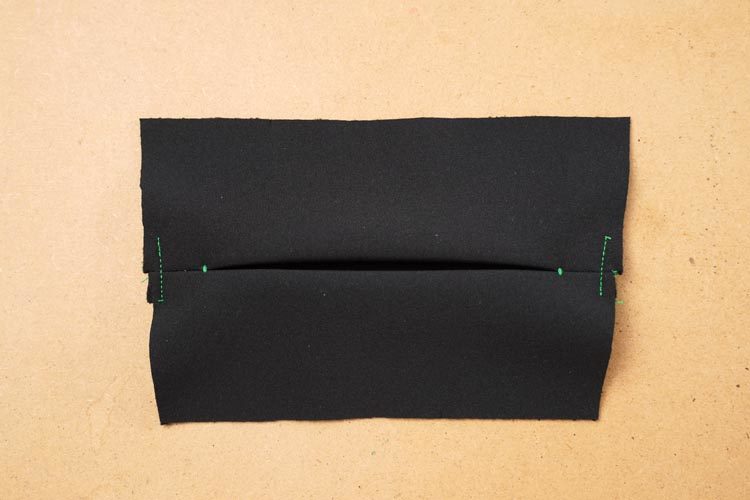
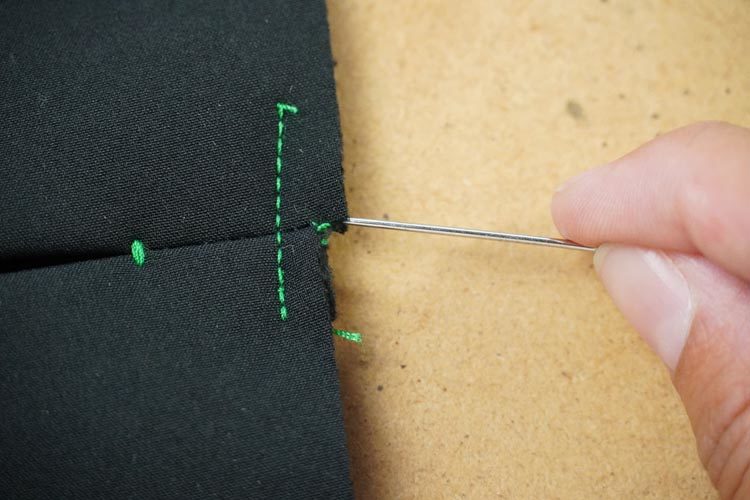
Sewing the knee patches like this will create a small “step” at the cutting edge. I recommend cutting these steps to create smooth edges.
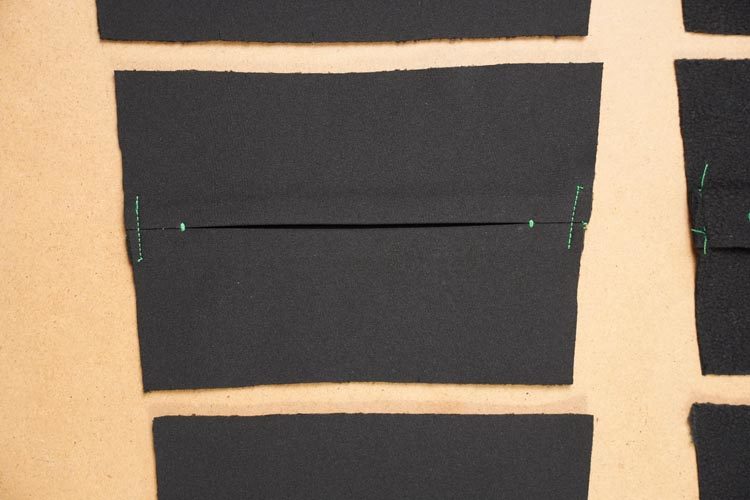
Iron the knee patches thoroughly. Use layer of canvas to prevent the iron from touching them directly.
4b – Segmented knee patches with darts
If you decided to sew the knee pads with darts, follow these steps: There are three marks on both sides of the knee patch (side seam and instep seam area). You won’t need the middle marks on both sides of the knee patch this time. But the two marks next to them are important. Fold the knee patch in one of these marks (face side in). Make a mark 1 cm away from the fold (at the cutting edge).
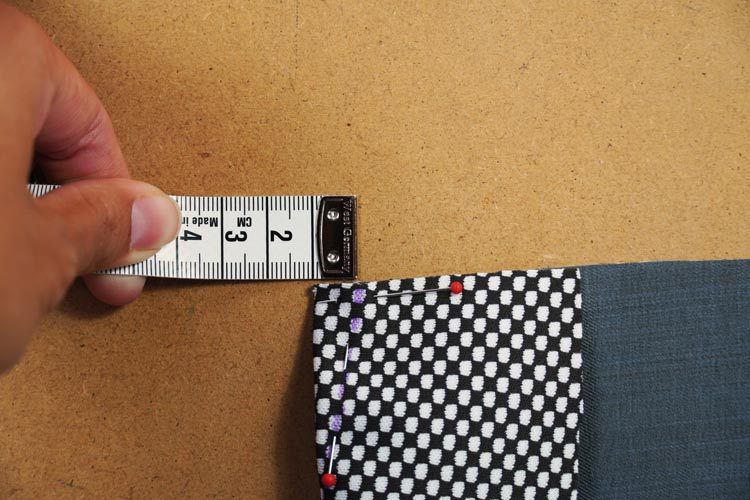
Then make mark at the fold itself. This one should be about 5 cm away from the cutting edge (depends on the size of the pants, 5 cm is about right for size 104). Connect the two points to create seam line.
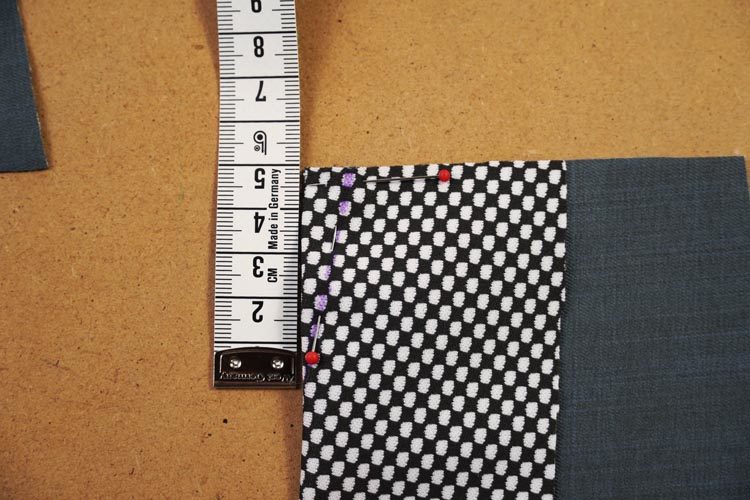
Sew the dart along this line.
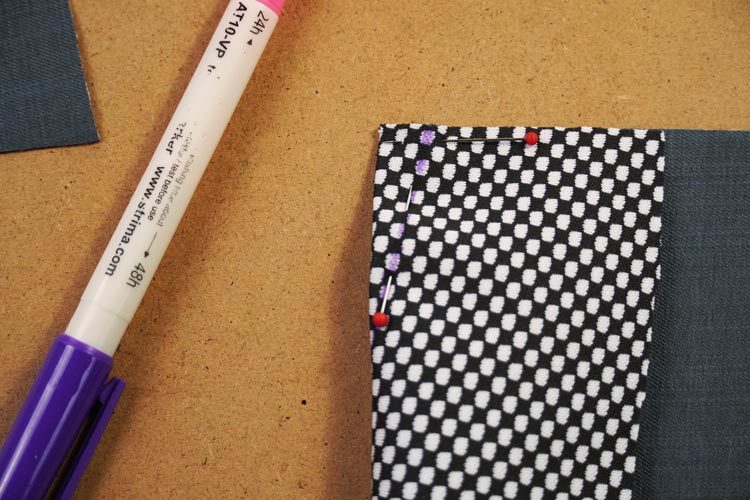
Sew the dart in the other mark on this side of the knee patch in the same way.
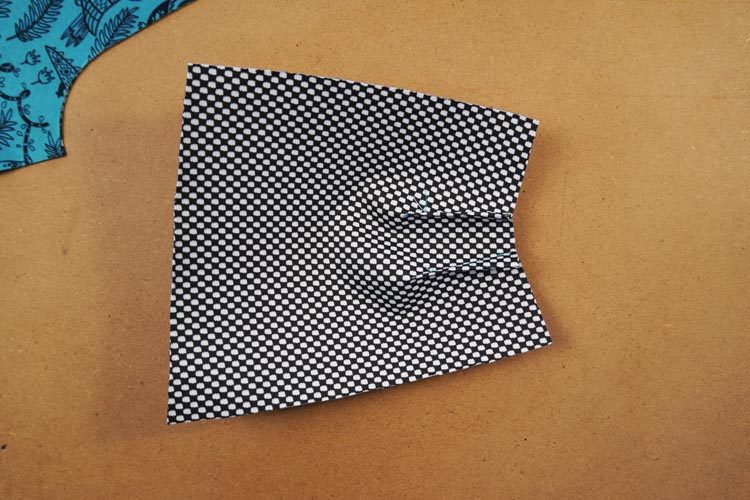
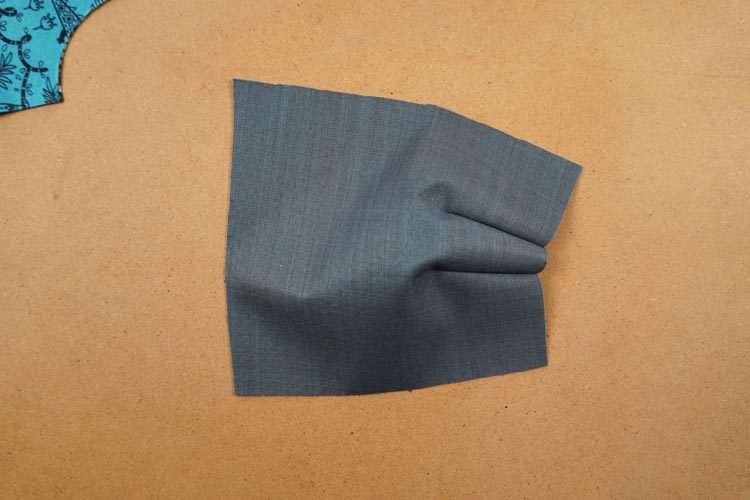
Fold the darts away from the center of the piece and iron them.
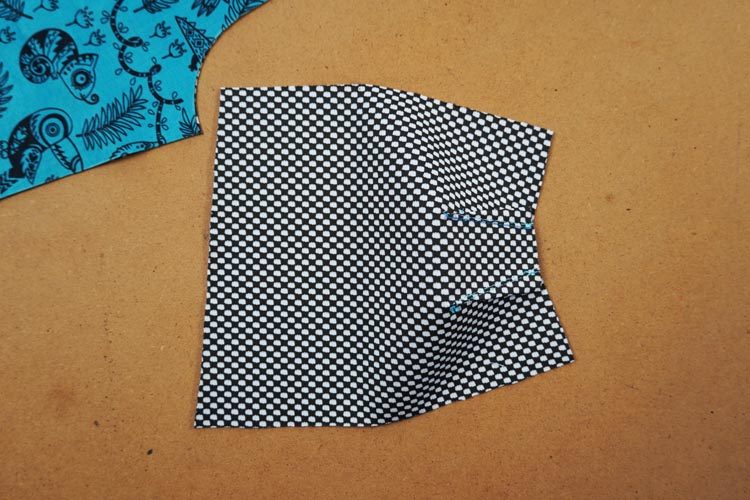
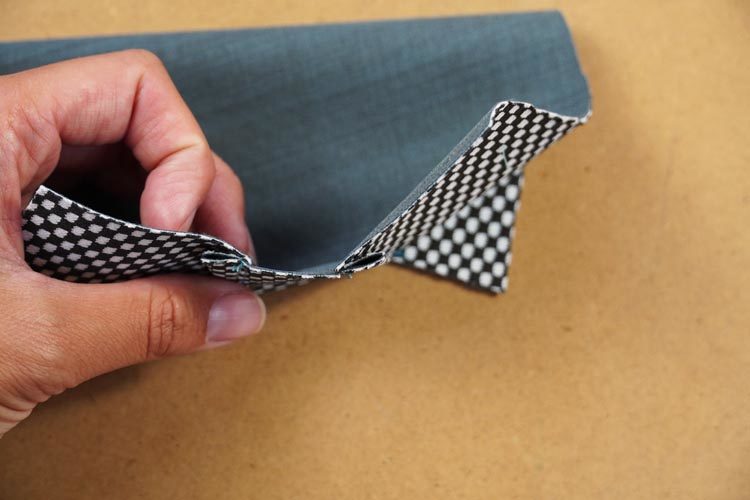
Topstitch the darts from the face side of the piece to stabilize them.
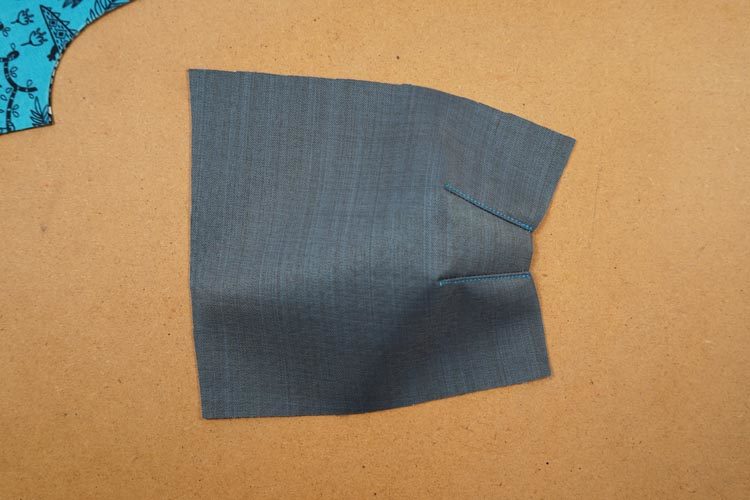
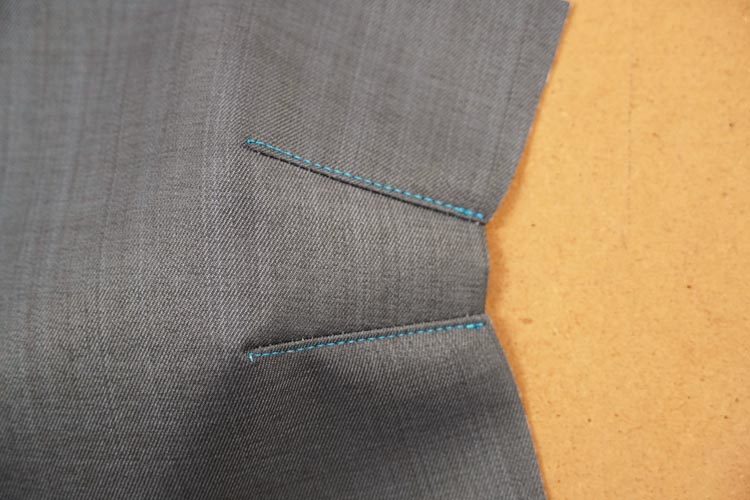
Do the darts on the opposite side of the knee patch in the same way.
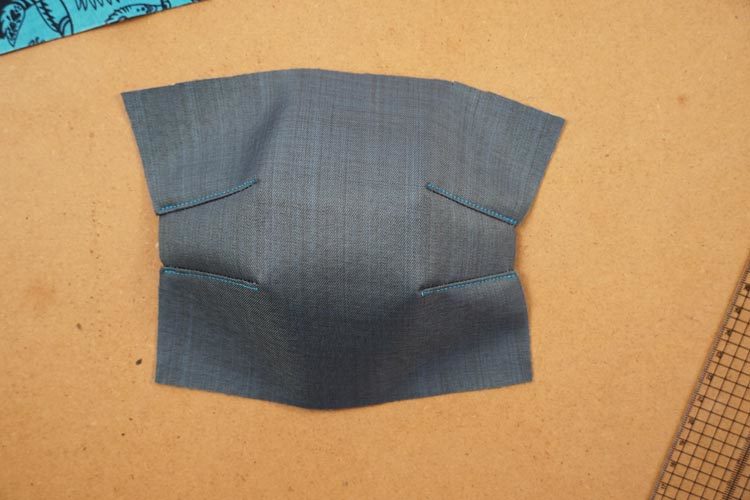

5 - Sewing the front pieces
Knee pads are ready and now you can connect the front pieces. Use marks on the knee patches to determine which front pieces belong to them.
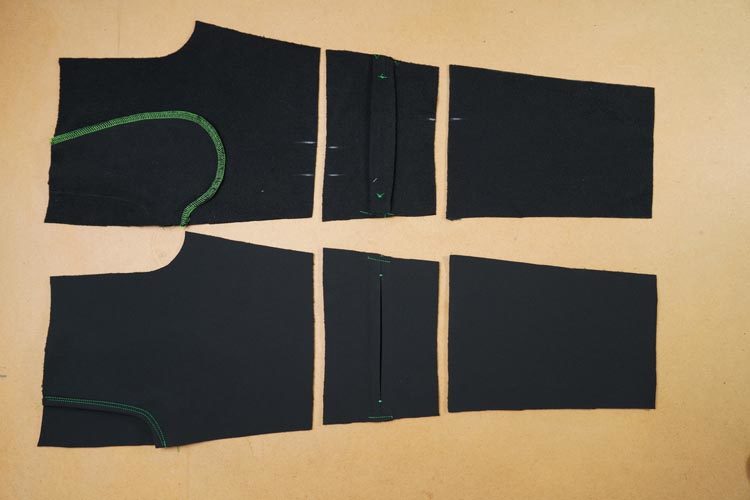
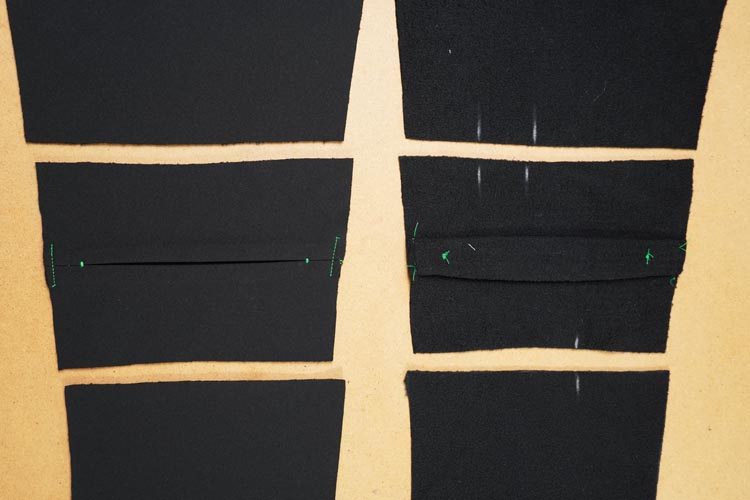
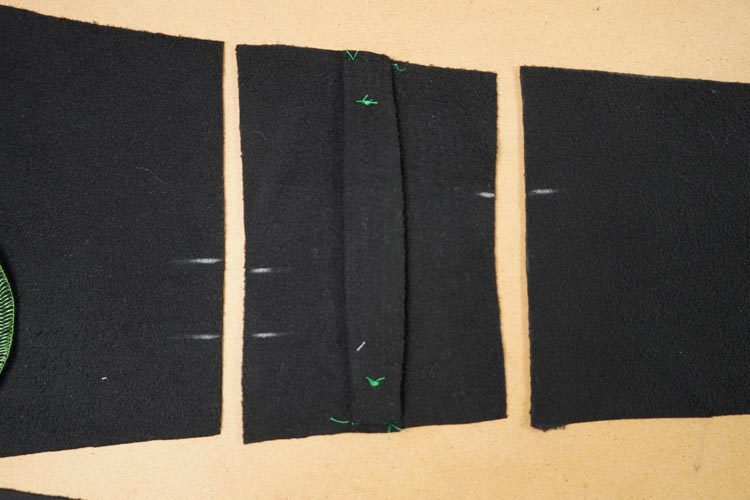
Lay the knee patch on the lower front piece (face side to face side) and “pin” the pieces together.
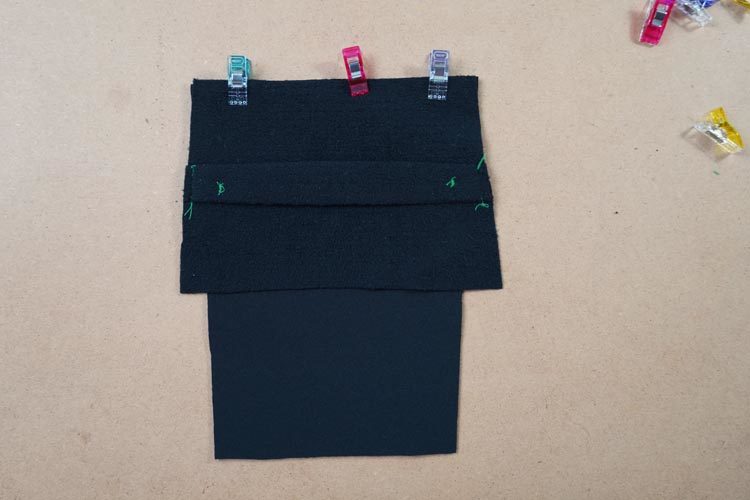
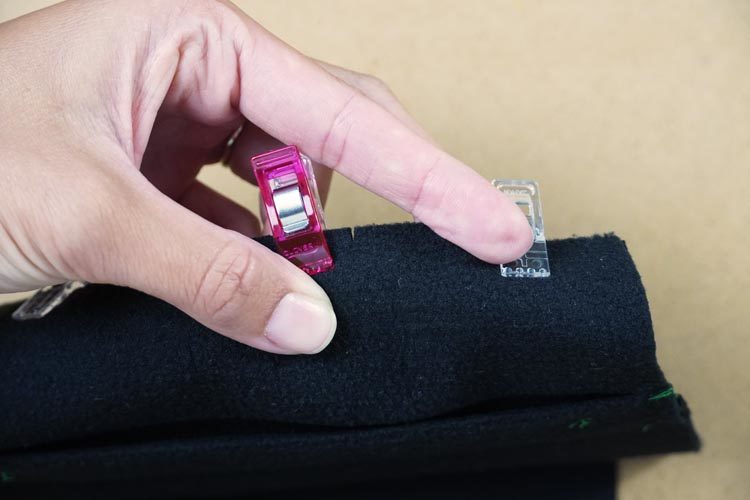

Then lay the upper front piece over the knee patch (face side to face side) and “pin” this seam too.

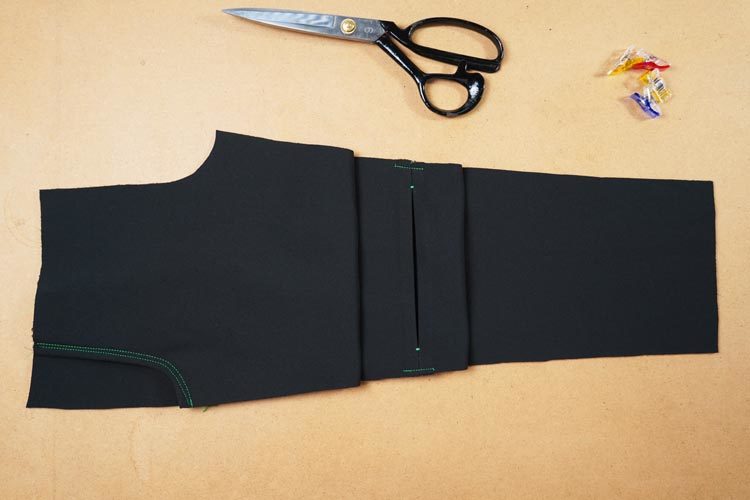
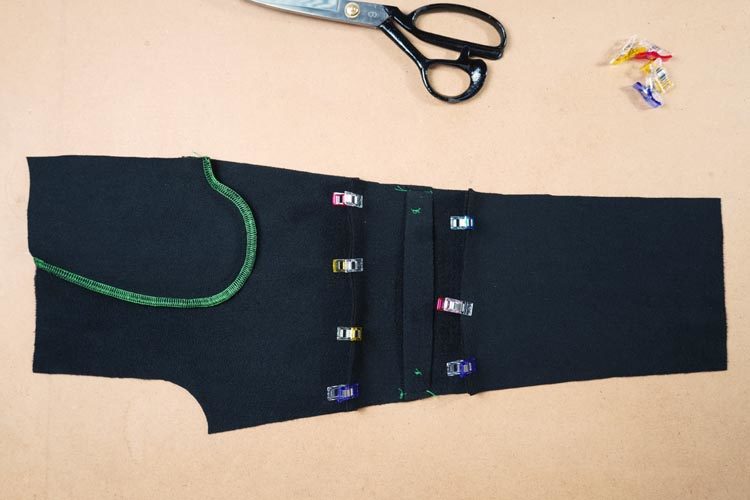
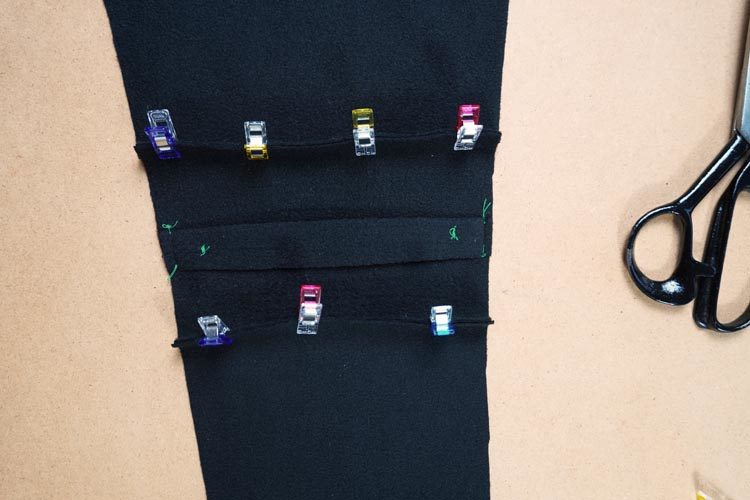
Sew the knee patch to the upper and lower front piece.
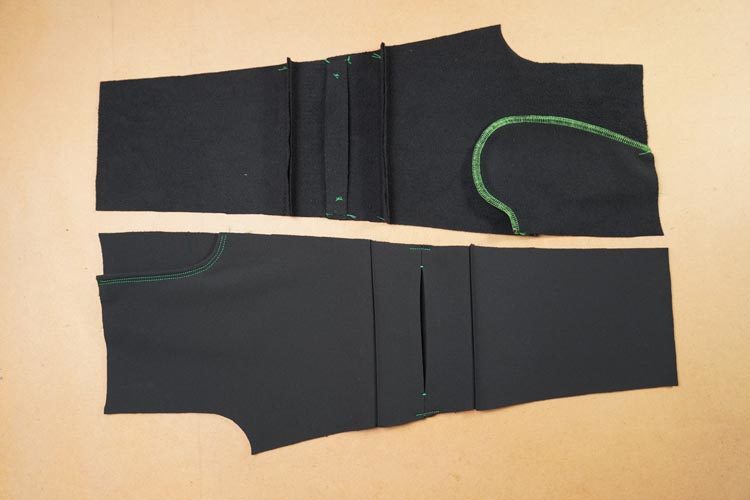
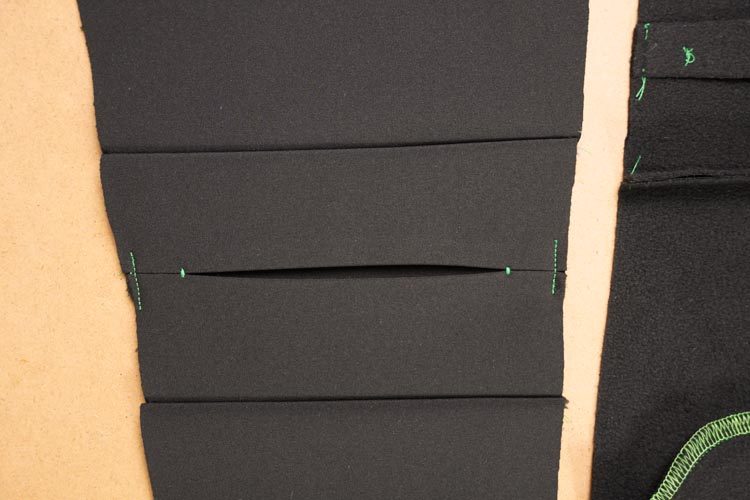
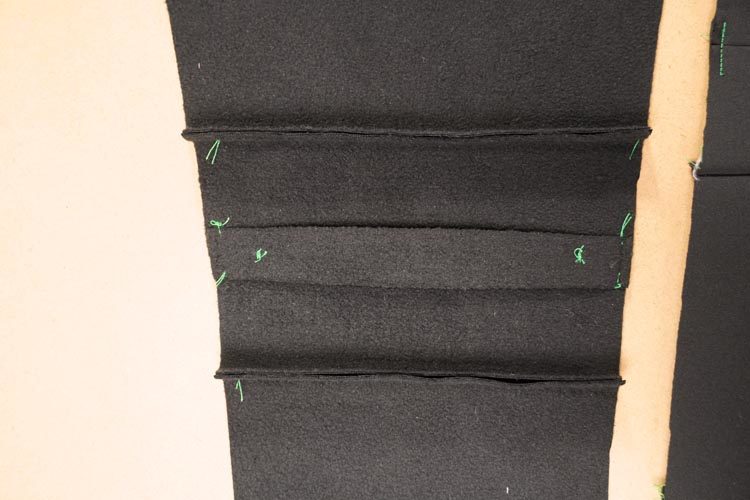
Clean the seams.
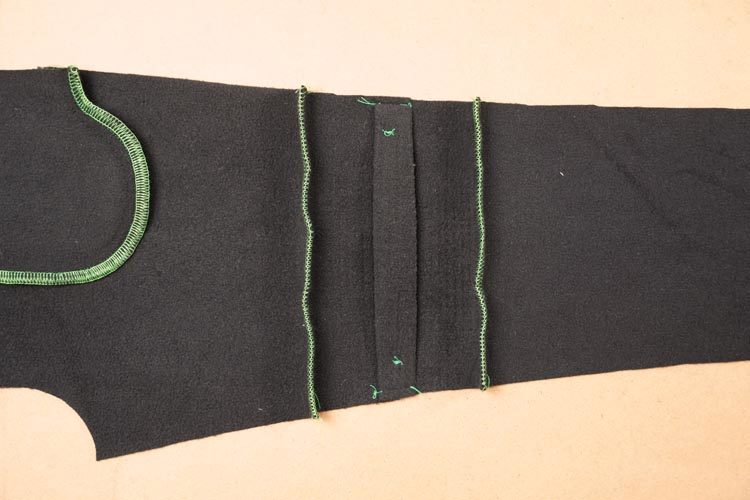
Fold the seam allowances away from the knee patch and topstitch through them. You can use just one straight seam here. However, if you have been using two parallel topstitching seams so far, it will look better if you continue to do so...
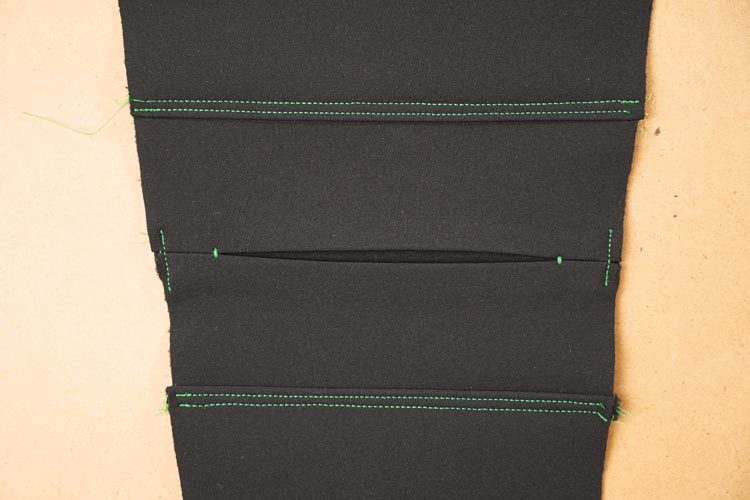
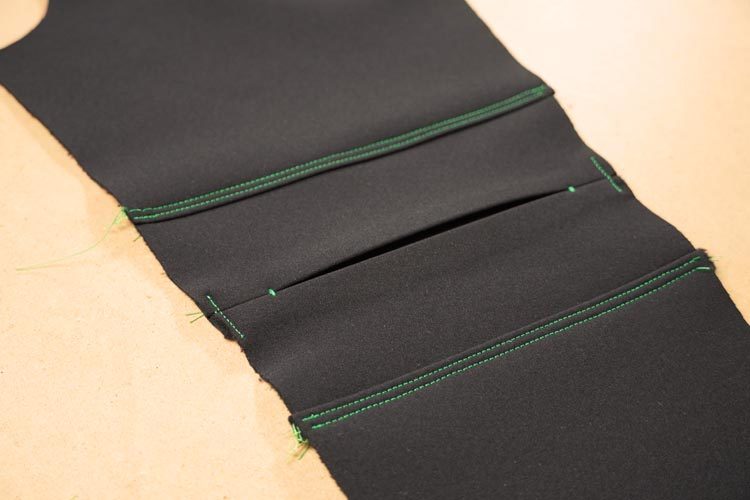
I pressed the seam allowances towards the knee patch when sewing the blue and orange pants. It seemed more natural to me, because the knee patches with darts have very distinct curves.
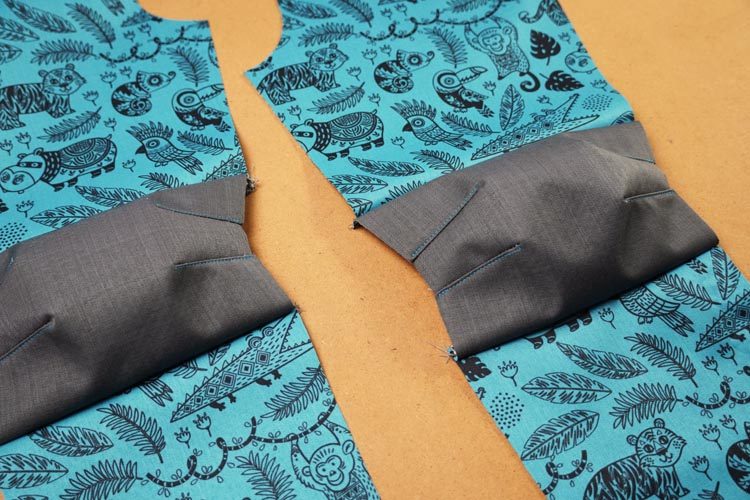
Note that the topstitching is now on the other side of the seams - in the knee patch.

6 – Connecting back and front pieces
The front and back pieces are ready, and you can start putting them together. It was necessary to proceed in a slightly unconventional way in the case of black trousers. They are heavily topstitched, and I also wanted to topstitch the side seams.
6a – Version 1 (less traditional) – Pants with prominent topstitching
I wanted to topstitch the side seams, but to do so I had to sew the yoke first. However, to sew the yoke, I had to sew the back crotch seam...
6a I. – Back crotch seam
Lay the back parts on top of each other (face side to face side) and “pin” the crotch seam.
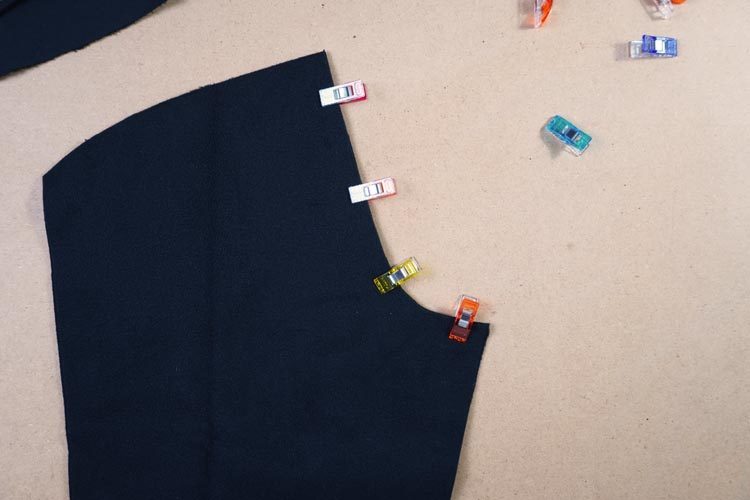
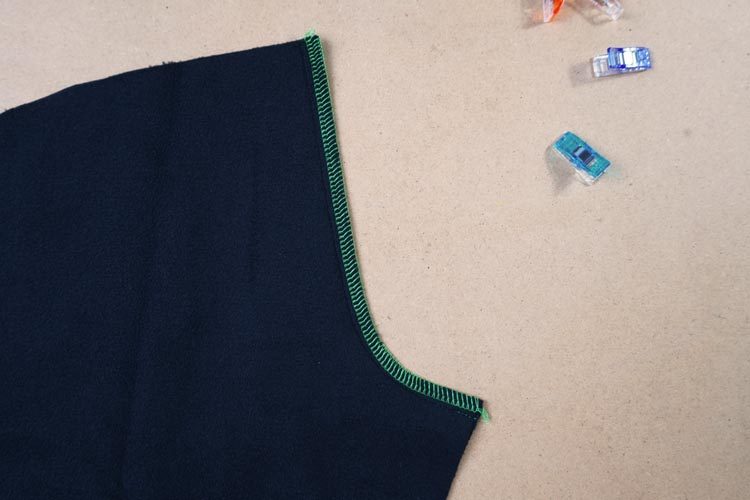
Sew and clean the crotch seam.
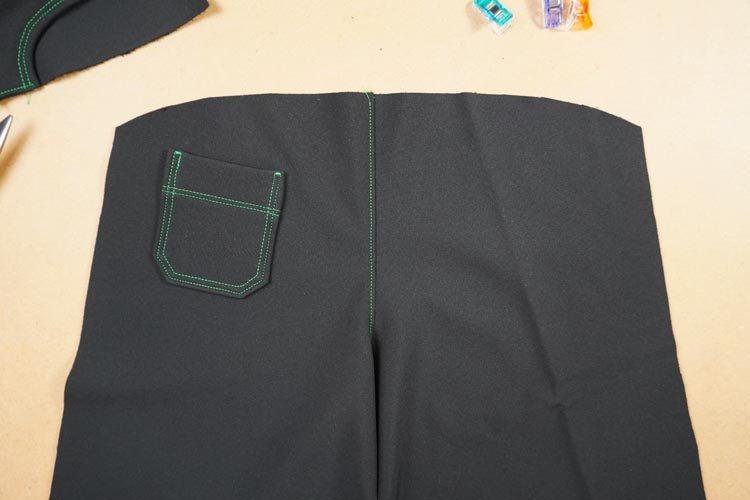
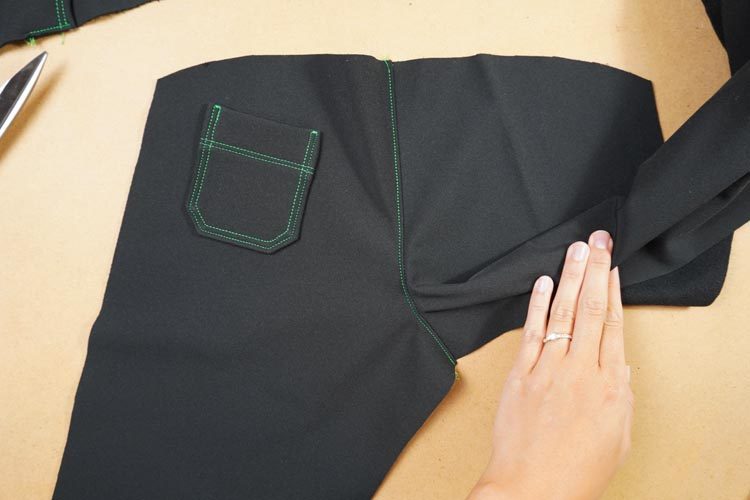
Fold the seam allowances towards the left piece and topstitch through them.
6a II. – Yoke
Lay the yoke over the back piece (face side to face side) and “pin” the pieces together. Seam allowance of the yoke is a bit longer, because this connecting seam is curved. This just a small reminder. Pieces won’t fit together If you try to align the ends of their seam allowances. Use marks to place the yoke correctly. Mark in the center of the yoke (in the fold since this is the folded fabric cut). This center mark needs to be aligned with the back crotch seam.
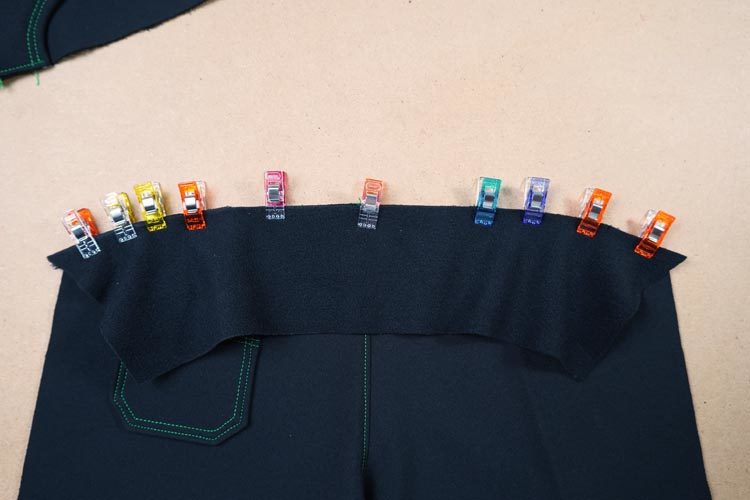
Sew and clean the connecting seam.
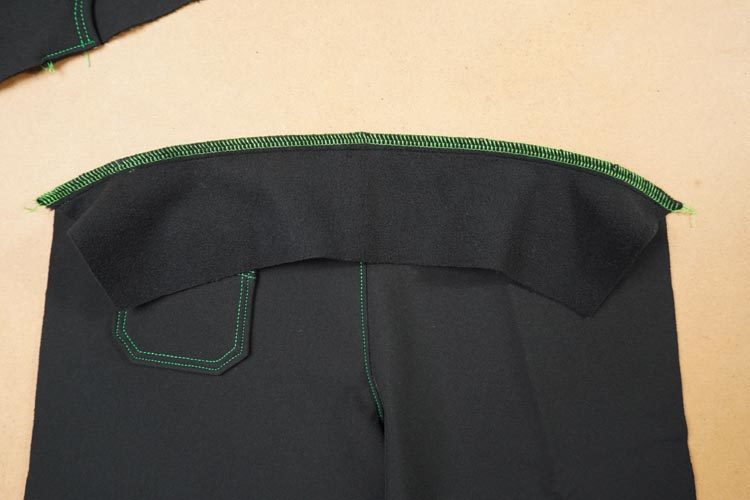
Fold the seam allowances towards the yoke and topstitch through them along the seam.
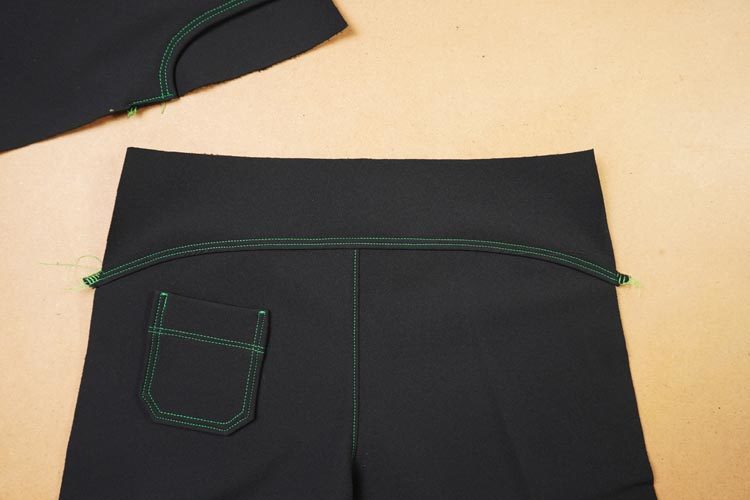
6a III. - Side seams
Lay the front pieces over the back piece (face side to face side) and “pin” both side seams. “Pin” from the leg hems and proceed towards the waistline.
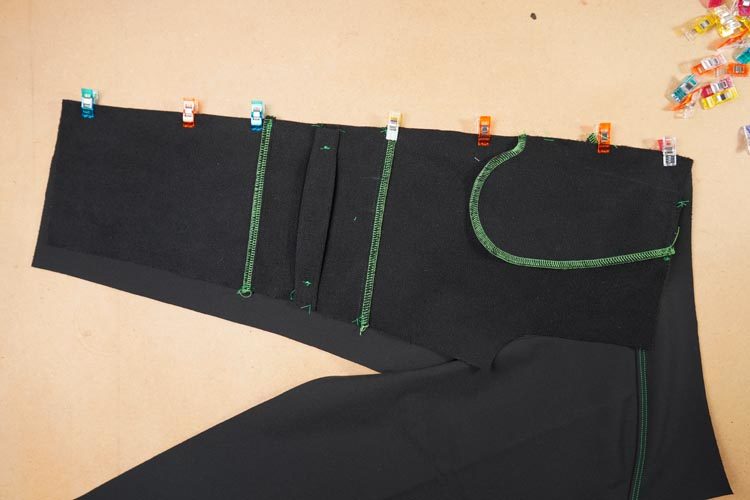
Sew and clean the side seams.
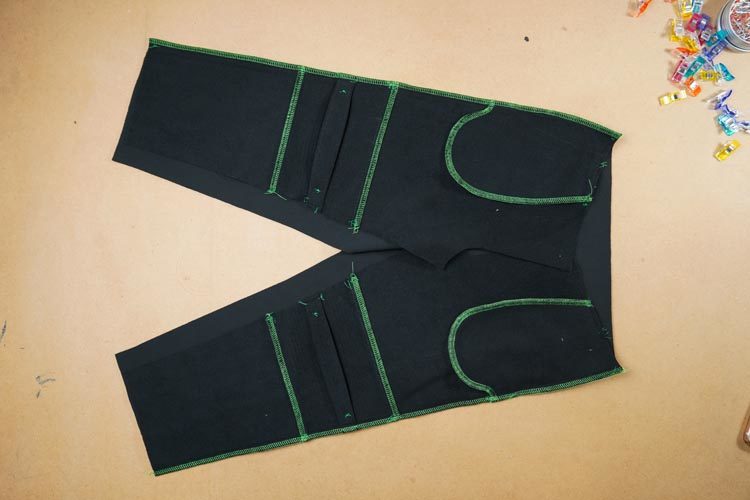
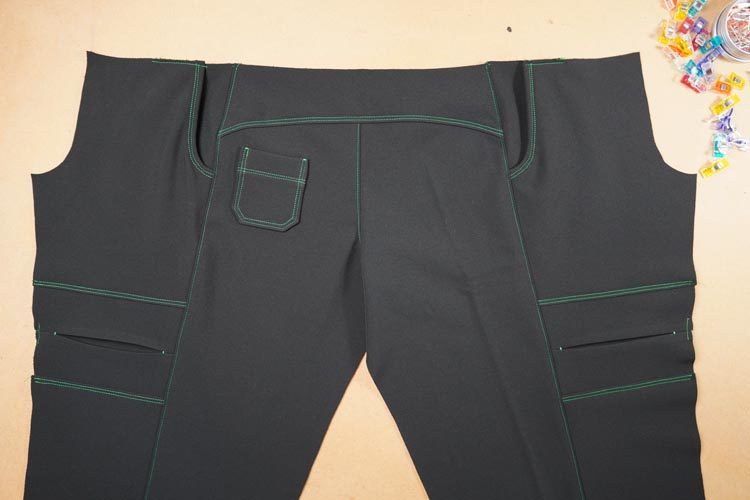
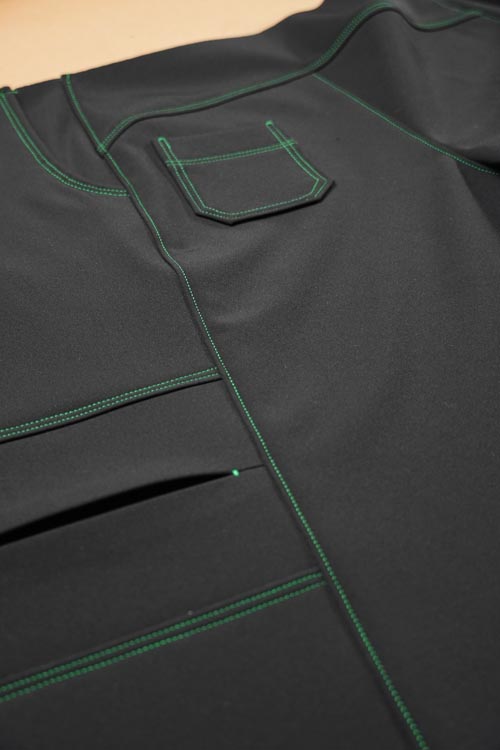
Spread the pants on your table - face sides of all pieces are facing you. This will allow you to topstitch the side seams easily. Seam allowances of the side seams are folded towards the back piece.
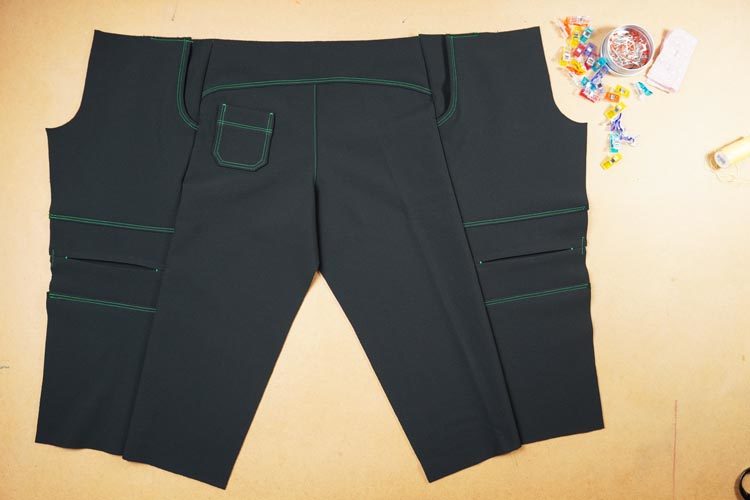
Topstitch along the side seams.
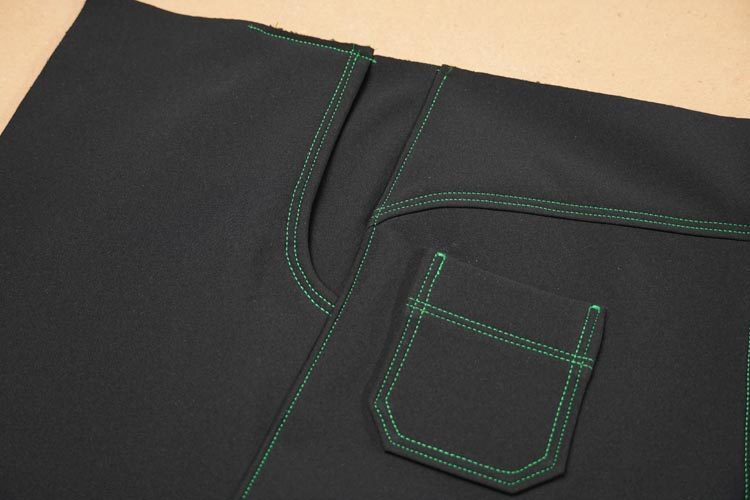
6a IV. – Front crotch seam
Let’s to the front crotch seam now. Pants are folded so that the front pieces are on top of each other (face side to face side). “Pin” the front crotch seam.
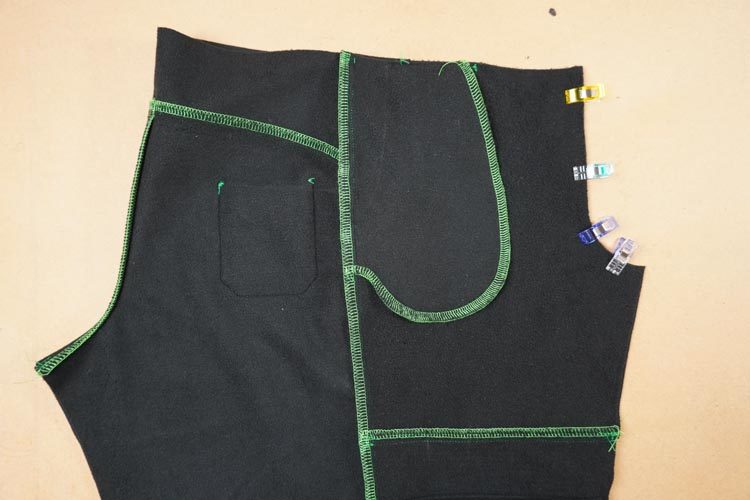
Sew and clean the front crotch seam.
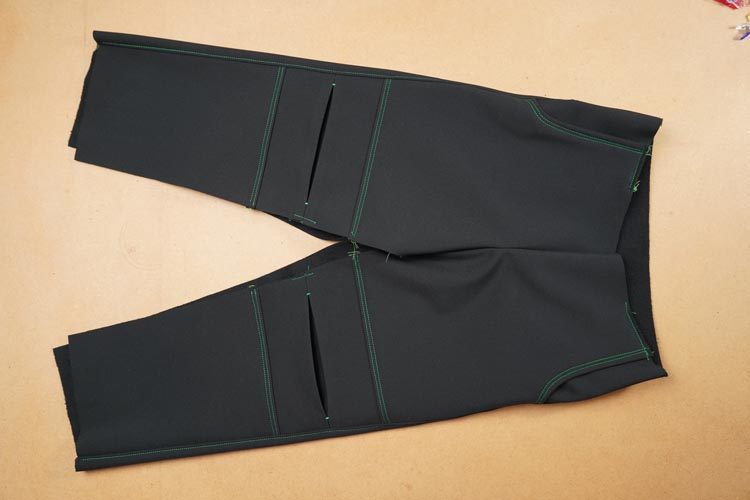
Fold the seam allowances towards the left leg - the seam allowances of the front and back crotch seams are folded in the same direction.
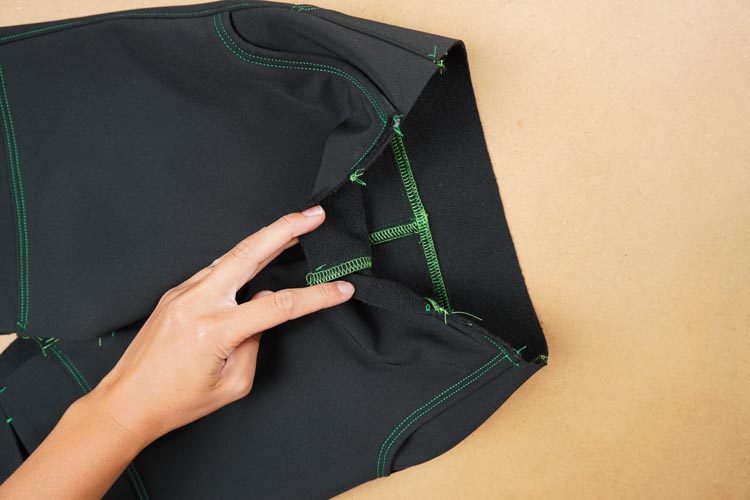
Topstitch along the front crotch seam.
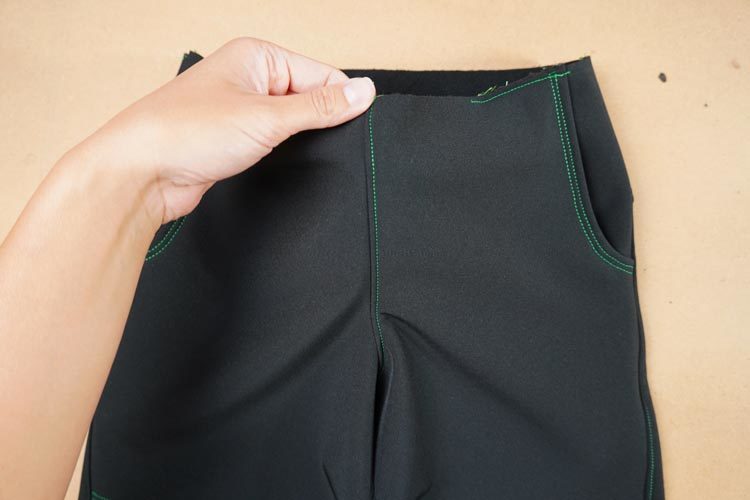
6a V. – Instep seams
Now you need to do the instep seams.
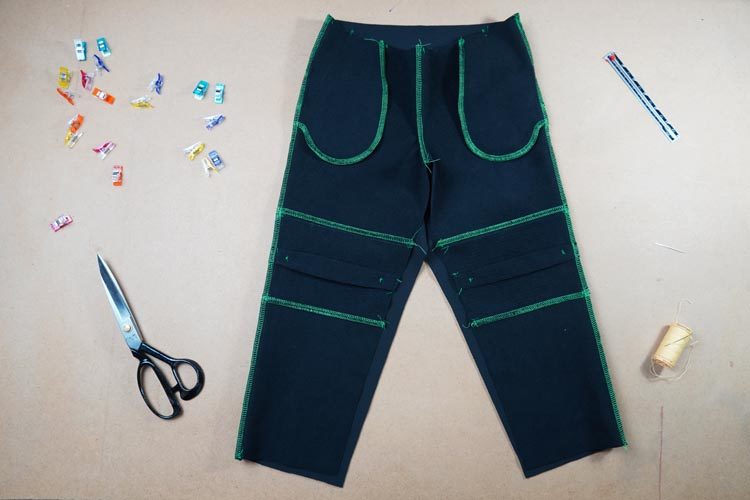
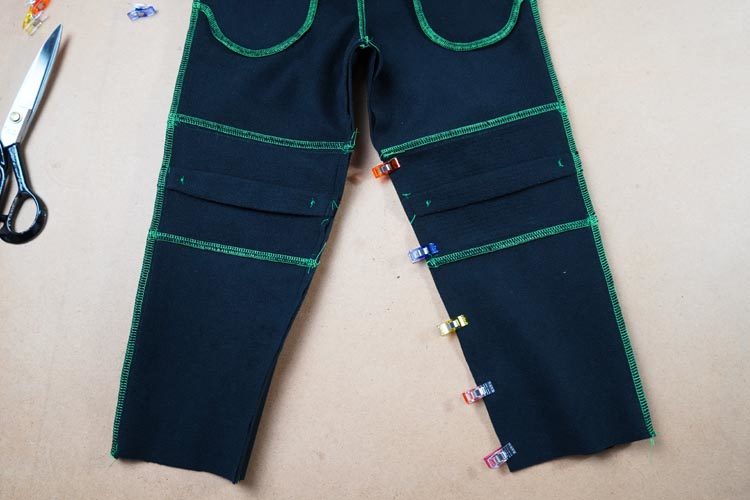
Fold the pants so that you have good access to the instep seams and “pin” them.
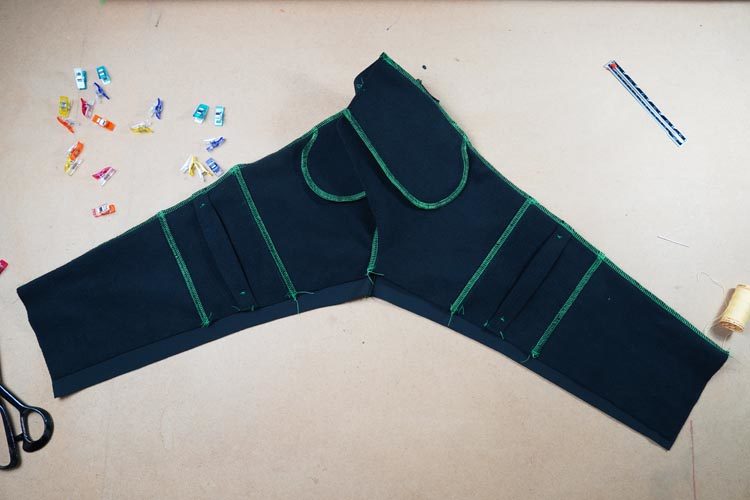
Proceed from the bottom hems of the legs towards the crotch seam. You are going to need to stretch the front pieces a little. Knee patches and lower front pieces should align nicely, so this part of the instep seam should be easy to pin. Stretch only the front pieces above the knee patches (upper front pieces).
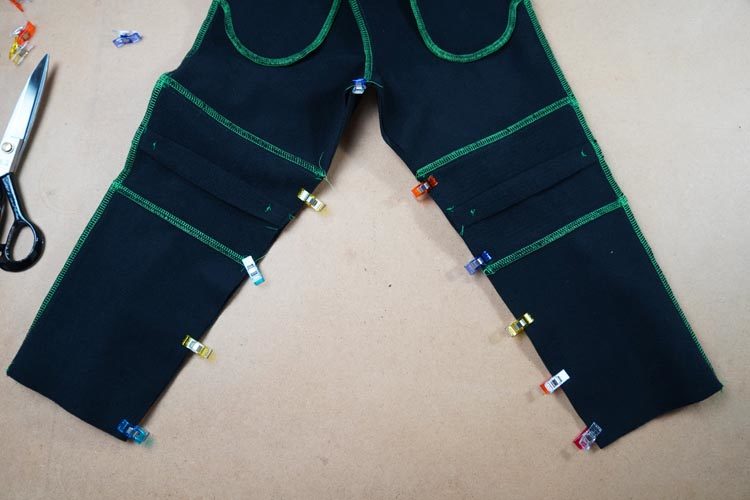
Sew one leg first - from the crotch seam towards the bottom hem of the leg.
Then do the other leg in the same way.
This procedure ensures that both legs are the same and that they won’t twist.
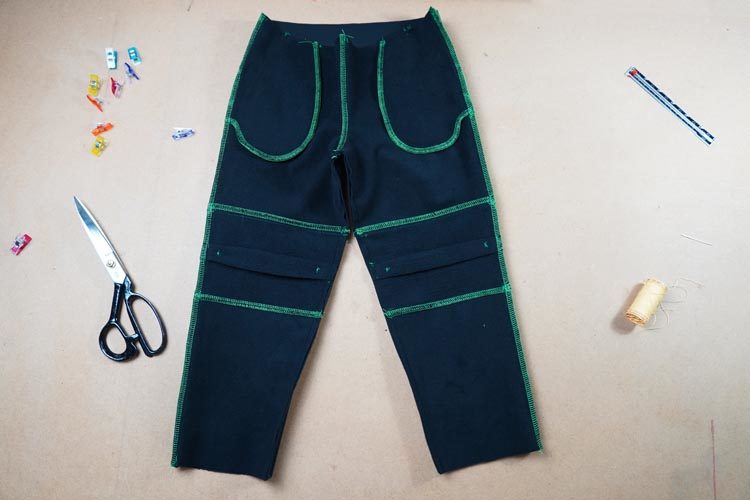
You can clean the instep seams in one go.
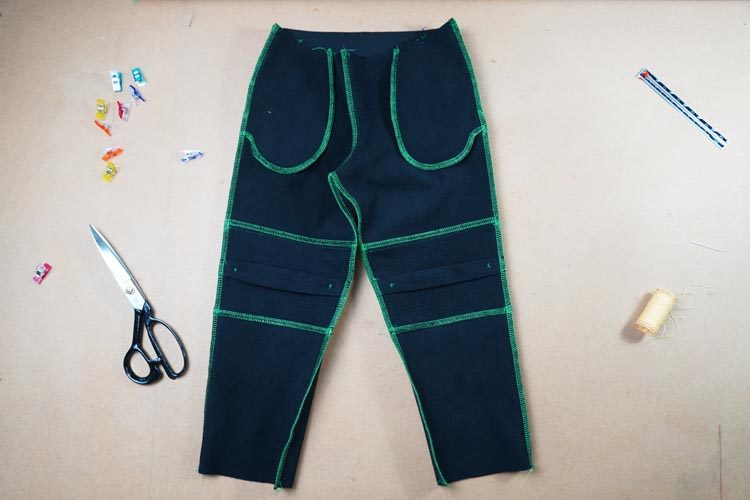
Turn the pants on the face side and check that they are neither warped nor twisted.
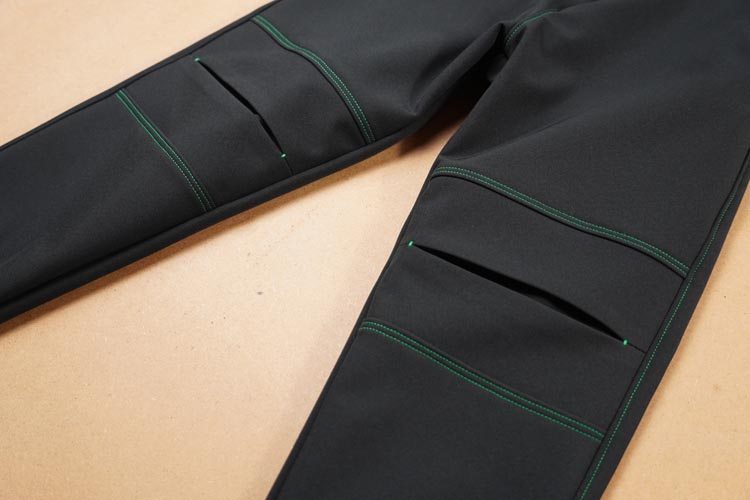
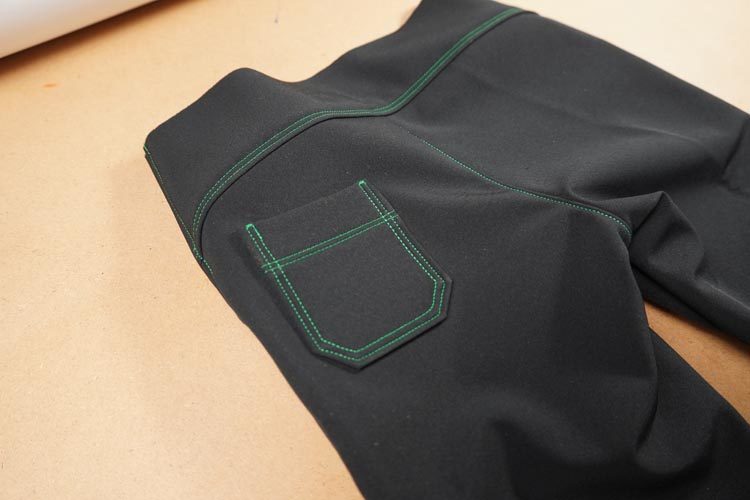
Now you only need to sew the hems (see chapter 7 - Hem knits).
Click here to get straight to the chapter on hem knits: Hem knits
6b – Version 2 (traditional method) - less prominent topstitching
This section focuses on sewing the pants in the traditional way (but without topstitching the side seams).
6b I. – Instep seams
Let’s do the instep seams first. Lay front pieces on the back pieces (face side to face side). Pin the instep seams (proceed from the bottom hems of the legs towards the crotch seam). You need to stretch the upper front pieces (above the knee patches) a little in order to make them fit neatly.
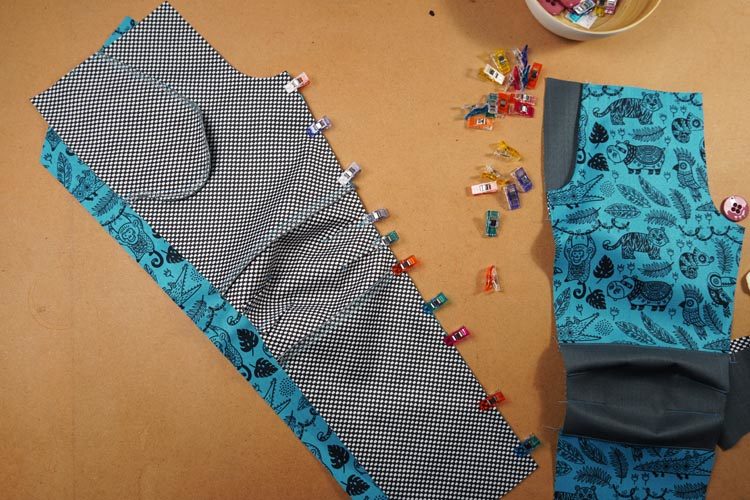
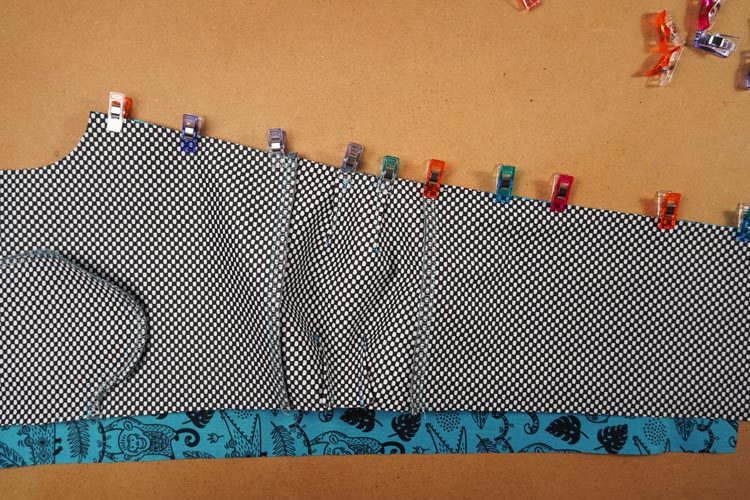
Sew and clean the crotch seam.
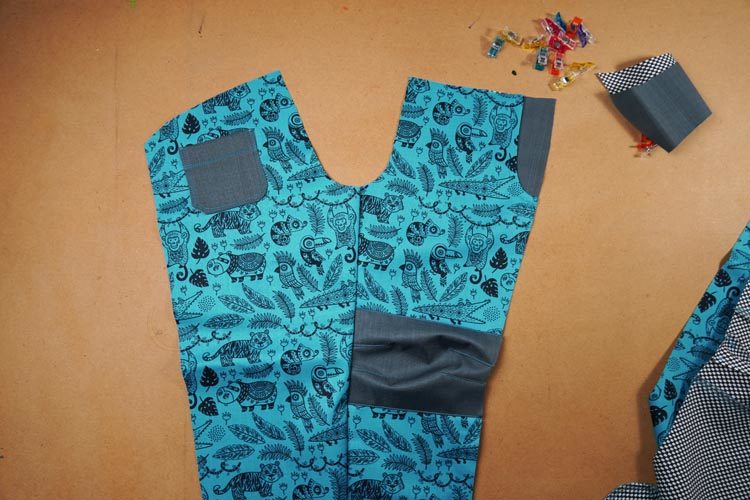
You can topstitch the instep seam if you want to. Pants will be more comfortable, because their inside will be smoother (flat seam allowances). If you decide to do so, press the seam allowances towards the back piece and topstitch along the instep seam (on the back piece side of the instep seam).
6b II. – Crotch seam
Spread both leg pieces and lay them on top of each other (face side to face side) and “pin” the entire crotch seam.
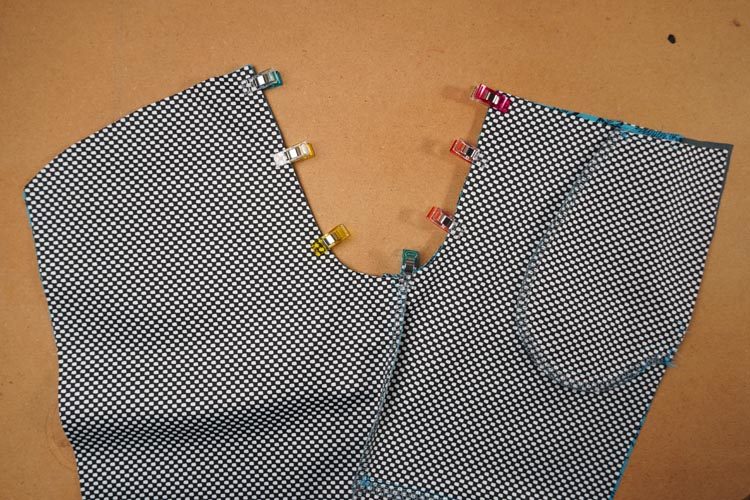
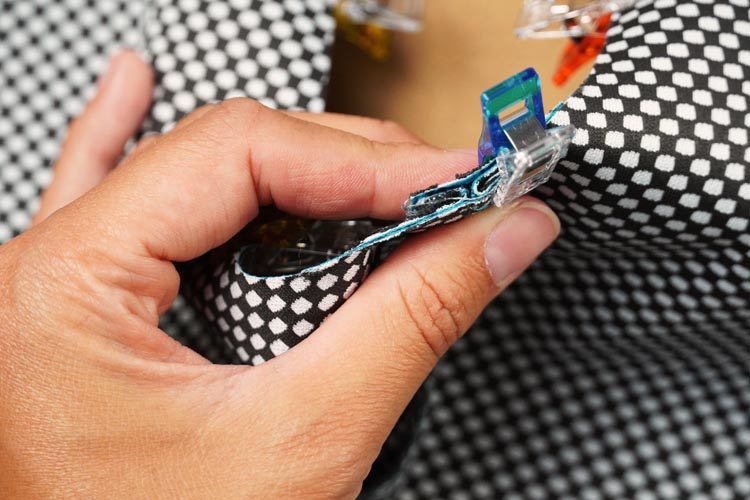
Fold the seam allowances of the instep seam in opposite directions to reduce the number of layers in this area. This is not possible if you have topstitched the instep seams (seam allowances are pressed towards the same direction).
Sew and clean the crotch seam.
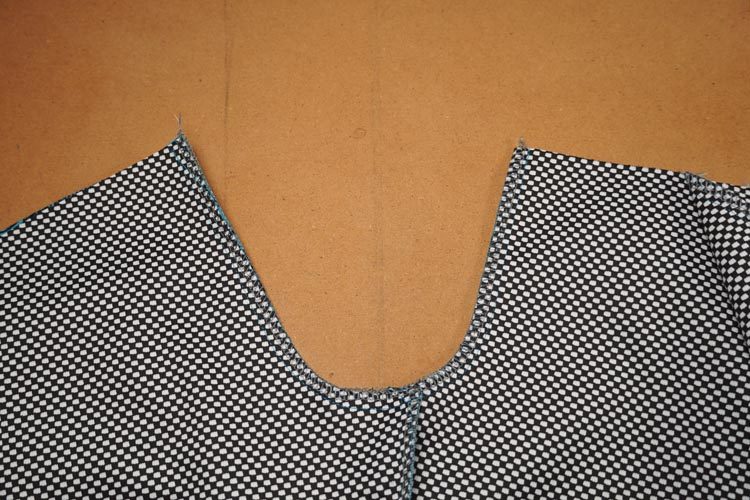
I recommend topstitching the crotch seam.
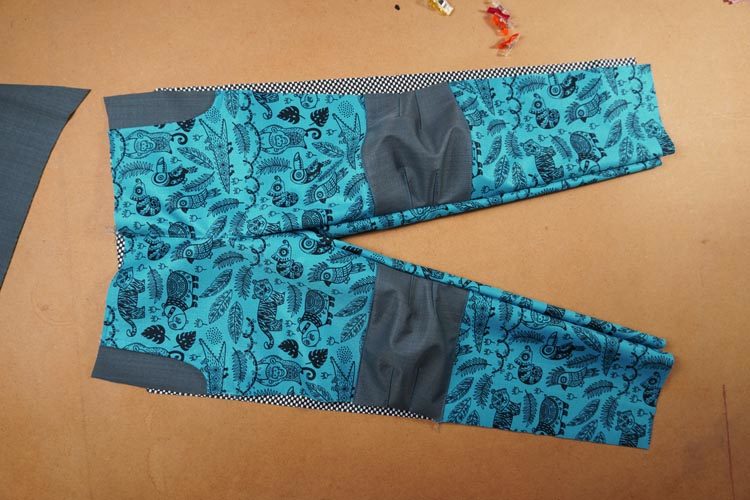
Press the seam allowances towards the left leg and topstitch the entire crotch seam in one go.
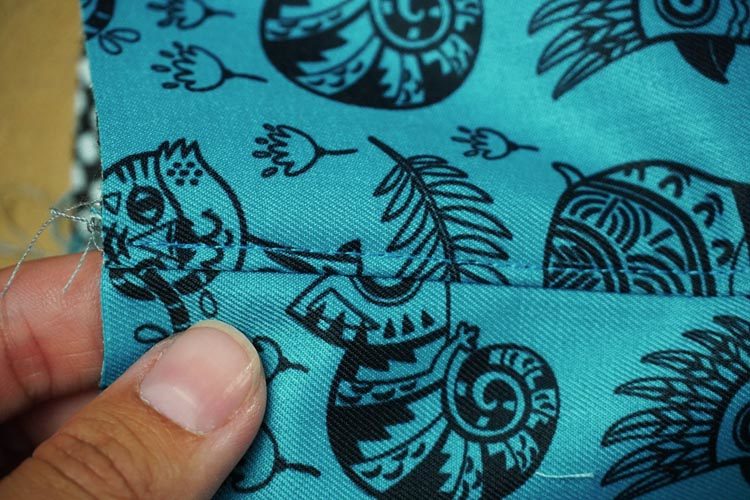
6b III. – Yoke
Now you can sew the yoke. Face the face side of the back piece.
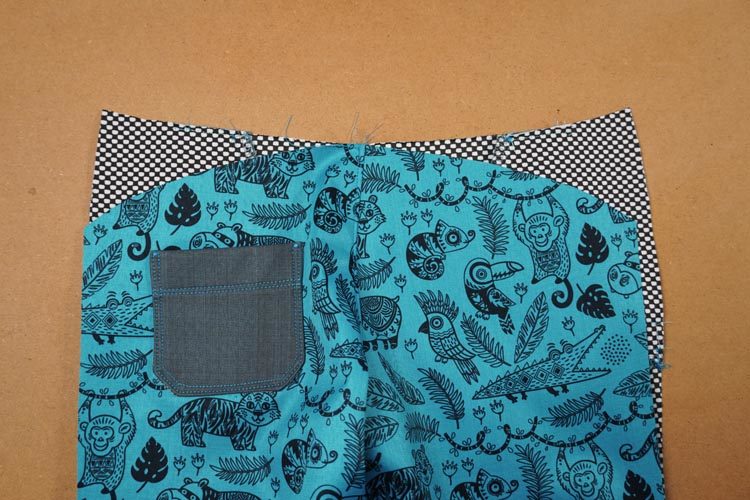

Pin the yoke to the back piece (face side to face side). Marks will help you to connect the pieces correctly. Sew and clean the connecting seam. Topstitch the seam (through the yoke).
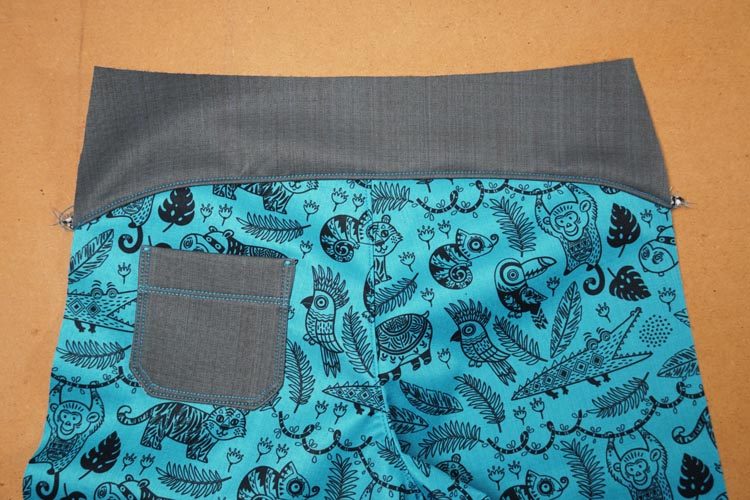
6b IV. - Side seams
Turn the pants inside out and pin the side seams.
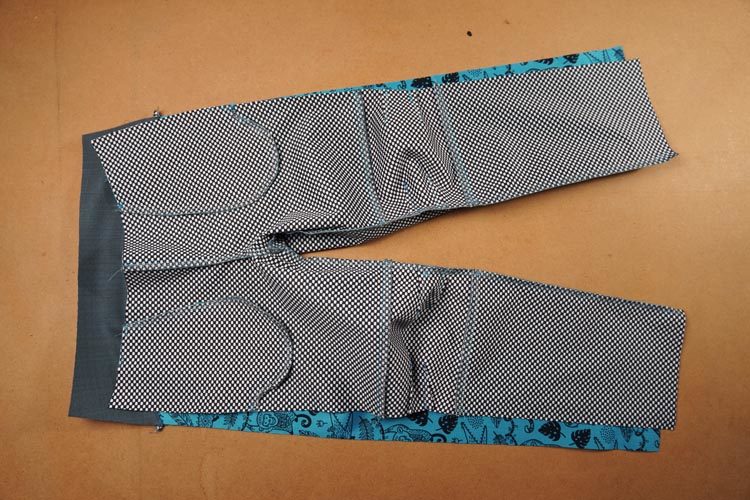
Sew and clean the side seams.
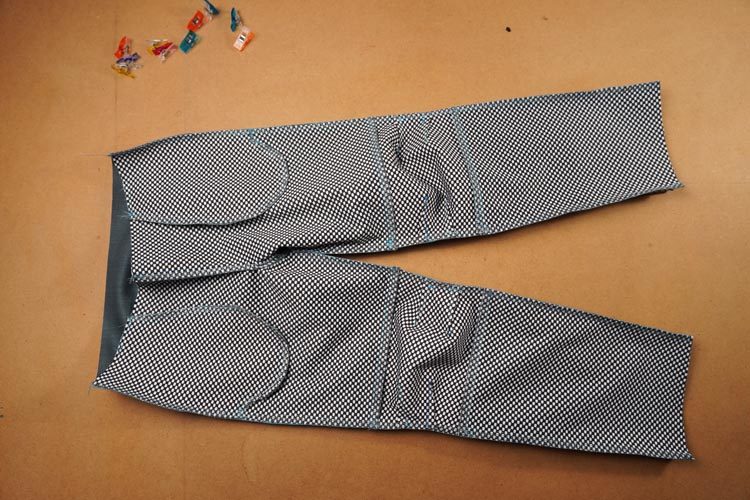

Now you just need to sew in the hem knits.
7 – Hem knits
The recommended size of the hems can be found in the chart that is attached to the pattern (PDF document). For the first pair of test pants (far left), I considered the old notes I had from previous years. And that was a mistake. As you can see, the green bottom hems are unnecessarily wide, and they could easily fall over the shoes at first. And I would say that the waistline hem is too narrow. You may not see it as a mistake, it is an individual matter. Choose the length and height of the hems according to your preferences. Some people prefer low hems, which are not so pronounced, while others prefer higher ones. Even the length of the hems is more or less up to you. And it also depends on the material - the ribbed hem knit can be shorter than the smooth one because it is more flexible and tends to stretch out over time. You may have to cut the pieces a little longer to make them comfortable when using more rigid knits... And last but not least, it depends on the children whom will be wearing the pants - each child is different (boys usually prefer looser clothes).
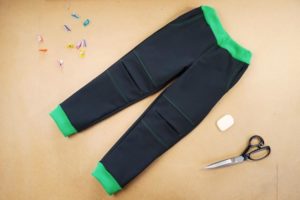
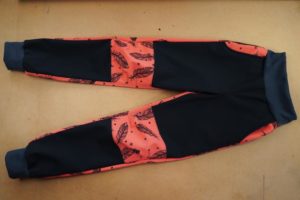
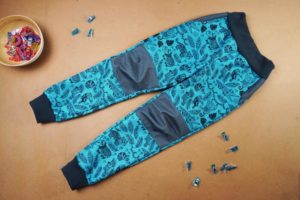
Correct sizes of the hems are therefore individual matter. Fairly reliable way to find the right size is to wrap the hems around the child’s leg/waist. Another possibility is to measure clothes that fit the child.
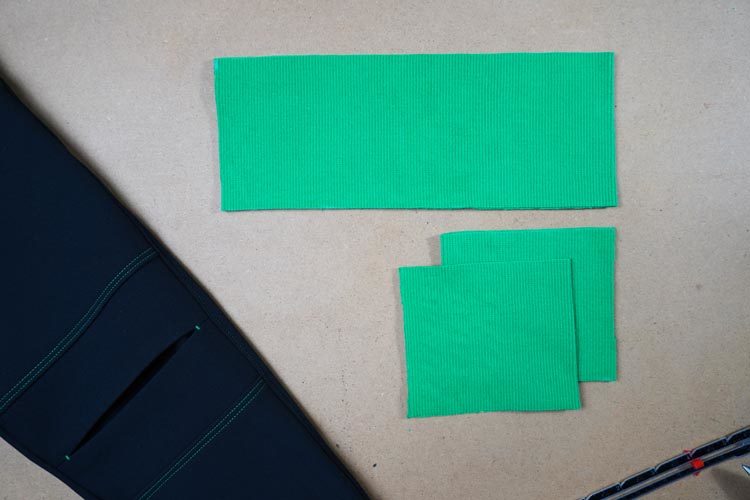
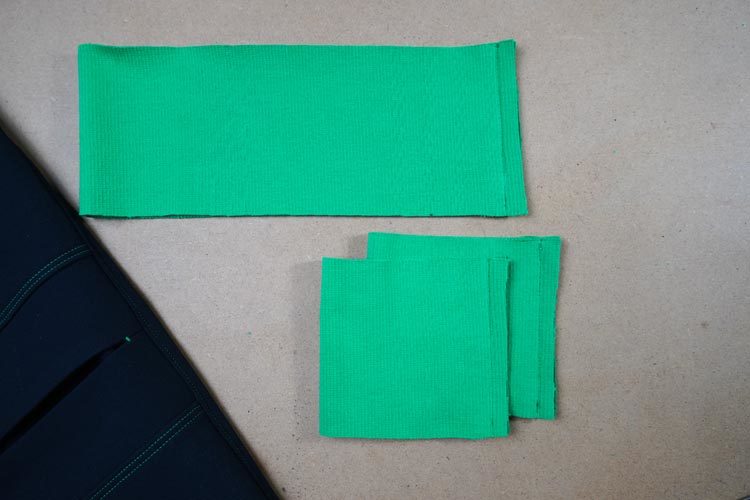
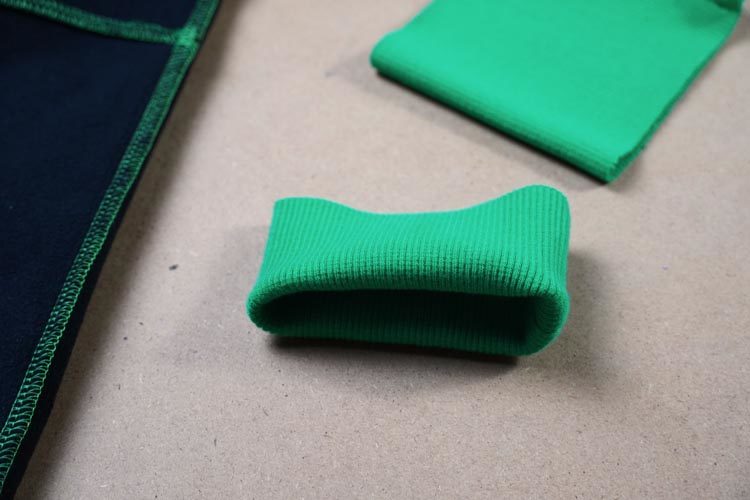
Fold the hem knits in half and sew them.
Also measure the correct length of the elastic waistband. Best way is to wrap it around your child’s waist. Because there is no chart of correct sizes - waistbands differ and each child likes different tightness of the waistline. Sew the ends of the elastic waistband. Try to make the seam as flat as possible.
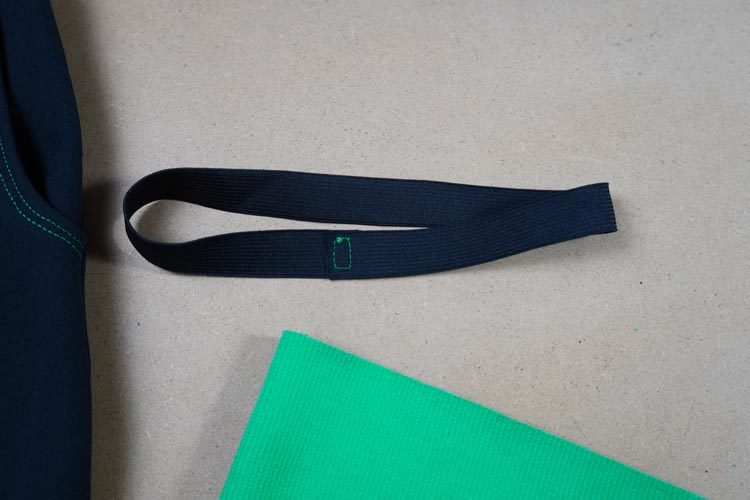
Place the waistband around the waistline hem (which is turned face side in).
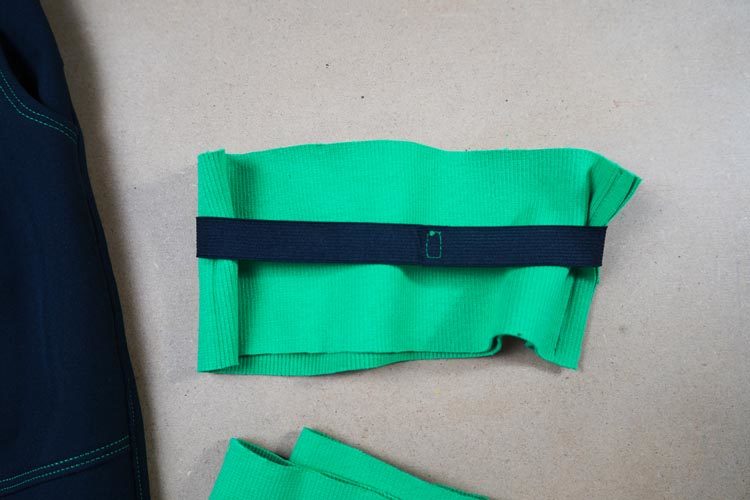
Fold (roll) the hem over the band. Now you have the hem face side out with elastic band inside it. I recommend marking the quarter points on the hem. This will help you to pin the hem to the pants correctly.
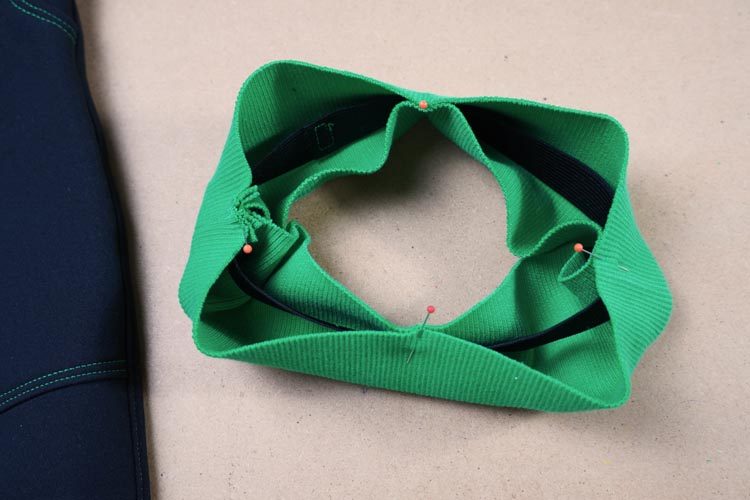
Pin the hem (with elastic band inside) to the face side of the pants.
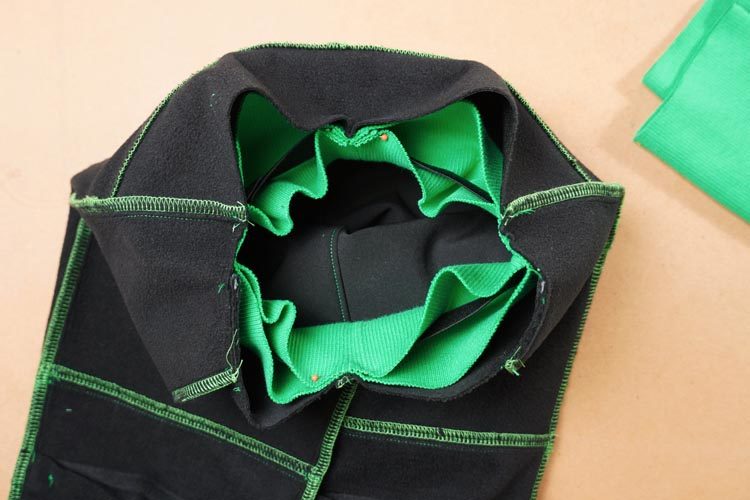
Prepare the leg hems in the same way. I did not put the elastic bands inside the bottom hems, but you can do that if you want to. This will help to keep the legs from sliding up (when wearing high rubber boots for example).
Sew the hems to the pants. This needs to be done with elastic seam, so you can sew directly on overlock or with zigzag seam for example. Pull free ends of thread chain under the loops when sewing on overlock.
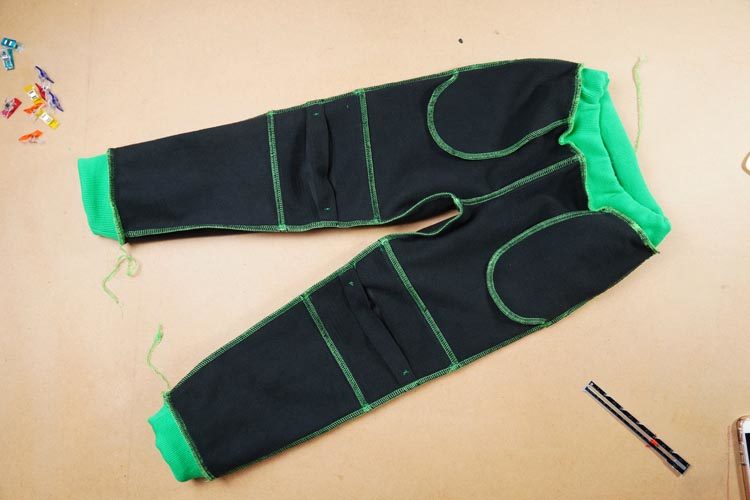
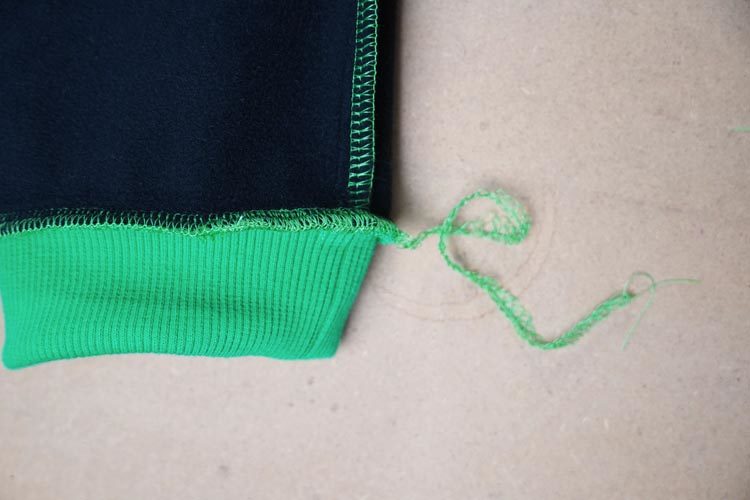
This was the last step - pants are ready!
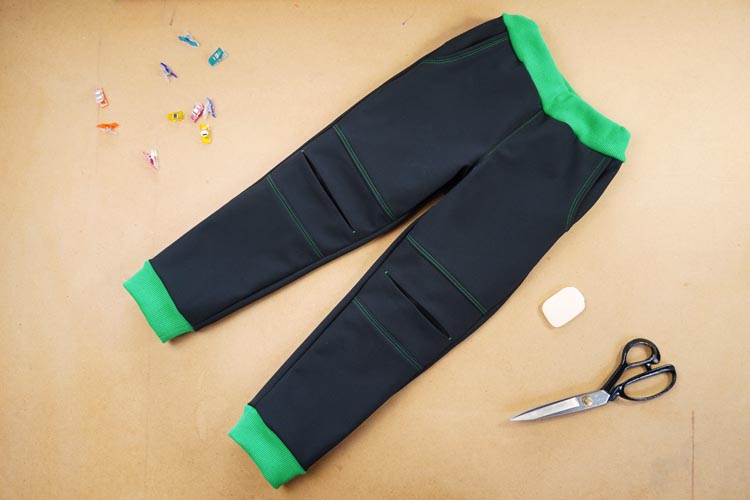
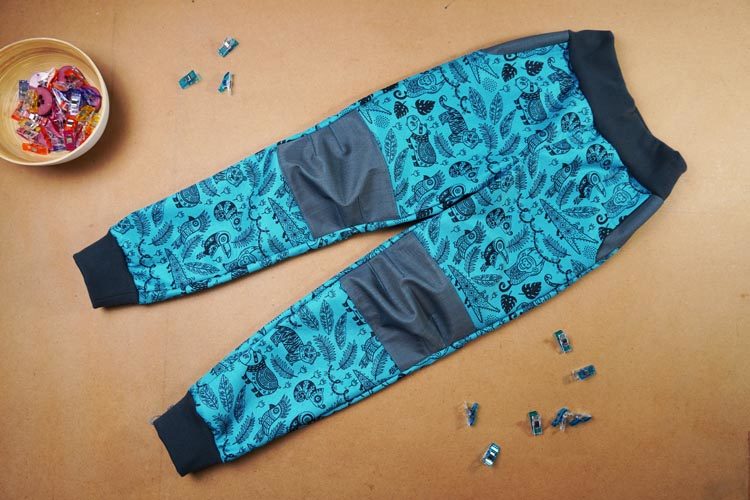
The following picture shows the knit hidden in the leg. This is how your growing pants are likely to look at the beginning. Our children usually do not worry about it and wear pants with hems on the outside right from the beginning. Again, it is up to you or your child.
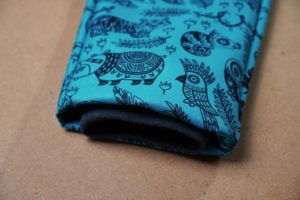
In the photo below you can maximum and minimum length of pants of one size…

Next picture shows size 104 of both growing pants and children’s pants BASIC.

You have gone through the instructions a we also went over the advantages of growing pants. So which pants will you sew for your children this time?
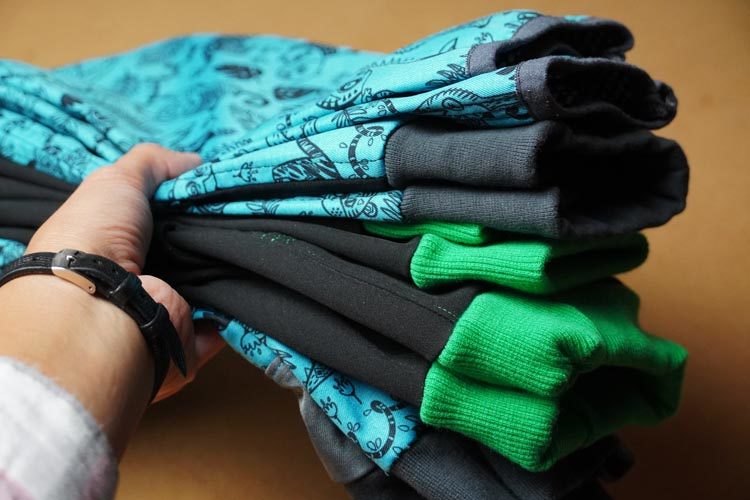
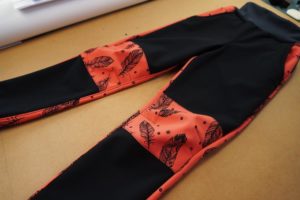
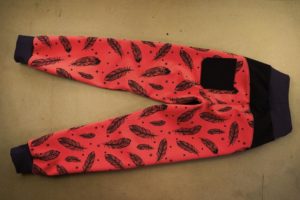
If you have a moment, leave a comment about how you liked the pattern and today's instructions below the article. I will also be pleased by any feedback on the layout of today's article (chapter system). Do you find the possibility of skipping from chapter to chapter useful? For example, when you follow the instructions for several days and you do not have to scroll through the instructions each time, but simply jump to any part right from the beginning of the article. Or is it something that won't help you because you read articles from start to finish? And of course, I will also be very happy if you let me know how you like the new pattern.
You can buy this pattern for children’s pants here:
Pattern for children’s softshell pants LET’S GROW (sizes 80 - 164)

