


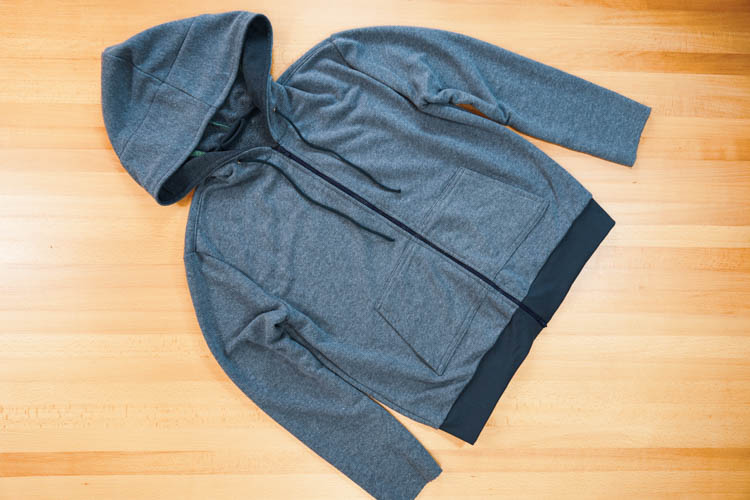
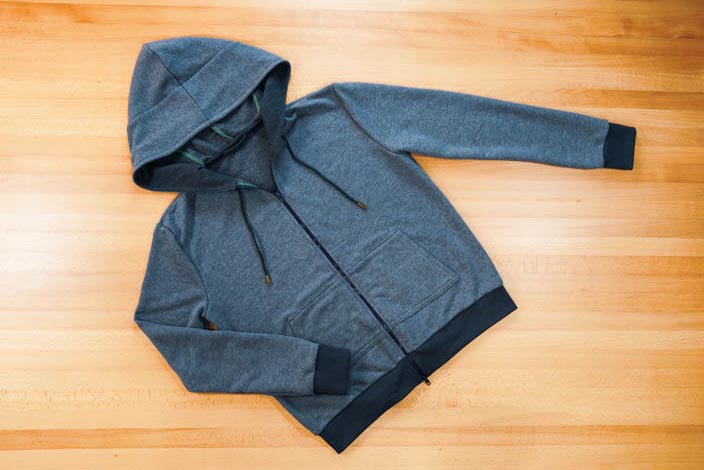
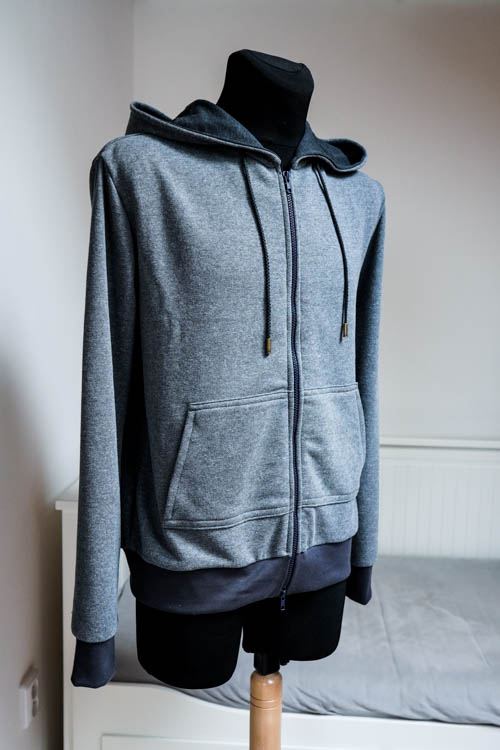
In today's article, I would like to show you my new pattern for a hoodie. So far, this particular pattern is available in men's sizes 44-66 and women's sizes 32-60. In time, I will also publish this pattern in children's sizes. In this article, you will find step-by-step instructions on how to sew the hoodie MY BOY.
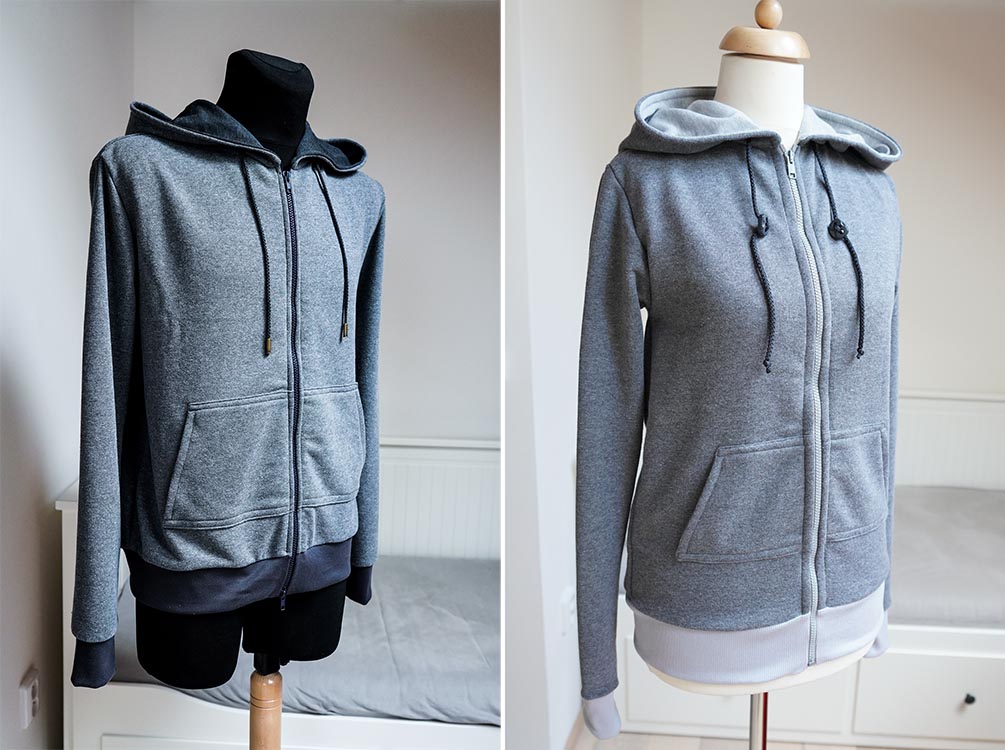
Sewing pattern for women’s & men’s hoodie
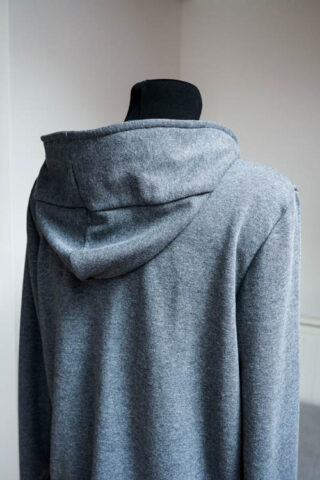
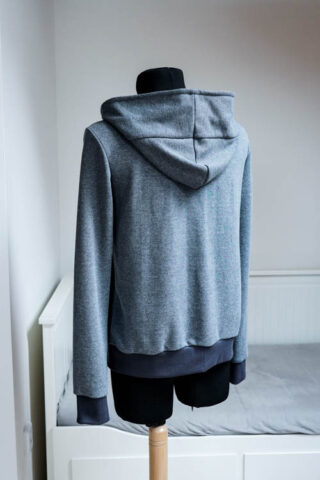
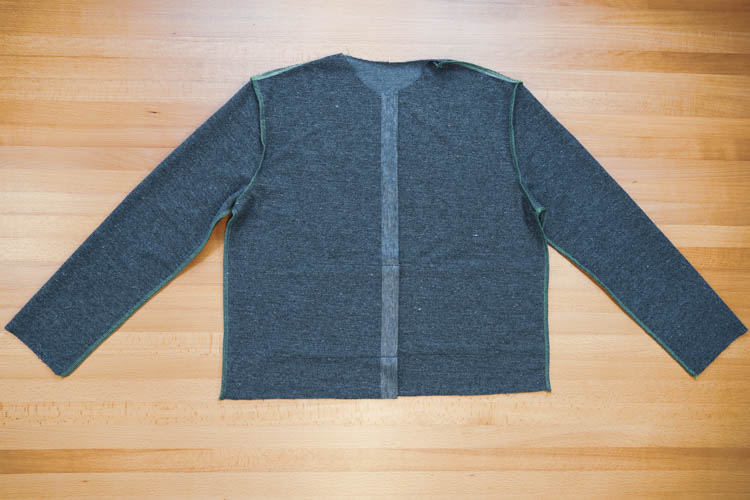
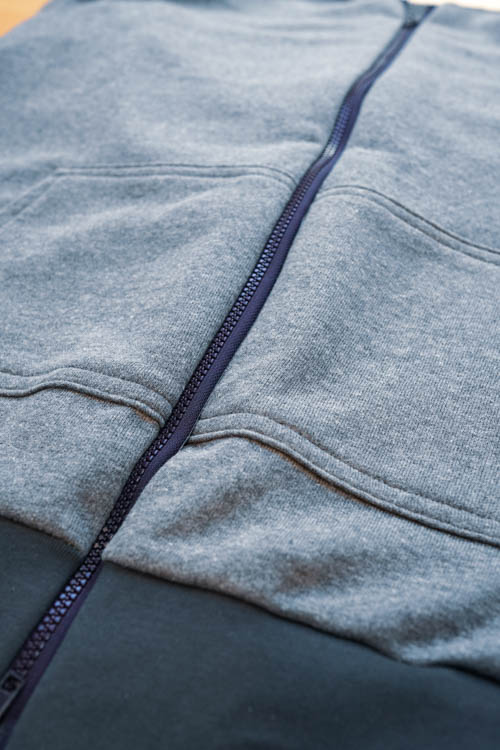
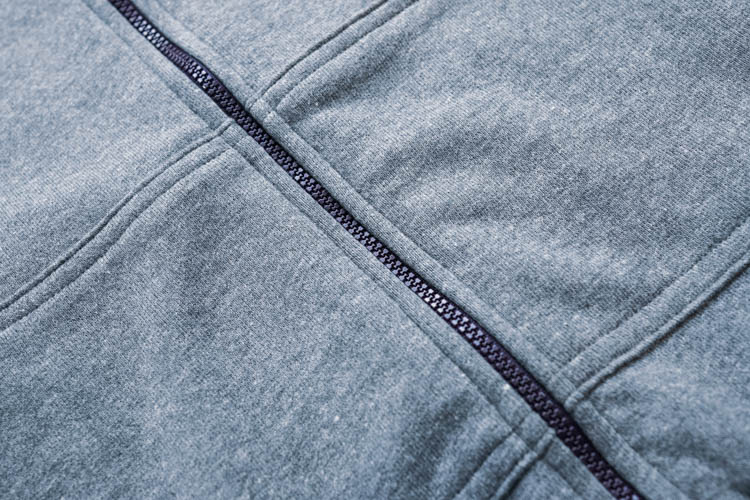
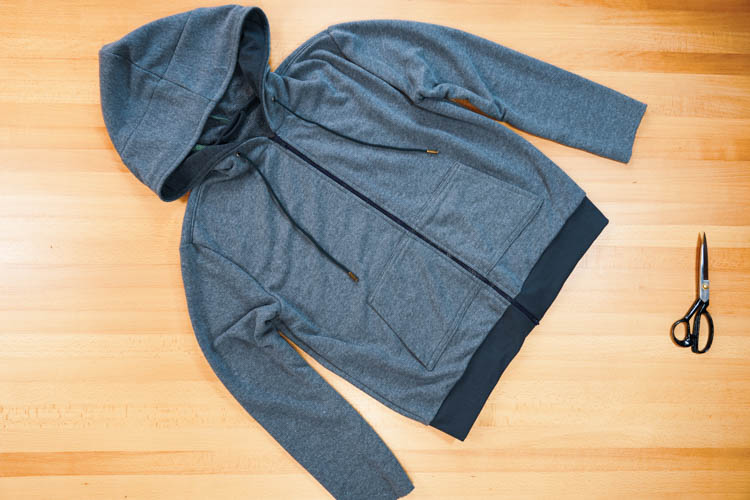
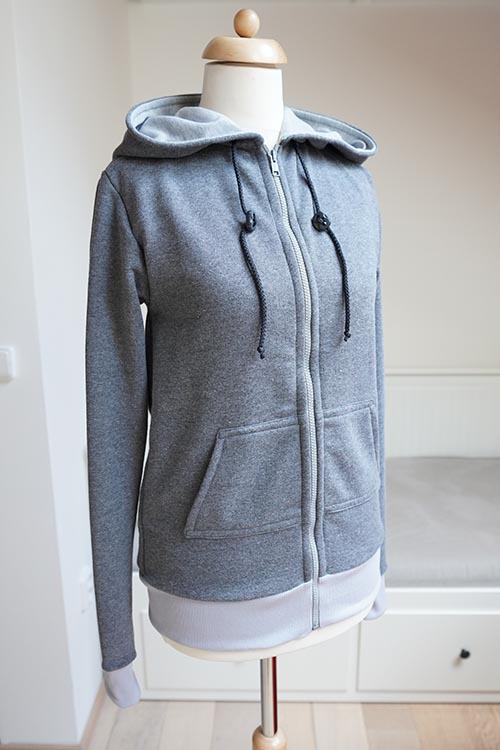
The hoodie is of a loose fit. It has a zipper and split kangaroo pocket (two patch pockets). The bottom hem and sleeves are finished with rib knit hem bands.


Recommended material
This pattern is designed for thick knits such as combed or uncombed laid-in knit, fleece, fleece sweater knit, etc.

The required amount of material:
(for 140 cm / 55" wide fabric)
- Sizes < 54: 2 m / 79"
- Sizes > 56: 2.2 m / 87"

You will also need:
- 70 cm / 28" long divisible zipper
- Hem knit – about 50 cm / 20" (for 140 cm / 55" wide sheet)
- thin one-sided fusible interfacing for reinforcement of the front pieces (around the zipper) and shoulder seams. You can also use Lastin to reinforce shoulder seams.
- Hood:
- two grommets
- drawstring (about 1.4 m / 55" long)
- two aglets
My tip:
I sewed my sweatshirt partly on a serger and partly on a regular sewing machine. If you do not have an overlocker sewing machine (serger), you can easily sew the whole hoodie on a regular sewing machine. Just reduce the bobbin thread tension and the presser foot pressure. You can use a zig-zag stitch to clean the cutting edges. You can find out more about sewing elastic fabrics on a regular sewing machine here:


Sewing instructions
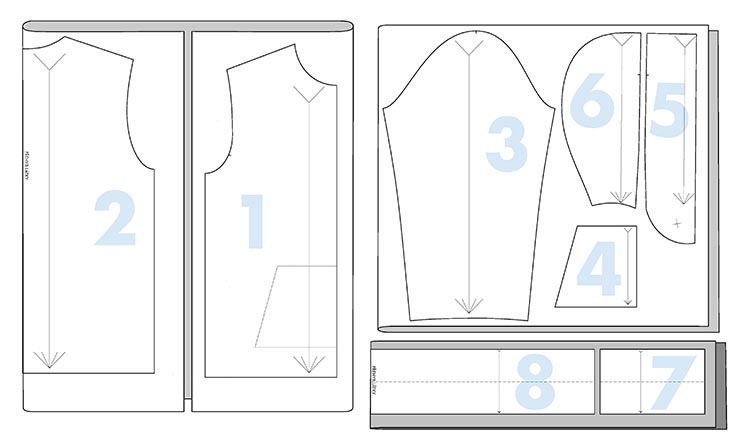
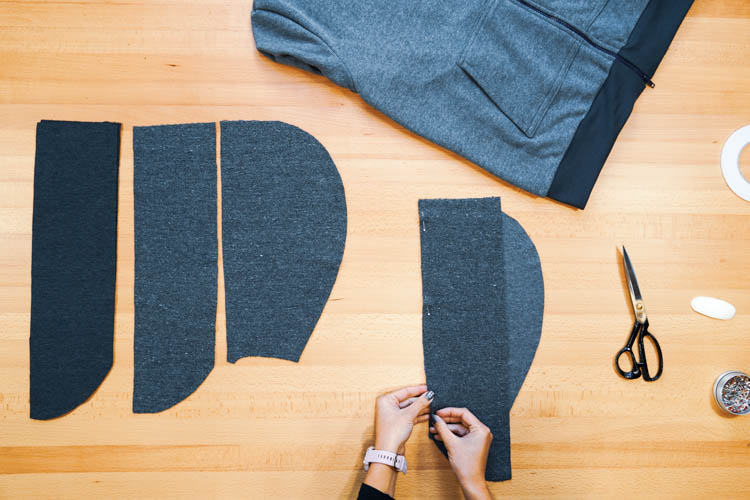
Pattern layout
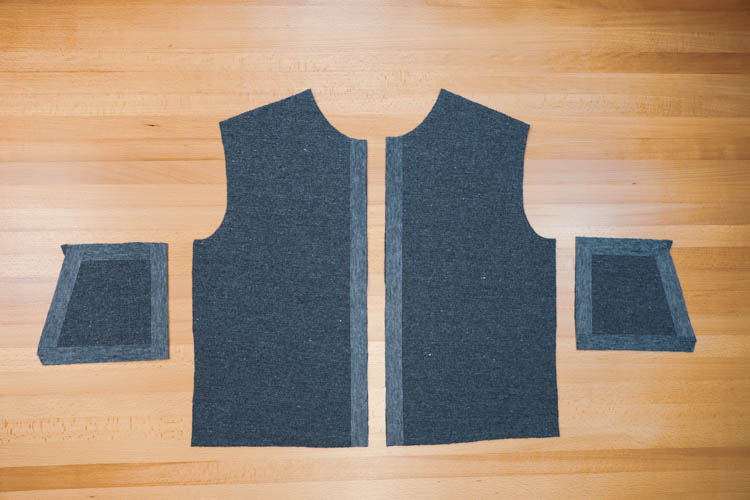
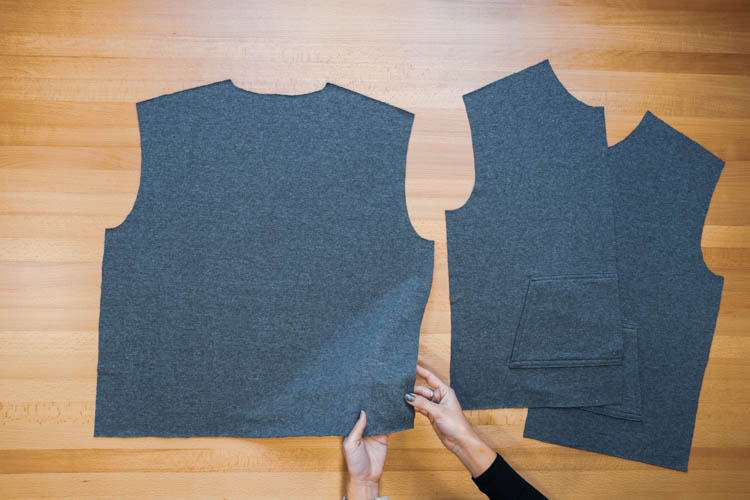
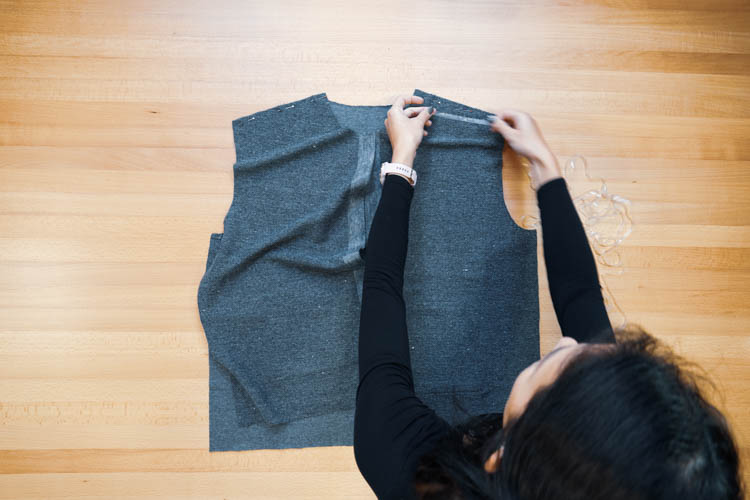
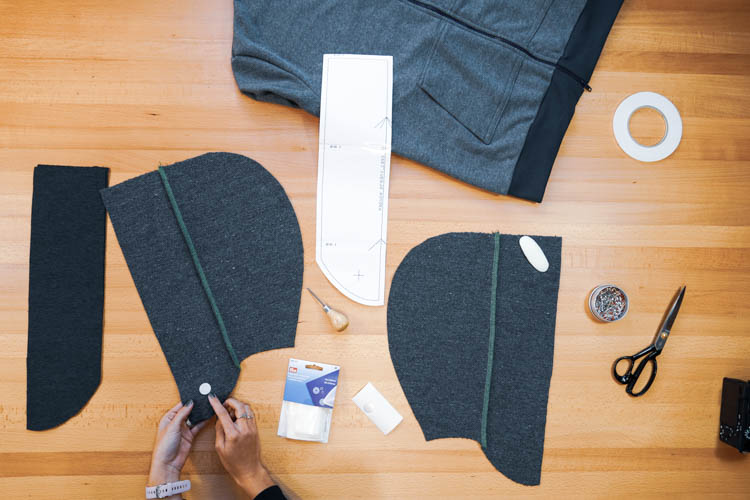
1- Position & prepare the pieces
- Primary fabric:
- 2x front piece
- 1x back piece (cut on the fold)
- 2x sleeve piece
- 2x pocket piece
- 4x front part of the hood (alternatively 2 pieces from the primary fabric and 2 pieces from the secondary/contrasting fabric)
- 2x back part of the hood
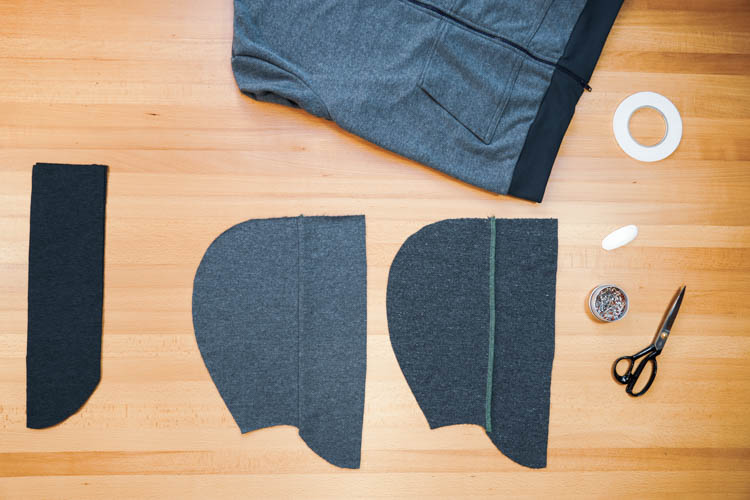
- Hem knit:
- 1x bottom hem (folded fabric cut)
- 2x sleeve hem - cuffs
The seam allowances to which the zipper will be attached (on front pieces and pockets) are 1.5 cm / 5/8" wide. The remaining edges of the pockets have 2 cm / 3/4" wide seam allowances and the same is true for the shorter sides of the bottom hem (where the zipper will be). All other seam allowances are 1 cm / 0.4" wide.

2 - Interfacing
Reinforce the center edges of the front pieces and all edges of both pockets with 2 cm / 3/4" wide strips of one-sided fusible interfacing.
Pockets
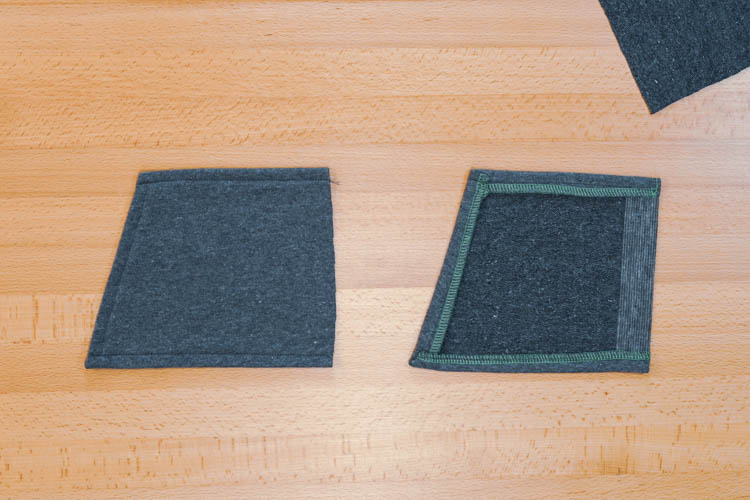
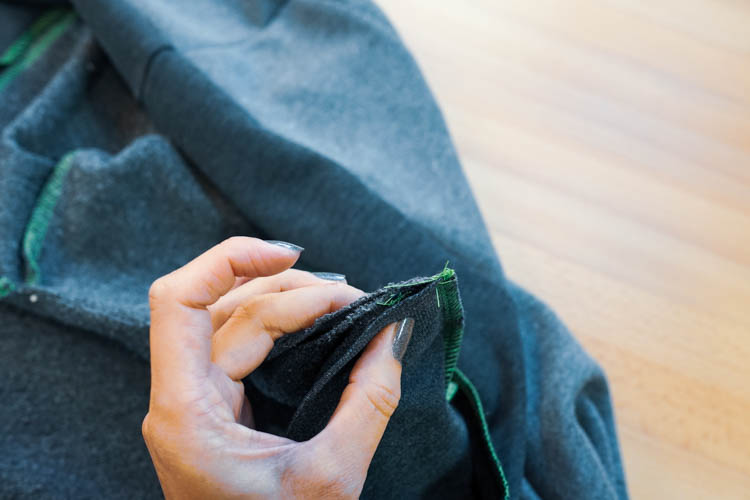
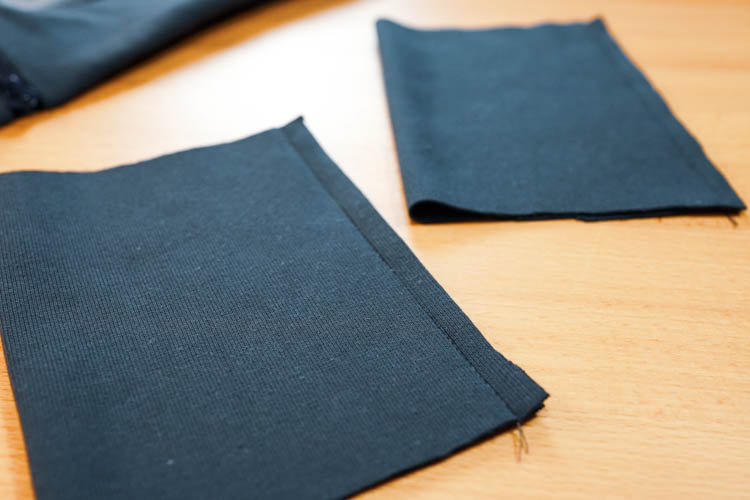
3 - Prepare the pocket pieces
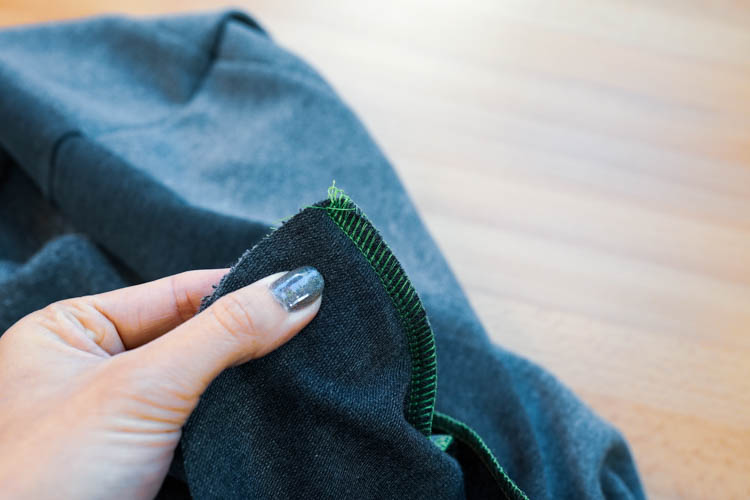
First, prepare the pocket pieces - clean the outer edges - top, bottom, and pocket opening (slanted edge).
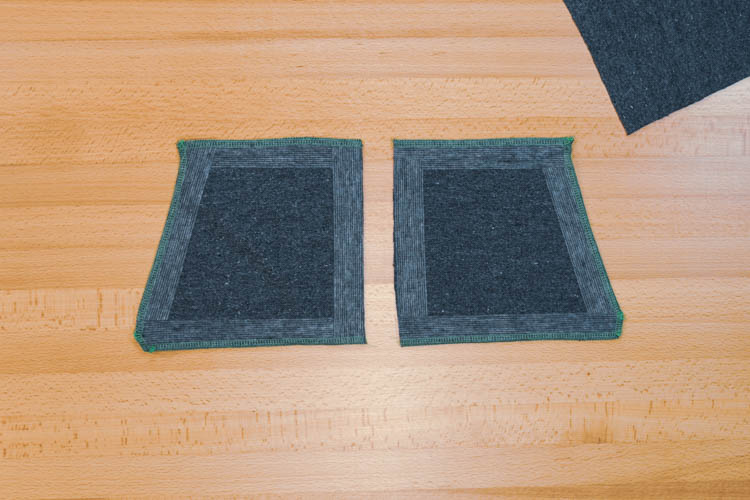
Fold the cleaned edges 1.5 cm / 5/8" to the reverse side and sew through them from the face side of the pocket.
4 - Sew the pockets to the front pieces
Use pins to mark the future position of the pockets on the front pieces. The recommended position is marked in the pattern Pay attention to accuracy, even a small difference in the position of the pockets will be obvious at first glance. You can adjust the position to your liking, but the pockets must be positioned exactly the same on both sides.
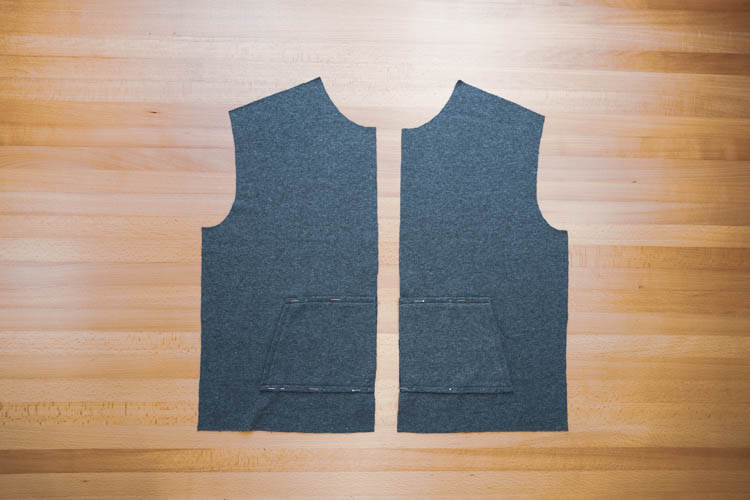
If you are afraid that your pockets will shift when you sew them, you can baste (temporarily stitch) them to the front pieces.
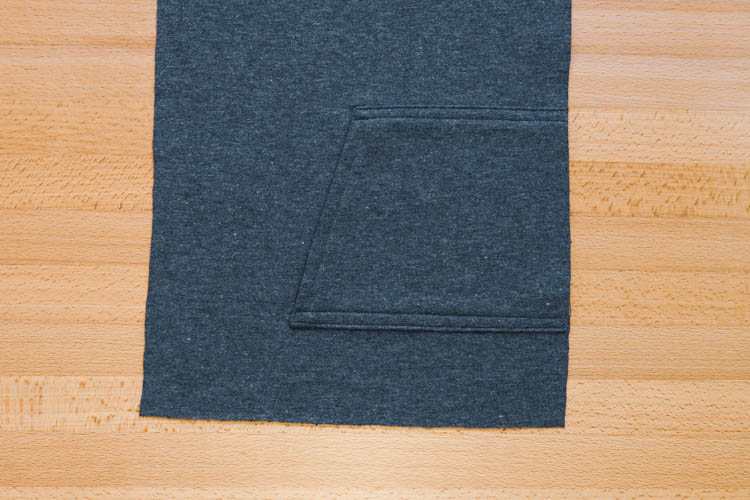

Sew the top and bottom edges of the pockets to the front pieces. Sew close to the edges. Be careful not to sew shut the pocket opening (slanted side). :)
Shoulder seams
5 - Shoulder seams & Lastin reinforcement
Take the back piece and lay it face side up.
Put both front pieces on top of the back piece (face sides to face side). I recommend reinforcing the shoulder seams with Lastin. If you do not have Lastin, you can reinforce the edges of the front pieces with strips of one-sided fusible interfacing. Strips should be about 1 cm / 0.4" wide. Pin both shoulder seams.
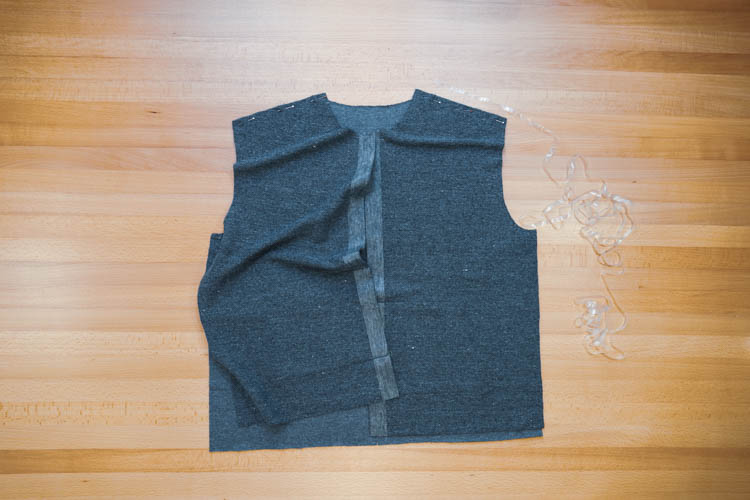
If you have reinforced the shoulder seams with fusible interfacing, you can now sew and clean them. If you have decided to use Lastin, you will need to work it into the seam. Place the Lastin strip on top of the pinned shoulder seam. Allow about 2 cm / 3/4" of the Lastin strip to protrude beyond the seam.
Sew the shoulder seams and don’t stretch the Lastin strip.
Finish the shoulder seam and cut the Lastin strip.

You can now trim the excess parts of the Lastin strip.
Work on the other shoulder seam in the same way.
Turn the pieces face side out and check the seams. They shouldn’t be wrinkled and they should be the same length on both sides.

6 - Topstitch the shoulder seams
Press the seam allowances towards the back piece and topstitch both shoulder seams.
Sleeves
7 - Sew the sleeves in flat
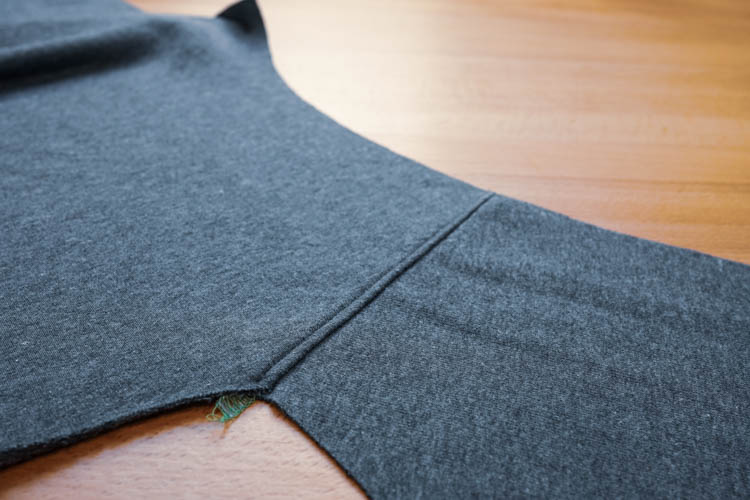
Spread the torso part on your table, so you can access the open armhole easily. Lay the first sleeve piece on top of the torso (face side to face side) and pin the top of the sleeve cap to the shoulder seam. Don’t swap the sleeves - the mark on the front part of the sleeve corresponds to the mark on the front piece of the sweatshirt.
Subsequently, pin the mark on the sleeve to the mark on the front piece of the sweatshirt.
Finally, pin the edges of the sleeve cap to the armhole.
Sew the sleeve to the torso and clean the seam.
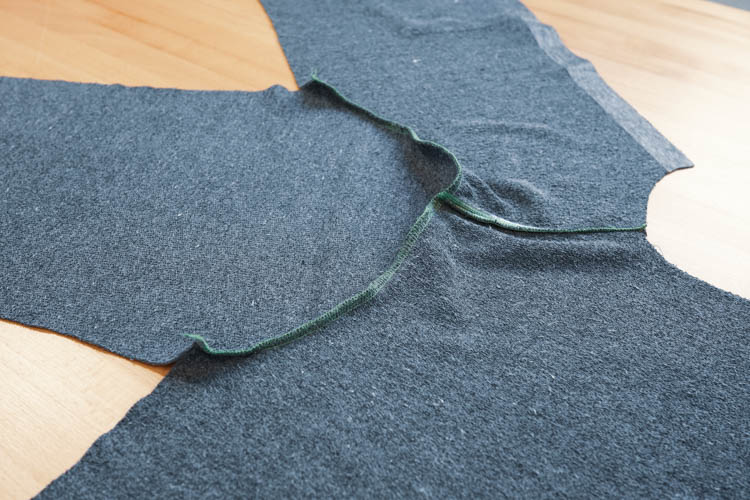
Sew the other sleeve in the same way.
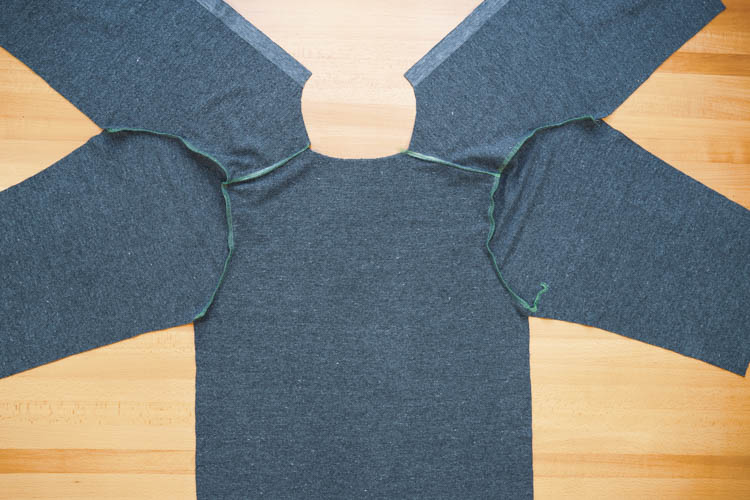
Sleeve seams & side seams
8 - Sew the side seams & sleeve seams
Have the sweatshirt inside out and pin the sleeve and side seams - the edges of the sleeve cap (armscye) must be aligned precisely, so you can later sew both seams in one go.
Sew the side seam and sleeve seam in one gg. Then clean the seam allowances. Sew the other side of the hoodie in the same way.
Bottom hem
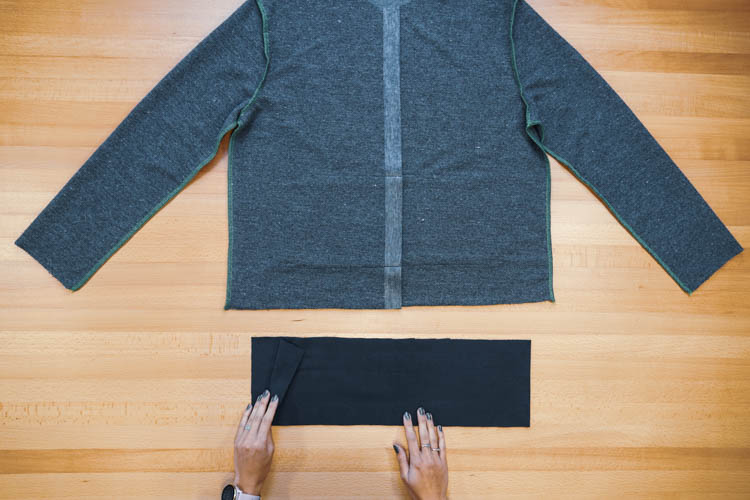
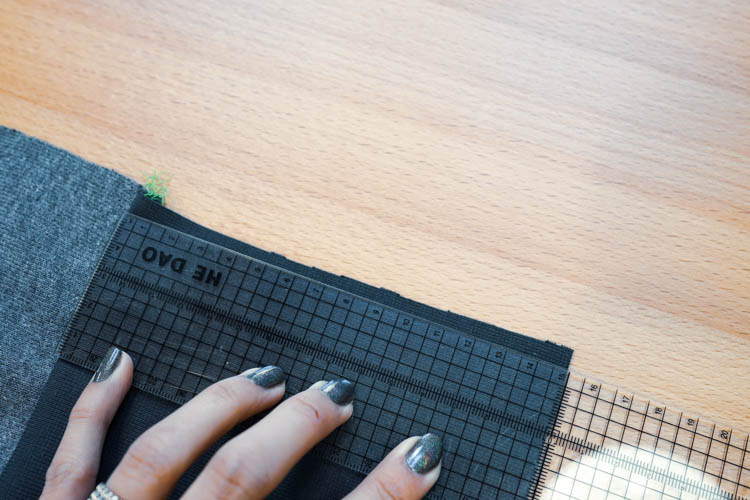
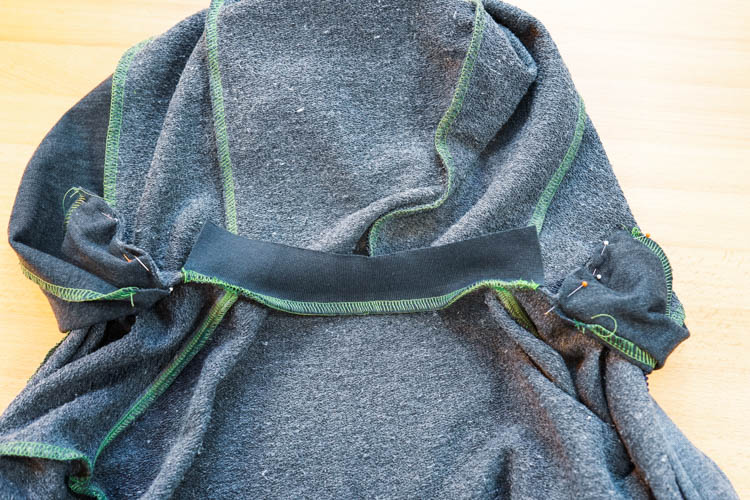
9 - Sew the rib knit to the bottom edge
Fold the rib knit band in half and pin the fold (half-point) to the middle of the back piece.
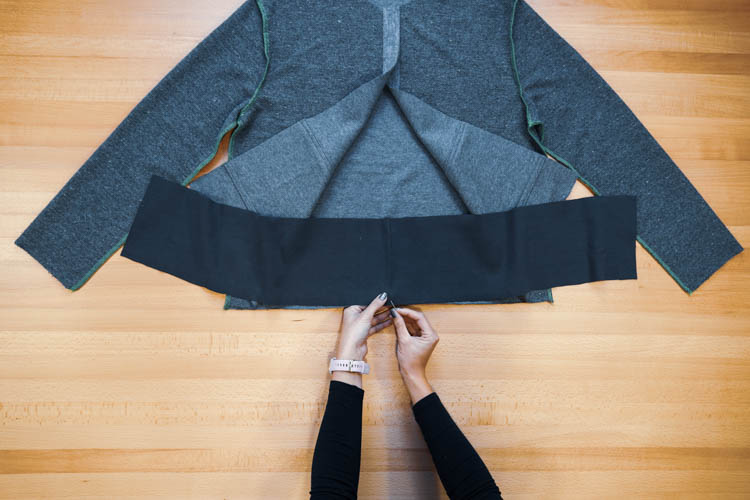
Then fold one of the shorter sides of the rib knit back on itself - its edge should reach about 2 cm / 3/4" beyond the half-point.
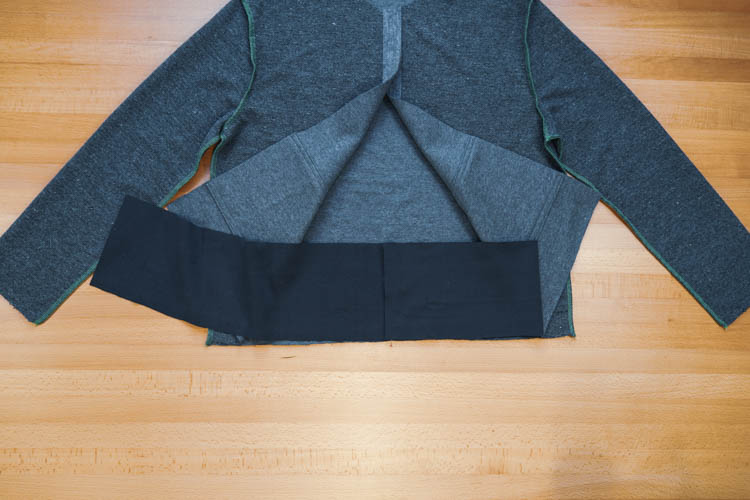
Pin the newly created fold (quarter-point) to the side seam.
Do the same thing on the other side of the hoodie.
Then pin the shorter sides of the rib knit to the edges of the front pieces.
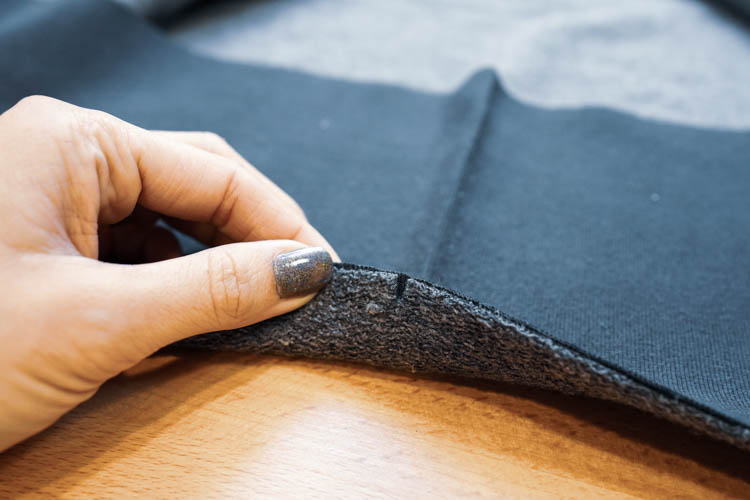
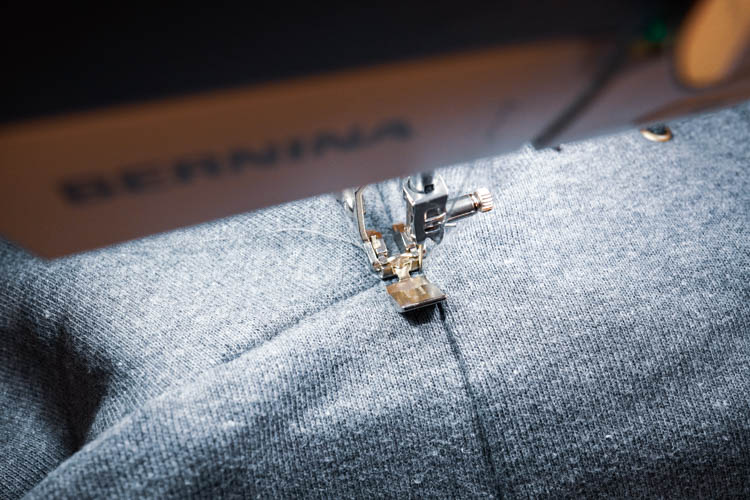
Evenly sew the rib knit to the bottom edge of the hoodie - it’s necessary to stretch the rib knit slightly.
Zipper
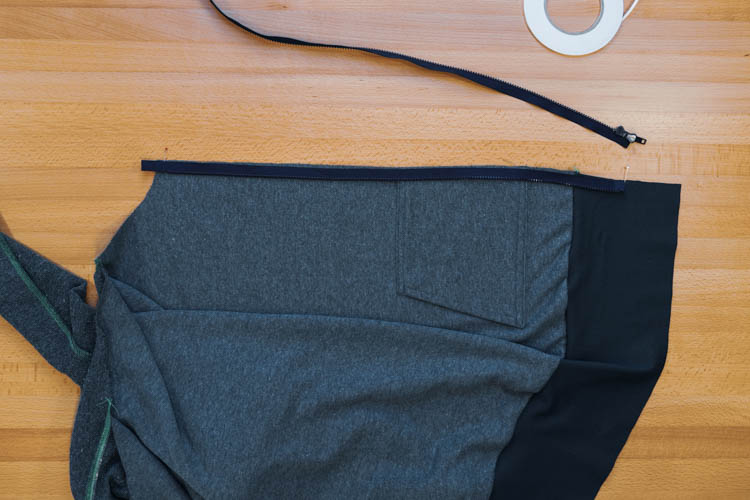
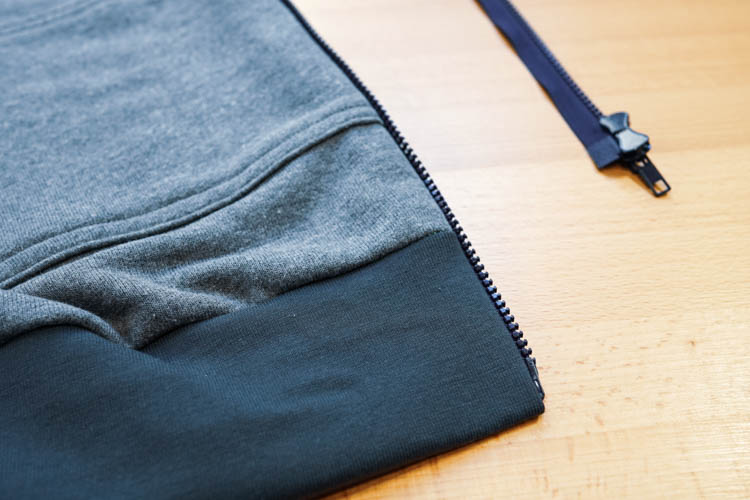
10 - Prepare the zipper
The finished bottom hem should be 7 cm / 2 3/4" wide (the total width of the rib knit including seam allowances is 16 cm / 6.3" , i.e. 15 cm / 5 7/8" from the seam to the edge).
Mark the point 7 cm / 2 3/4" below the seam (the place that will form the bottom edge of the hem) with a pin.
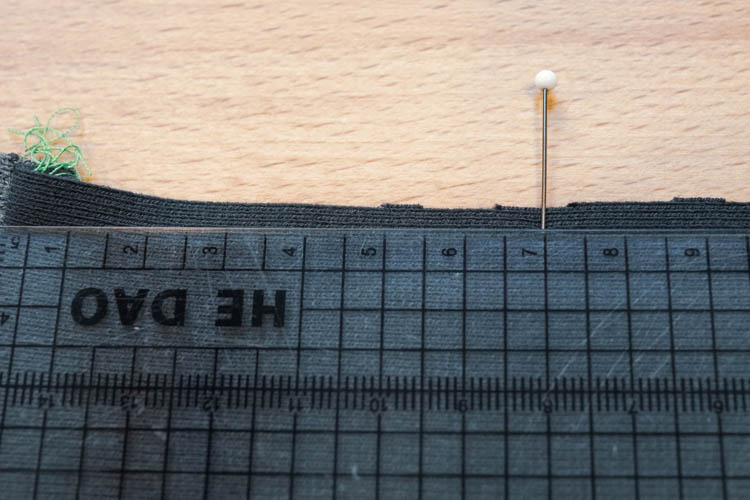
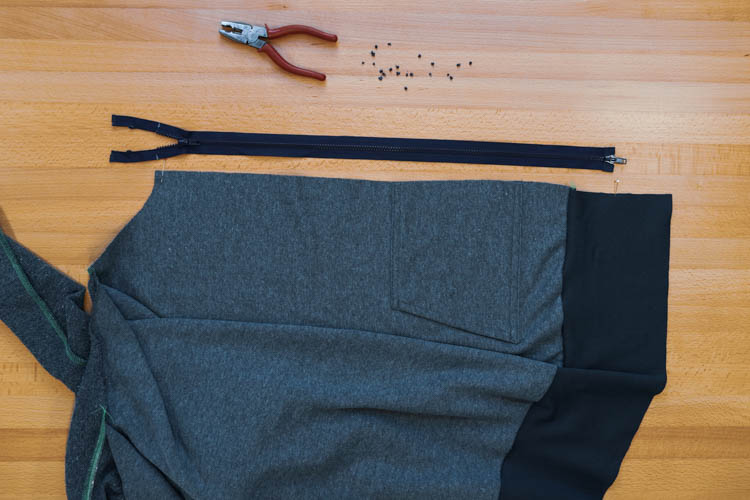
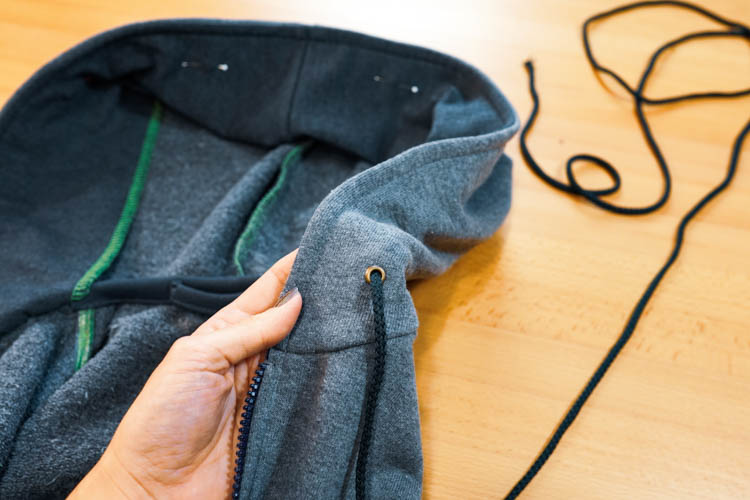
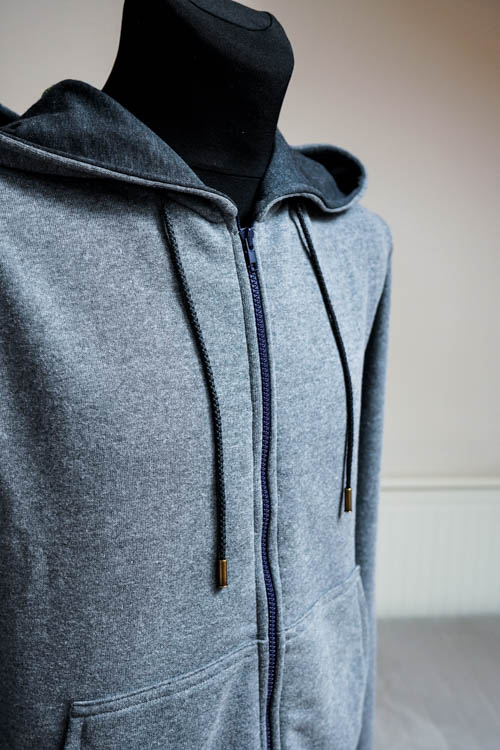
Here will be the lower end of the zipper. If you didn’t manage to buy a zipper of a suitable color and length, you can buy a longer (plastic) zipper and shorten it with pliers. You can read more about that here. The zipper for the men’s version of the hoodie is 70 cm / 28" long.
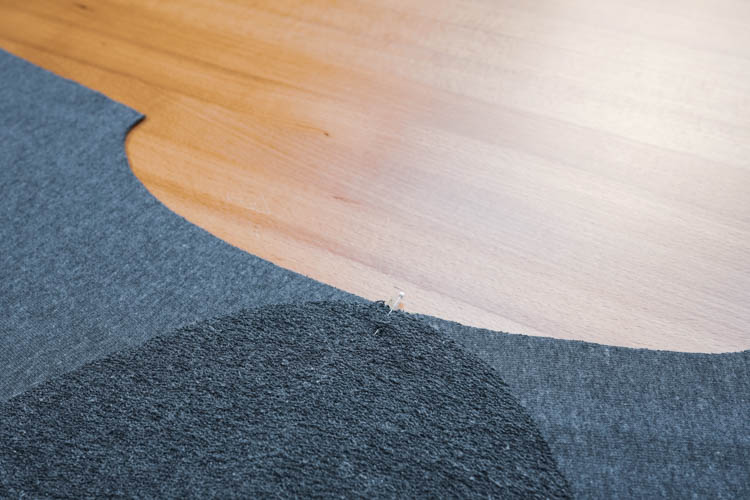
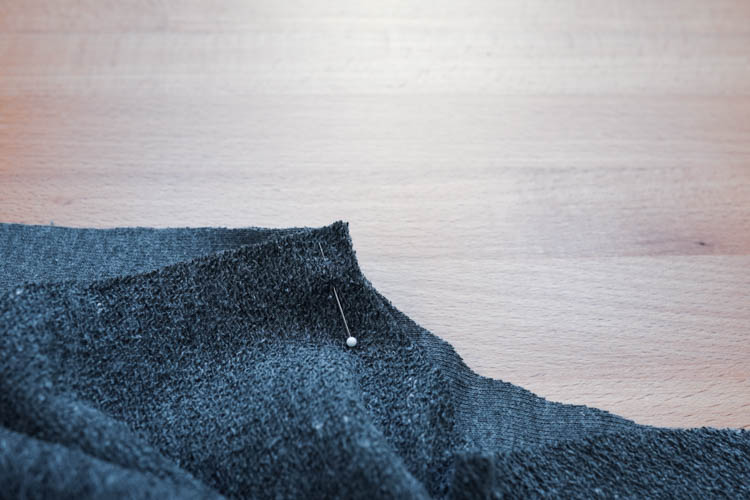
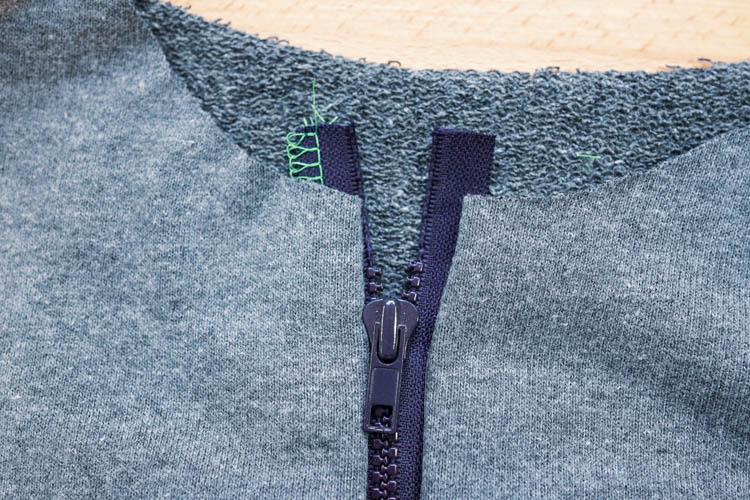
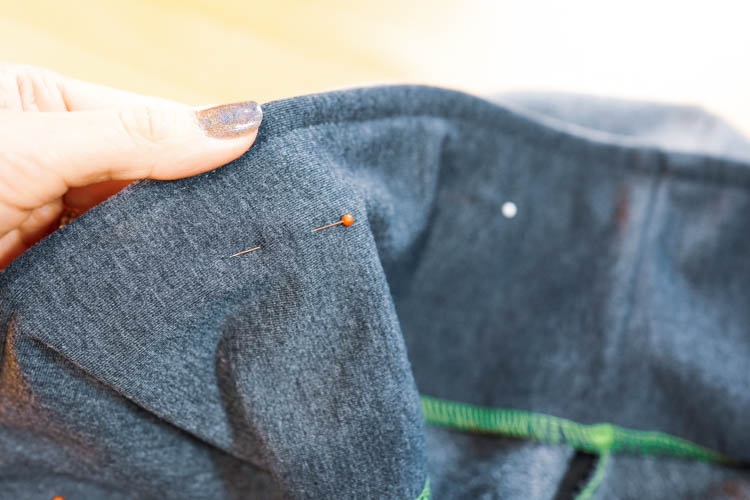
The upper end of the zipper should be 1 cm / 0.4" below the cutting edge of the neckline (in the photo below, this place is marked with a pin).
My zipper was 5 cm / 2" longer than necessary, so I removed the teeth at the top with pliers. When shortening the zipper, make sure that the slider does not slip out of it - it is very difficult to put it back on.

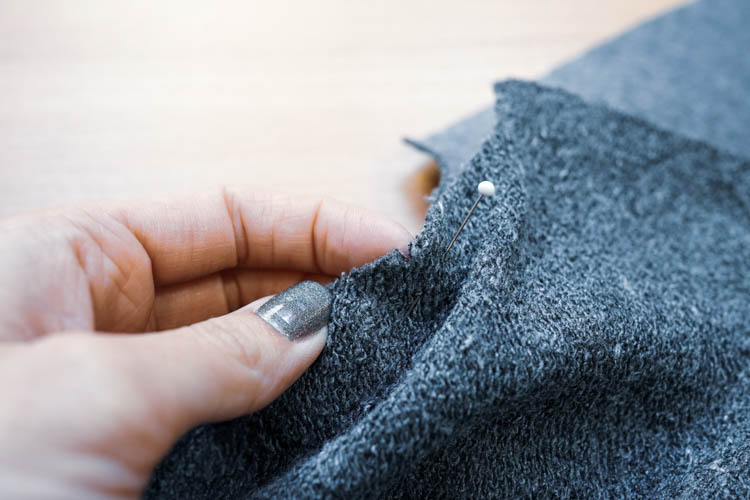
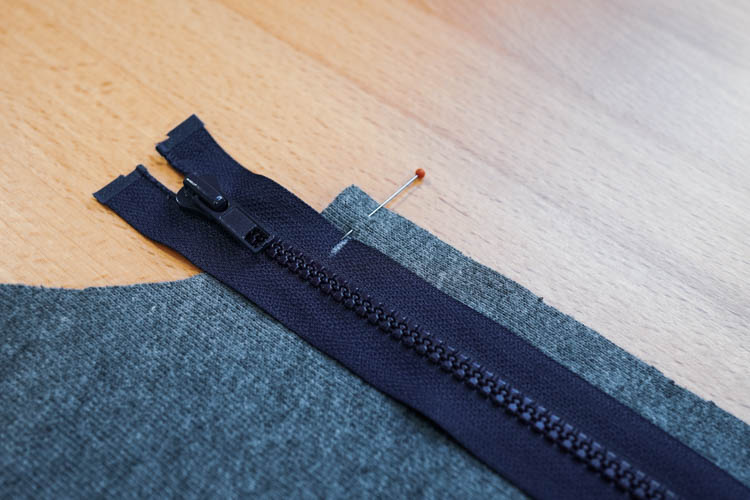
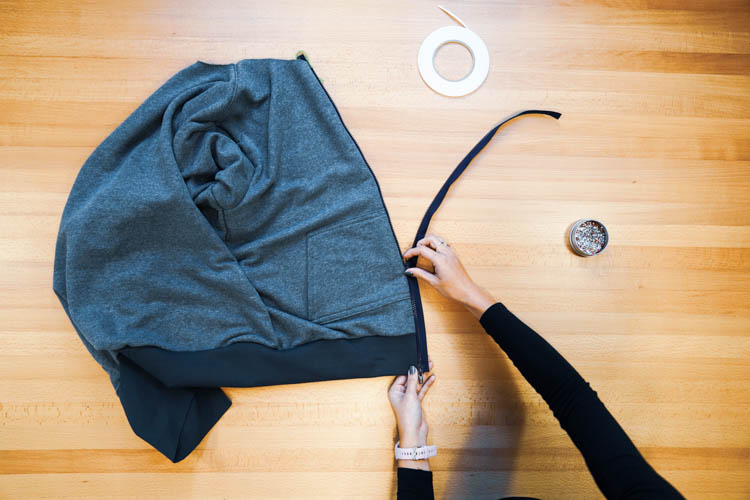
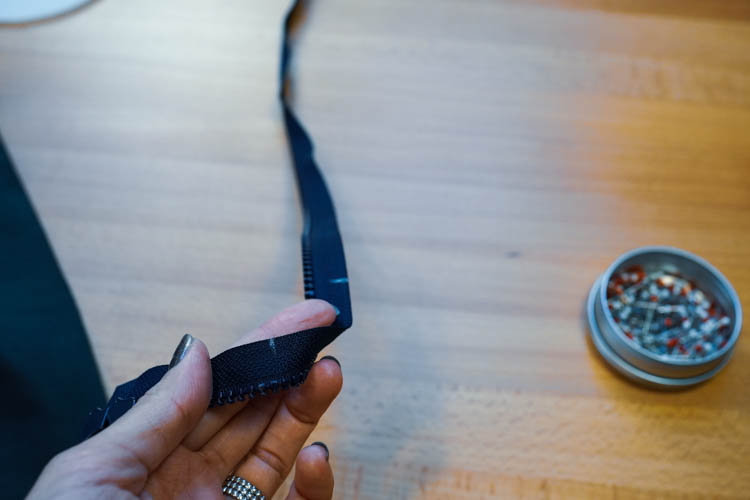
Unzip the zipper so you can pin it to the hoodie.
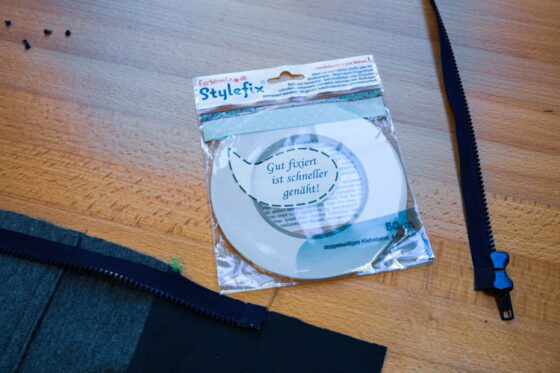
My tip:
You can try STYLEFIX tape (double-sided sticky tape), which will help you attach the zipper to the hoodie. However, it is necessary to take into account that the glue from the tape sticks to the needle, and therefore it is necessary to replace it after sewing the zipper. :)
You can find out more about the STYLEFIX tape here: Sewing with Stylefix tape
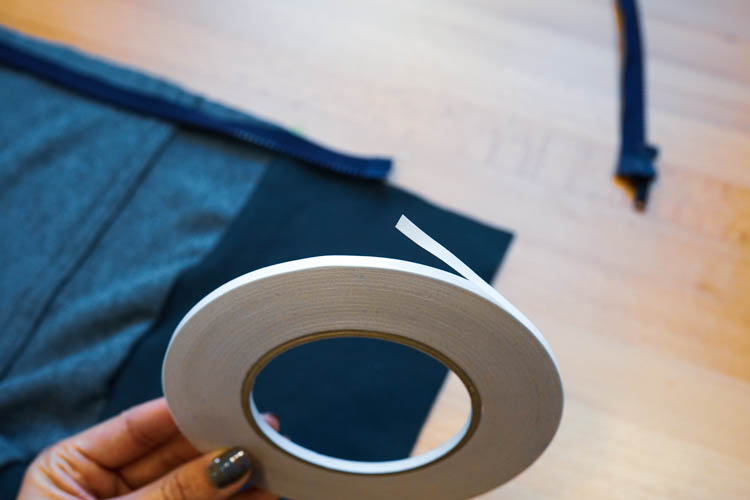
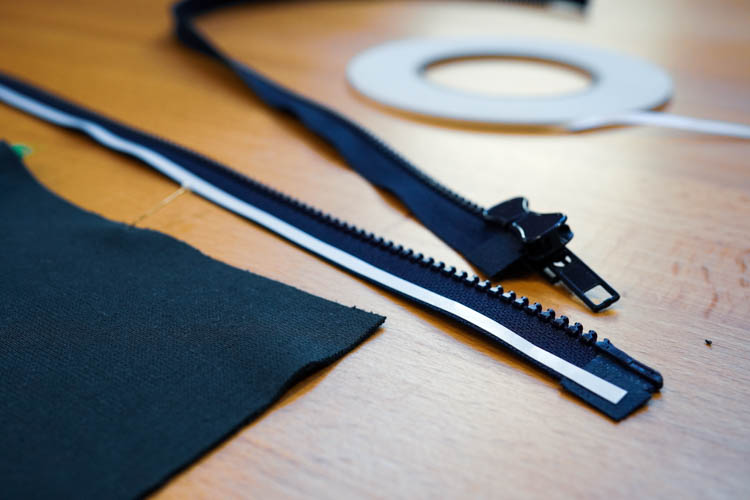
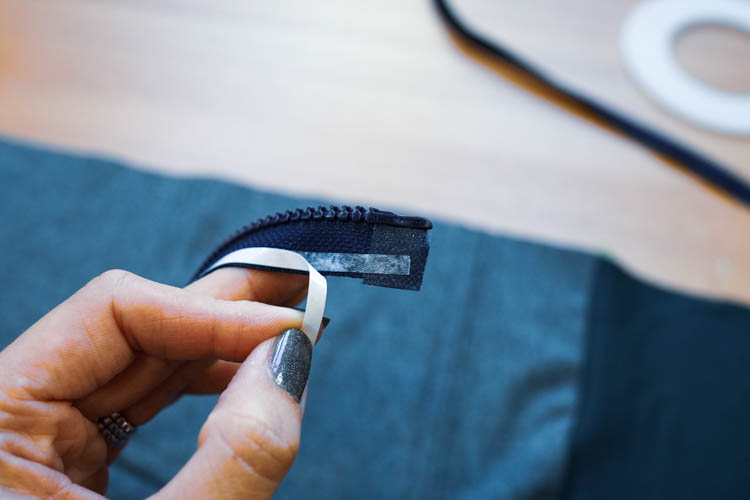
In this case, pins are not enough, because it is necessary to sew precisely, so glue or baste the zipper to your hoodie
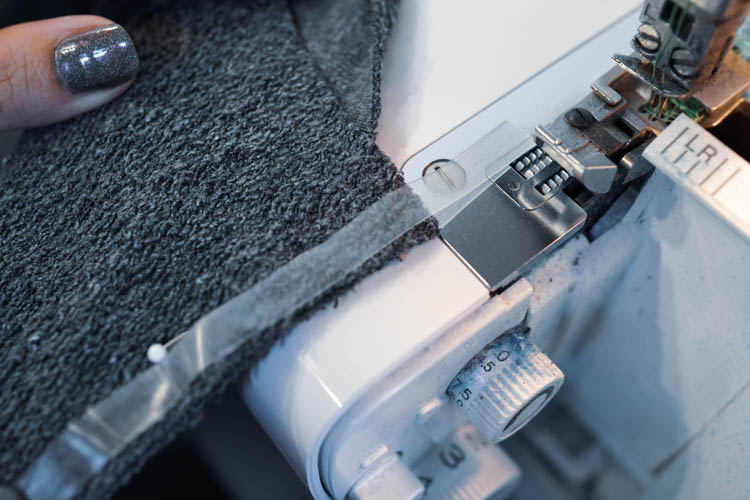
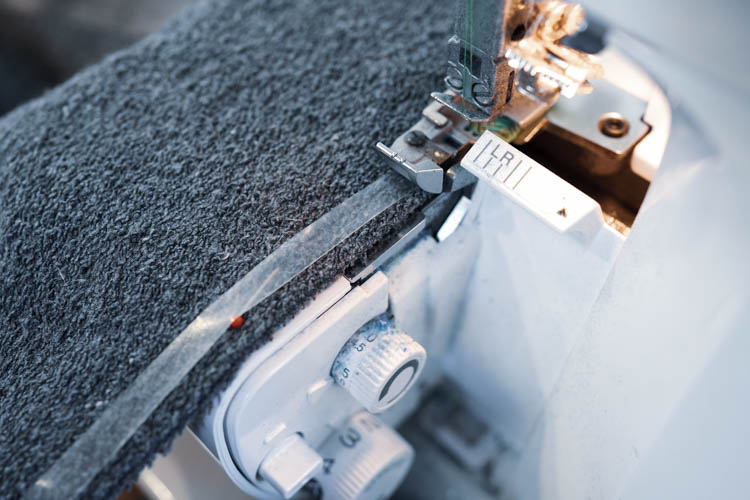
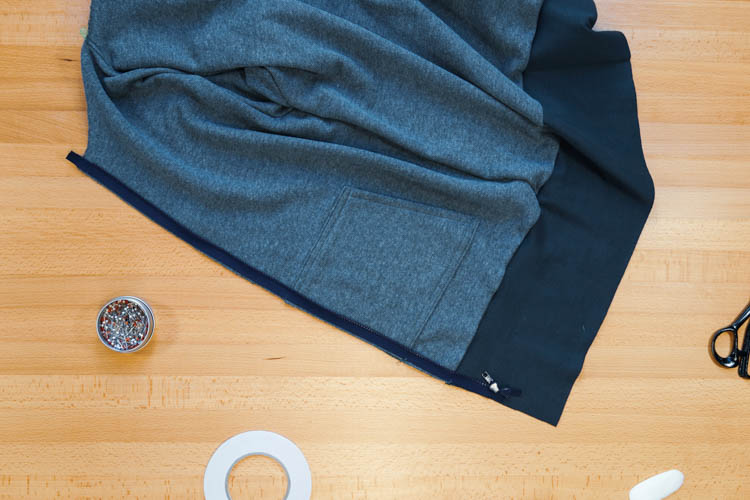
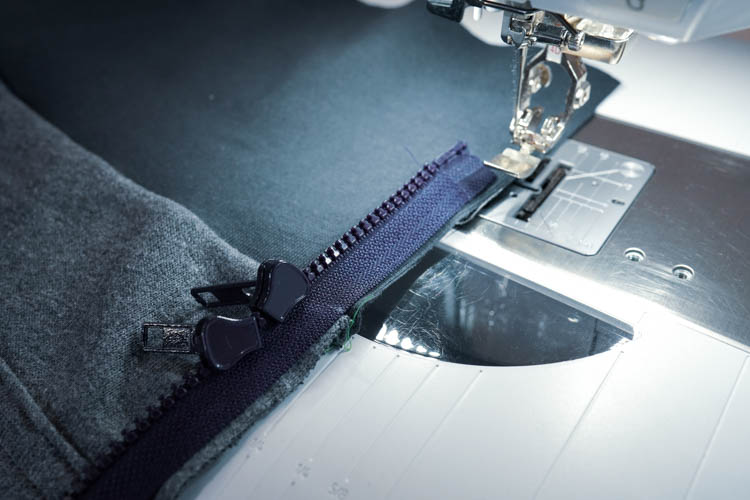
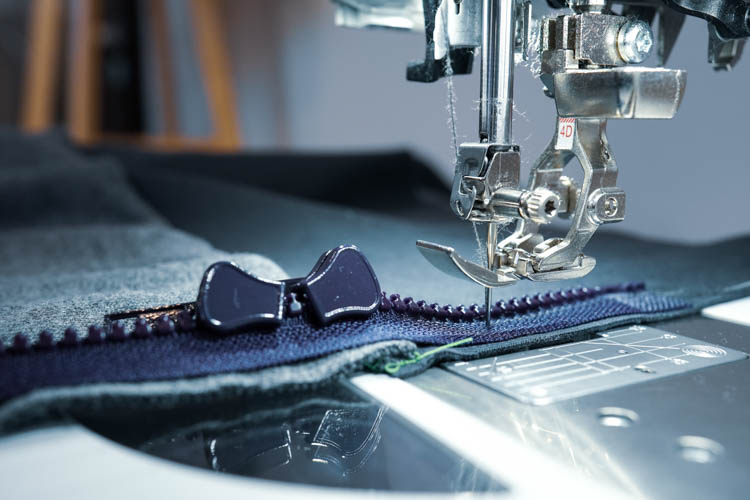
11 - Sew the first side of the zipper
I recommend using a zipper foot. This type of presser foot will allow you to sew close to the teeth of the zipper and at the same distance from the teeth along the entire length of the seam.

Sew the side of the zipper without the slider first.
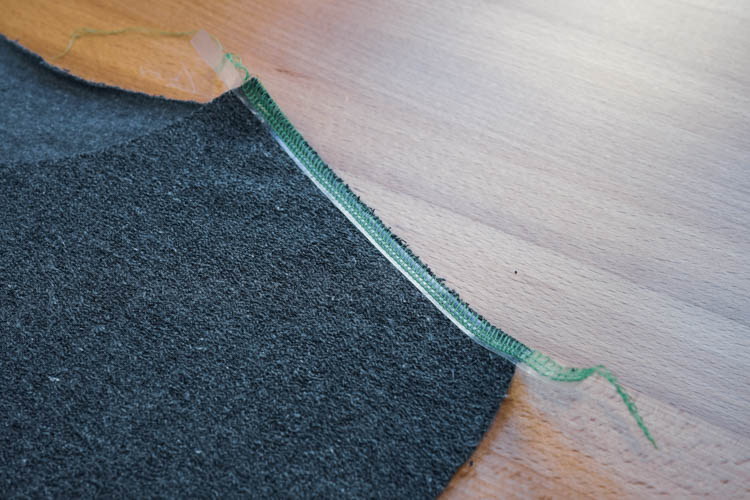
Close the zipper (if you have shortened the zipper, be careful that the slider does not slip off...) and check that the zipper is sewn correctly. The slider should move up and down without difficulty and the zipper tape should be firmly sewn along its entire length. Unzip the zipper if everything seems to be in order.
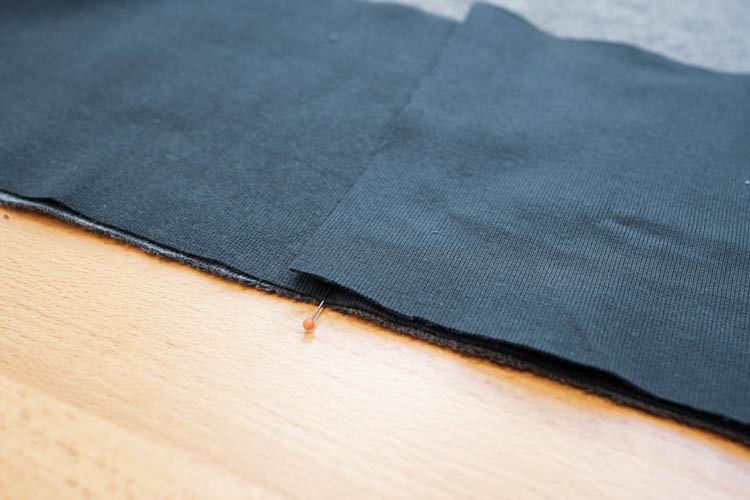
12 - Finish the first side of the bottom hem
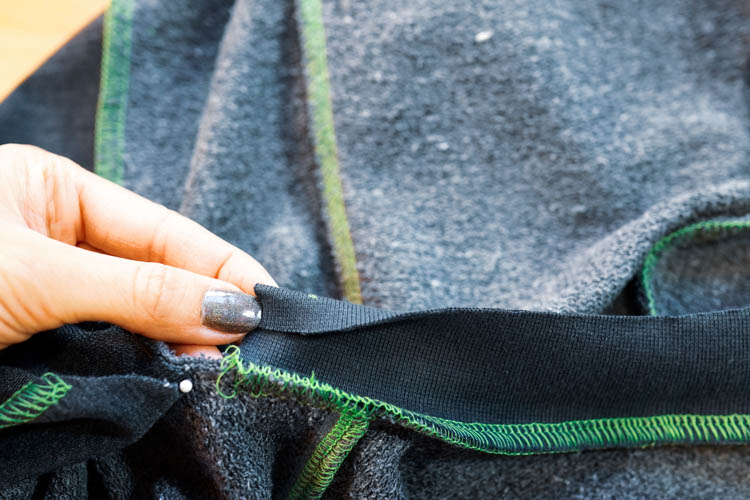
We fold the face side of the rib knit over the sewn side of the zipper. Pin the hem.

Clean the edge of the front piece (& the zipper tape) and the folded bottom hem.
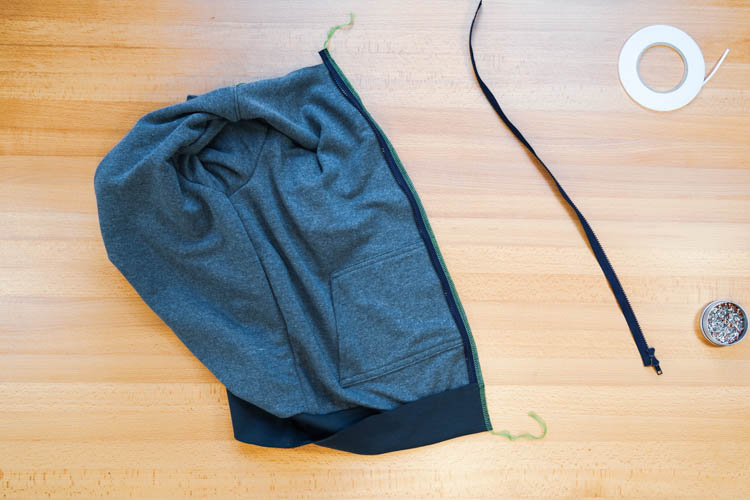
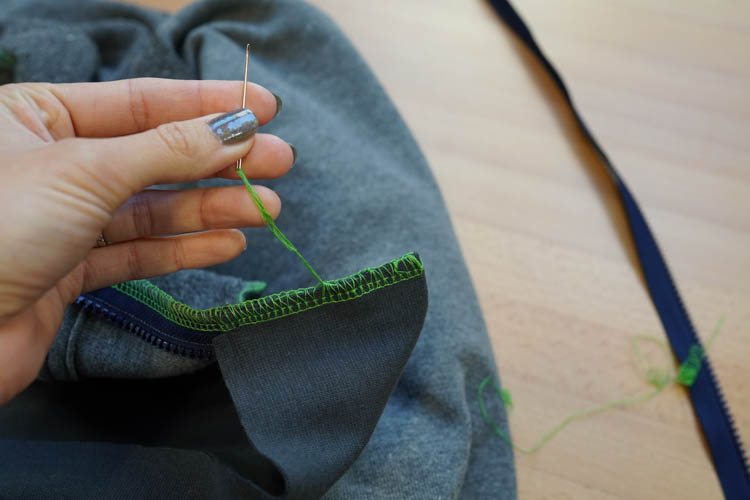
Finish the serger seam by pulling the thread chain under the loops.
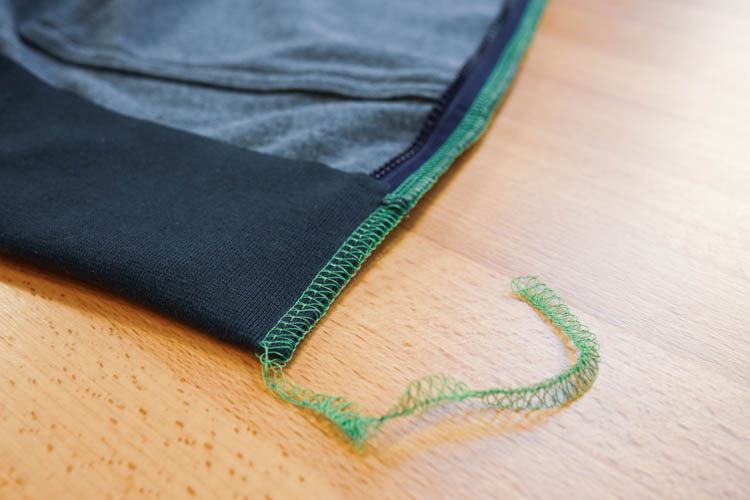
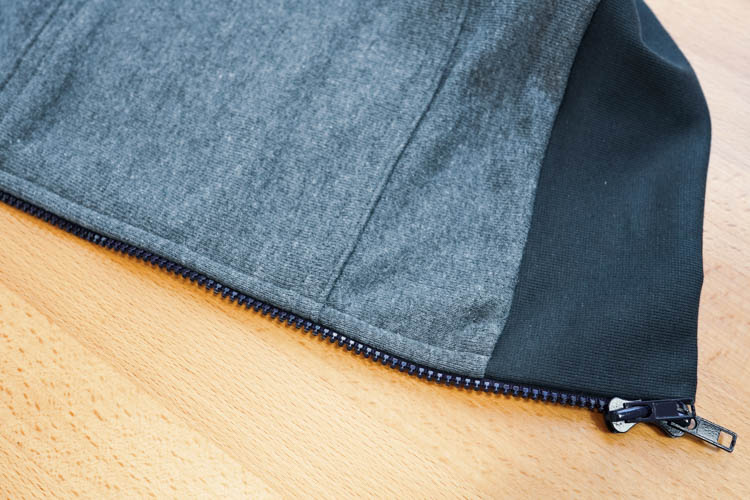
Check the face side of the hem, it should look like this:
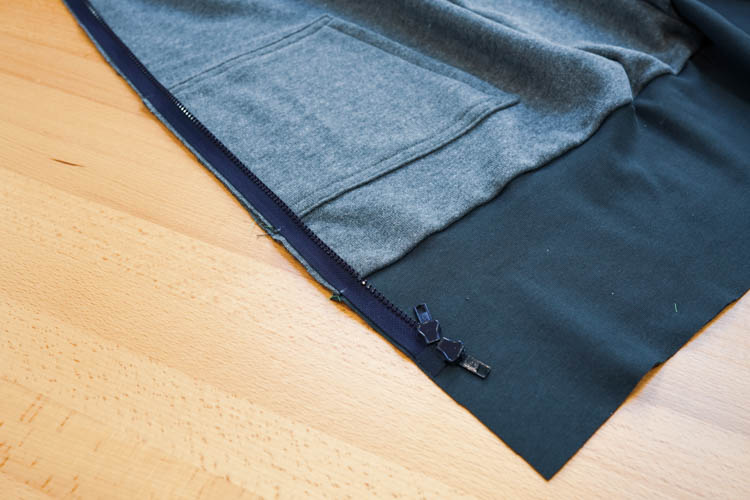
13 - Sew the second side of the zipper
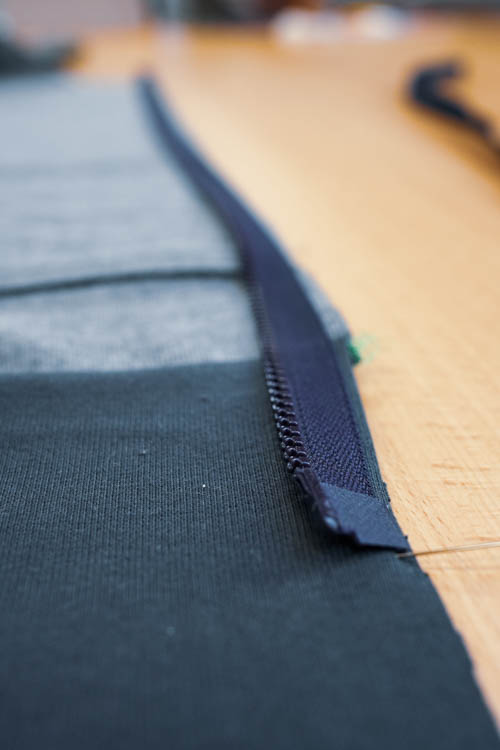
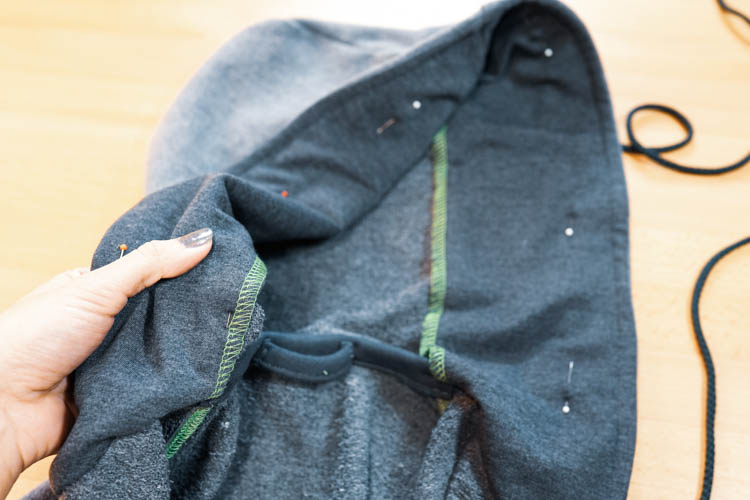
Close the zipper again and mark the location of the pocket seams and the seam of the bottom hem. These marks will help you maintain the symmetry of the sweatshirt.

Transfer the marks to the reverse side of the zipper tape.
Baste the zipper tape to the second front piece. Make sure that the marks on the zipper tape are aligned on the corresponding seams on the front piece.
Just to be 100% sure... Close the zipper again and check that the hoodie is symmetrical - the pockets must be at the same height and the edges of the bottom hem seam must be aligned.
The cutting edges of the neckline should also be aligned.
If you find a mistake, correct it as best as you can, it pays off... :)
Move the slider away from the end of the zipper and sew a few inches. When you get to the slider, leave the needle in the lower position (in the fabric), lift the presser foot...
and carefully move the slider around it to the already sewn part of the zipper. Then you can finish the seam.

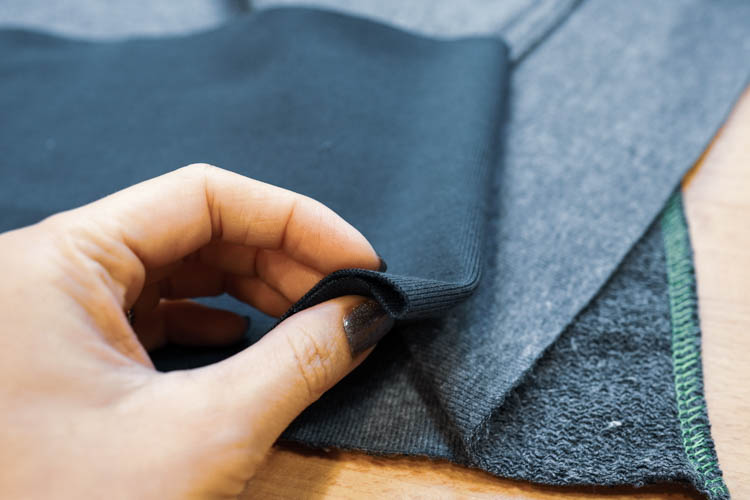
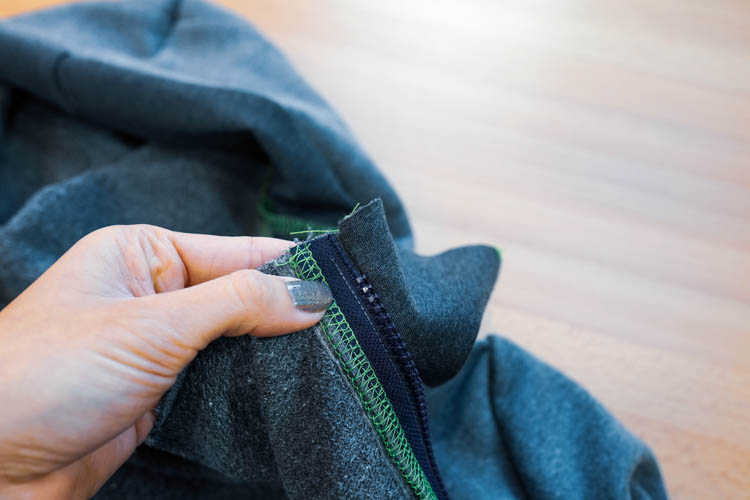
14 - Finish the second side of the bottom hem
Fold the rib knit over the zipper tape and clean the whole edge of the front piece. It's the same as before...
Close the zipper and check the face side of your hoodie. If everything is in order, you can topstitch both sides of the zipper.
Finish the rest of the bottom hem
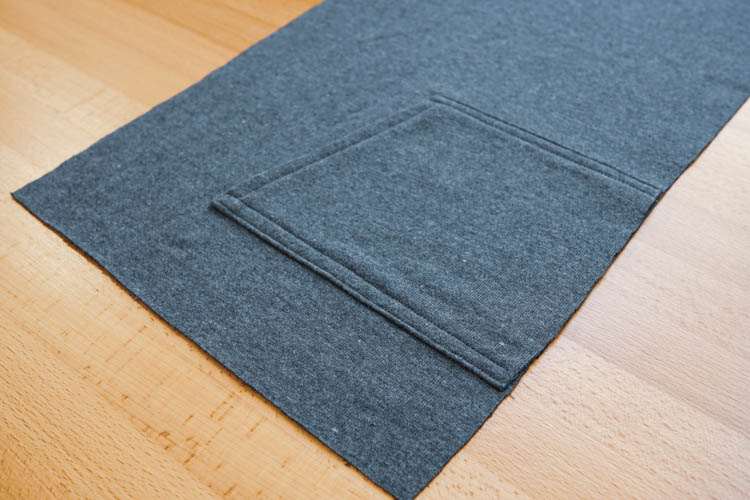
15 - Close the rib knit hem

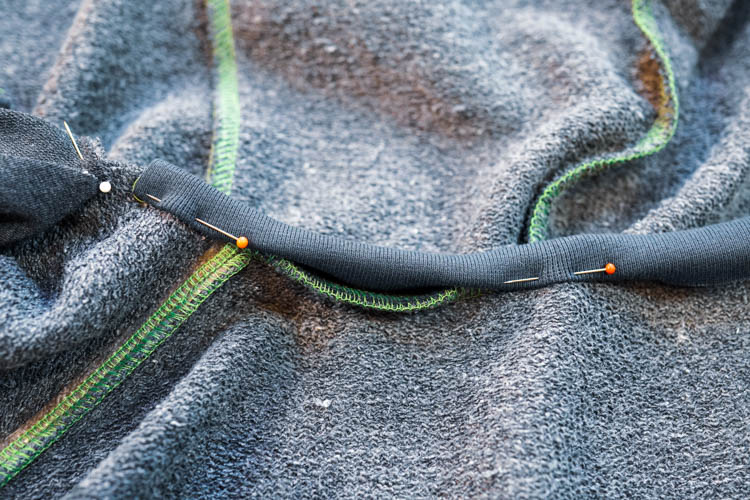
Let's finish the bottom hem of the hoodie. Pin the half-point of the rib knit to the middle of the back piece.

Then pin the quarter points to the side seams. Take your time, pin the hem evenly, and be sure to check the face side of the hem before sewing to avoid unnecessary mistakes.
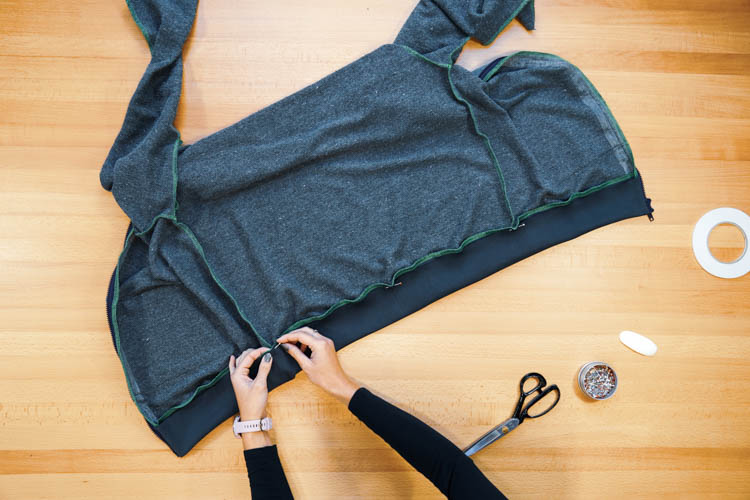
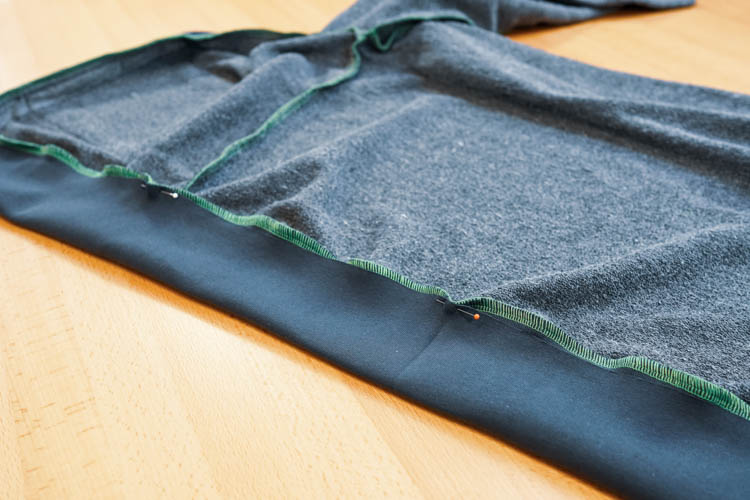
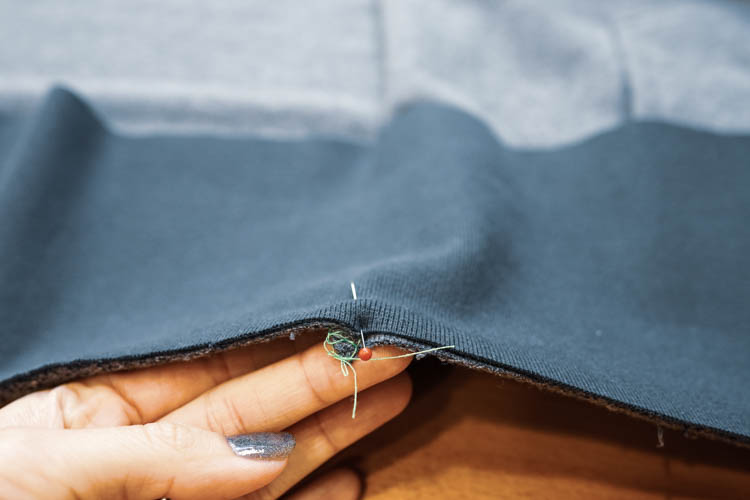
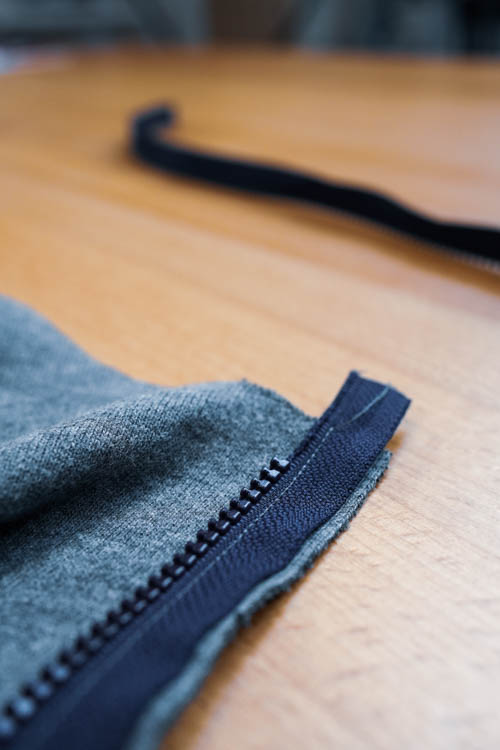
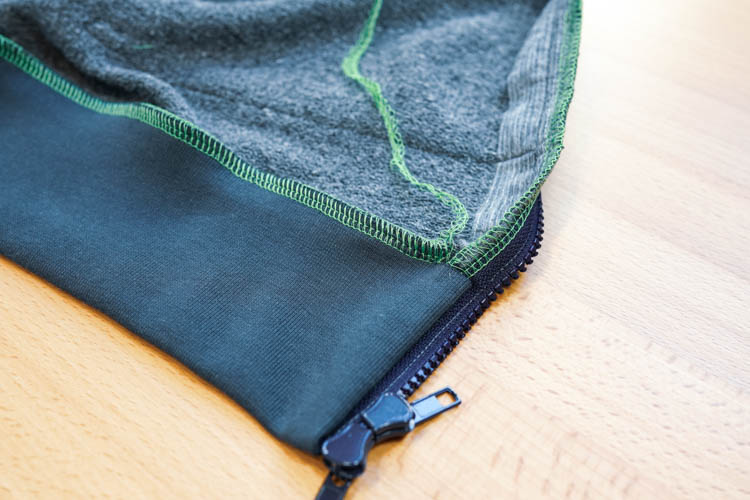
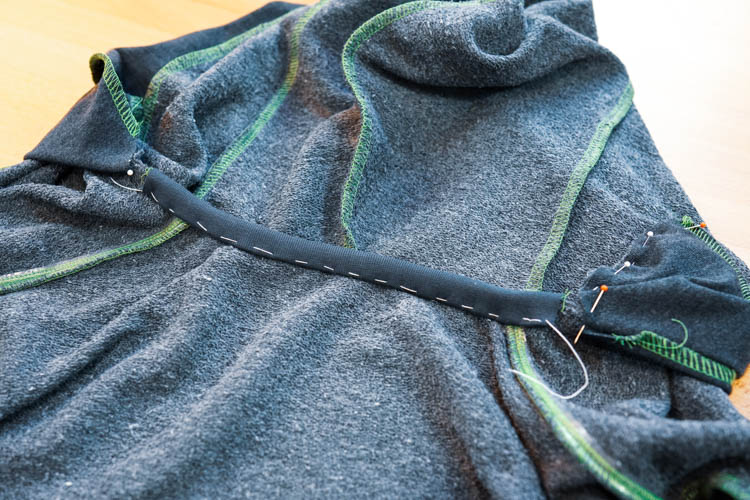
Sew the second edge of the hem. Try to get as close as possible to the zipper on both sides. This part is a bit tricky, but with a little effort and patience, you will certainly get close enough.

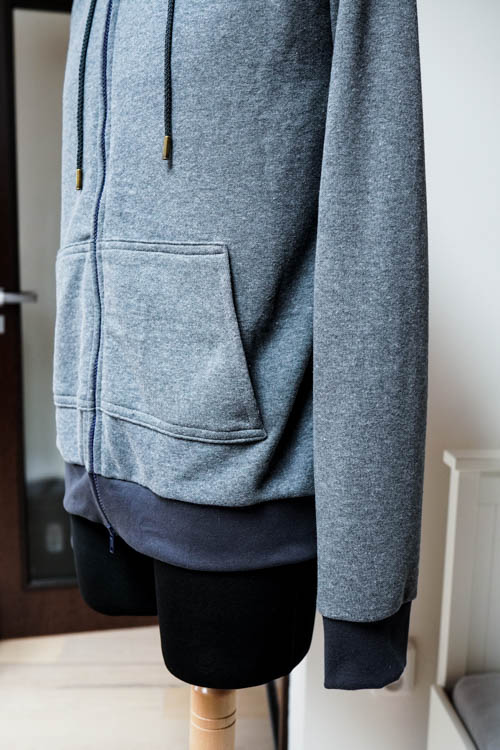
This is what it should look like near the zipper. It is not possible to sew to the edge, but you should at least get where I got to.
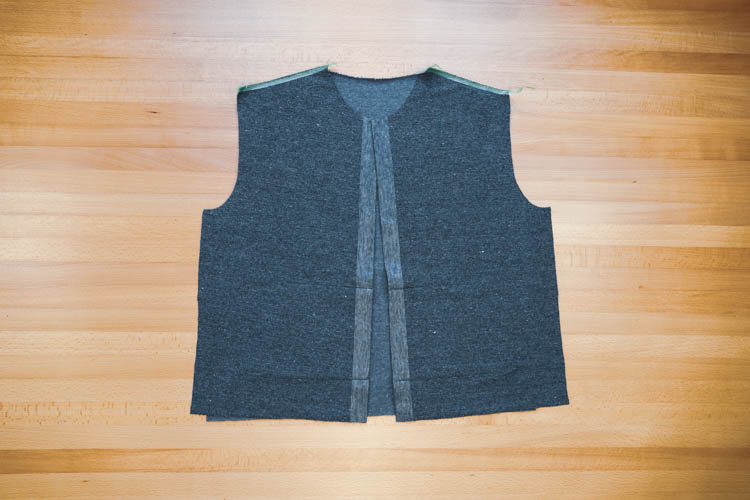
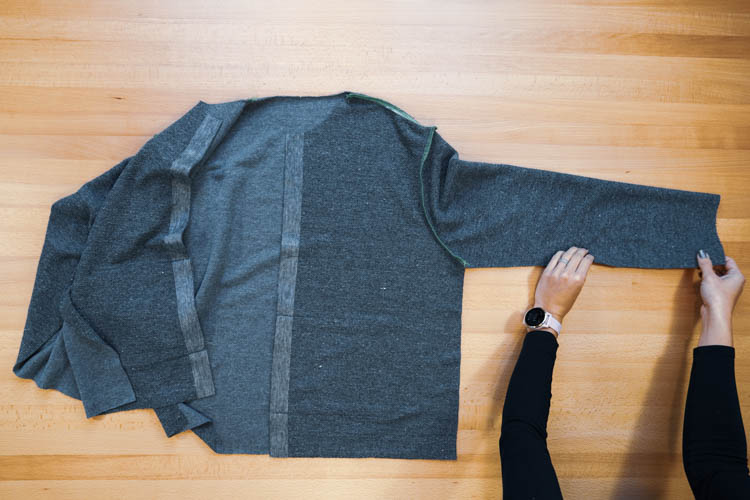
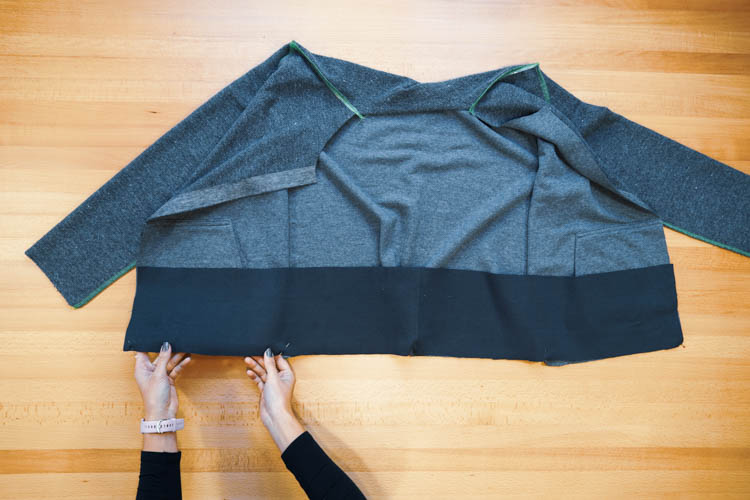
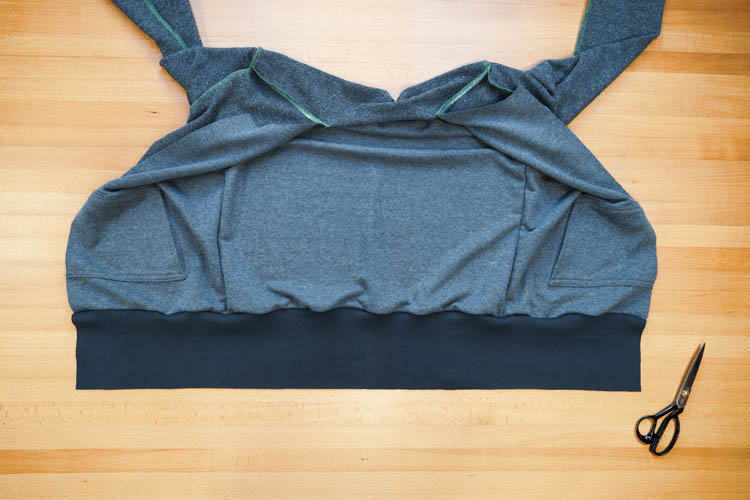
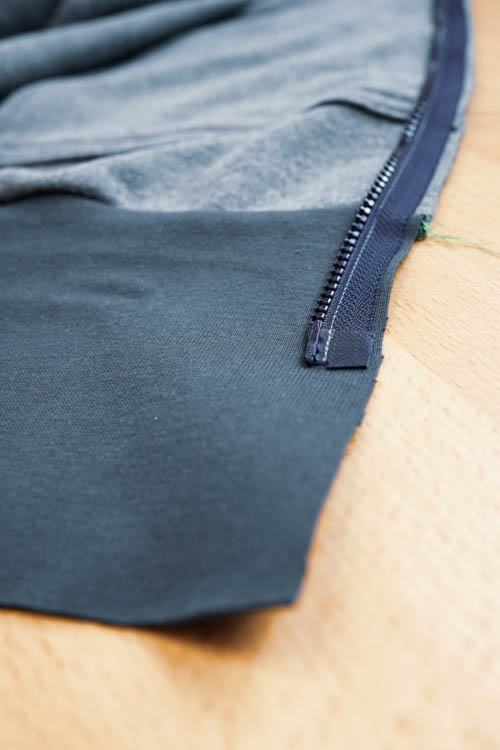
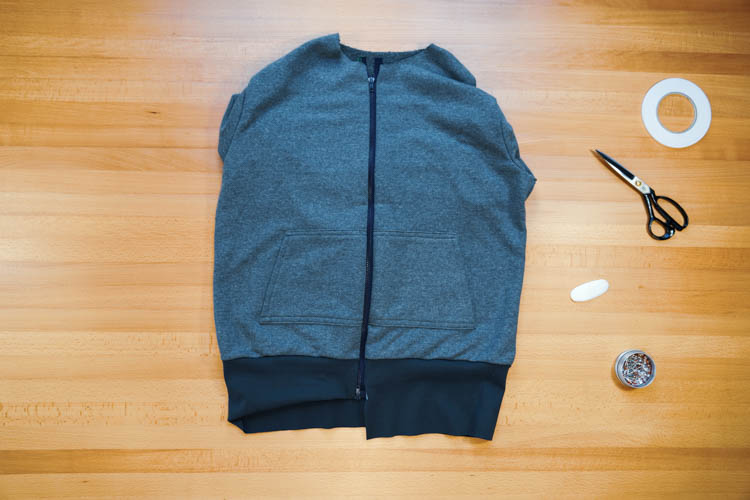
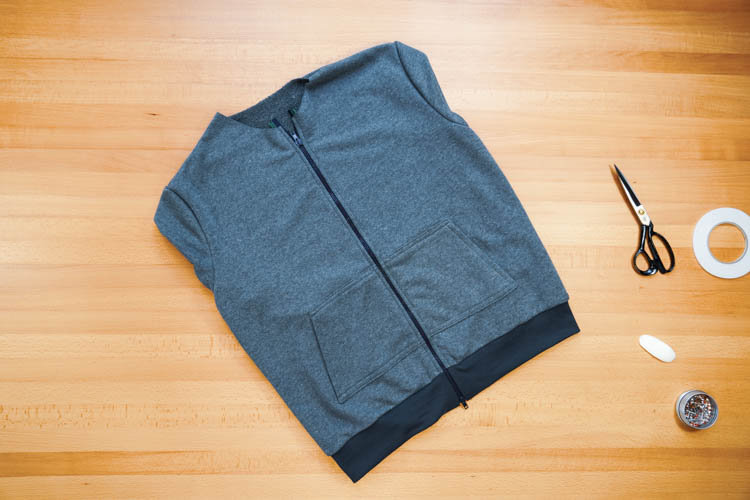
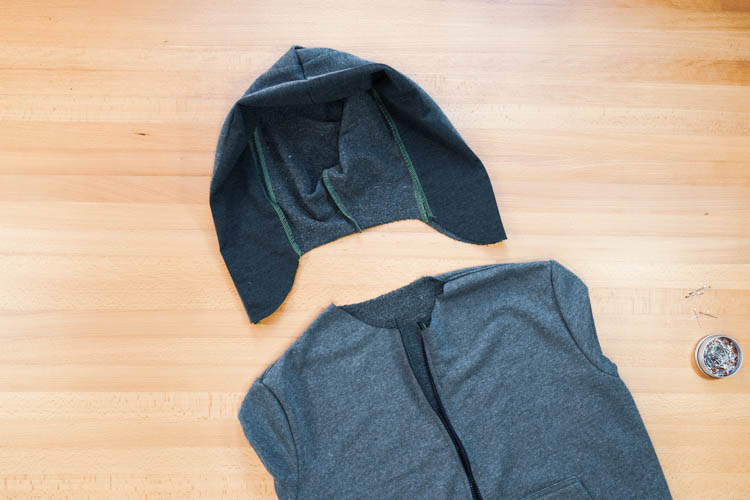
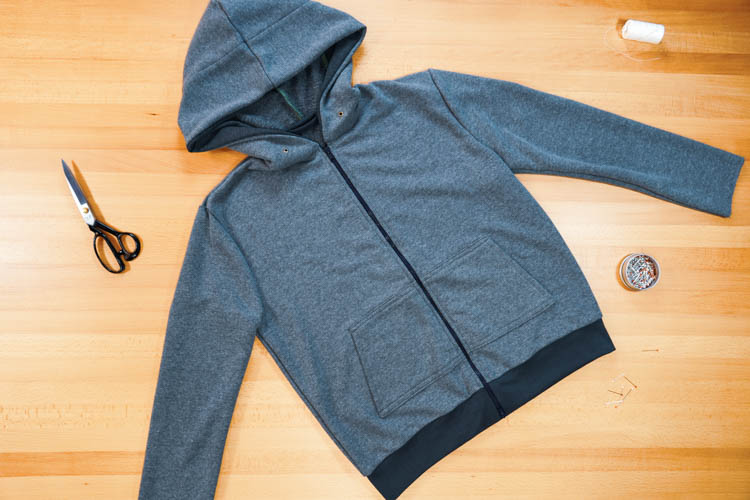
And this is what you should have so far - the bottom hem is finished, the zipper (including the topstitching) is in place as well as pockets that are symmetrically placed on both sides of the hoodie. The sleeves are there too, but I hid them under the back piece.
Hood
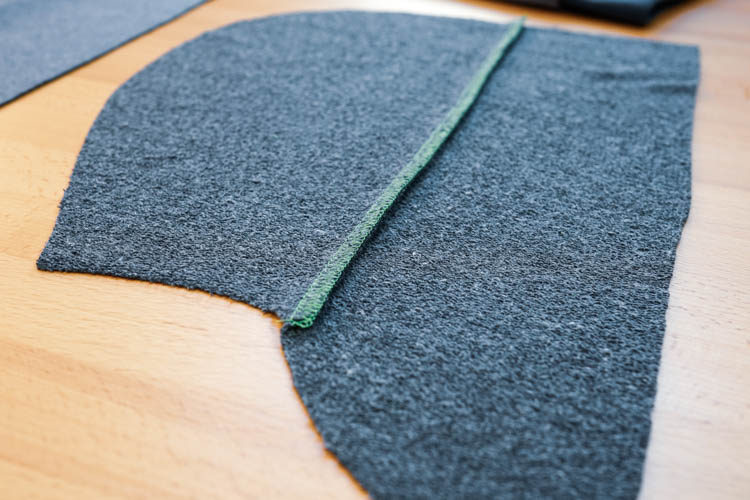
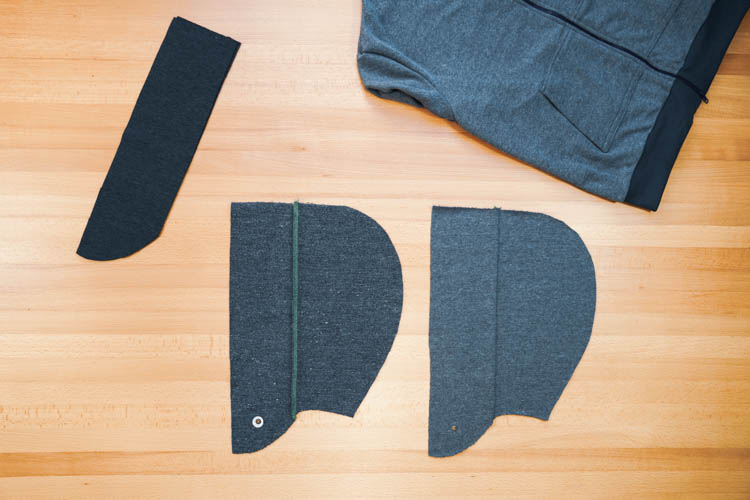
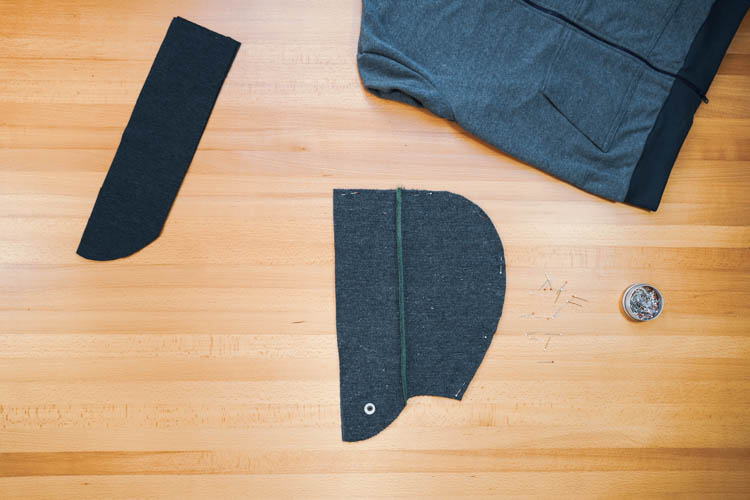
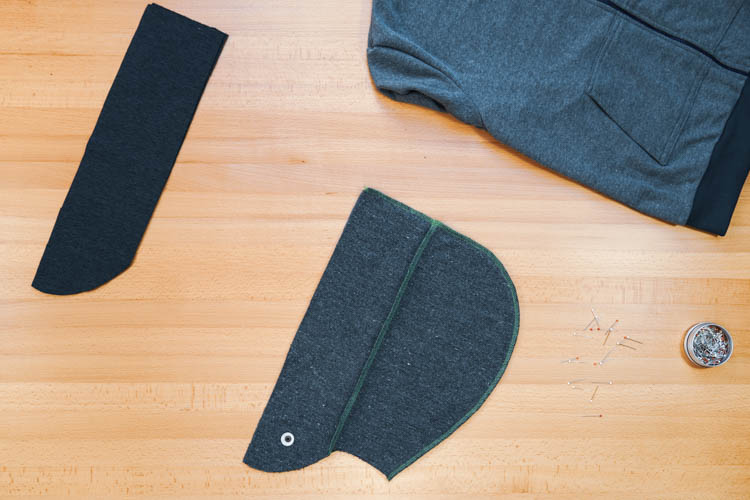
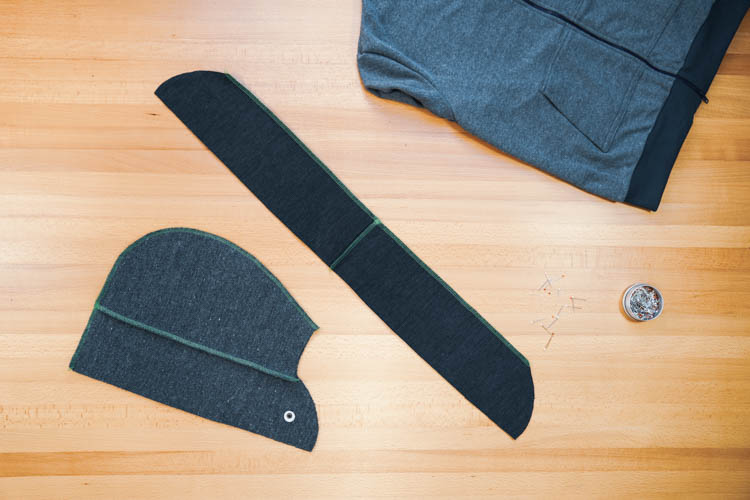
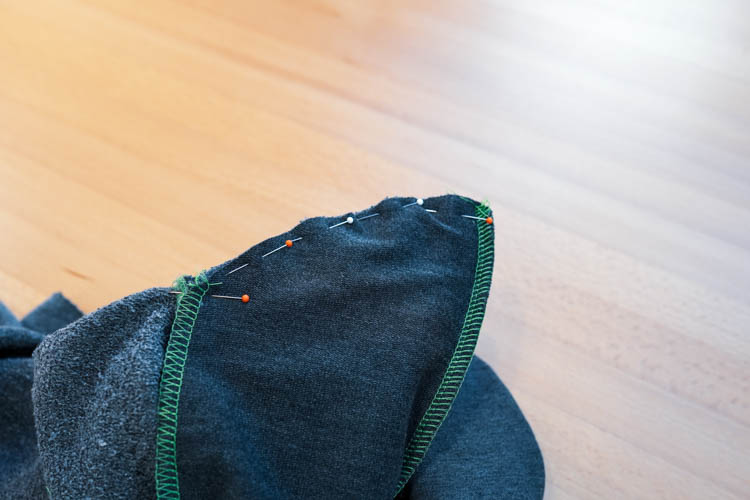
16 - Prepare the hood pieces
I prepared two of the front hood pieces from my primary fabric and two from the same material only in a darker shade, so that you can find your way around the instructions more easily and you always know on which side of the hood I’m working on.
Pin the front piece to the back piece.
Sew the two pieces and clean the seam. Press the seam allowances towards the front piece. Work on the second (mirrored) set of parts in the same way.
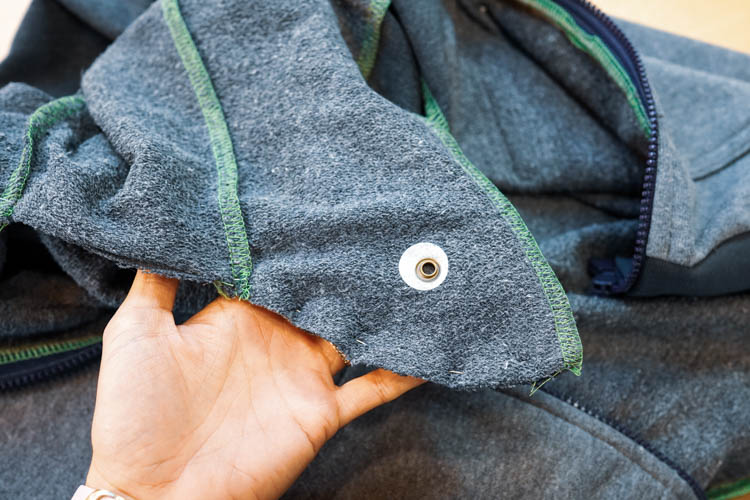
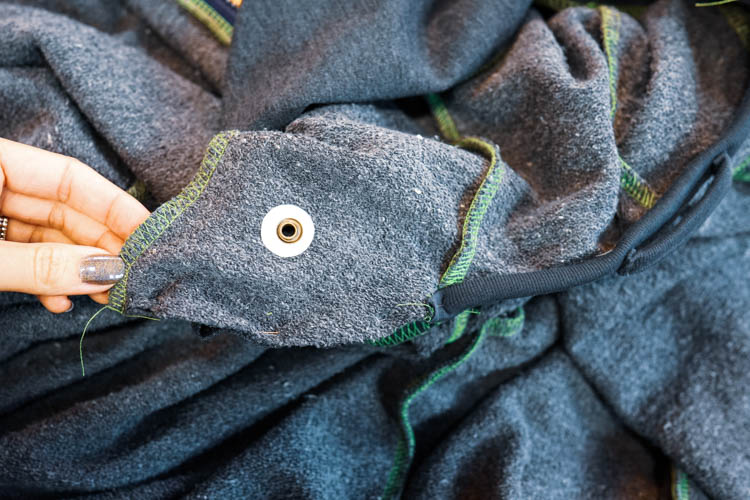
17 - Grommets
Use an awl to make a hole in the front part of the hood. You can transfer the mark from the pattern or simply overlay the fabric piece with the paper piece and pierce both.
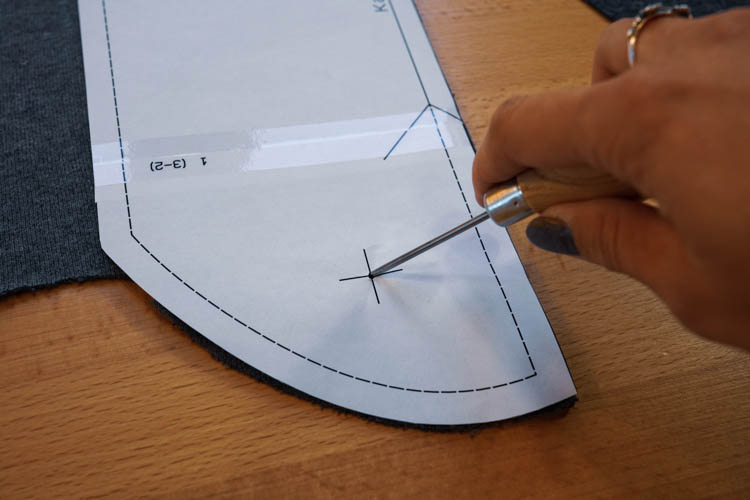
You can reinforce the grommet area with a small piece of fusible interfacing.
Insert the grommet (the instructions are usually found on the packaging). Often, all you need is a pad (such as a wooden cutting board), a hammer, and a little bit of brute force. :) I will add an article about grommets and related tips & tricks soon.
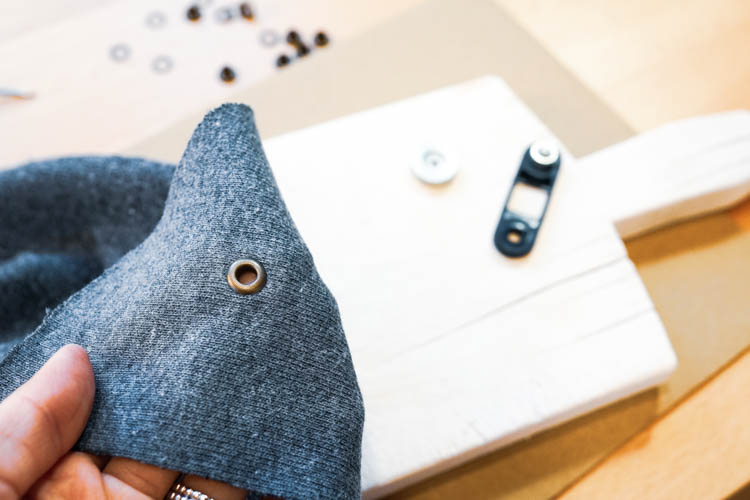
Insert the second grommet as well.
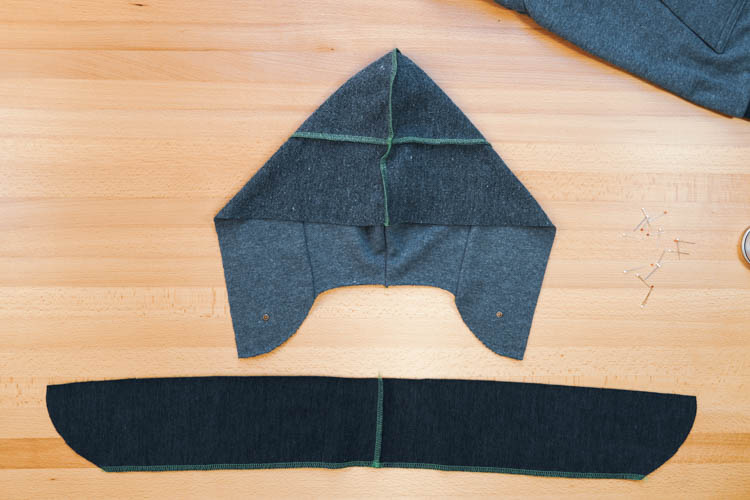
18 - Form the hood
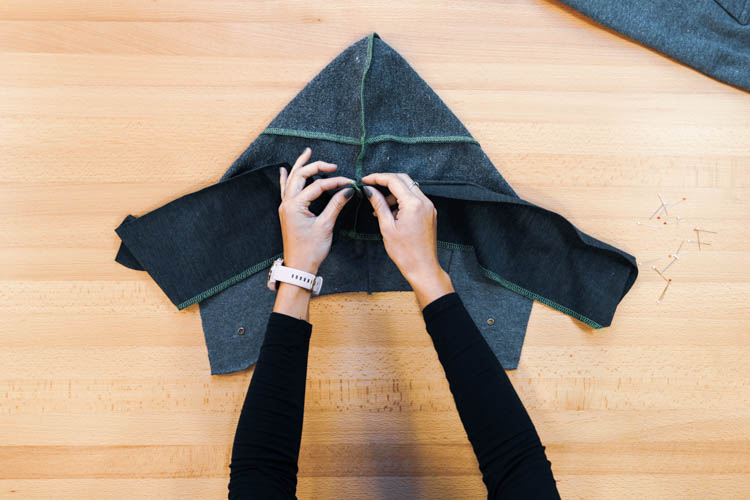
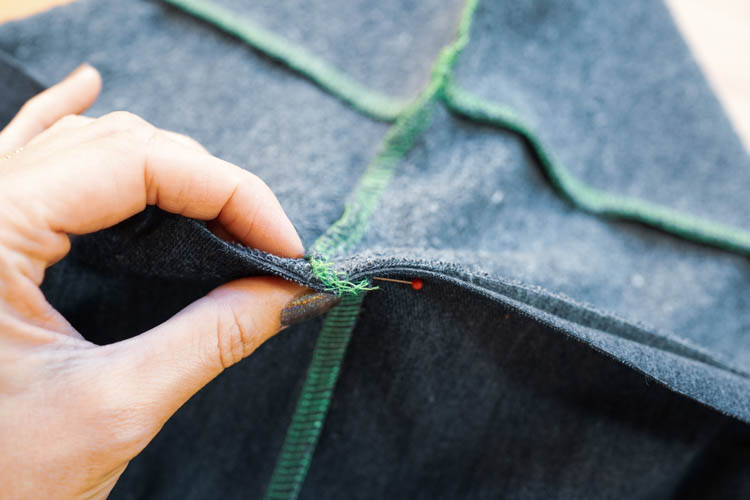
Put the two parts of the hood on top of each other (face side to face side) Pin the rear center seam.
Sew the pieces and clean the seam.
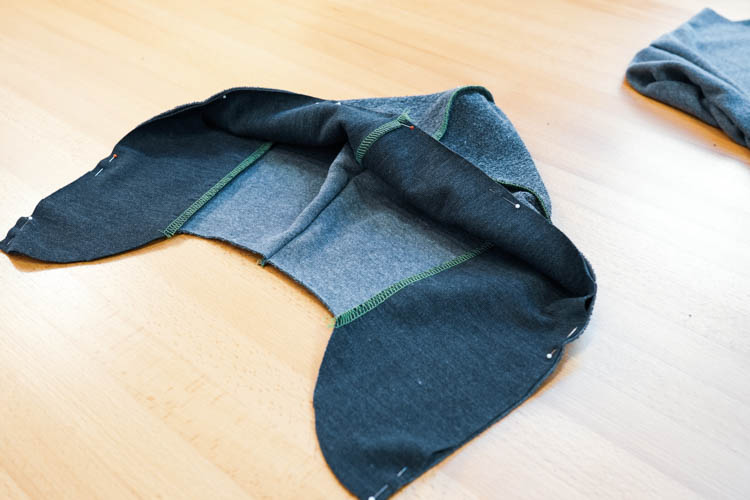
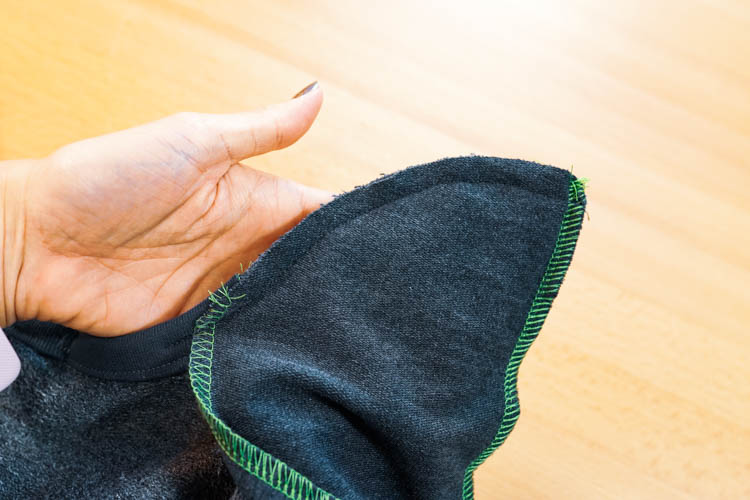
19 - Hood facing
The hood facing consists of the two remaining front hood pieces. Put the two parts together (face side to face side), and pin the center seam - short straight sides.
Sew and clean the center seam. Also, clean the outer side of the facing - only its straight part (leave the curved parts raw).
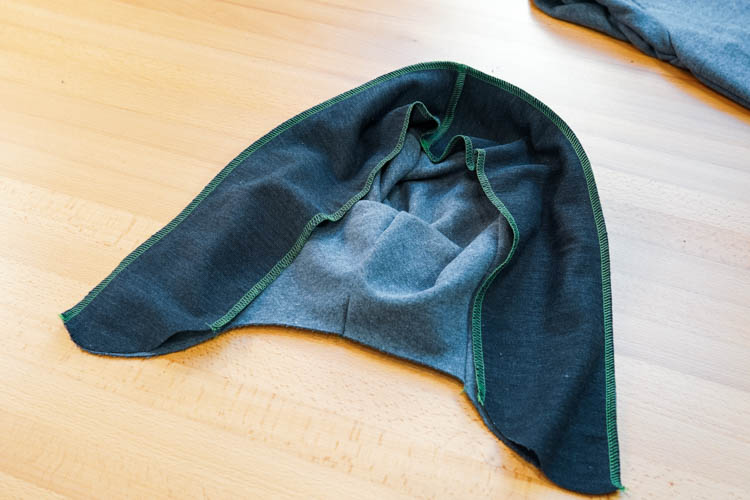
Turn the hood inside out.
Pin the facing (its raw edge) to the outer edge of the hood - start in the middle where the center seams meet.
I recommend folding the seam allowances in opposite directions to make this part of the seam as flat as possible.
Then pin the rest of the facing to the hood.
Sew the facing to the hood and clean the seam.
Connecting the hood to the torso
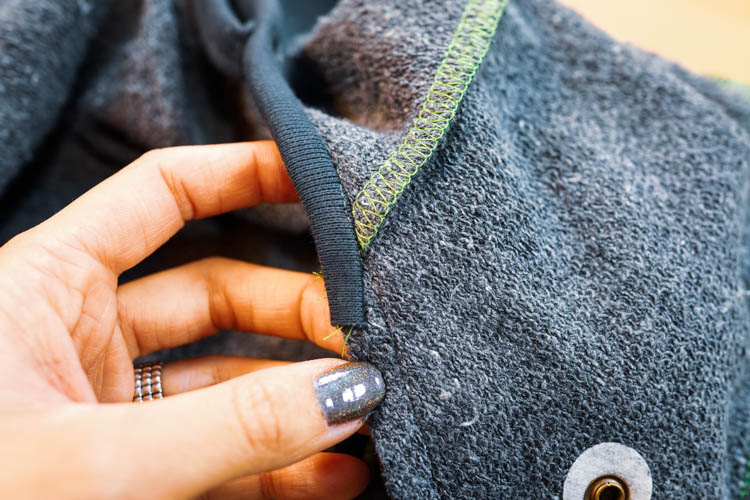
20 - Sew the hood to the neckline
Turn the hood face side out and fold the facing to the inside of the hood.
Pin the center seam to the middle of the neckline - the back piece of the sweatshirt.

Pin the remaining two seams on the hood (which connect the front and back pieces) to the shoulder seams of the hoodie.
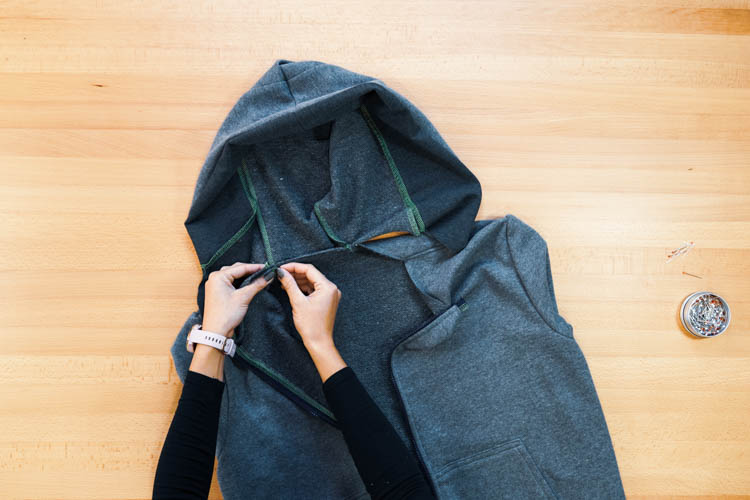
The seam with which connects the facing to the rest of the hood goes to the edges of the neckline (where the zipper is).
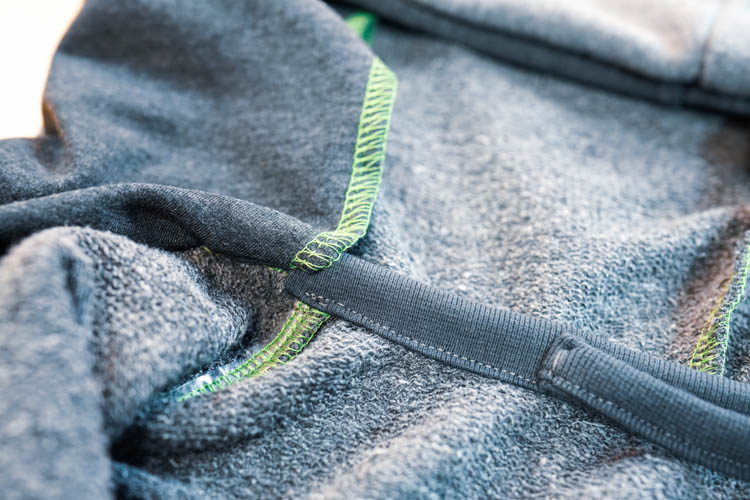
Take the front part of the hood (face side up) and overlay it with the front piece of the sweatshirt so that the teeth of the zipper lie exactly at the seam of the hood.
Then place the hood facing over the front piece.
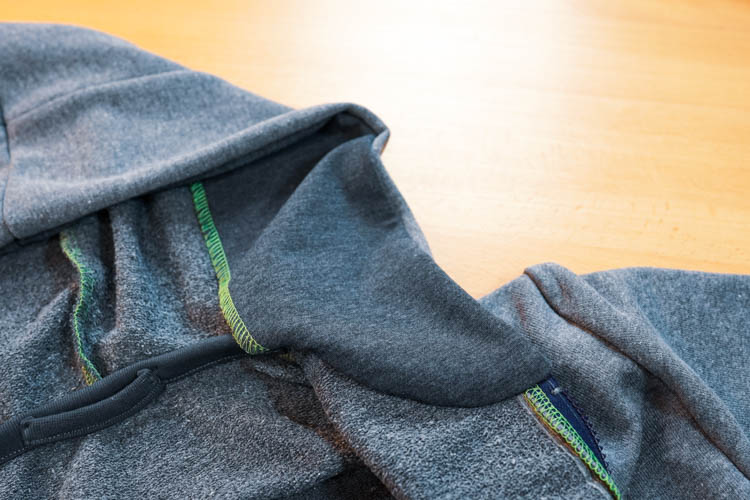
This creates a three-layer "sandwich" - at the very back is the front part of the hood, in the middle the front piece of the sweatshirt with and at the very front is the hood facing.
Carefully pin all three layers in this position.
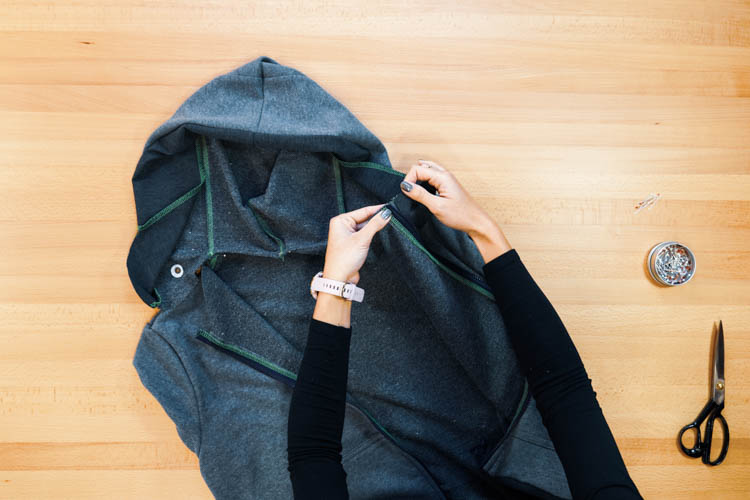
This is what it should look like from the other side:
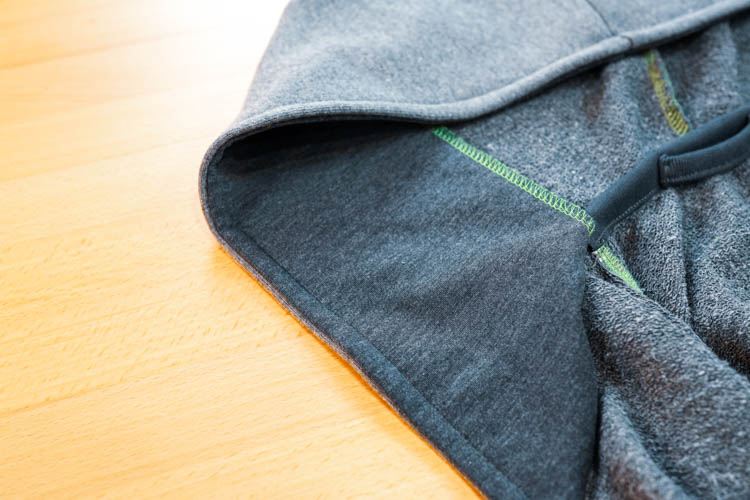
Do the same on the other side of the hood. The result should look like my hoodie in the photo below - the hood is connected to the neckline.
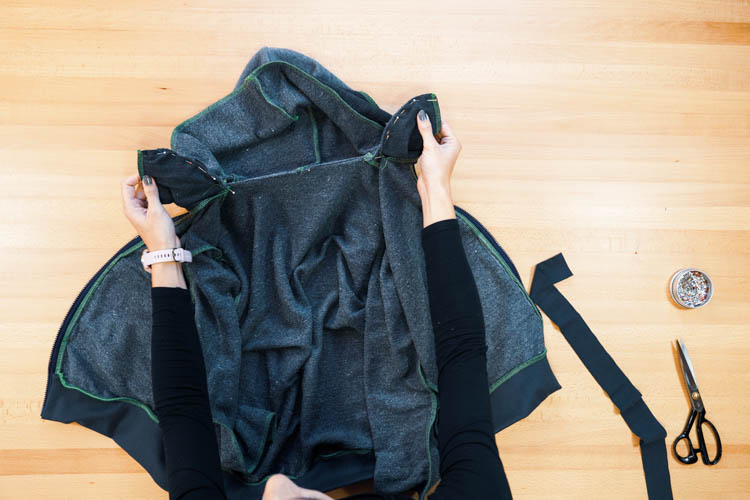
Check the connection, correct any mistakes, and when you are satisfied, you can sew and clean the neckline.
Finishing touches (some are optional)
21 - Neckline finish
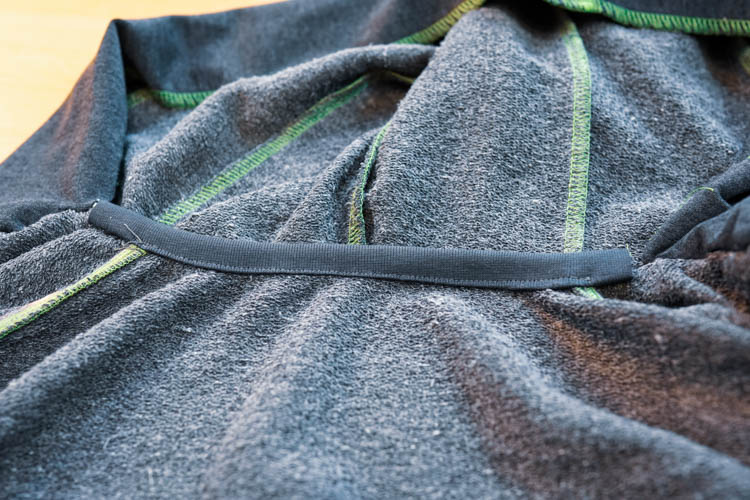
If you don’t like what the neckline looks like now, you can clean it with a strip of fabric. I used a 4 cm / 1 5/8" wide knit strip.
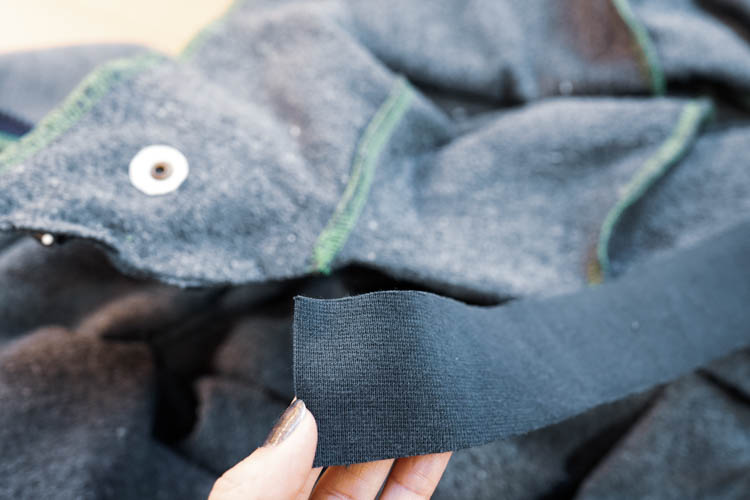
Pull out the pin that connects the edge of the facing to the remaining two layers.

Place your knit strip (face side down) on the reverse side of the hood, so that the shorter side of the strip extends beyond the “side seam” of the hood (a little bit over the front piece of the hood).
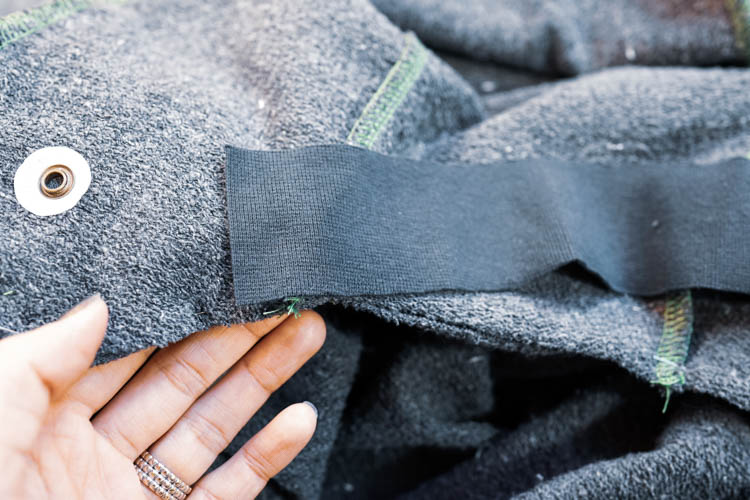
Pin the strip to the hood.
Pin the other side of the strip in the same way. The knit strip should be slightly taut. Sew the knit strip to the hood and the back piece of the sweatshirt. The seam should reach about 1 centimeter / 0.4 " beyond the shoulder seams - to the front pieces of the sweatshirt - on both sides.
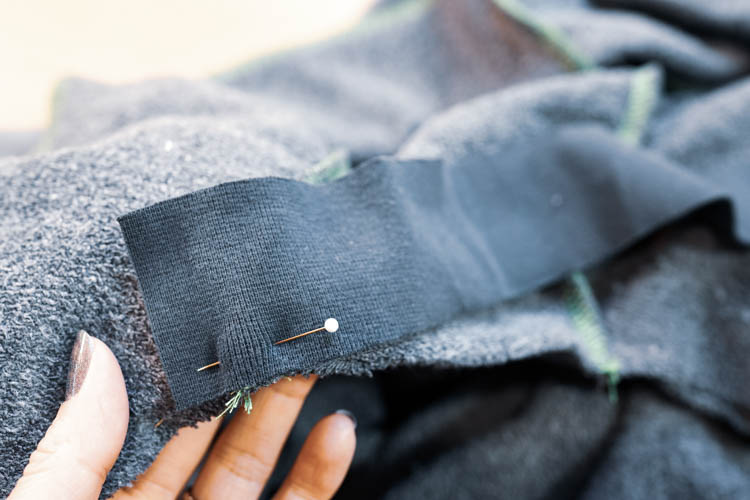
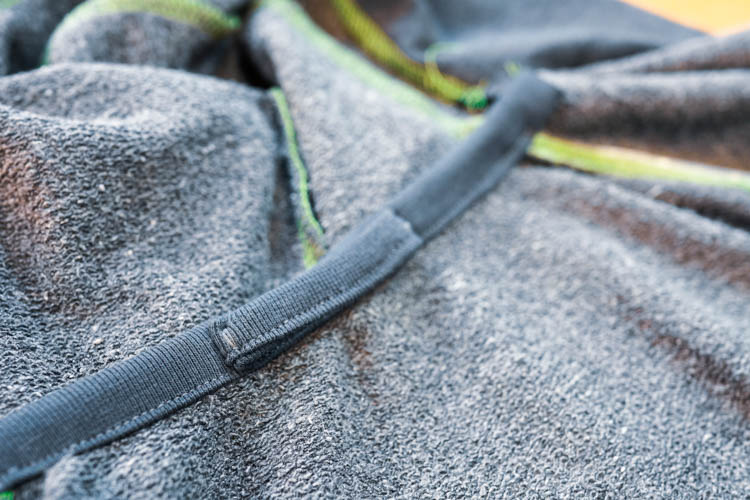
Fold 1 cm / 0.4" of the free side of the strip back on itself.
And then once again, so that the strip wraps around the seam allowance at the same time.
Baste the strip to your hoodie.
This is what it should look like from the face side of the hoodie:

Then sew along the edge of the strip and attach it to the hoodie. Use some kind of elastic stitch - three-step straight stitch, for example.
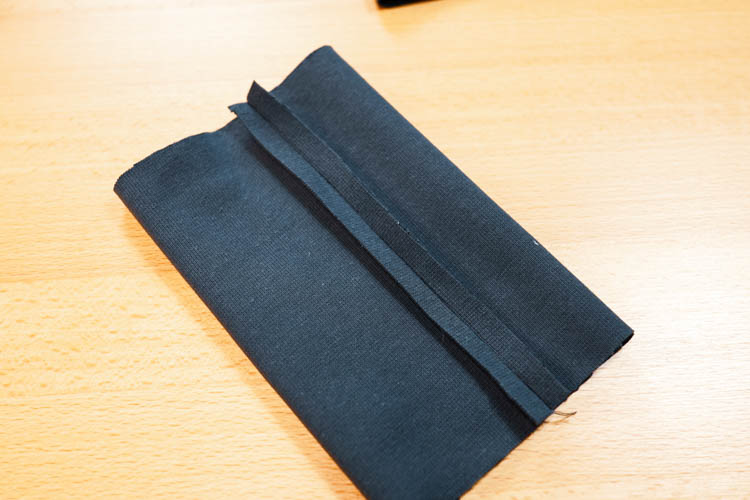
22 - Hanging loop
You can create a hanging loop from fabric leftovers. It should be about 7 cm / 2 3/4" long. My hanging loop is made from the rest of the knit strip I used for neckline finishing. It was originally 4 cm / 1 5/8" wide, but after folding it is less than a centimeter.
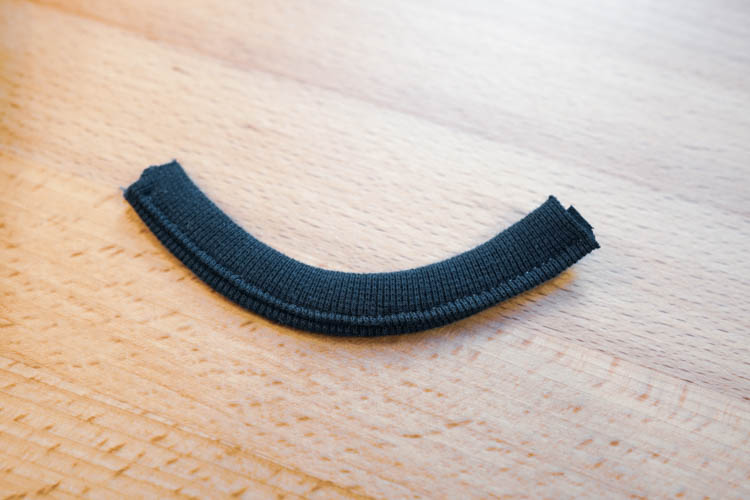
Fold the shorter sides as shown below and sew the loop to the middle of the back piece.
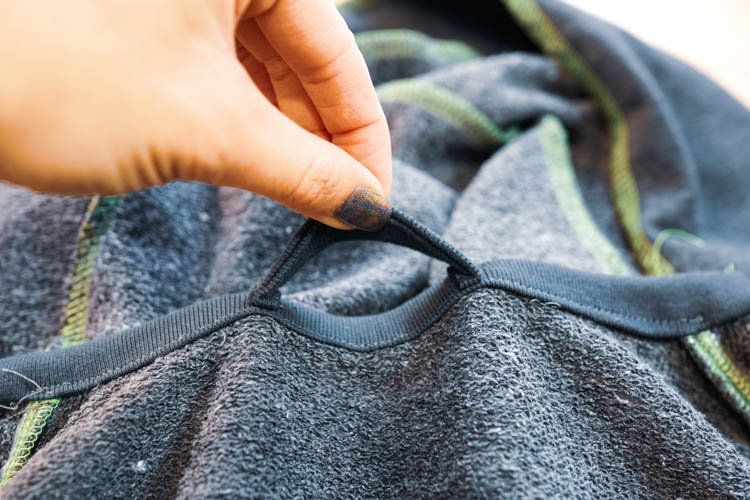
23 - Front parts of the neckline
If you have finished only the back part of the neckline/hood so far, you also need to finish the two front parts of the neckline. Pin the edge of the facing back to the hoodie - this time over the edge of the binding strip.

Sew through all three layers - facing, the front piece of the sweatshirt, and the front piece of the hood - with a straight stitch.
Try to continue the previous seam - neckline binding.
This is what the result should look like:
24 - Zipper stop
If you have shortened the zipper, you need to sew a new zipper stop. Choose a wide zig-zag and sew a few stitches in place - just above the last zipper tooth. It's like sewing tacks. Do this on both sides of the zipper.

25. Hood topstitching
I recommend topstitching the whole front edge of the hood. This stabilizes the shape of the hood as a whole and the topstitching will keep the facing where it should be - inside the hood.
Drawstring
26 - Thread the drawstring through the hood
Insert the drawstring between the hood and its facing and thread both ends through the grommets.
Use a few pins to attach the drawstring to the hood so that you do not accidentally sew it to the hood.
Now pin (or baste) the free edge of the facing to the “side seam” of the hood.

27 - Finish the drawstring casing
Now topstitch the “side seam” of the hood. This will attach the edge of the facing to the hood and a drawstring casing will be finished. You can pull out pins and temporary stitches from the hood.
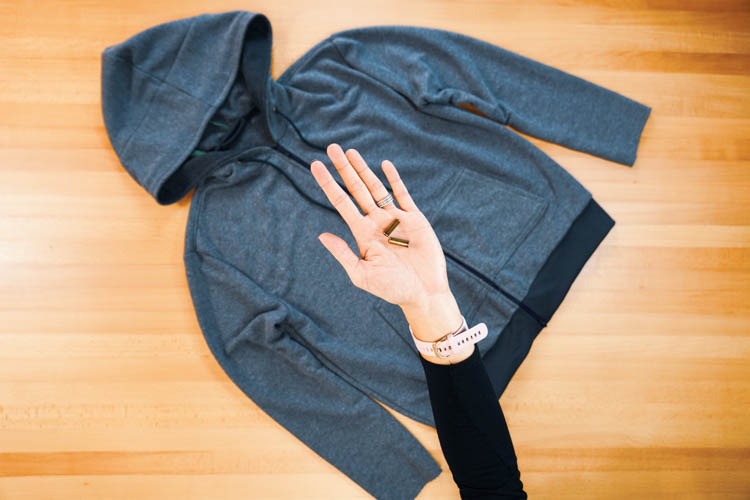
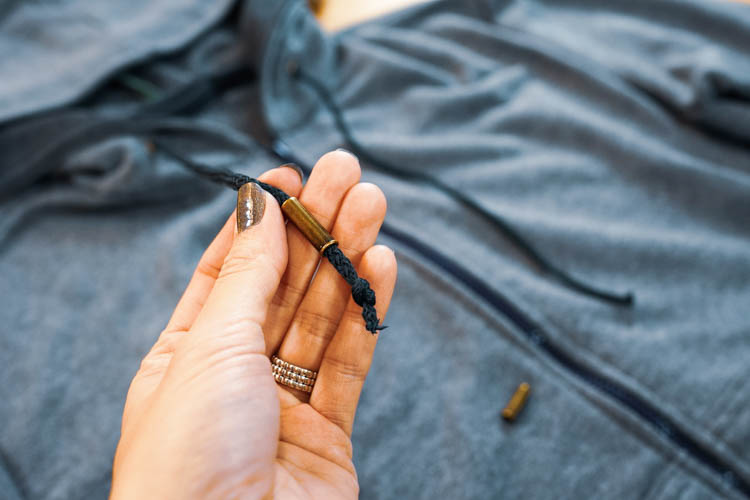
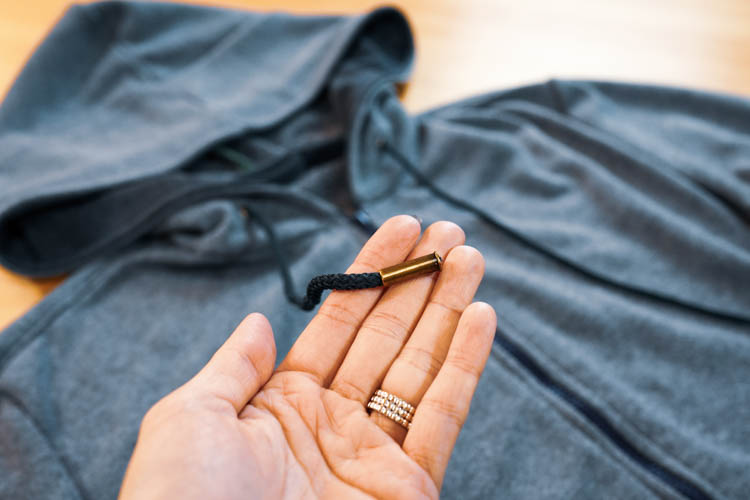
28 - Aglets
Use aglets to secure both ends of the drawstring. Aglets prevent fraying and, if properly sized, also prevent the drawstring from being accidentally pulled out of the hood. Aglets are available in many colors and shapes. My aglets are secured with a simple knot, but there are other types available. Follow the instructions on the packaging of your aglets.
Cuffs
29 - Sleeve hems
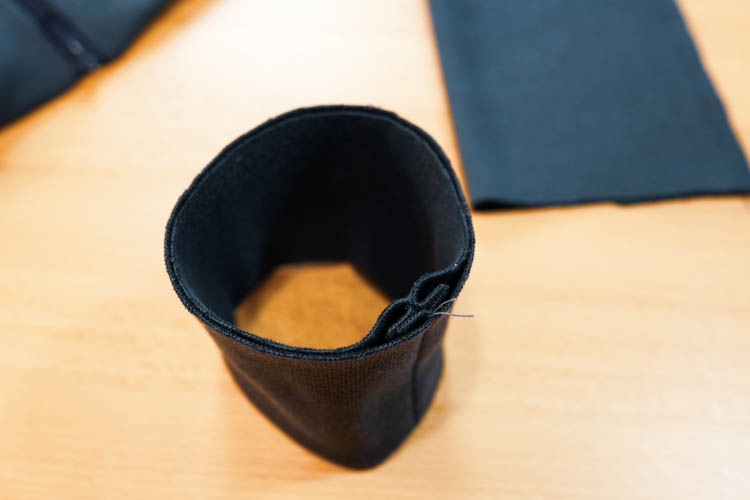
Now, all you have to do is finish the sleeves. Fold hem knits in half (face side in) and sew the shorter sides.
Press the seam allowances open and fold (“roll”) the hems in half to form two-layer tunnels (face side out).
Insert the hems to the sleeves (face side to face side), align seams on the hems with sleeve seams, and pin the edges.
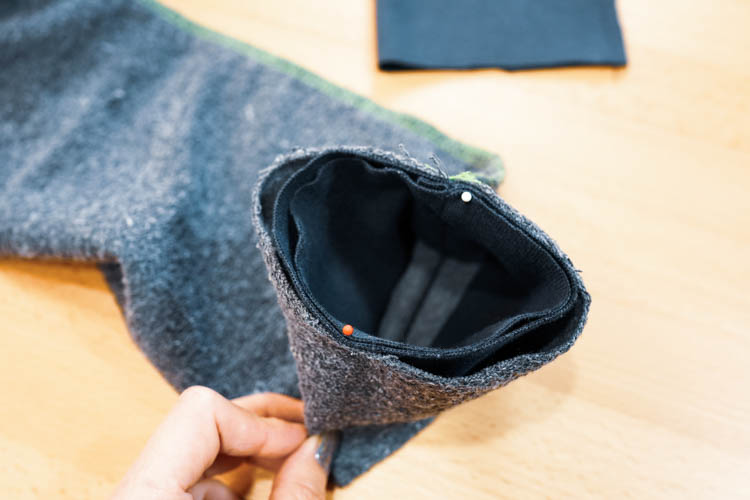
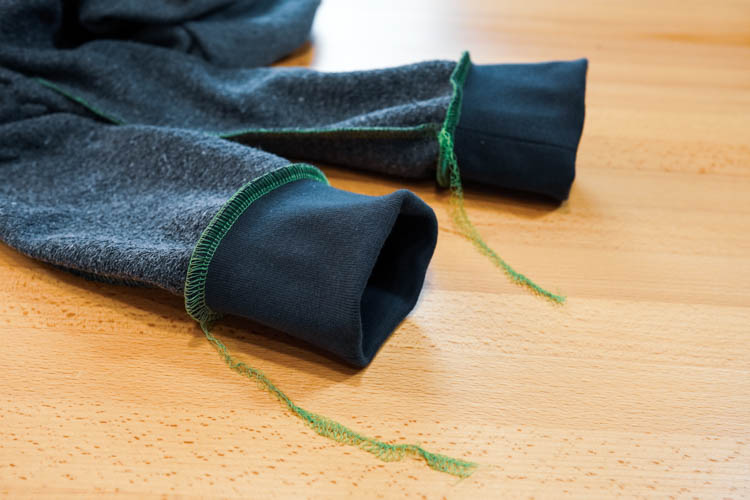
Sew the hems to the sleeves. When sewing, it is necessary to gently stretch the hems. Clean the seam allowances. Pull the thread chains under the loops when using your serger.
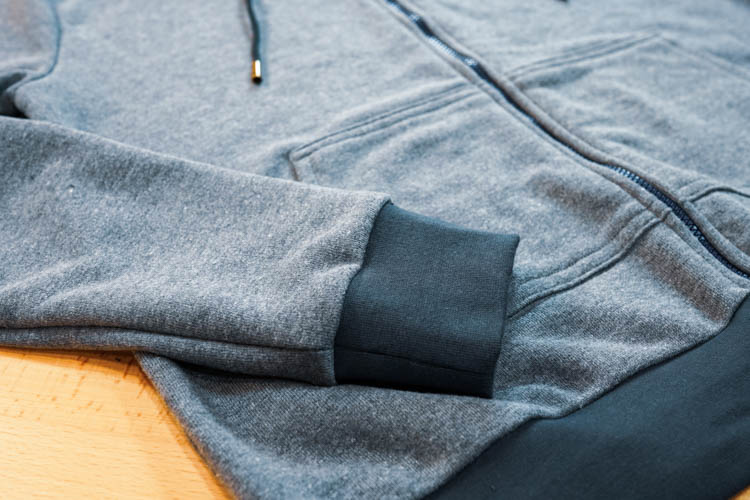
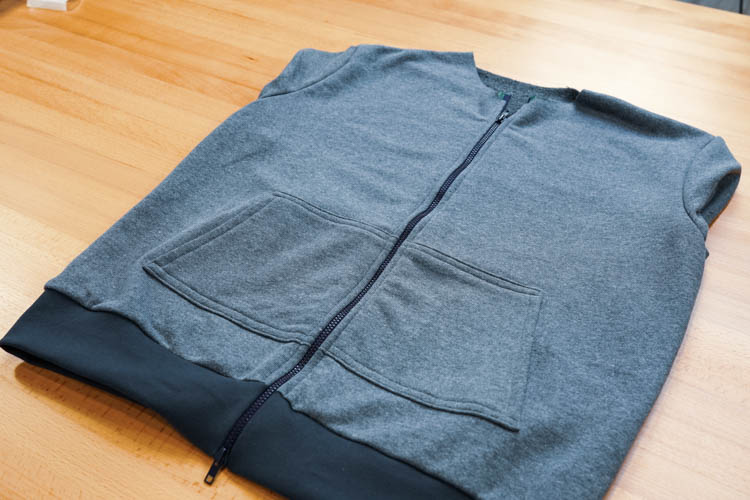
That’s it - your new hoodie is ready! Hurray! :)


Don't forget to share your joy with others!
Did you like today's instructions and pattern? If so, share it with your friends and tell me about it in the comments section below. I look forward to your feedback! ♥
PS: Did you know that there are FREE PATTERNS available on my blog?