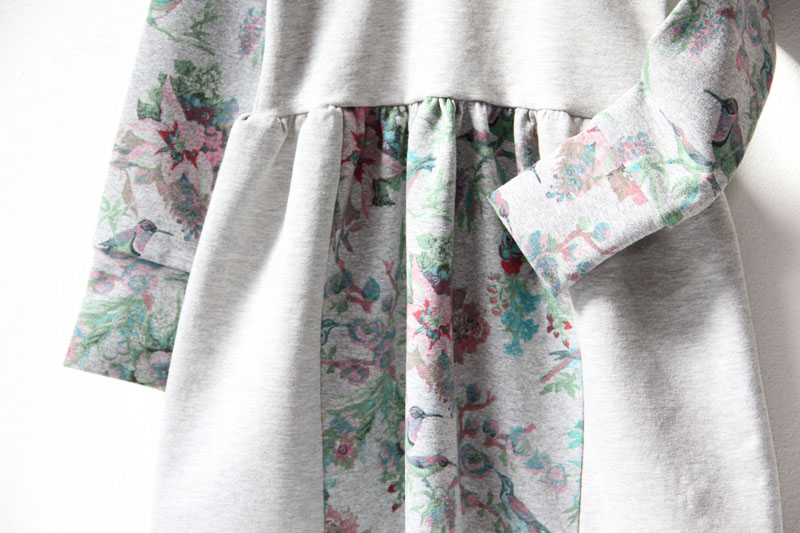
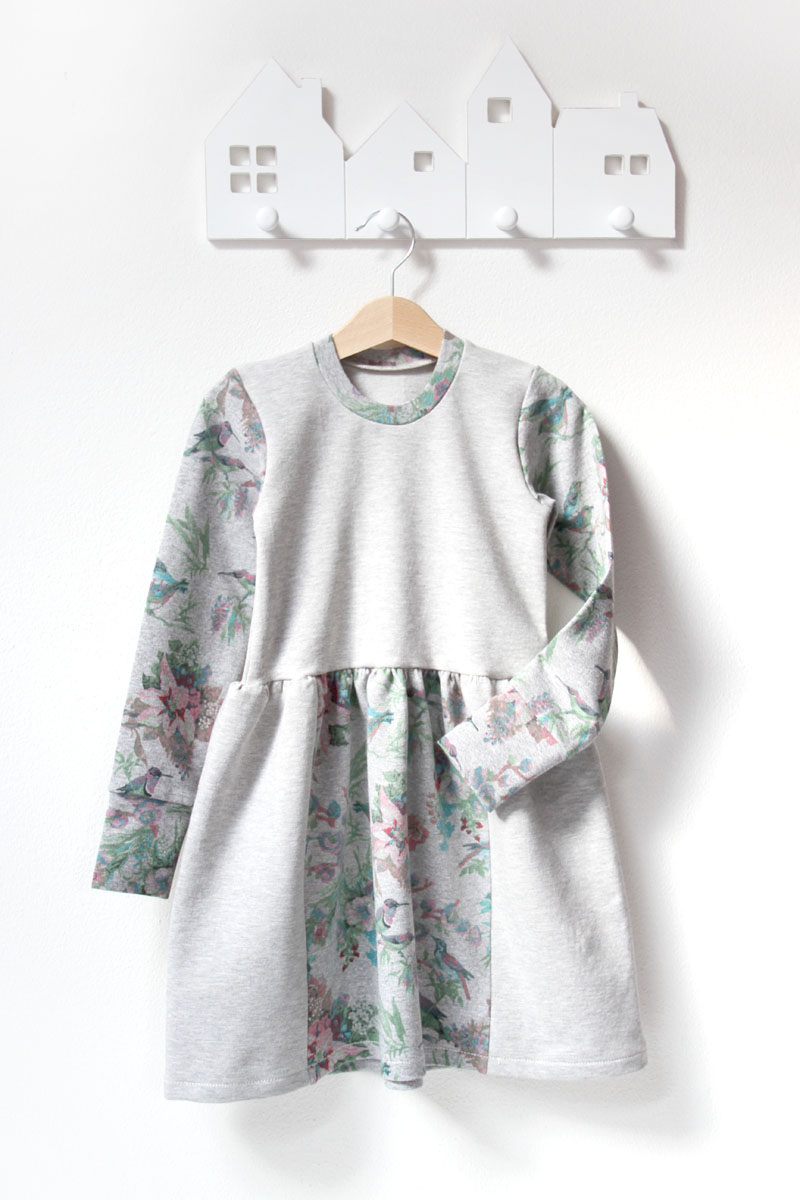
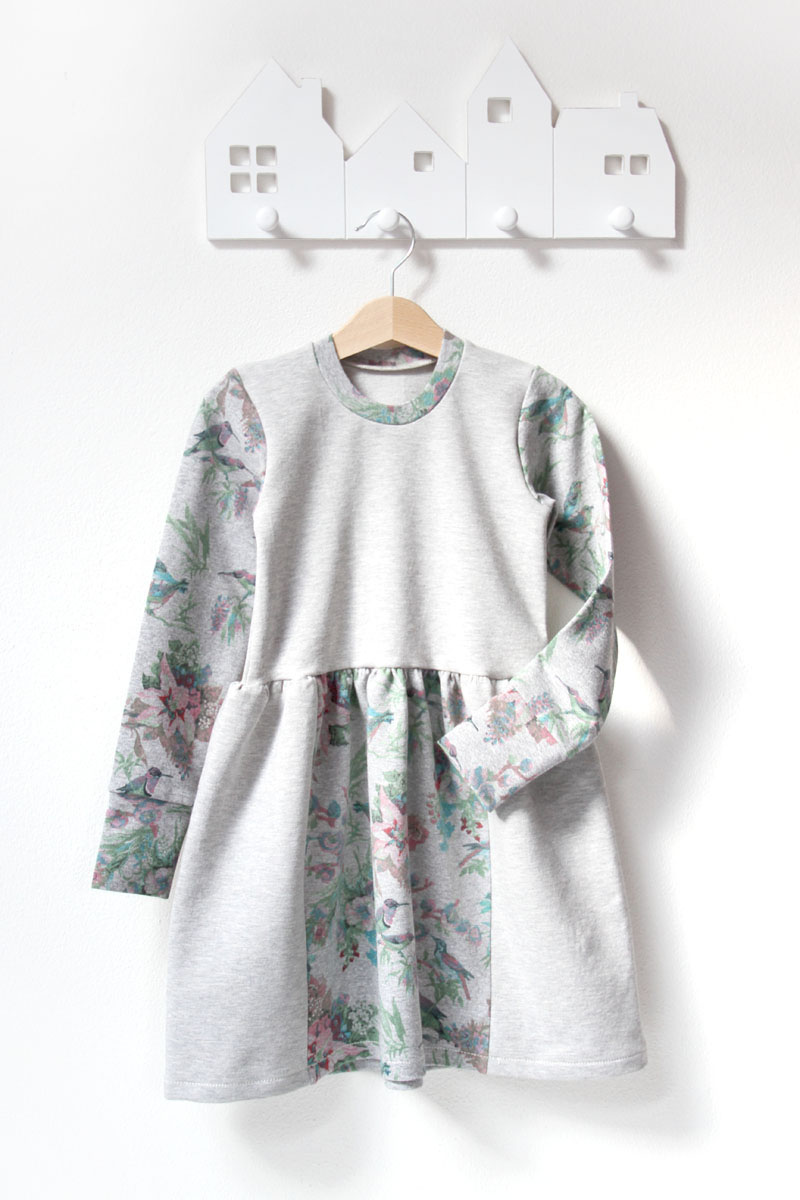
Wondering if it’s possible to sew a dress from French Terry? Oh yes, and the results can be awesome! So let's take a look at how to sew dresses from laid-in knit. I will sew a children's dress, but you can certainly sew a women's dress. You can get the pattern for children's dress that I used for this article here:
If you are looking for a nice pattern for a women's dress, you might like this one:
Material
Thinner uncombed laid-in knit (French Terry) is suitable for our purposes. In stores, you can usually find this material in the knits category. The weight (grammage) should be about 250g/m2 and you will recognize this material by the loops on the wrong side. I fell in love with this material, it is ideal for the period when it is too cold for a T-shirt and too warm for a sweatshirt. You will find a large selection, for example, in the Dumlatek.cz store: French Terry - With prints French Terry - Monochromatic.
I used fabric leftovers from another of my projects.

Sewing instructions
I sewed the dress on my overlock, but you can easily do it with a regular sewing machine. If you plan to use a regular sewing machine, I recommend reading this article first:
Sewing elastic fabrics with a regular sewing machine - 4 steps to success
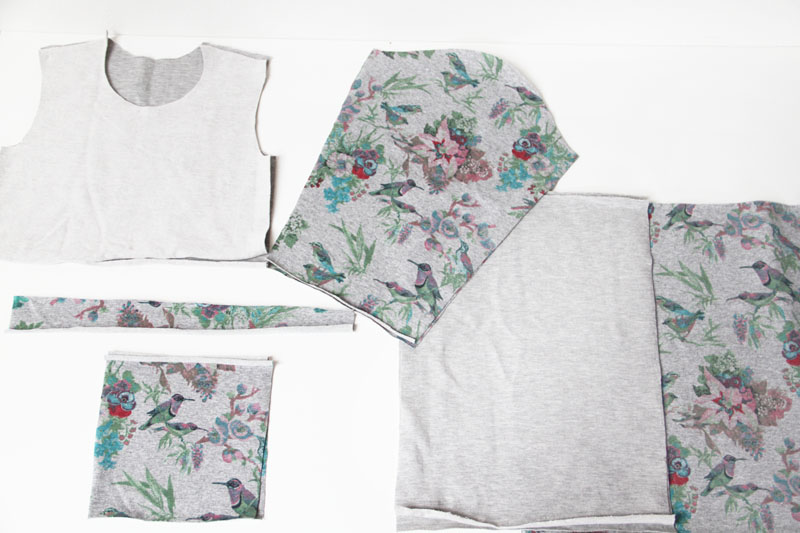
Pattern layout
- 1x front piece (cut on the fold)
- 1x back piece (cut on the fold)
- 2x sleeve piece (Mine are slightly shortened so that I can finish them with cuffs.)
- 2x cuff (optional)
- 2x skirt piece (I have 4 smaller pieces - I used scraps and there was no room for the whole skirt piece.)
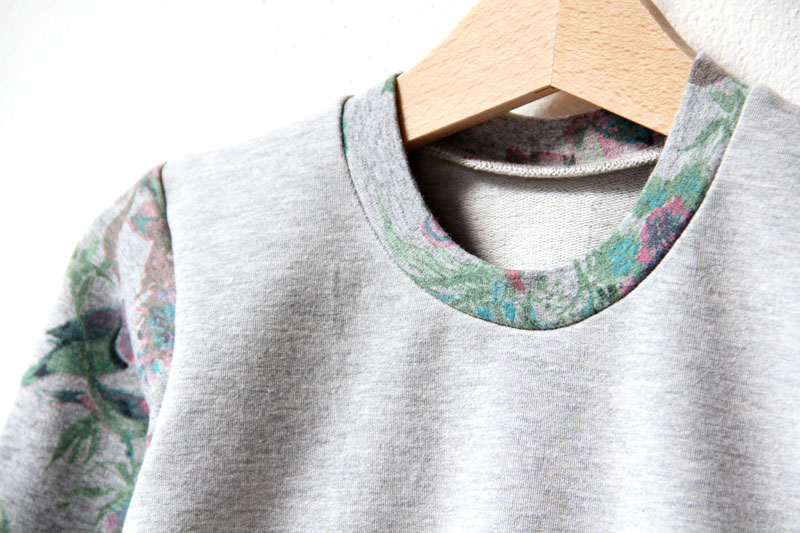
- 1x neckline hem - elastic knit strip (The width is 5 cm / 2" and you can measure the exact length later.)
Bodice
Let's work on the bodice first. Put the front piece on the back piece (face side to face side) and sew one shoulder seam.
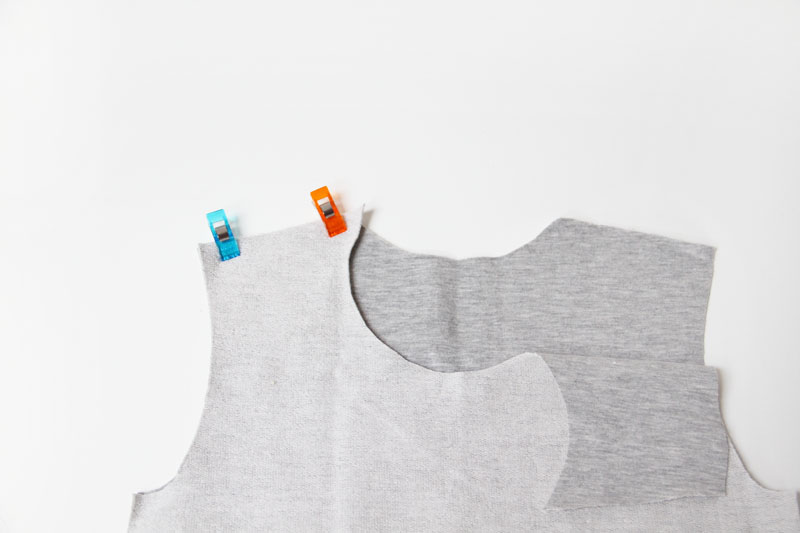
If you want to use a wider strip (5 cm / 2" instead of 3.5 cm 1 3/8") for the neckline hem, cut 1 cm (0.4") from the entire circumference of the neckline.
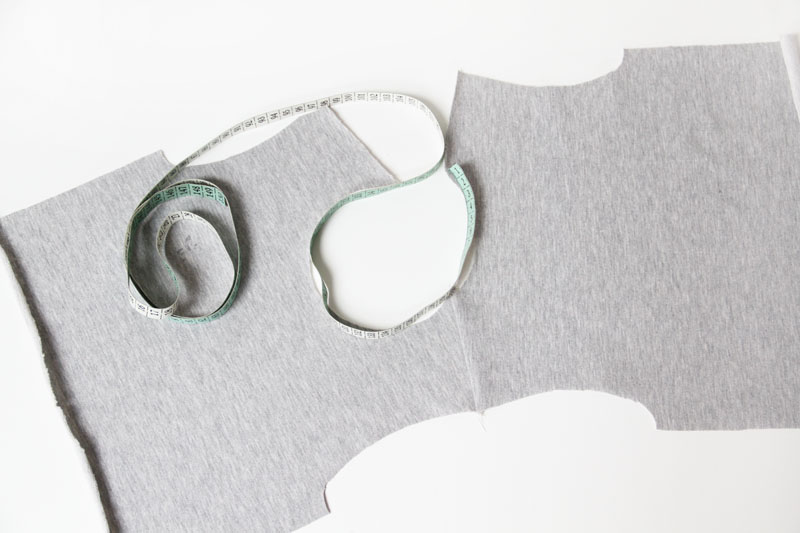
Measure the circumference of the neckline (with a tailor's tape laid on its side) and multiply this number by 0.7. The result is the recommended length of the knit strip for the hem. Well... An approximate recommended length - every material is a little different…
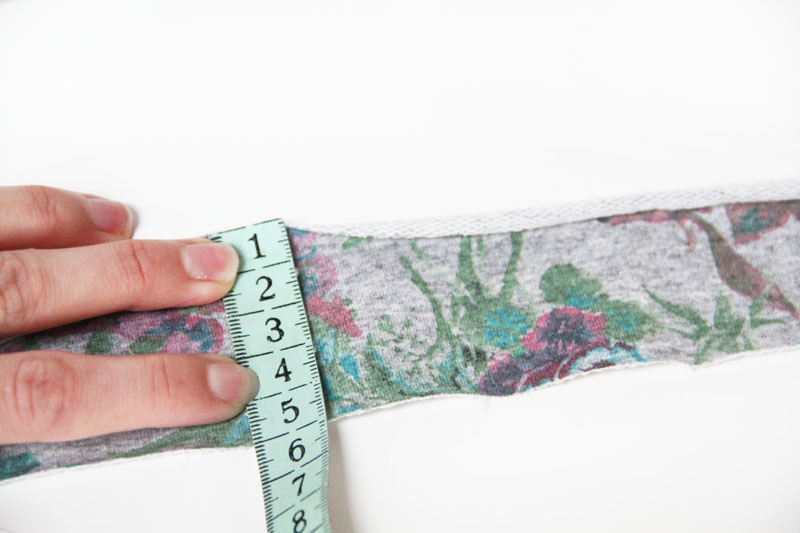
You can cut the strip a few centimeters longer so that you can adjust the tightness of the neckline. Use a pin to mark the recommended length that you calculated earlier.
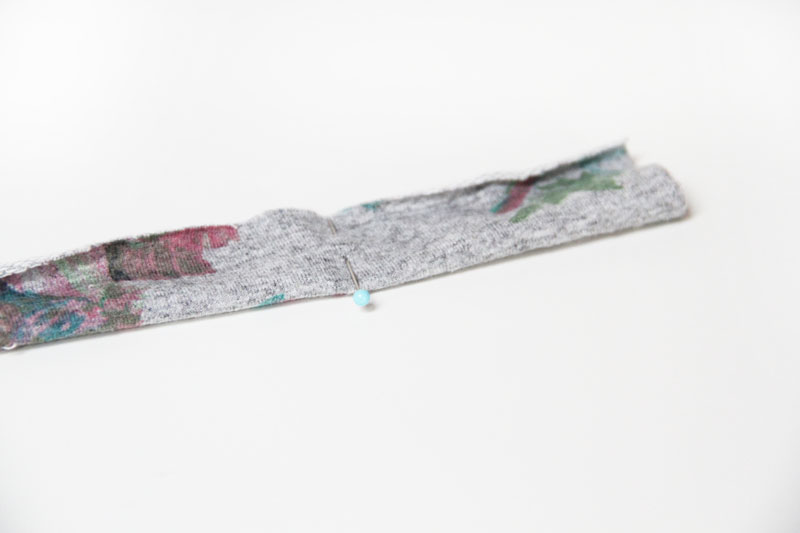
Fold the strip in half (lengthwise) and pin it to the neck opening. In an ideal situation, you will get exactly to your mark that indicates the recommended length. If you have less stretchy material, you will probably need to go beyond the pin and use a slightly longer strip.
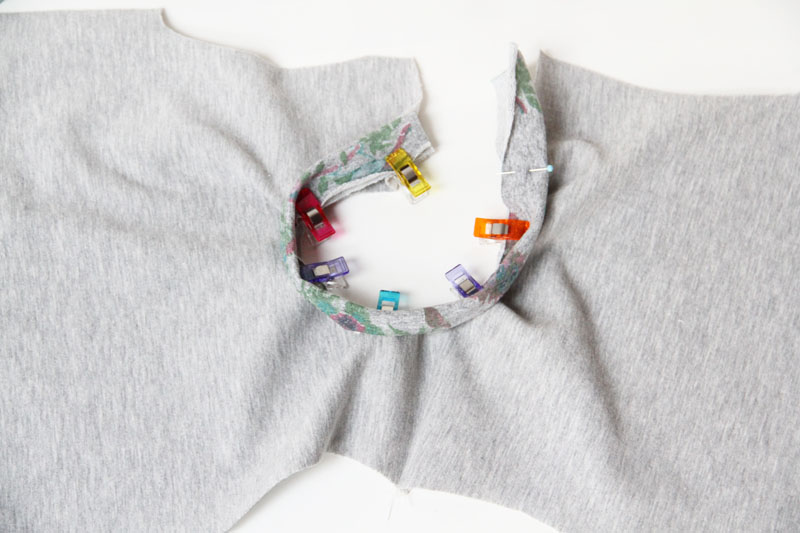
Iron the neckline to “set” the hem in place.
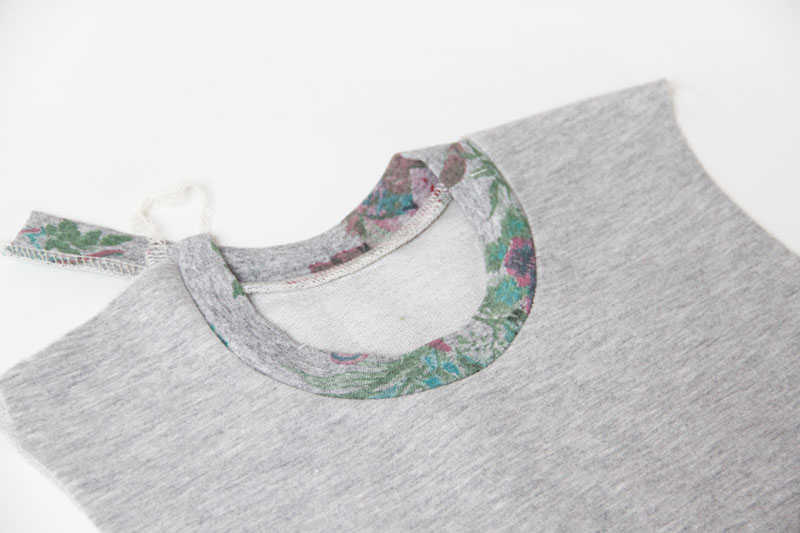
Turn the bodice inside out and pin the other shoulder seam. Sew the other shoulder seam.
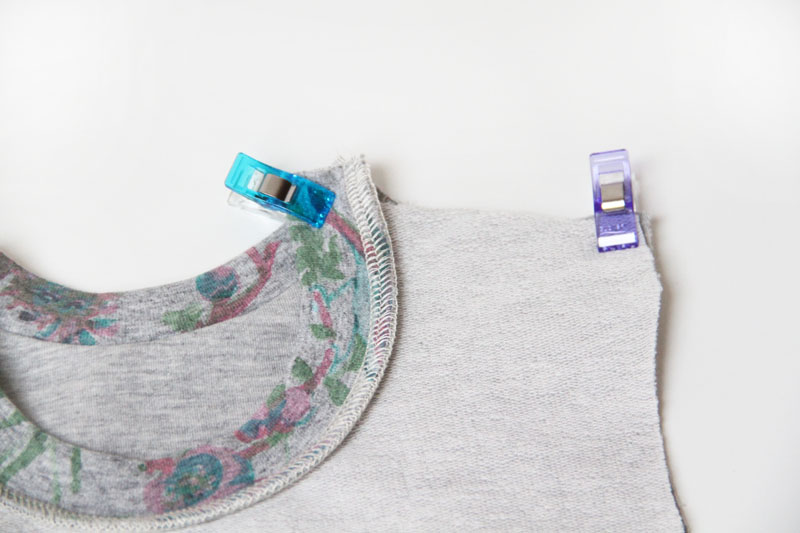
Pull free ends of the thread chain under the loops when using an overlock.
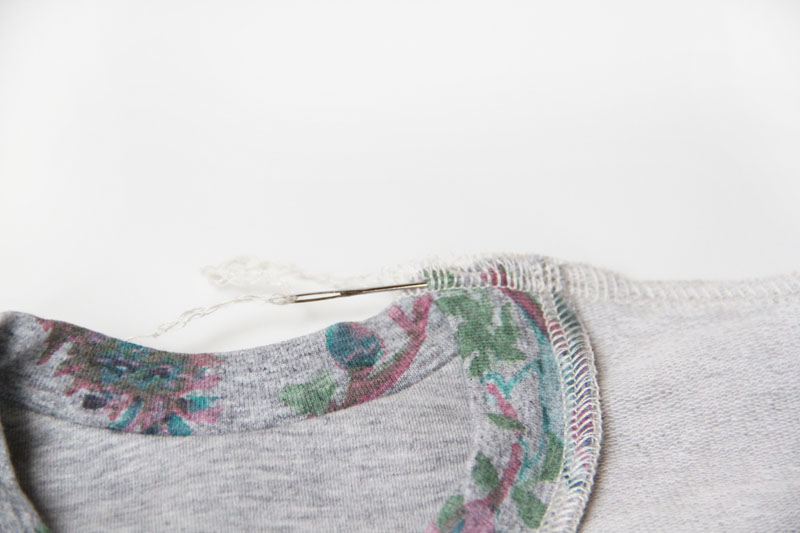
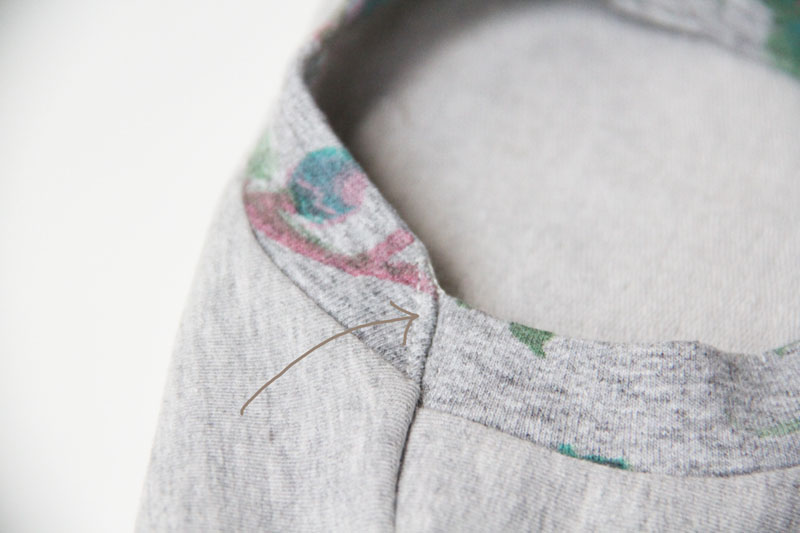
Press the seam allowances towards the back piece and use a few small stitches to keep it in place. This will make the neckline more comfortable.
Sleeves
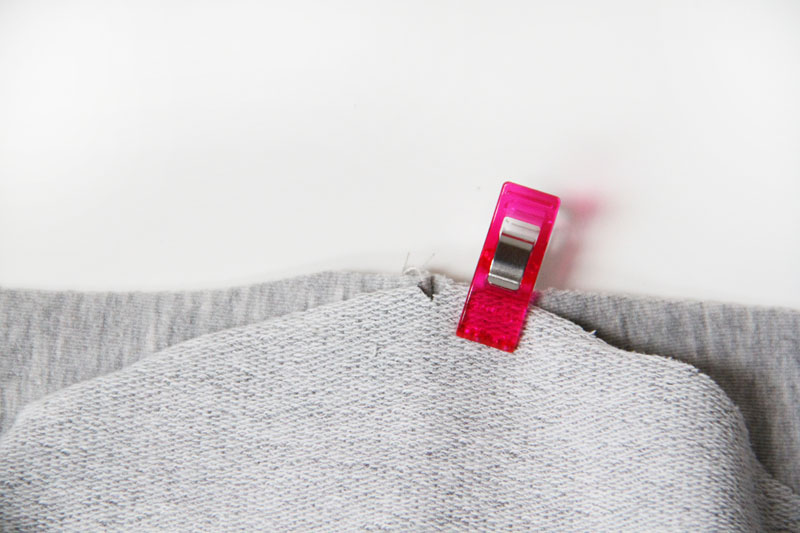
Mark the top of the sleeve head with a small notch (cut). Align your notch with the shoulder seam and pin these two points.
Pin the rest of the sleeve cap to the open armscye.
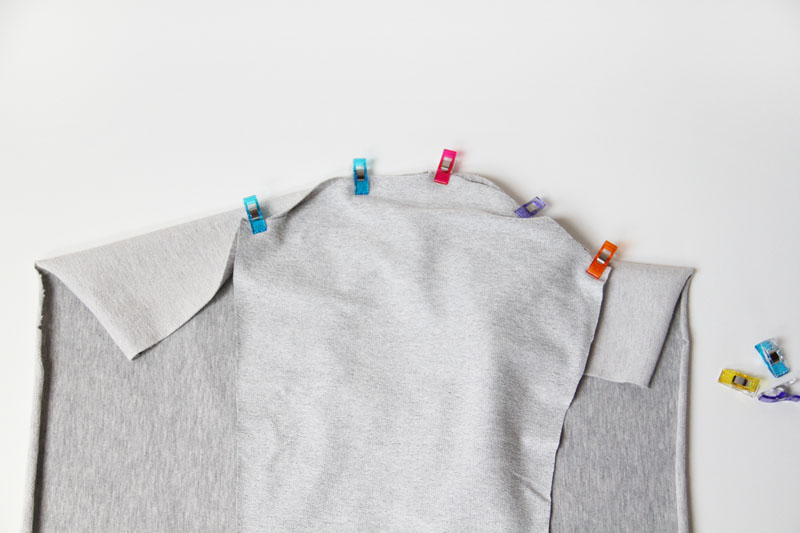
Sew the sleeve to the bodice. Work on the other sleeve in the same way. Now pin the side seams and sleeve seams on both sides of the bodice.
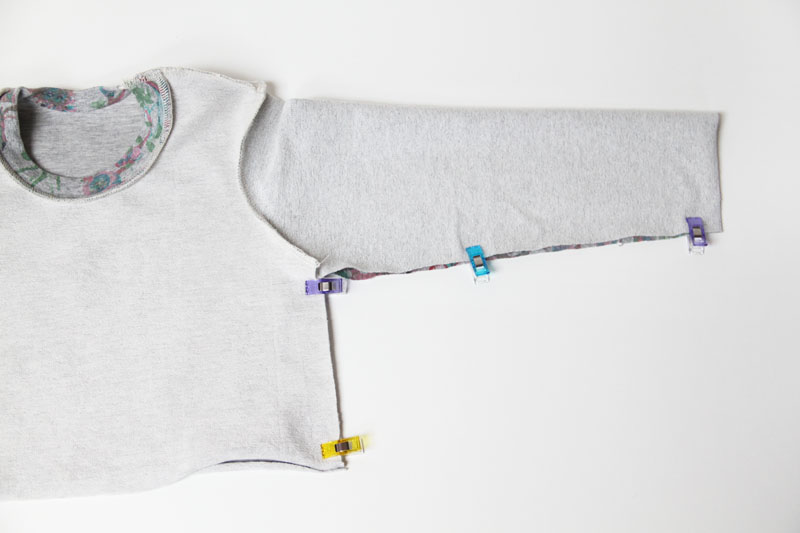
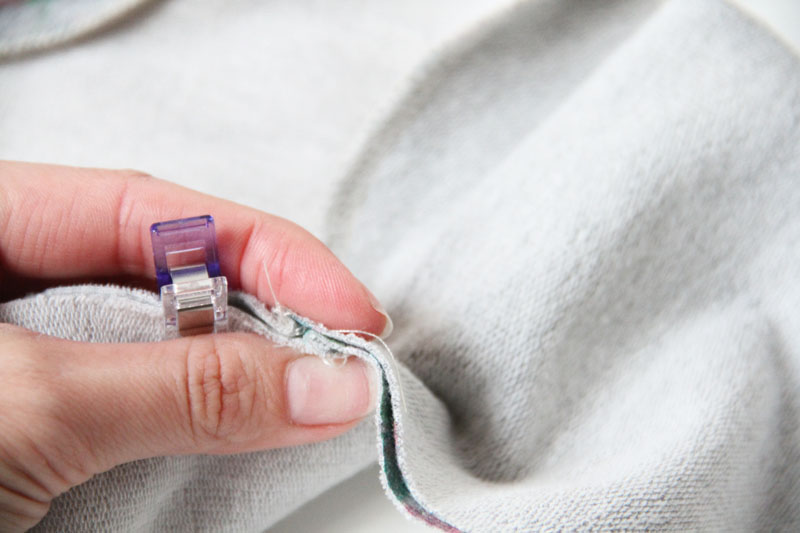
Pay attention to the armpit area - both ends of the armscye/sleeve cap must be aligned. Fold seam allowances of the armscye in opposite directions. Sew sleeve seam & side seam in one go (and then do the same on the other side of the bodice).
Cuffs
Fold the cuff pieces in half and sew their edges (to form the tunnels)
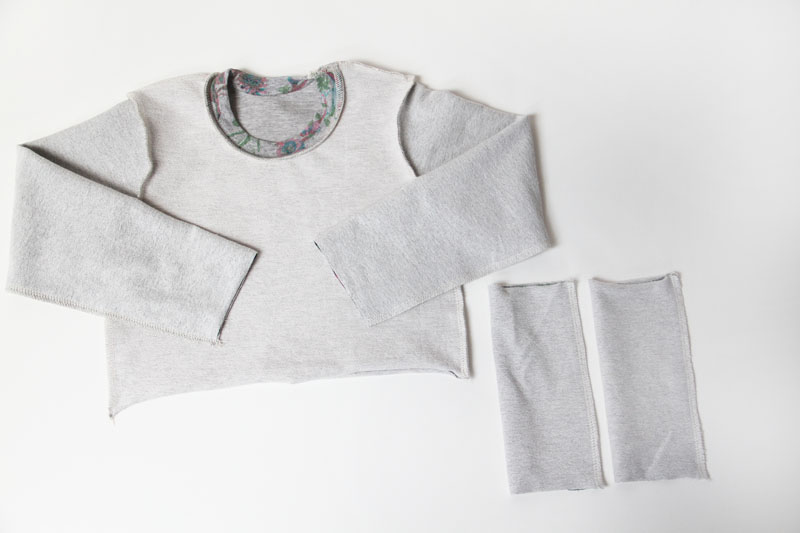
Use small notches to mark the half-points of both cuff pieces (the points opposite to the seam).
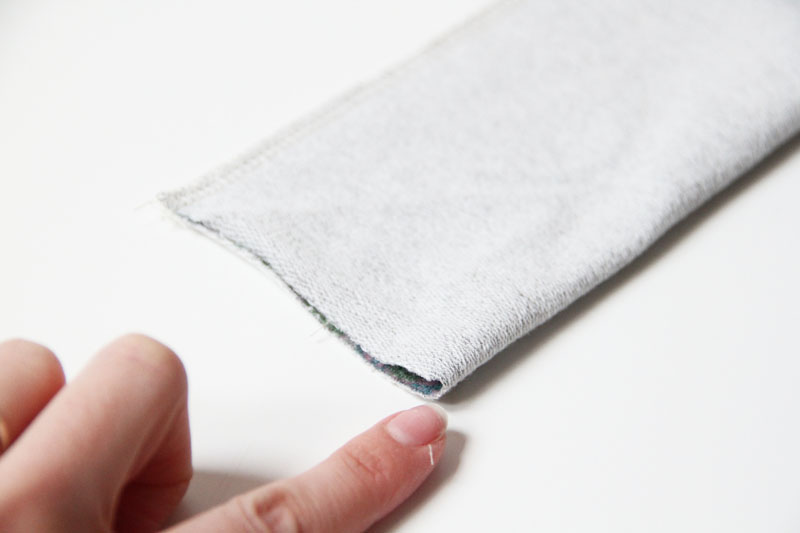
Mark the bottom edges of both sleeves in the same fashion.
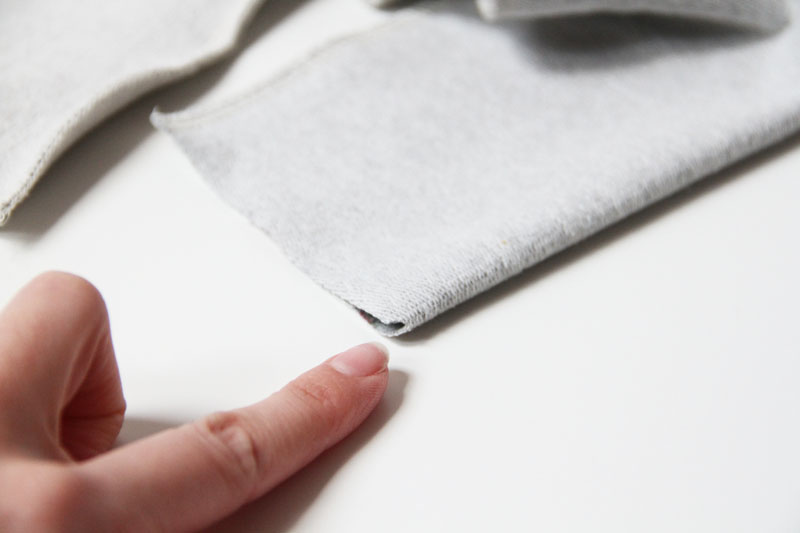
Fold (“roll”) the cuff pieces in half to form their final shape.
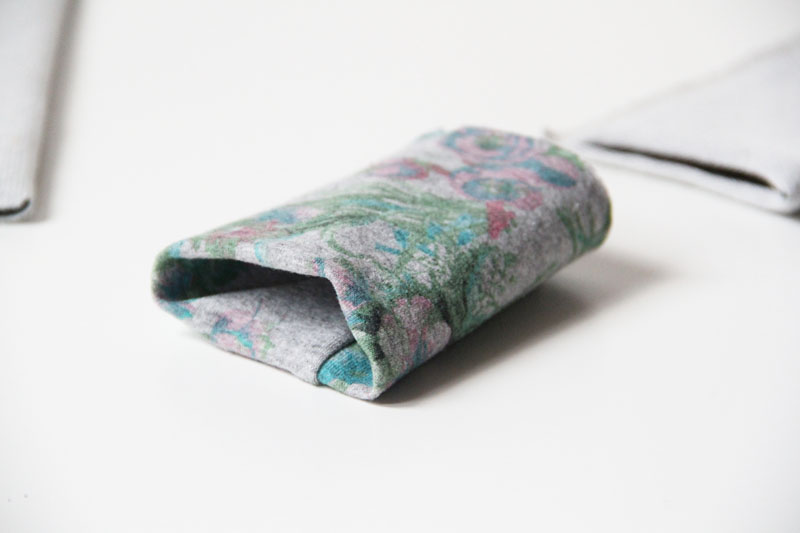
Insert the first cuff into the sleeve (face side to face side), align both pieces “seam-to-seam and notch-to-notch” and pin them.
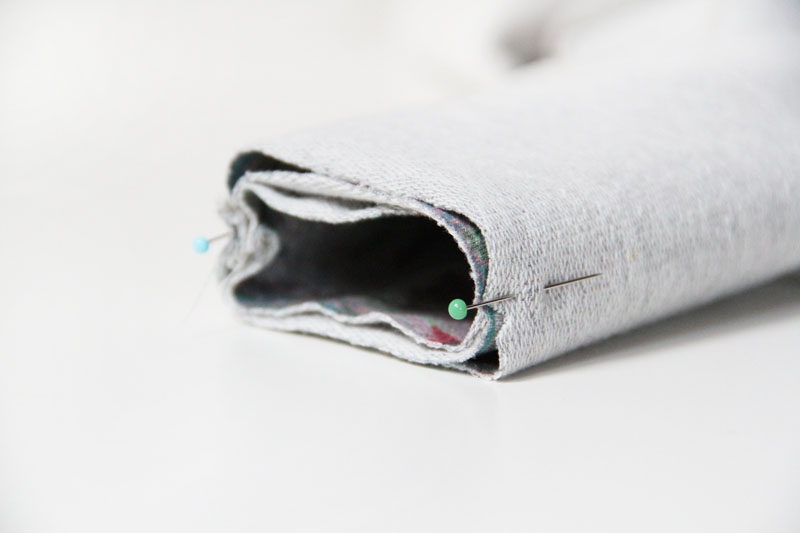
Now sew “on the inside” of the sleeve (see photo below).
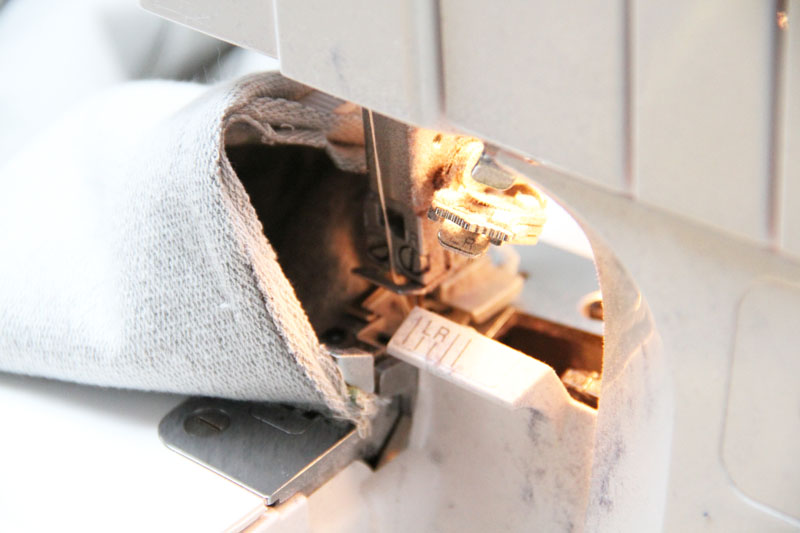
Pull the free end of the thread chain under the loops. Sew the second cuff in the same way.
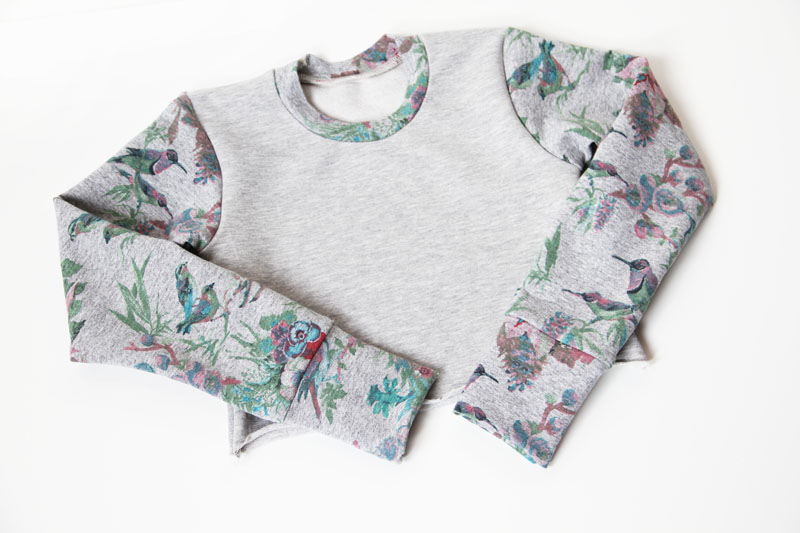
Skirt
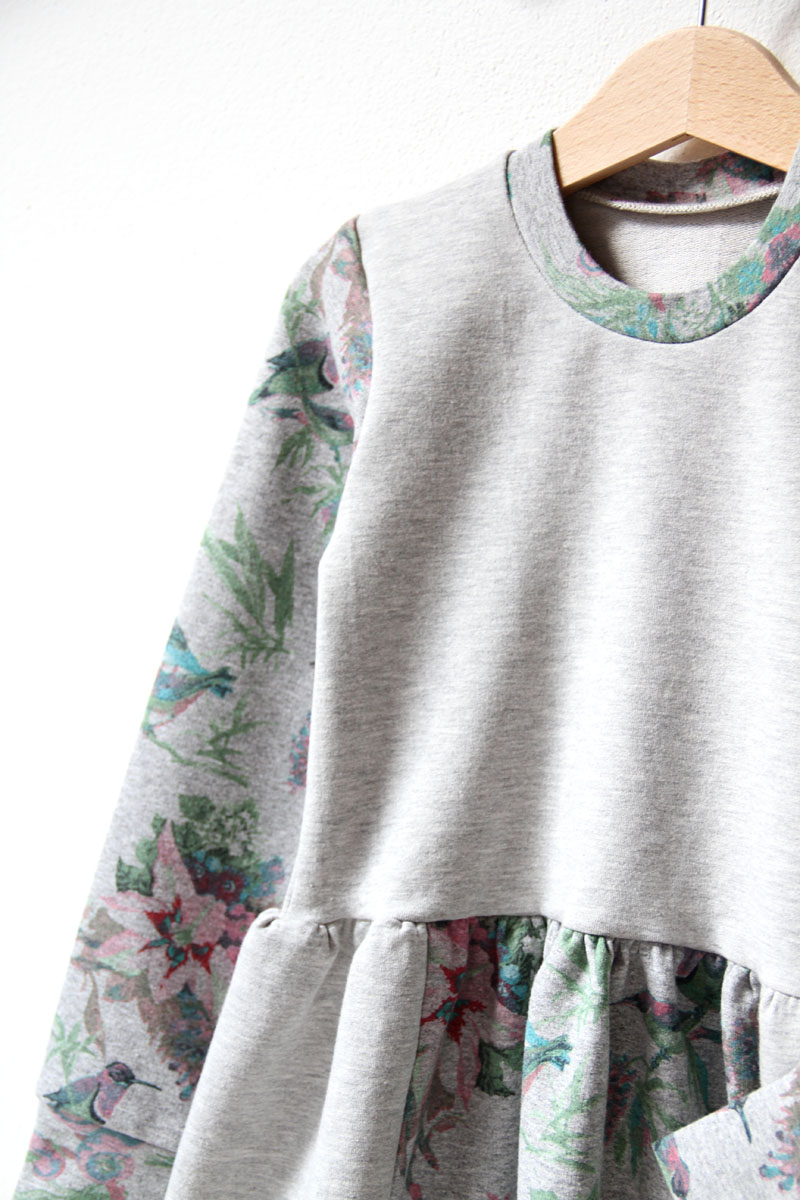
My skirt has four parts (pieces of my scrap fabric were too small), so I have to sew four seams. You should only have two parts.
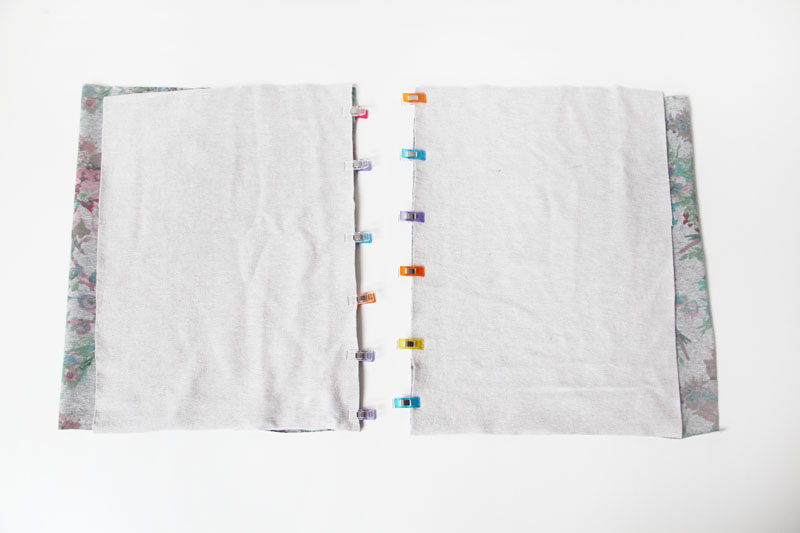
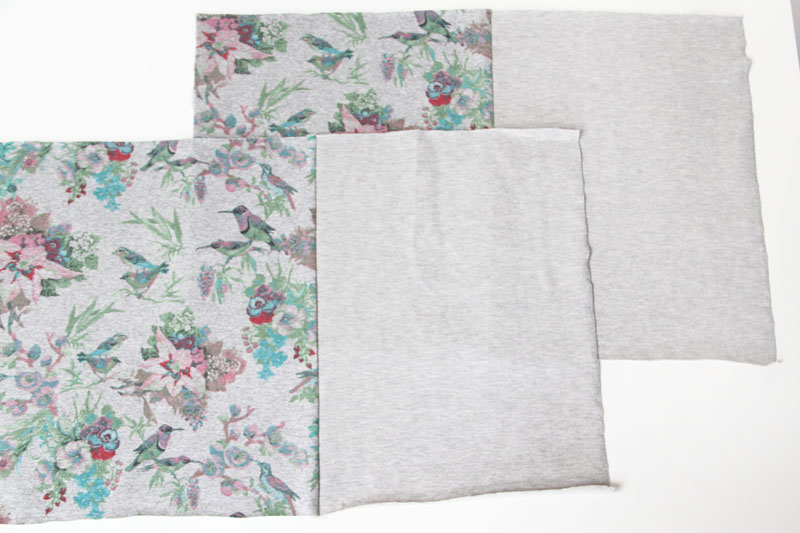
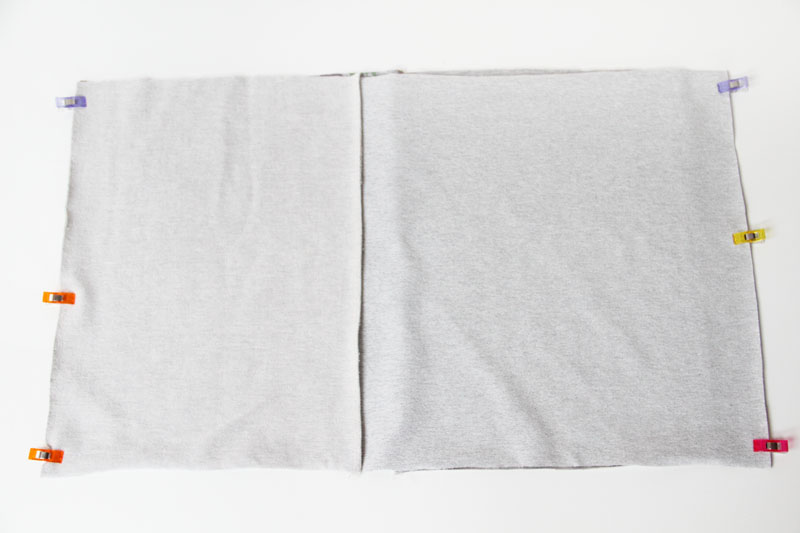
Iron all seams and the whole skirt thoroughly.
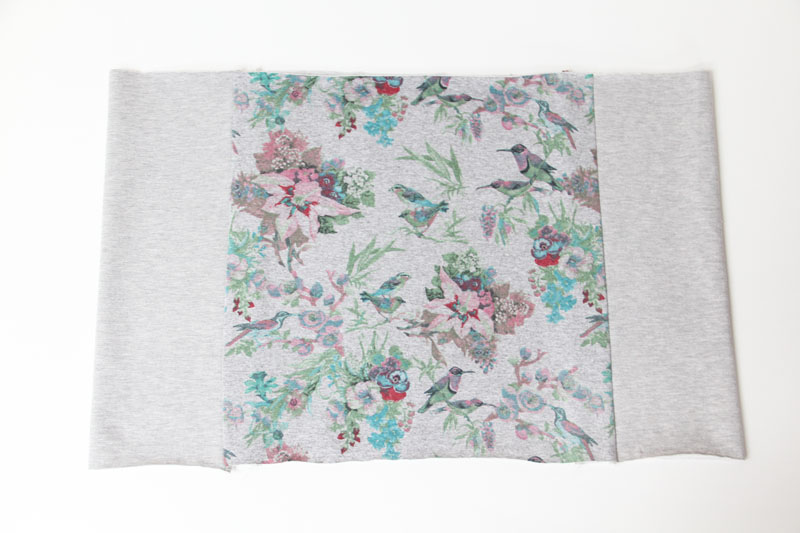
If you also work with a skirt that has four parts and you have “side panels”, then fold the seams of the side panels on top of each other…
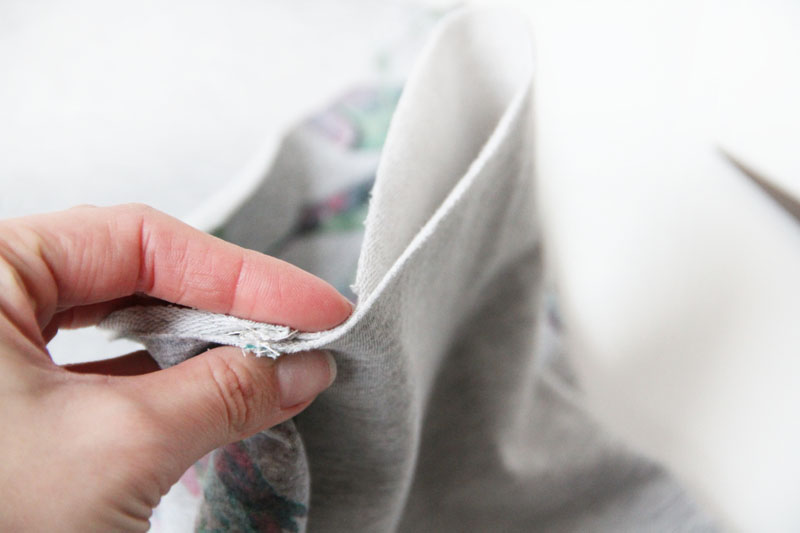
...to find the centers of the side panels. Mark these points with small notches - in these places the skirt meets the side seams on the bodice.
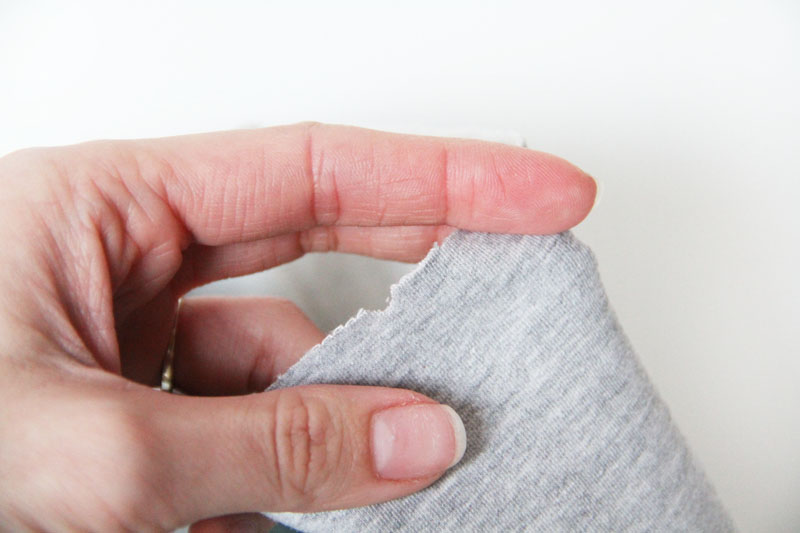
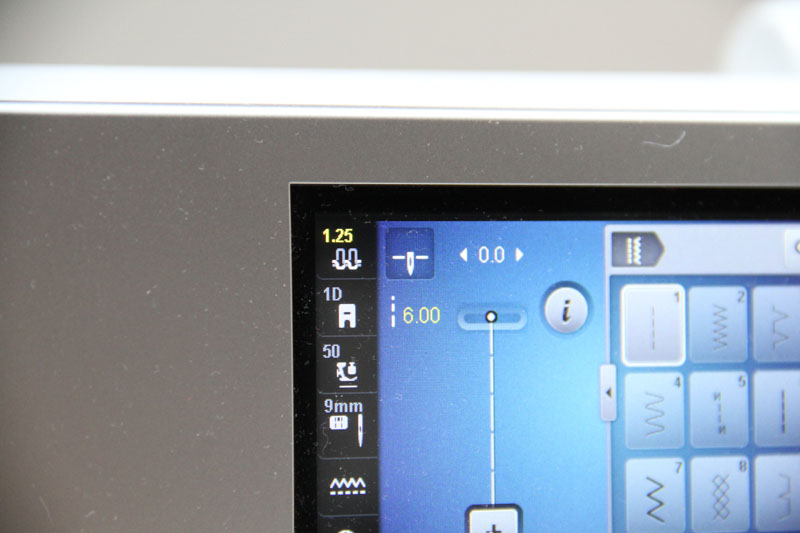
Let’s drape the skirt. Set your machine to the longest straight stitch possible and reduce the presser foot pressure and the lower (bobbin) thread tension.
Prepare the skirt so that you can start sewing from one of the side seams. The center of one of the side panels in my case...
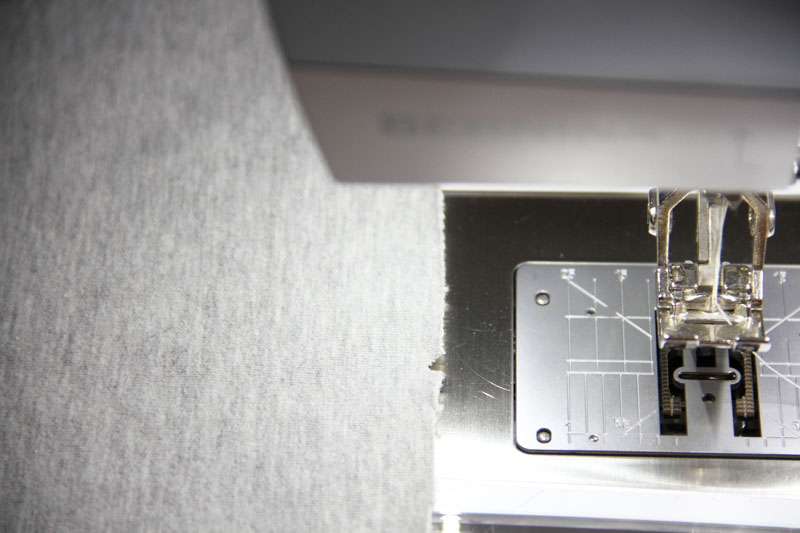
Turn off automatic backstitching.
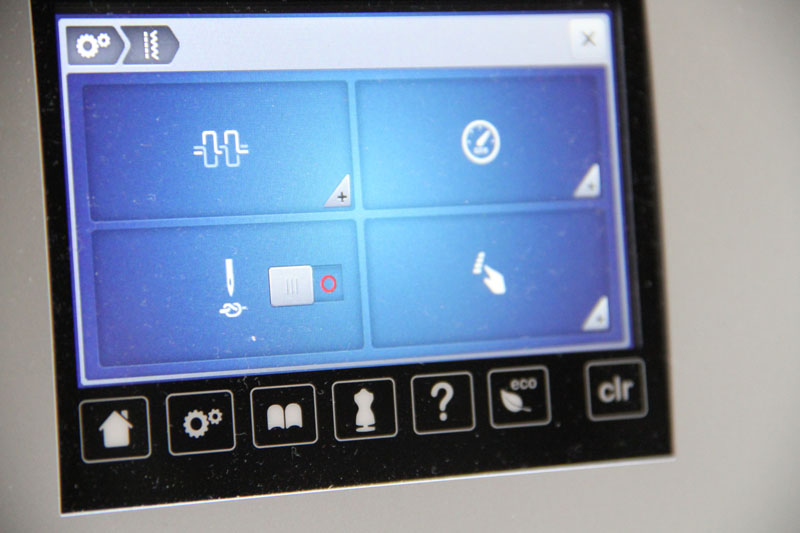
Pull about 15 cm (6") of the thread from the sewing machine.
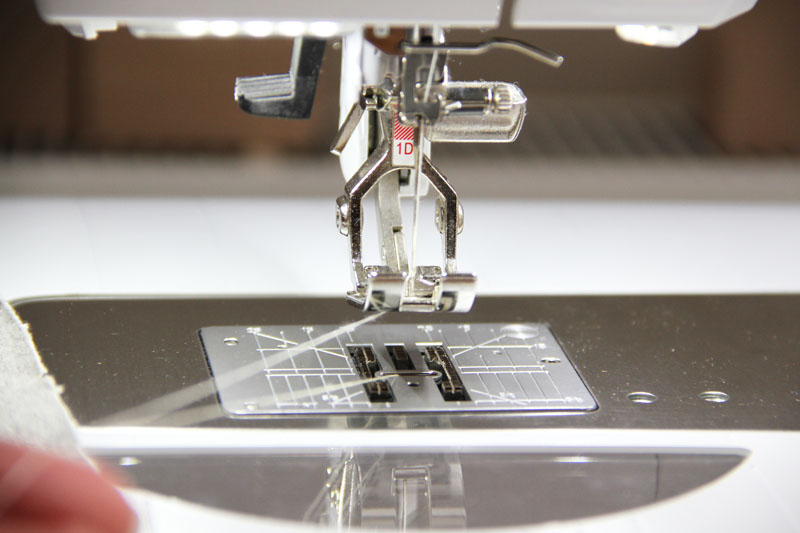
Now sew around the entire circumference of the skirt. Sew about 0.5 cm (0.2") from the edge. Don’t backstitch when you reach the end - just pull out about 15 cm (6") of thread again.
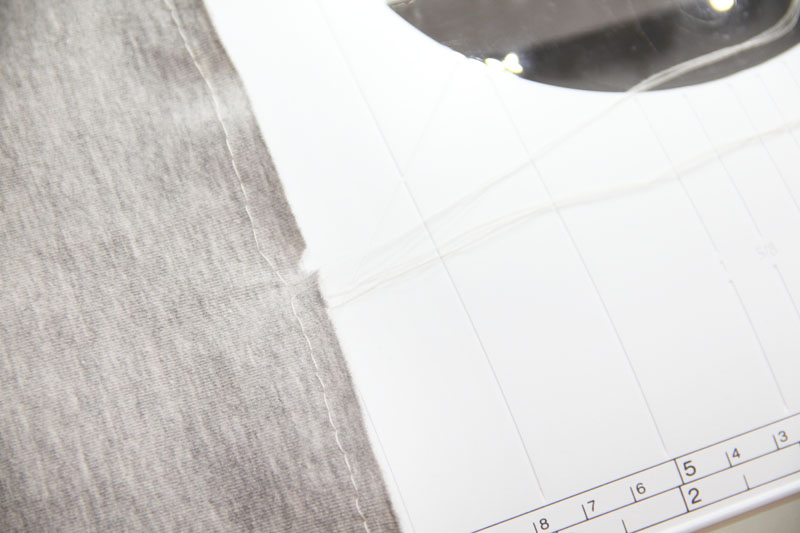
Sew another parallel seam (same settings) about 0.5 cm (0.2") from the original seam.
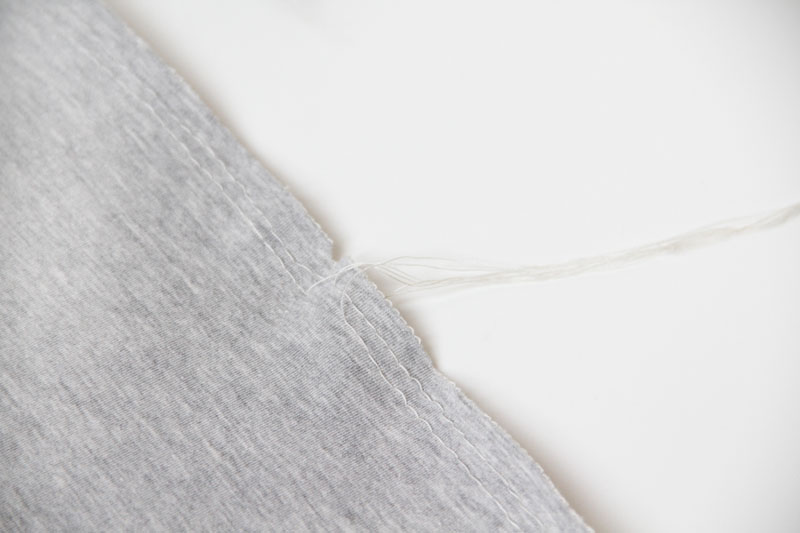
Find ends of both top threads...
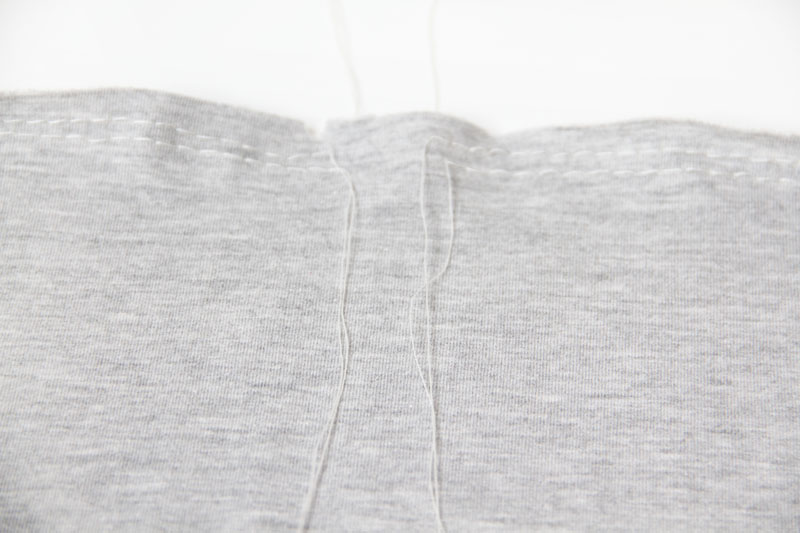
...and tie them.
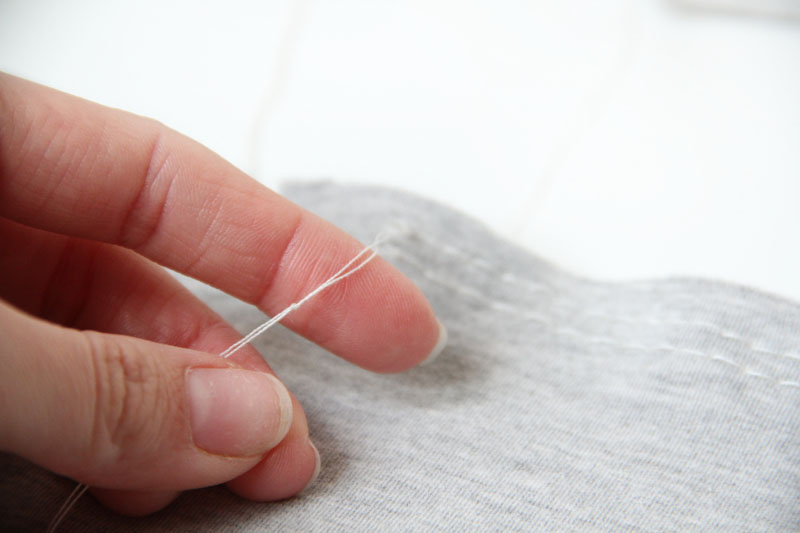
Now carefully pull both top threads on one side of the skirt and it should start to crease.
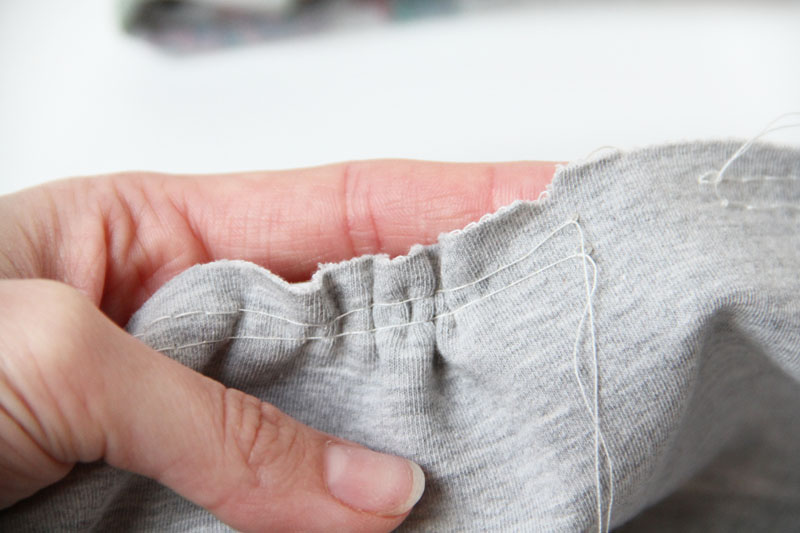
If the threads slid away at the other end of the seam, you can fix it with a needle:
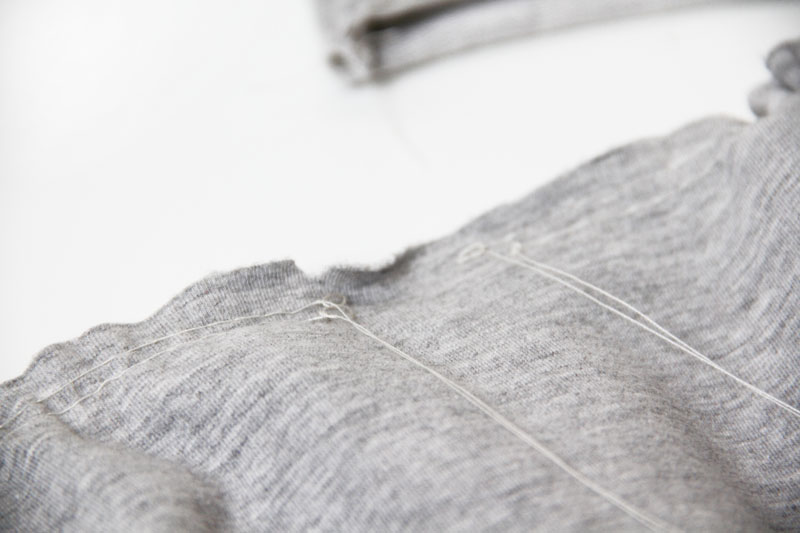
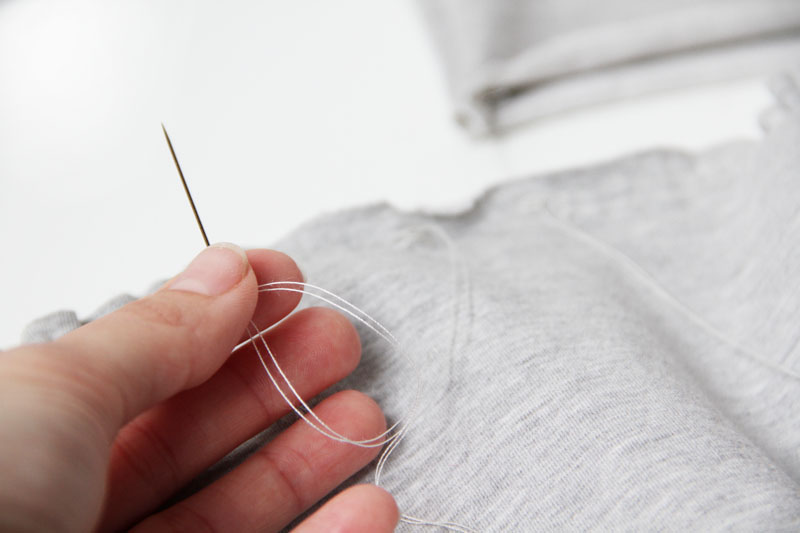
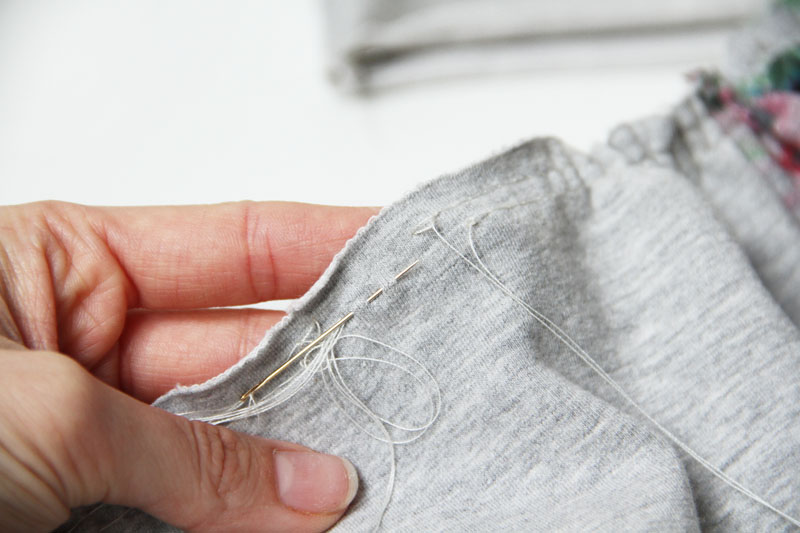
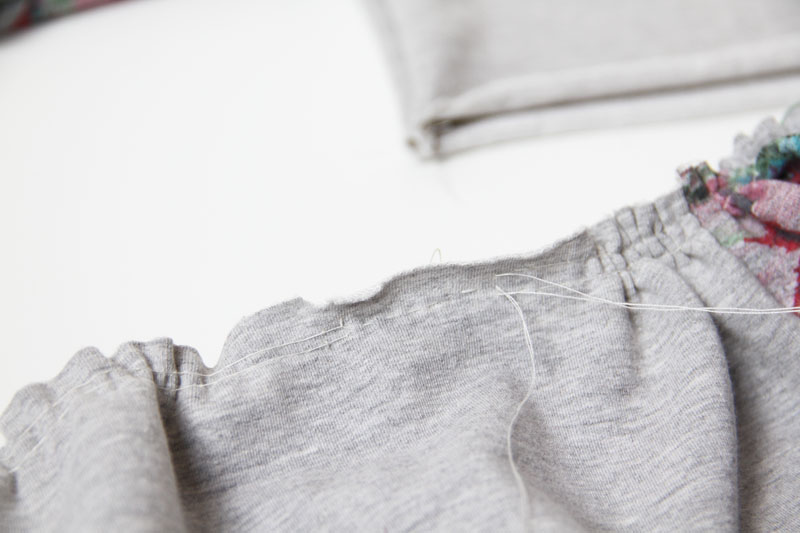
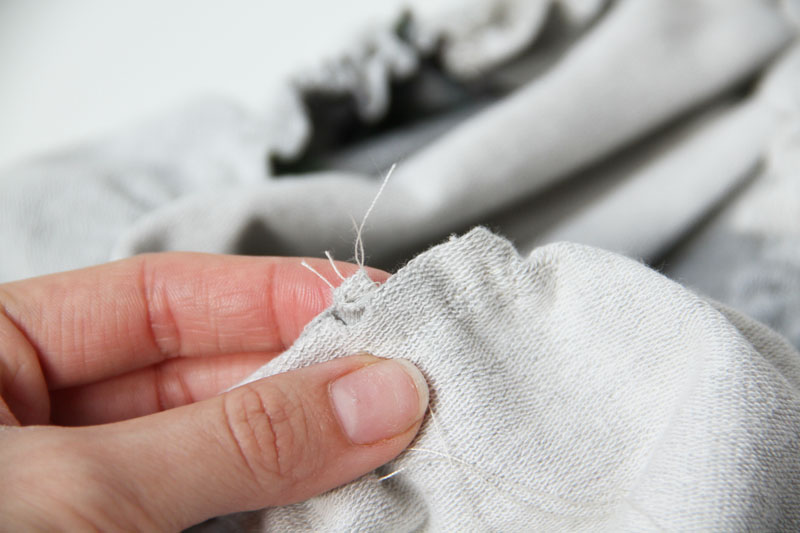
Pull the threads until the upper edge of the skirt has the same circumference as the bottom edge of the bodice (or 1 - 2 cm / 0.4 - 3/4" larger than the bodice). If you overdo it, it won’t be easy to sew the skirt to the bodice. Tie all upper threads to keep them from sliding away.
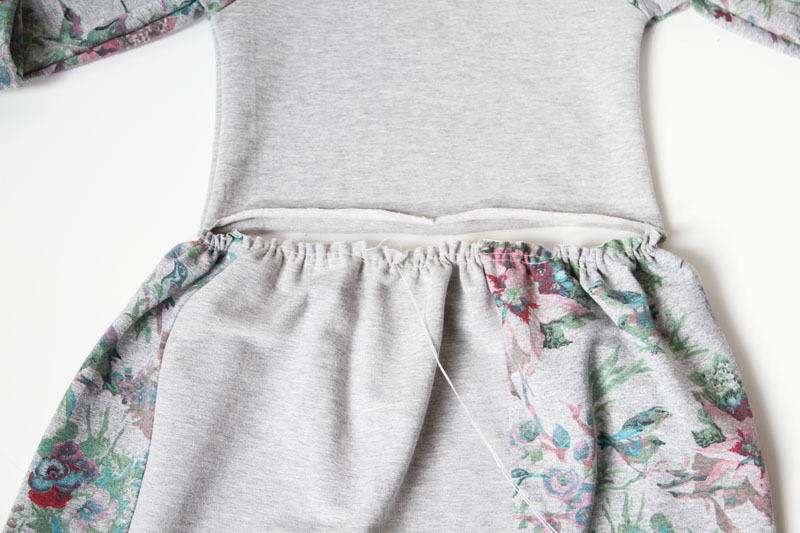
Align side seams (notches in my case) of the skirt and side seams of the bodice.
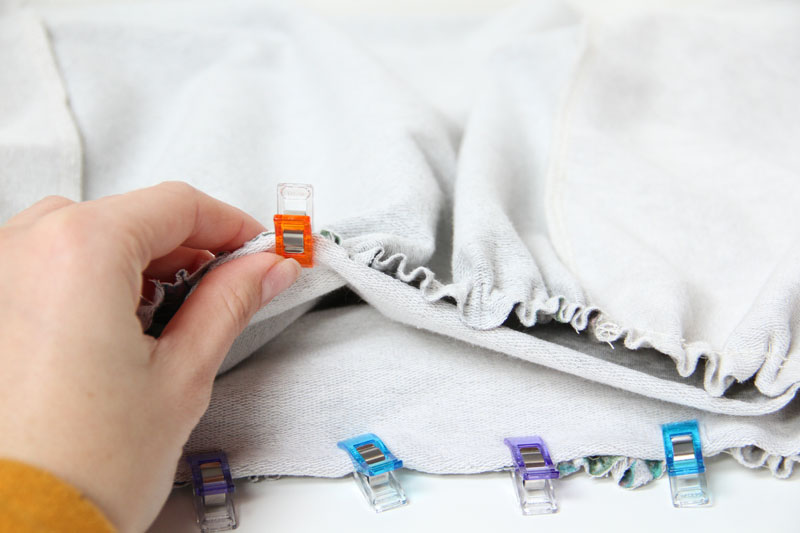
Pin the skirt to the bodice. Try to “spread” the draping evenly.
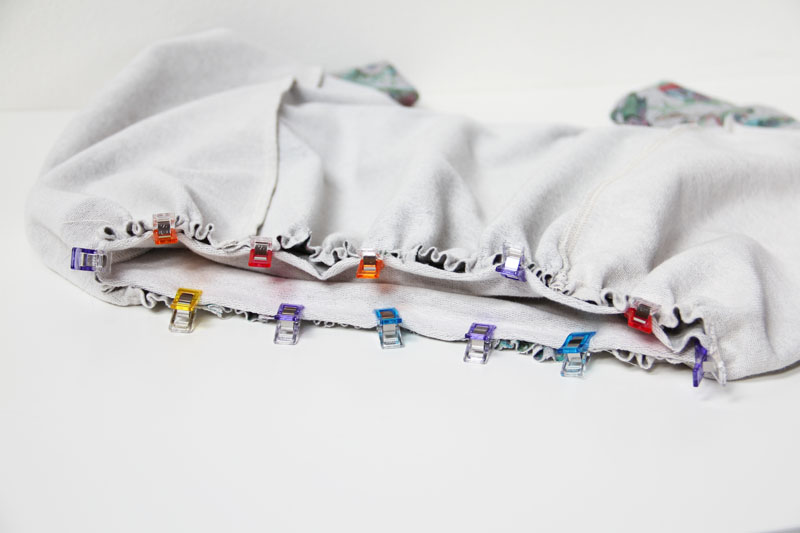
Sew the skirt to the bodice. Sew so that the draping on the skirt is in contact with the feed dogs. Otherwise, the presser foot will push it out of its place and the seam will not be even.
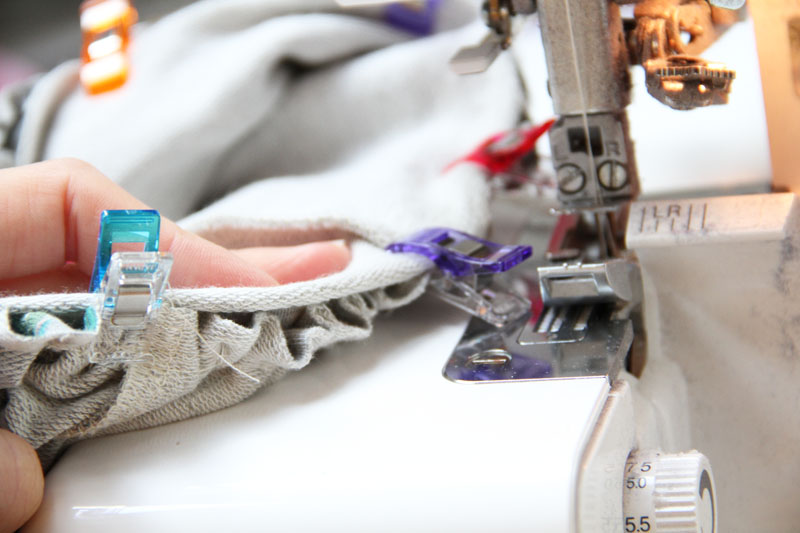
Start sewing from one of the side seams.
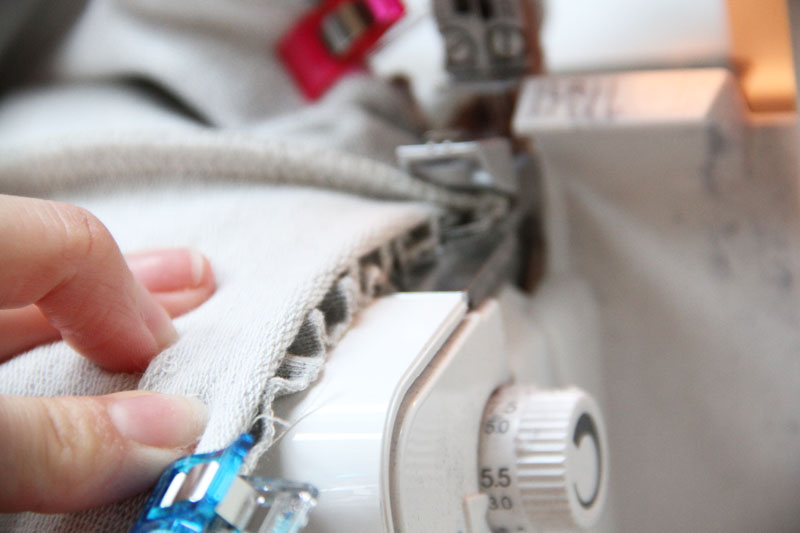
Sew around the entire circumference of the skirt.
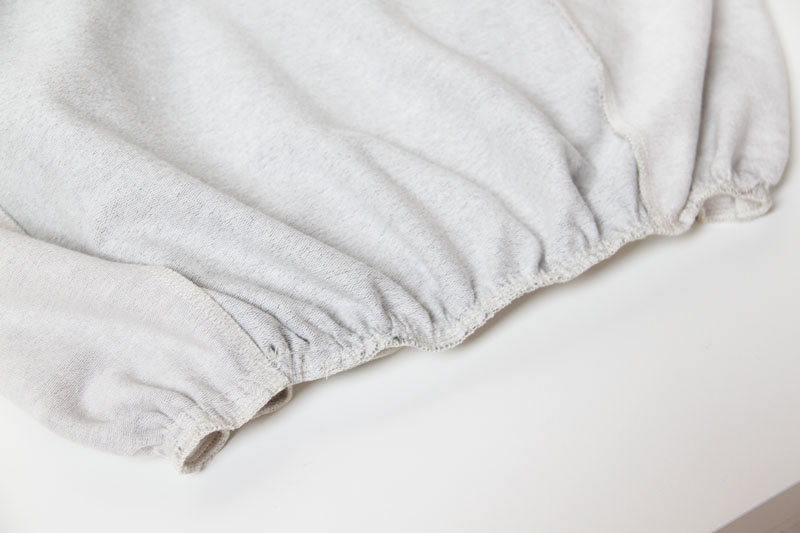
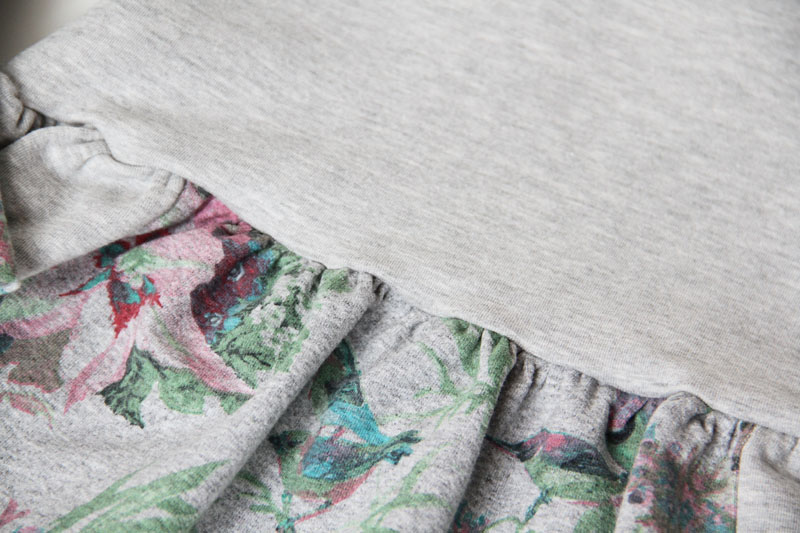
Turn the dress on the face side.
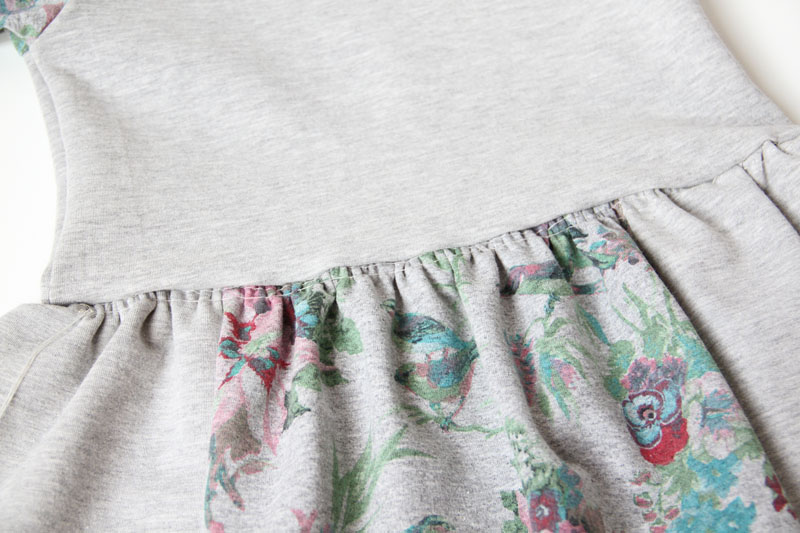
Find the threads you used to drape the skirt and cut their knots.
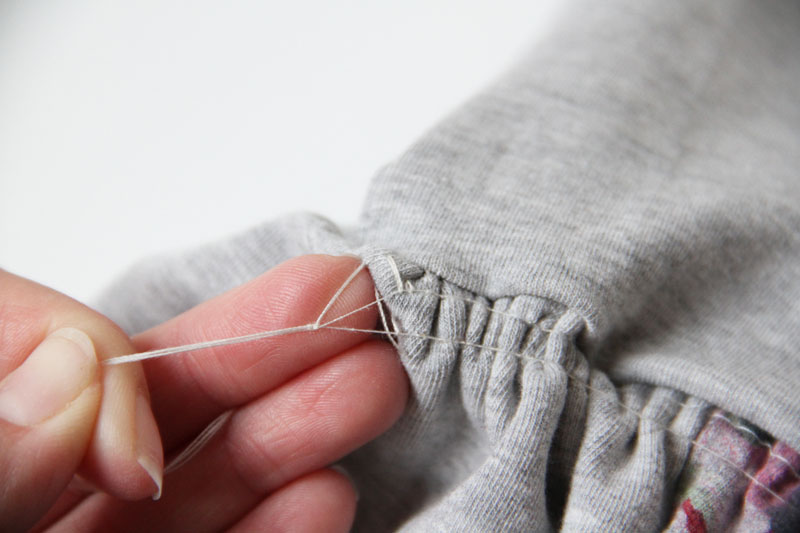
Pull out all the threads - don't forget the lower (bobbin) threads on the inside of the dress.
Bottom hem
Clean the bottom cutting edge of the skirt. Pull free ends of the thread chain under the loops when using an overlock.
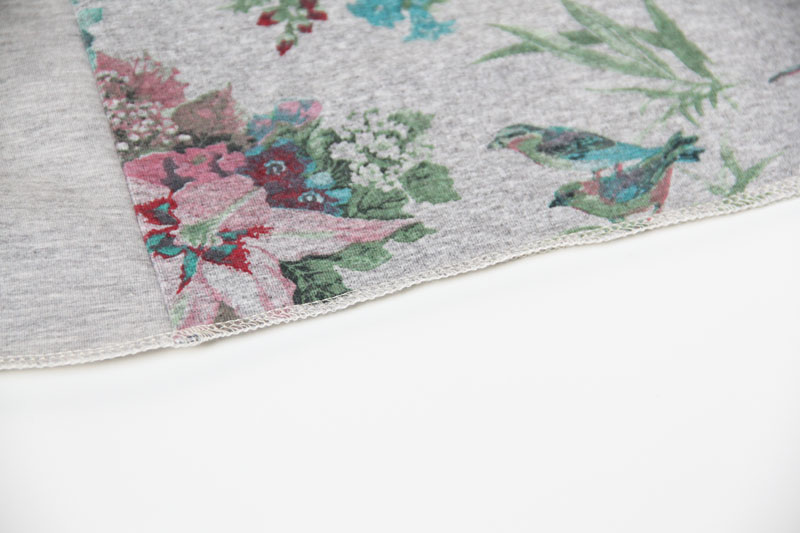
Fold the edge (2 - 3 cm / 3/4 - 1.18") to the reverse side of the dress and pin it there.
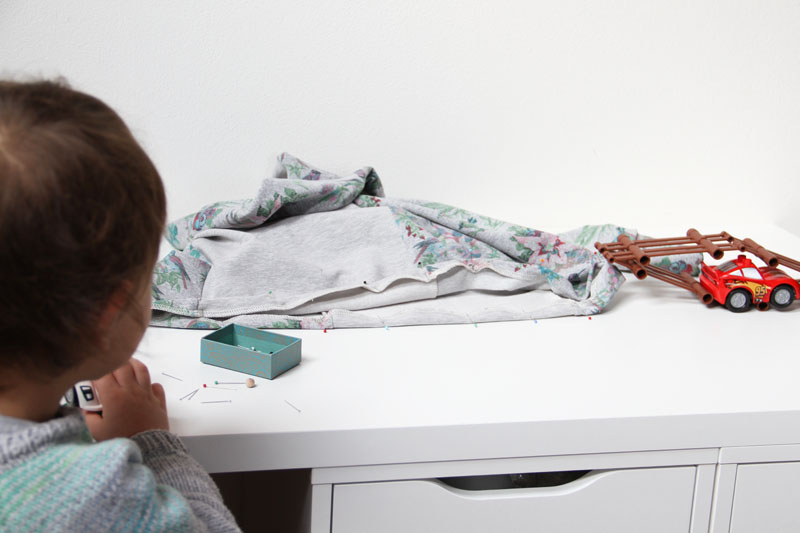
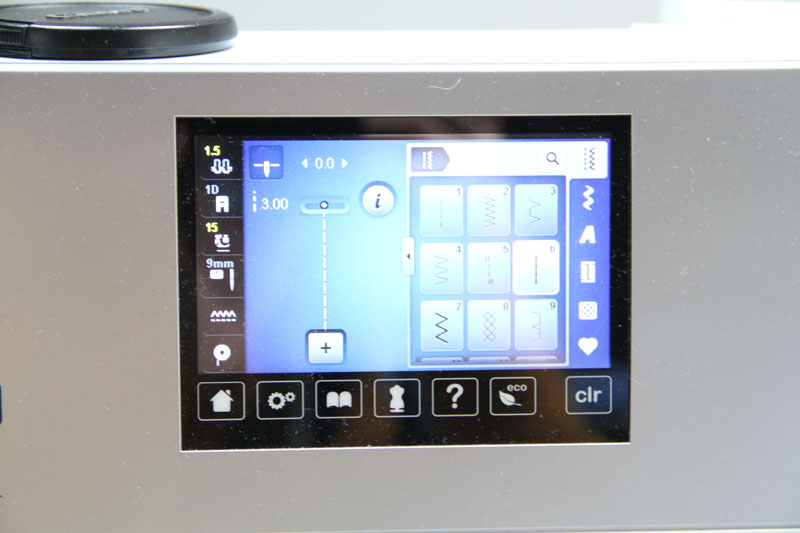
Reduce the bobbin thread tension & the pressure of the presser foot and choose an elastic stitch.
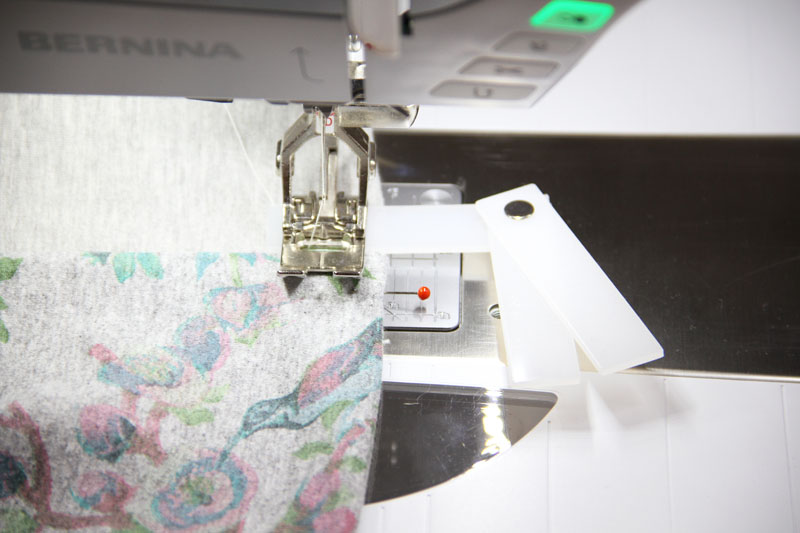
Sew around the bottom edge of the skirt. If you have a two-part skirt, start sewing from one of the side seams. If you have a four-part skirt, start from one of the seams on the backside of the skirt.
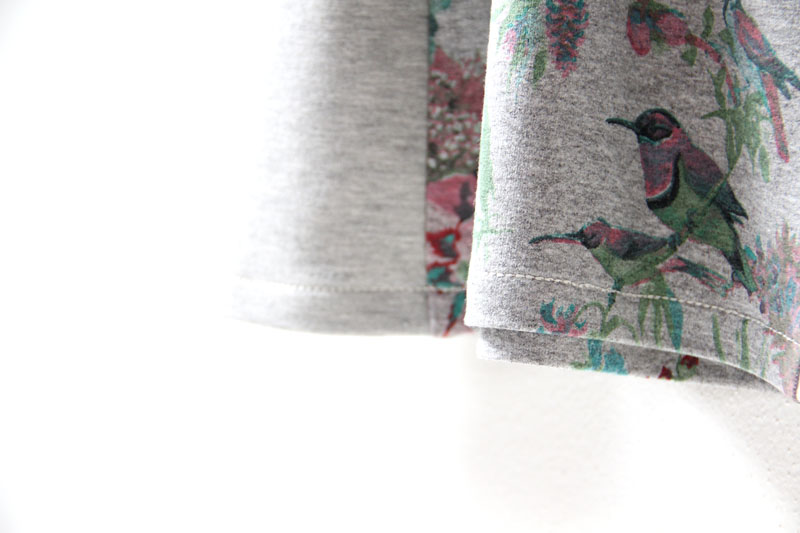
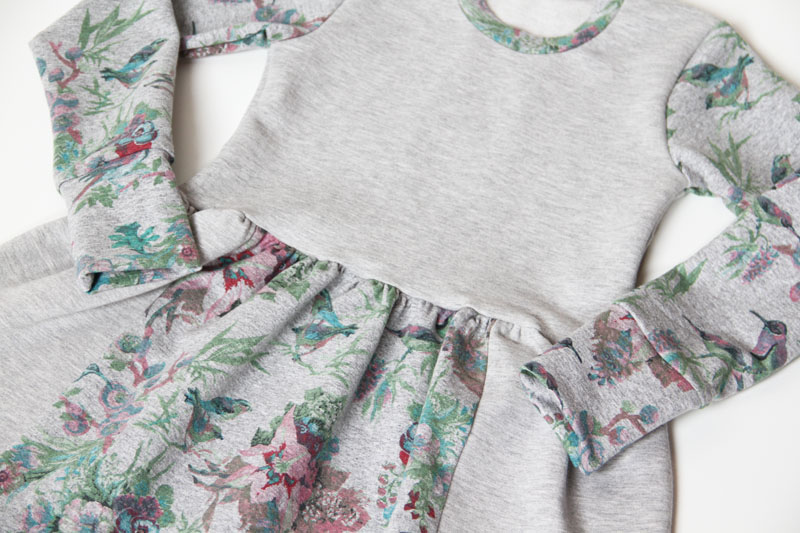
And it is done! Simple dress that can be worn from autumn to spring...
If you have a moment, leave a comment about how you liked today's article and tell me what would you like to see next time.
Have a nice day, Petra
PS: You can take a look at the pattern from this article here:
The pattern for children’s dress FLORA
The pattern for girl's dress FLORA
EXPLORE THE PATTERN
If you are looking for some nice pattern for a women's dress, you might like this one:

The pattern for women's dress JACKELINE
EXPLORE THE PATTERN
Material
Thinner uncombed laid-in knit (French Terry) is suitable for our purposes. In stores, you can usually find this material in the knits category. The weight (grammage) should be about 250g/m2 and you will recognize this material by the loops on the wrong side. I fell in love with this material, it is ideal for the period when it is too cold for a T-shirt and too warm for a sweatshirt. You will find a large selection, for example, in the Dumlatek.cz store: French Terry - With prints French Terry - Monochromatic.
I used fabric leftovers from another of my projects.
Sewing instructions
I sewed the dress on my overlock, but you can easily do it with a regular sewing machine. If you plan to use a regular sewing machine, I recommend reading this article first:
Sewing elastic fabrics with a regular sewing machine - 4 steps to success
explore the article
Pattern layout
1x front piece (cut on the fold)
1x back piece (cut on the fold)
2x sleeve piece (Mine are slightly shortened so that I can finish them with cuffs.)
2x cuff (optional)
2x skirt piece (I have 4 smaller pieces - I used scraps and there was no room for the whole skirt piece.)
1x neckline hem - elastic knit strip (The width is 5 cm / 2" and you can measure the exact length later.)
 LAID-IN KNIT DRESS (PATTERN + INSTRUCTIONS)
Bodice
Let's work on the bodice first. Put the front piece on the back piece (face side to face side) and sew one shoulder seam.
 LAID-IN KNIT DRESS (PATTERN + INSTRUCTIONS)
If you want to use a wider strip (5 cm / 2" instead of 3.5 cm 1 3/8") for the neckline hem, cut 1 cm (0.4") from the entire circumference of the neckline.
Measure the circumference of the neckline (with a tailor's tape laid on its side) and multiply this number by 0.7. The result is the recommended length of the knit strip for the hem. Well... An approximate recommended length - every material is a little different…
 LAID-IN KNIT DRESS (PATTERN + INSTRUCTIONS)
 LAID-IN KNIT DRESS (PATTERN + INSTRUCTIONS)
You can cut the strip a few centimeters longer so that you can adjust the tightness of the neckline. Use a pin to mark the recommended length that you calculated earlier.
 LAID-IN KNIT DRESS (PATTERN + INSTRUCTIONS)
Fold the strip in half (lengthwise) and pin it to the neck opening. In an ideal situation, you will get exactly to your mark that indicates the recommended length. If you have less stretchy material, you will probably need to go beyond the pin and use a slightly longer strip.
 LAID-IN KNIT DRESS (PATTERN + INSTRUCTIONS)
Iron the neckline to “set” the hem in place.
 LAID-IN KNIT DRESS (PATTERN + INSTRUCTIONS)
Turn the bodice inside out and pin the other shoulder seam. Sew the other shoulder seam.
 LAID-IN KNIT DRESS (PATTERN + INSTRUCTIONS)
Pull free ends of the thread chain under the loops when using an overlock.
 LAID-IN KNIT DRESS (PATTERN + INSTRUCTIONS)
Press the seam allowances towards the back piece and use a few small stitches to keep it in place. This will make the neckline more comfortable.
 LAID-IN KNIT DRESS (PATTERN + INSTRUCTIONS)
Sleeves
Mark the top of the sleeve head with a small notch (cut). Align your notch with the shoulder seam and pin these two points.
 LAID-IN KNIT DRESS (PATTERN + INSTRUCTIONS)
Pin the rest of the sleeve cap to the open armscye.
 LAID-IN KNIT DRESS (PATTERN + INSTRUCTIONS)
Sew the sleeve to the bodice. Work on the other sleeve in the same way. Now pin the side seams and sleeve seams on both sides of the bodice.
 LAID-IN KNIT DRESS (PATTERN + INSTRUCTIONS)
Pay attention to the armpit area - both ends of the armscye/sleeve cap must be aligned. Fold seam allowances of the armscye in opposite directions. Sew sleeve seam & side seam in one go (and then do the same on the other side of the bodice).
 LAID-IN KNIT DRESS (PATTERN + INSTRUCTIONS)
Cuffs
Fold the cuff pieces in half and sew their edges (to form the tunnels)
 LAID-IN KNIT DRESS (PATTERN + INSTRUCTIONS)
Use small notches to mark the half-points of both cuff pieces (the points opposite to the seam).
 LAID-IN KNIT DRESS (PATTERN + INSTRUCTIONS)
Mark the bottom edges of both sleeves in the same fashion.
 LAID-IN KNIT DRESS (PATTERN + INSTRUCTIONS)
Fold (“roll”) the cuff pieces in half to form their final shape.
 LAID-IN KNIT DRESS (PATTERN + INSTRUCTIONS)
Insert the first cuff into the sleeve (face side to face side), align both pieces “seam-to-seam and notch-to-notch” and pin them.
 LAID-IN KNIT DRESS (PATTERN + INSTRUCTIONS)
Now sew “on the inside” of the sleeve (see photo below).
 LAID-IN KNIT DRESS (PATTERN + INSTRUCTIONS)
Pull the free end of the thread chain under the loops. Sew the second cuff in the same way.
 LAID-IN KNIT DRESS (PATTERN + INSTRUCTIONS)
Skirt
My skirt has four parts (pieces of my scrap fabric were too small), so I have to sew four seams. You should only have two parts.
 LAID-IN KNIT DRESS (PATTERN + INSTRUCTIONS)
 LAID-IN KNIT DRESS (PATTERN + INSTRUCTIONS)
 LAID-IN KNIT DRESS (PATTERN + INSTRUCTIONS)
Iron all seams and the whole skirt thoroughly.
 LAID-IN KNIT DRESS (PATTERN + INSTRUCTIONS)
If you also work with a skirt that has four parts and you have “side panels”, then fold the seams of the side panels on top of each other…
 LAID-IN KNIT DRESS (PATTERN + INSTRUCTIONS)
...to find the centers of the side panels. Mark these points with small notches - in these places the skirt meets the side seams on the bodice.
 LAID-IN KNIT DRESS (PATTERN + INSTRUCTIONS)
Let’s drape the skirt. Set your machine to the longest straight stitch possible and reduce the presser foot pressure and the lower (bobbin) thread tension.
 LAID-IN KNIT DRESS (PATTERN + INSTRUCTIONS)
Prepare the skirt so that you can start sewing from one of the side seams. The center of one of the side panels in my case...
 LAID-IN KNIT DRESS (PATTERN + INSTRUCTIONS)
Turn off automatic backstitching.
 LAID-IN KNIT DRESS (PATTERN + INSTRUCTIONS)
Pull about 15 cm (6") of the thread from the sewing machine.
 LAID-IN KNIT DRESS (PATTERN + INSTRUCTIONS)
Now sew around the entire circumference of the skirt. Sew about 0.5 cm (0.2") from the edge. Don’t backstitch when you reach the end - just pull out about 15 cm (6") of thread again.
 LAID-IN KNIT DRESS (PATTERN + INSTRUCTIONS)
Sew another parallel seam (same settings) about 0.5 cm (0.2") from the original seam.
 LAID-IN KNIT DRESS (PATTERN + INSTRUCTIONS)
Find ends of both top threads...
 LAID-IN KNIT DRESS (PATTERN + INSTRUCTIONS)
...and tie them.
 LAID-IN KNIT DRESS (PATTERN + INSTRUCTIONS)
Now carefully pull both top threads on one side of the skirt and it should start to crease.
 LAID-IN KNIT DRESS (PATTERN + INSTRUCTIONS)
If the threads slid away at the other end of the seam, you can fix it with a needle:
 LAID-IN KNIT DRESS (PATTERN + INSTRUCTIONS)
 LAID-IN KNIT DRESS (PATTERN + INSTRUCTIONS)
 LAID-IN KNIT DRESS (PATTERN + INSTRUCTIONS)
 LAID-IN KNIT DRESS (PATTERN + INSTRUCTIONS)
Pull the threads until the upper edge of the skirt has the same circumference as the bottom edge of the bodice (or 1 - 2 cm / 0.4 - 3/4" larger than the bodice). If you overdo it, it won’t be easy to sew the skirt to the bodice. Tie all upper threads to keep them from sliding away.
 LAID-IN KNIT DRESS (PATTERN + INSTRUCTIONS)
Align side seams (notches in my case) of the skirt and side seams of the bodice.
 LAID-IN KNIT DRESS (PATTERN + INSTRUCTIONS)
Pin the skirt to the bodice. Try to “spread” the draping evenly.
 LAID-IN KNIT DRESS (PATTERN + INSTRUCTIONS)
 LAID-IN KNIT DRESS (PATTERN + INSTRUCTIONS)
Sew the skirt to the bodice. Sew so that the draping on the skirt is in contact with the feed dogs. Otherwise, the presser foot will push it out of its place and the seam will not be even.
 LAID-IN KNIT DRESS (PATTERN + INSTRUCTIONS)
Start sewing from one of the side seams.
 LAID-IN KNIT DRESS (PATTERN + INSTRUCTIONS)
Sew around the entire circumference of the skirt.
 LAID-IN KNIT DRESS (PATTERN + INSTRUCTIONS)
Turn the dress on the face side.
 LAID-IN KNIT DRESS (PATTERN + INSTRUCTIONS)
Find the threads you used to drape the skirt and cut their knots.
 LAID-IN KNIT DRESS (PATTERN + INSTRUCTIONS)
Pull out all the threads - don't forget the lower (bobbin) threads on the inside of the dress.
 LAID-IN KNIT DRESS (PATTERN + INSTRUCTIONS)
 LAID-IN KNIT DRESS (PATTERN + INSTRUCTIONS)
Bottom hem
Clean the bottom cutting edge of the skirt. Pull free ends of the thread chain under the loops when using an overlock.
 LAID-IN KNIT DRESS (PATTERN + INSTRUCTIONS)
Fold the edge (2 - 3 cm / 3/4 - 1.18") to the reverse side of the dress and pin it there.
 LAID-IN KNIT DRESS (PATTERN + INSTRUCTIONS)
Reduce the bobbin thread tension & the pressure of the presser foot and choose an elastic stitch.
 LAID-IN KNIT DRESS (PATTERN + INSTRUCTIONS)
Sew around the bottom edge of the skirt. If you have a two-part skirt, start sewing from one of the side seams. If you have a four-part skirt, start from one of the seams on the backside of the skirt.
 LAID-IN KNIT DRESS (PATTERN + INSTRUCTIONS)
 LAID-IN KNIT DRESS (PATTERN + INSTRUCTIONS)
And it is done! Simple dress that can be worn from autumn to spring...
 LAID-IN KNIT DRESS (PATTERN + INSTRUCTIONS)
If you have a moment, leave a comment about how you liked today's article and tell me what would you like to see next time.
 LAID-IN KNIT DRESS (PATTERN + INSTRUCTIONS)
Have a nice day, Petra
PS: You can take a look at the pattern from this article here:
The pattern for children’s dress FLORA
Explore the pattern
pattern for a women's dress, you might like this one:
Material
Thinner uncombed laid-in knit (French Terry) is suitable for our purposes. In stores, you can usually find this material in the knits category. The weight (grammage) should be about 250g/m2 and you will recognize this material by the loops on the wrong side. I fell in love with this material, it is ideal for the period when it is too cold for a T-shirt and too warm for a sweatshirt. You will find a large selection, for example, in the Dumlatek.cz store: French Terry - With prints French Terry - Monochromatic.
I used fabric leftovers from another of my projects.

Sewing instructions
I sewed the dress on my overlock, but you can easily do it with a regular sewing machine. If you plan to use a regular sewing machine, I recommend reading this article first:
Sewing elastic fabrics with a regular sewing machine - 4 steps to success
Pattern layout
- 1x front piece (cut on the fold)
- 1x back piece (cut on the fold)
- 2x sleeve piece (Mine are slightly shortened so that I can finish them with cuffs.)
- 2x cuff (optional)
- 2x skirt piece (I have 4 smaller pieces - I used scraps and there was no room for the whole skirt piece.)
- 1x neckline hem - elastic knit strip (The width is 5 cm / 2" and you can measure the exact length later.)

Bodice
Let's work on the bodice first. Put the front piece on the back piece (face side to face side) and sew one shoulder seam.

If you want to use a wider strip (5 cm / 2" instead of 3.5 cm 1 3/8") for the neckline hem, cut 1 cm (0.4") from the entire circumference of the neckline.
Measure the circumference of the neckline (with a tailor's tape laid on its side) and multiply this number by 0.7. The result is the recommended length of the knit strip for the hem. Well... An approximate recommended length - every material is a little different…


You can cut the strip a few centimeters longer so that you can adjust the tightness of the neckline. Use a pin to mark the recommended length that you calculated earlier.

Fold the strip in half (lengthwise) and pin it to the neck opening. In an ideal situation, you will get exactly to your mark that indicates the recommended length. If you have less stretchy material, you will probably need to go beyond the pin and use a slightly longer strip.

Iron the neckline to “set” the hem in place.

Turn the bodice inside out and pin the other shoulder seam. Sew the other shoulder seam.

Pull free ends of the thread chain under the loops when using an overlock.

Press the seam allowances towards the back piece and use a few small stitches to keep it in place. This will make the neckline more comfortable.

Sleeves
Mark the top of the sleeve head with a small notch (cut). Align your notch with the shoulder seam and pin these two points.

Pin the rest of the sleeve cap to the open armscye.

Sew the sleeve to the bodice. Work on the other sleeve in the same way. Now pin the side seams and sleeve seams on both sides of the bodice.

Pay attention to the armpit area - both ends of the armscye/sleeve cap must be aligned. Fold seam allowances of the armscye in opposite directions. Sew sleeve seam & side seam in one go (and then do the same on the other side of the bodice).

Cuffs
Fold the cuff pieces in half and sew their edges (to form the tunnels)

Use small notches to mark the half-points of both cuff pieces (the points opposite to the seam).

Mark the bottom edges of both sleeves in the same fashion.

Fold (“roll”) the cuff pieces in half to form their final shape.

Insert the first cuff into the sleeve (face side to face side), align both pieces “seam-to-seam and notch-to-notch” and pin them.

Now sew “on the inside” of the sleeve (see photo below).

Pull the free end of the thread chain under the loops. Sew the second cuff in the same way.

Skirt
My skirt has four parts (pieces of my scrap fabric were too small), so I have to sew four seams. You should only have two parts.


Iron all seams and the whole skirt thoroughly.

If you also work with a skirt that has four parts and you have “side panels”, then fold the seams of the side panels on top of each other…

...to find the centers of the side panels. Mark these points with small notches - in these places the skirt meets the side seams on the bodice.

Let’s drape the skirt. Set your machine to the longest straight stitch possible and reduce the presser foot pressure and the lower (bobbin) thread tension.

Prepare the skirt so that you can start sewing from one of the side seams. The center of one of the side panels in my case...

Turn off automatic backstitching.

Pull about 15 cm (6") of the thread from the sewing machine.

Now sew around the entire circumference of the skirt. Sew about 0.5 cm (0.2") from the edge. Don’t backstitch when you reach the end - just pull out about 15 cm (6") of thread again.

Sew another parallel seam (same settings) about 0.5 cm (0.2") from the original seam.

Find ends of both top threads...

...and tie them.

Now carefully pull both top threads on one side of the skirt and it should start to crease.

If the threads slid away at the other end of the seam, you can fix it with a needle:


Pull the threads until the upper edge of the skirt has the same circumference as the bottom edge of the bodice (or 1 - 2 cm / 0.4 - 3/4" larger than the bodice). If you overdo it, it won’t be easy to sew the skirt to the bodice. Tie all upper threads to keep them from sliding away.

Align side seams (notches in my case) of the skirt and side seams of the bodice.

Pin the skirt to the bodice. Try to “spread” the draping evenly.


Sew the skirt to the bodice. Sew so that the draping on the skirt is in contact with the feed dogs. Otherwise, the presser foot will push it out of its place and the seam will not be even.

Start sewing from one of the side seams.

Sew around the entire circumference of the skirt.

Turn the dress on the face side.

Find the threads you used to drape the skirt and cut their knots.

Pull out all the threads - don't forget the lower (bobbin) threads on the inside of the dress.


Bottom hem
Clean the bottom cutting edge of the skirt. Pull free ends of the thread chain under the loops when using an overlock.

Fold the edge (2 - 3 cm / 3/4 - 1.18") to the reverse side of the dress and pin it there.

Reduce the bobbin thread tension & the pressure of the presser foot and choose an elastic stitch.

Sew around the bottom edge of the skirt. If you have a two-part skirt, start sewing from one of the side seams. If you have a four-part skirt, start from one of the seams on the backside of the skirt.


And it is done - a simple dress that can be worn from autumn to spring... :)

If you have a moment, leave a comment about how you liked today's article and tell me what would you like to see next time.

Have a nice day, Petra
PS: You can take a look at the pattern from this article here:
The pattern for children's dress FLORA
PS: Did you know that there are FREE PATTERNS available on my blog?


