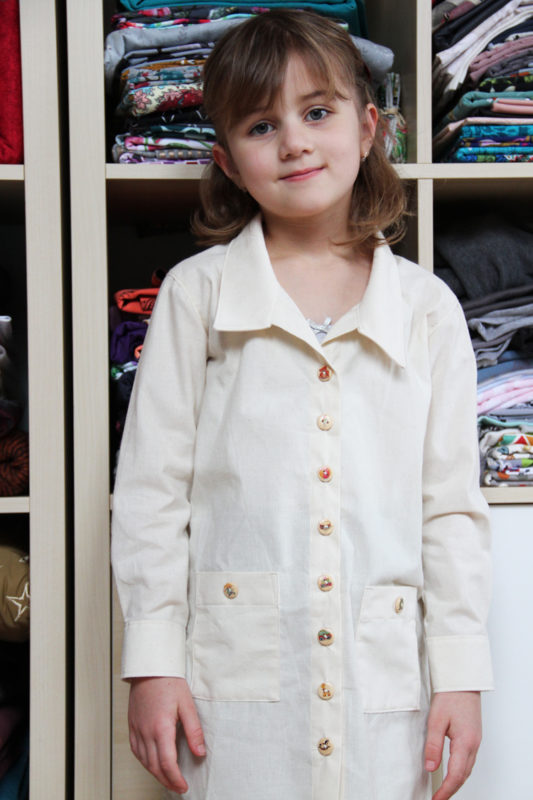
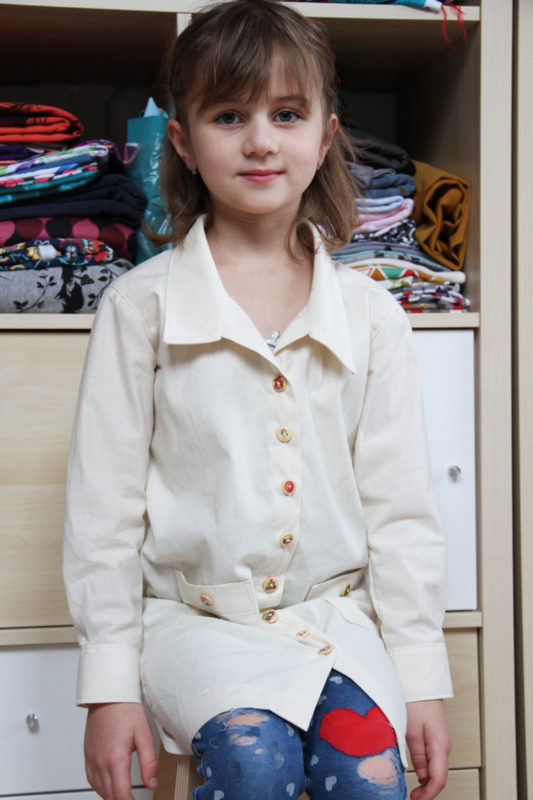
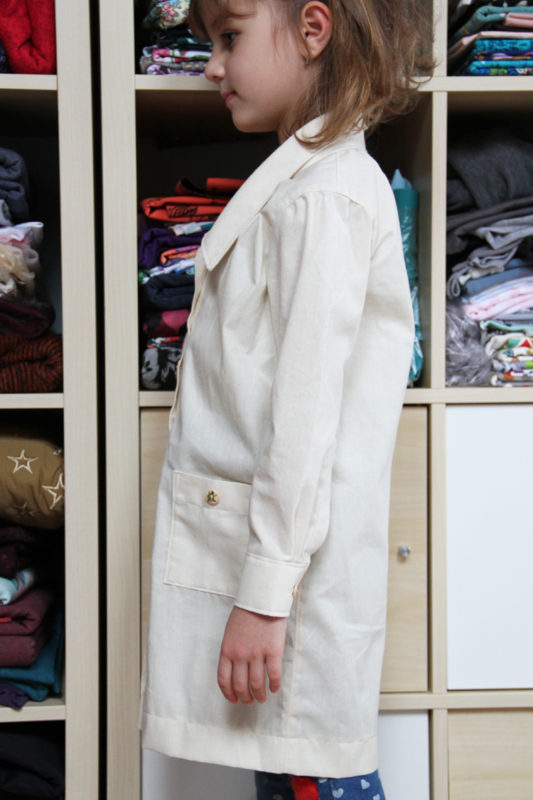
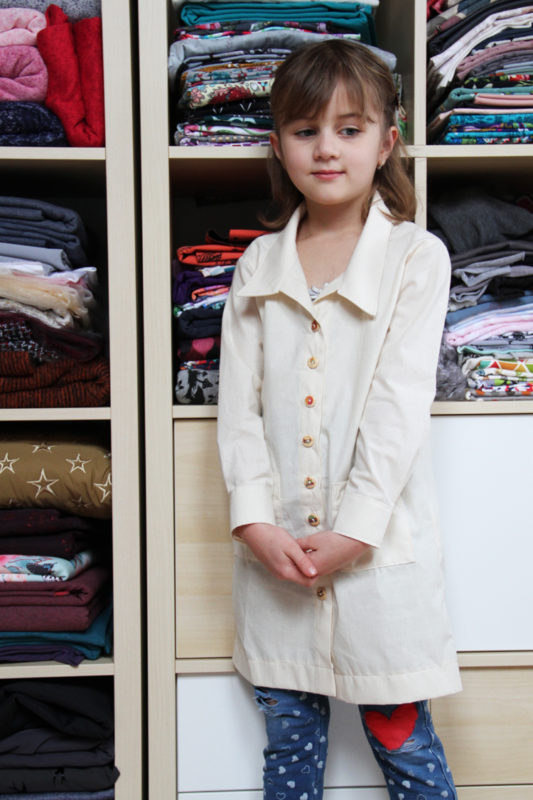
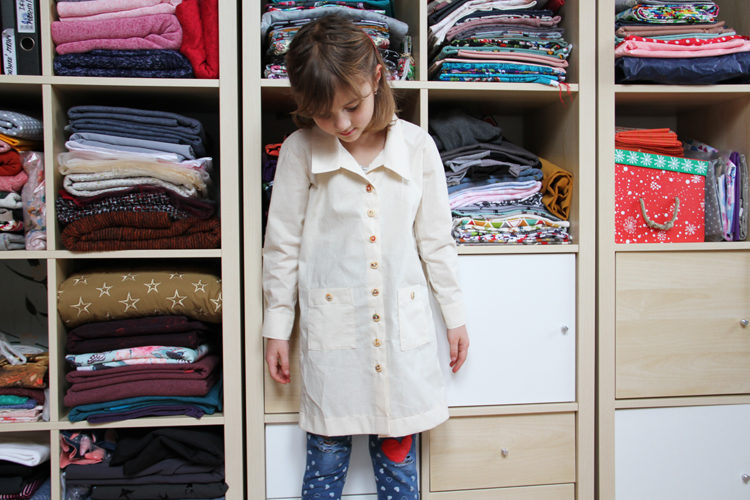
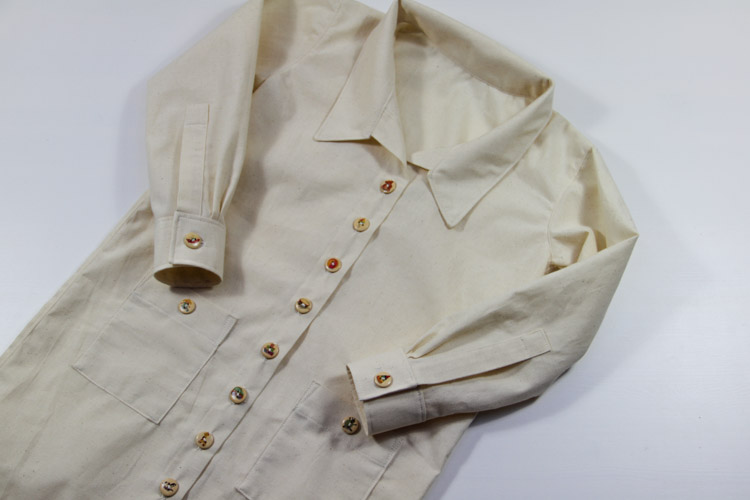
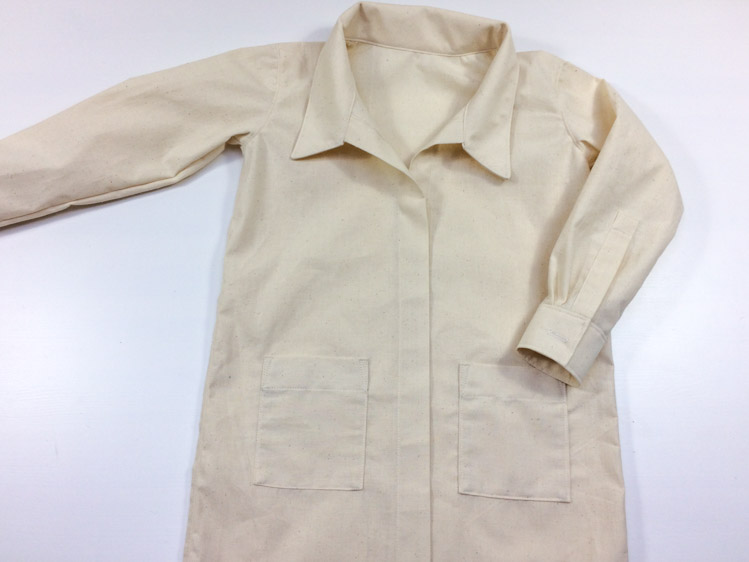
If you have a little artist at home, then a pattern for a painter’s jacket / shirt will definitely come in handy. Terulka loves to paint and create, which is why she wanted a painting easel and watercolor paints for Christmas. Since we planned to make some of our Christmas presents ourselves, it occurred to me that this was a perfect opportunity to complete Terulka's artistic set. So, I created a pattern for a simple shirt (blouse, apron) - in this context a painter's jacket. When Terulka started kindergarten years ago, I was looking for painter’s aprons in various stores and their offer was pretty horrible for my taste. They offered mostly plastic / rubber crazy-colored-something that seemed very uncomfortable to wear. When Terulka started going to art courses a few years ago, I noticed that the lecturers were wearing very simple work shirts. That's exactly what I was looking for! And so, this year I finally made a painter’s jacket for Terulka.
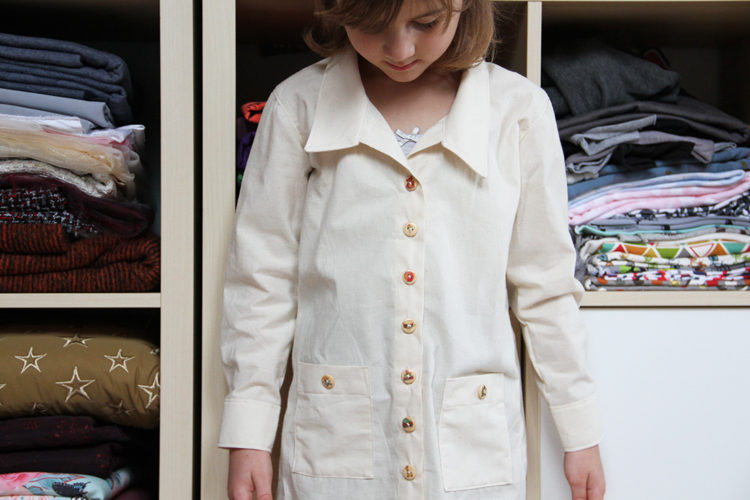
Painter’s jacket (apron)
Pattern for children’s shirt
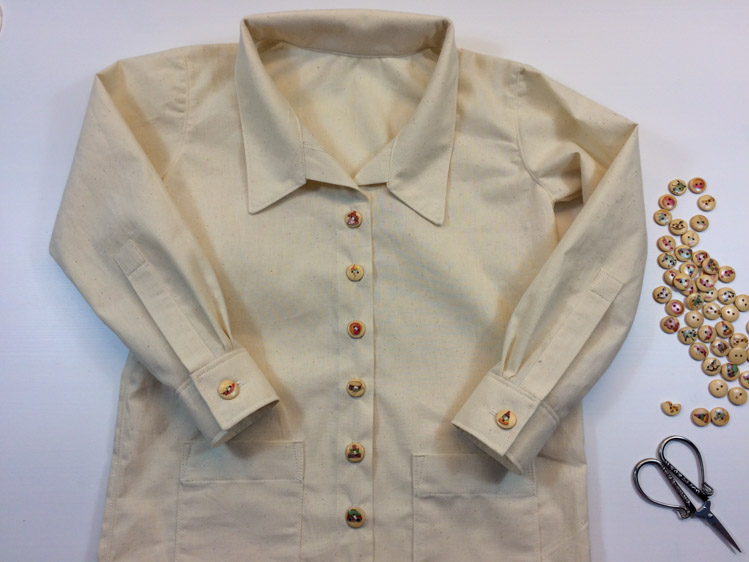
You can use this simple pattern for a children's shirt to sew extended shirt / blouse for casual wear (you can also easily adjust the length to sew a classic shirt) or, for example, to sew a painter’s jacket.
You can get this pattern here:
Pattern for simple children’s shirt / blouse
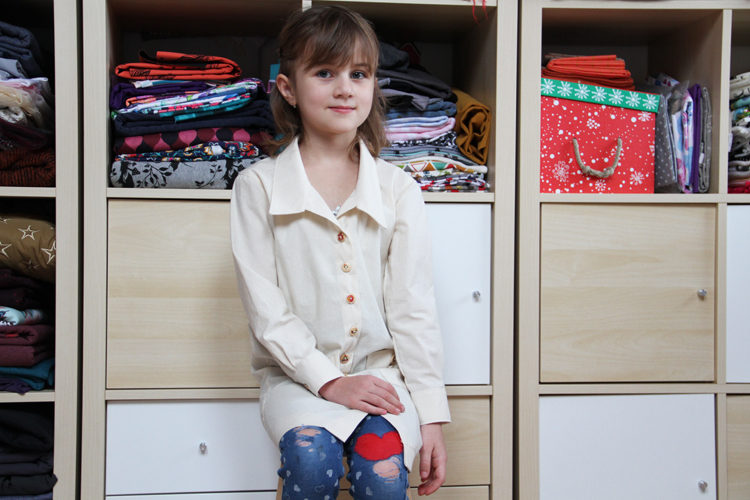
How to sew a shirt / blouse / apron
Recommended material
You will need some type of woven fabric to sew this simple shirt. Ordinary cotton canvas is suitable for sewing a painter's jacket. I use it to sew test pieces and I bought it at Dumlatek.cz:
If you want to sew a shirt for casual wear, I recommend using soft & flowing fabrics and Shirt fabrics, such as Cotton poplin and American cotton canvas.
Some parts of the shirt will need to be reinforced. I recommend using fusible canvas to reinforce the collar and cuffs and thin one-sided fusible facing to reinforce the button placket .

Sewing
Cuts preparation
According to the paper pattern prepare:
- 2x front piece
- 1x back piece (folded fabric cut)
- 2x sleeve piece
- 2x collar piece
- 2x cuff piece
- patch pockets - classic ones and/or chest pockets
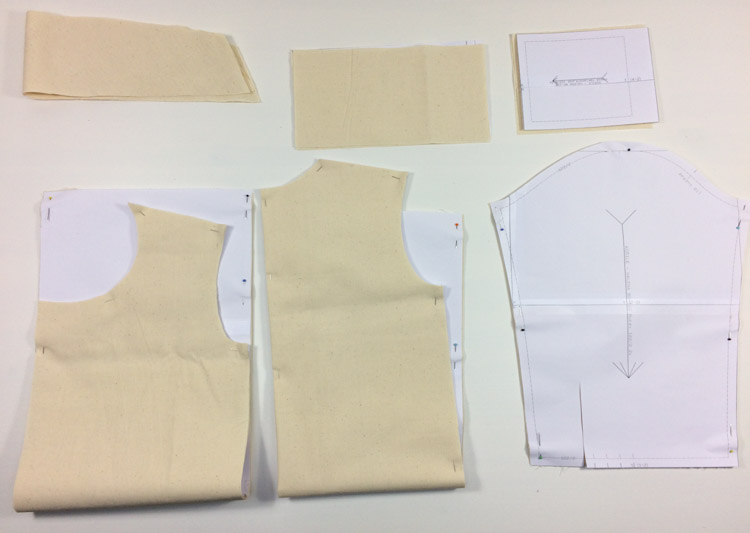
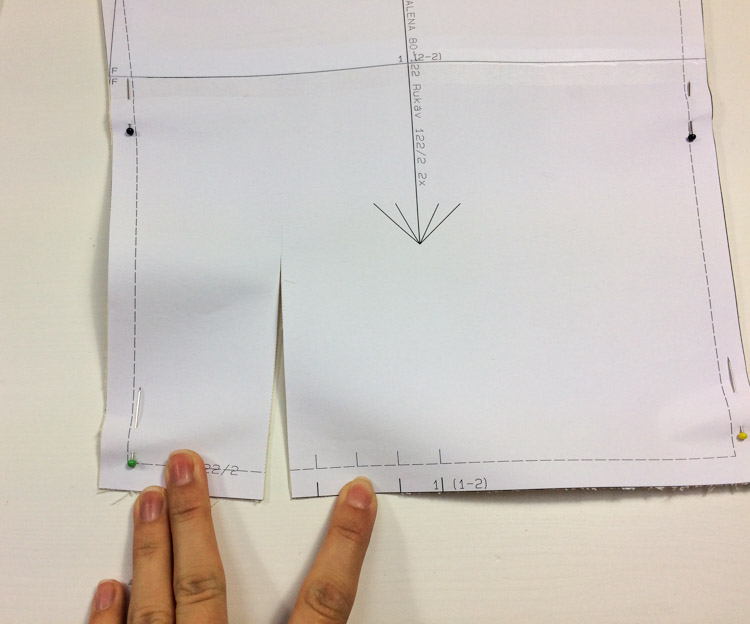
Don’t forget to transfer marks to your fabric pieces. Marks for attaching the sleeve to the torso, for example, are very important. You should also prepare the slit on the sleeves. Children's shirts usually have an 8-12 cm long slit. It depends on how wide the sleeve is, how long the child's arms are, etc. Cut the slit according to the paper pattern. You can also indicate the position of the pleats next to the slit (although you can also do this later), and easestitch the bottom edge of the sleeve as needed.
Reinforcing the pieces
Classic shirts need to be properly reinforced; you should not underestimate it. Usually two types of one-sided fusible reinforcement are used.
Thin one-sided fusible facing (which you can get here, for example: Fusible facing):
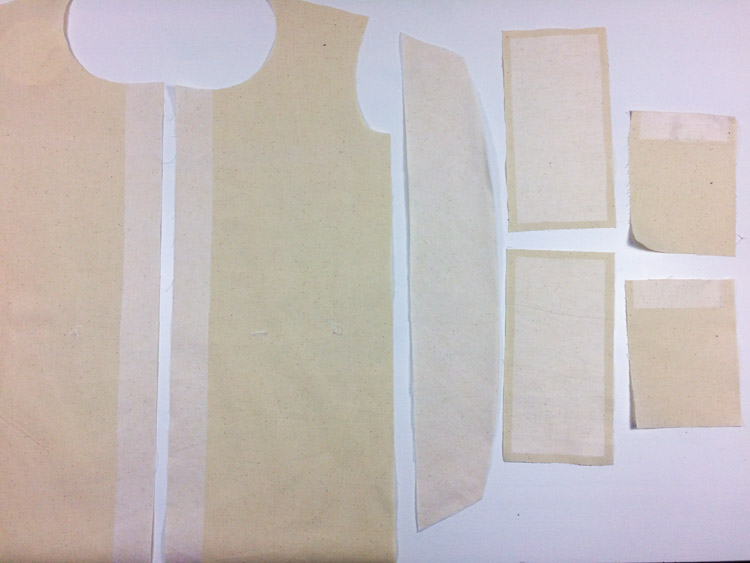
One-sided fusible facing is used quite frequently. Use it to reinforce the button placket on both front pieces (cut 4 cm wide strips). Don’t forget to “mirror” the front pieces so that you don’t end up with two left front pieces or two right front pieces Also use one-sided fusible facing to reinforce the upper collar, cuff pieces and wide seam tabs of the pocket pieces.
Fusible canvas
You can get fusible canvas of medium thickness (which is suitable for children's and women's shirts) here: Fusible canvas - Medium. Unfortunately, I couldn’t find thick fusible canvas (which I use for men's shirts and jackets) in any Czech e-shop. But I believe that you will be able to get it in your country. I usually buy it in a brick & mortar store in Liberec: Martina Sewing Center.)
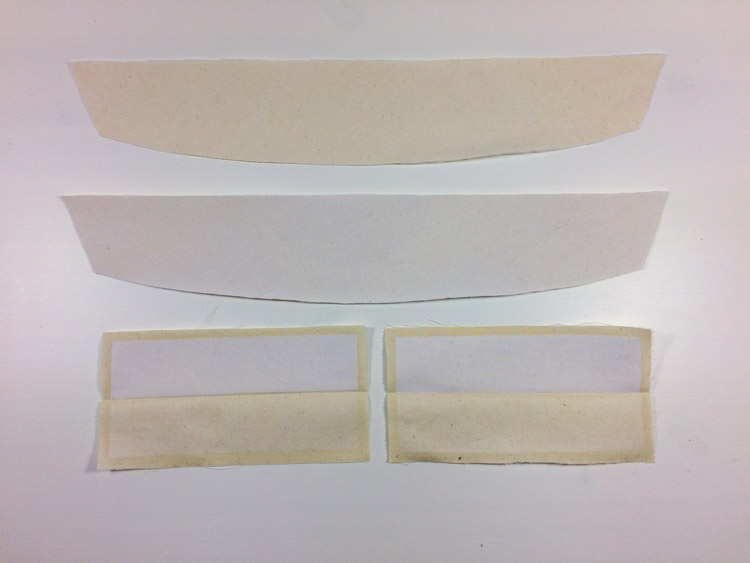
Use fusible canvas to reinforce the undercollar and one half of each cuff.
The undercollar is the part of the collar that is at the bottom when you wear the shirt - it lies “on the shirt”. The upper collar is the second part - the one that is facing up.
Patch pockets
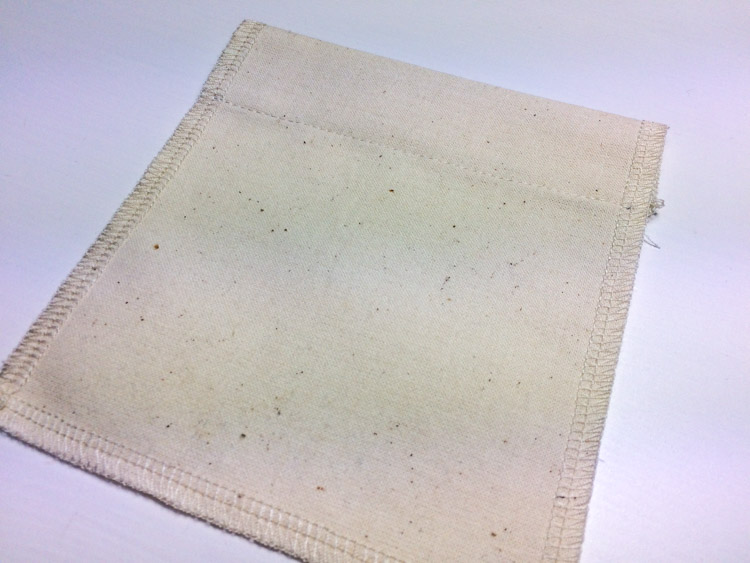
Let’s sew patch pockets first. The seam tab is reinforced, clean all cutting edges. Fold the top cutting edge to the reverse side (depending on the width of the seam tab, in my case 3 cm) and sew through it.
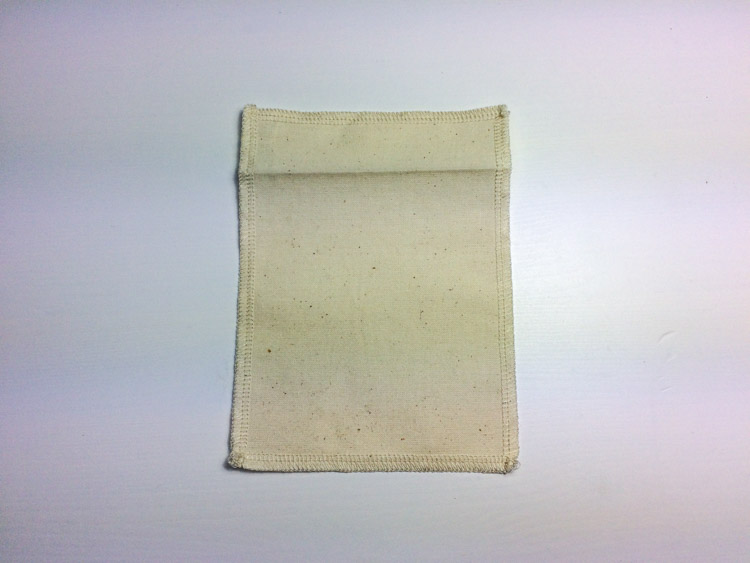
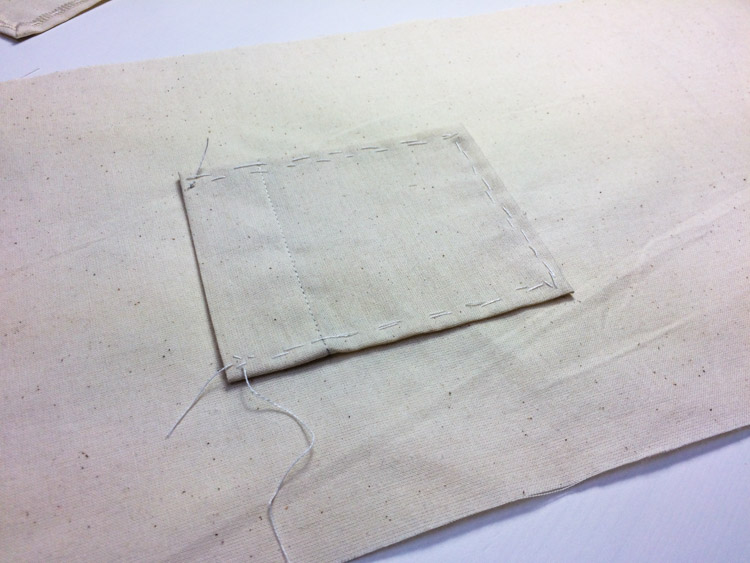
Fold the other seam tabs to the reverse side (1 cm) and baste.

Mark the positions of the patch pockets according to the paper pattern and baste the pockets to the front pieces.
Button placket
Button plackets on both front pieces should be reinforced (using 4 cm wide strips of one-sided fusible facing). Clean the cutting edges.
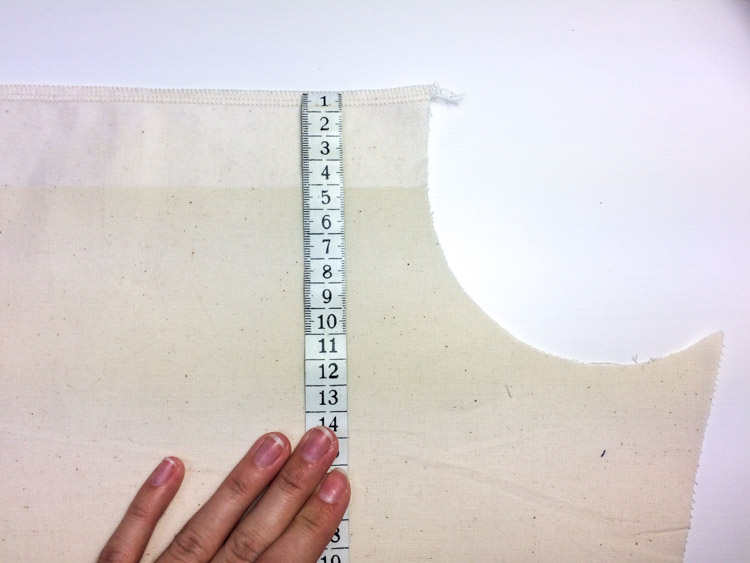
Fold the edge (3 cm) to the reverse side and pin it there.
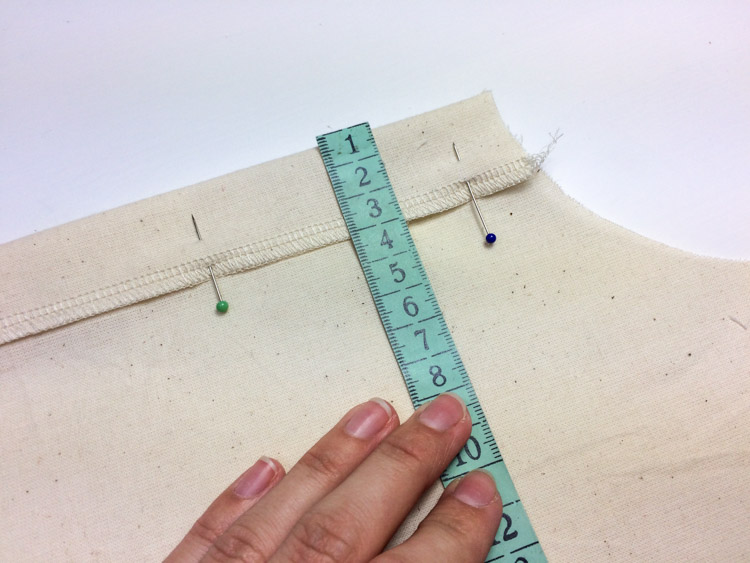
Do the same on the other front piece.
You can also pin the collar. Pin the two short sides and one of the longer sides - the straight one.
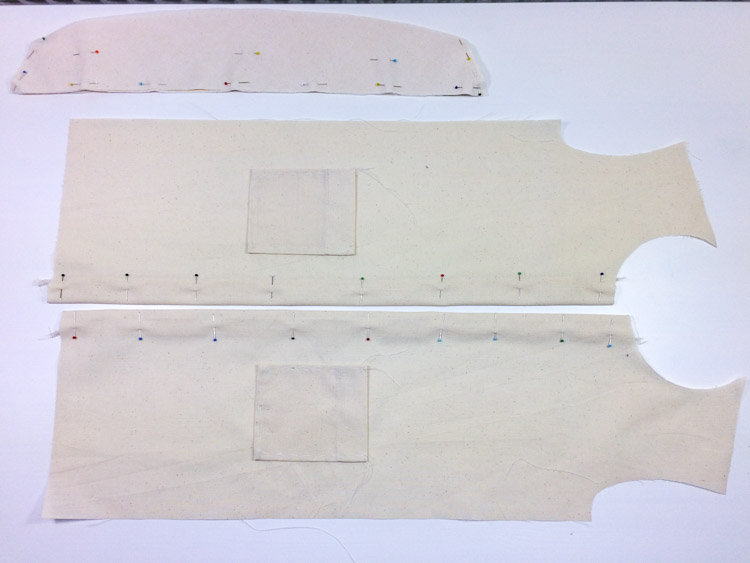
Sew the button plackets on both front pieces.
Shoulder seams
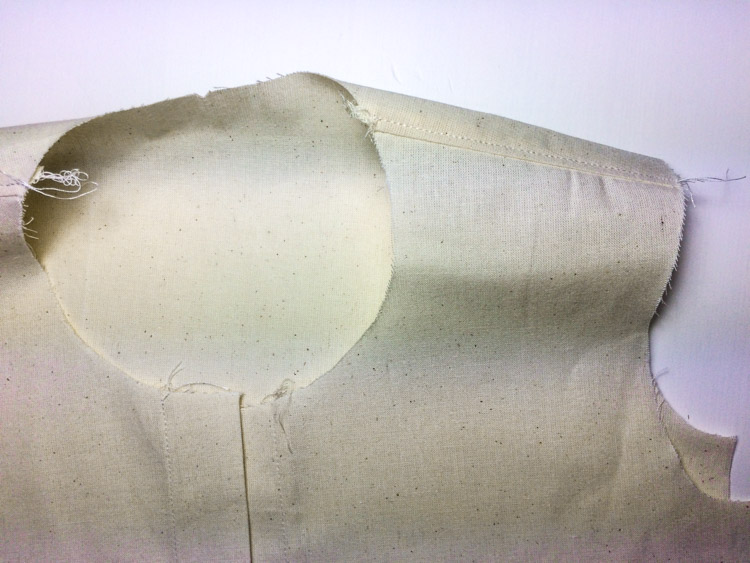
Place both front pieces over the back piece (face sides to face side). Sew the shoulder seams and clean the seam allowances.
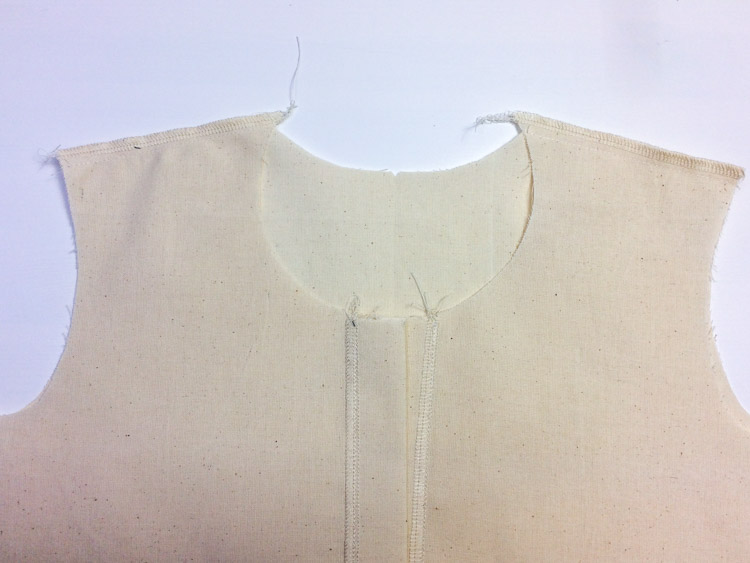
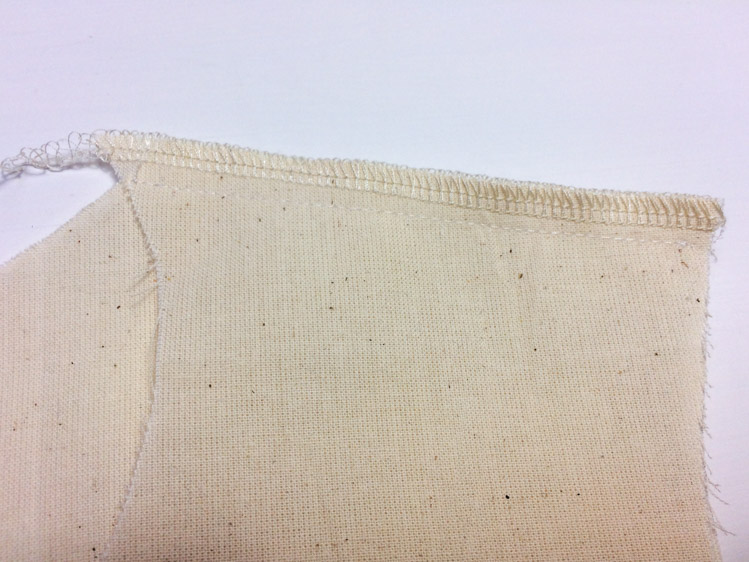
Turn the shirt face side out and press the seam allowances towards the back piece. Topstitch the shoulder seams 0.5 cm from the original seam (on the back-piece side of the seam - sew through the seam allowances). This stabilizes and flattens the seam.
Collar (preparation)
Now you can prepare the collar. Sew the three pinned sides. Cut the corners and I also recommend grading the seam allowances. Grading - cut half of the seam allowance of the undercollar so that there are no bumps & creases after you turn the collar on the face side. Grading will also ensure that the seam allowances will not be as visible when you iron the shirt.
(See this article for more traditional tailoring tips: How to sew a women’s skirt + 6 traditional tailoring tips)
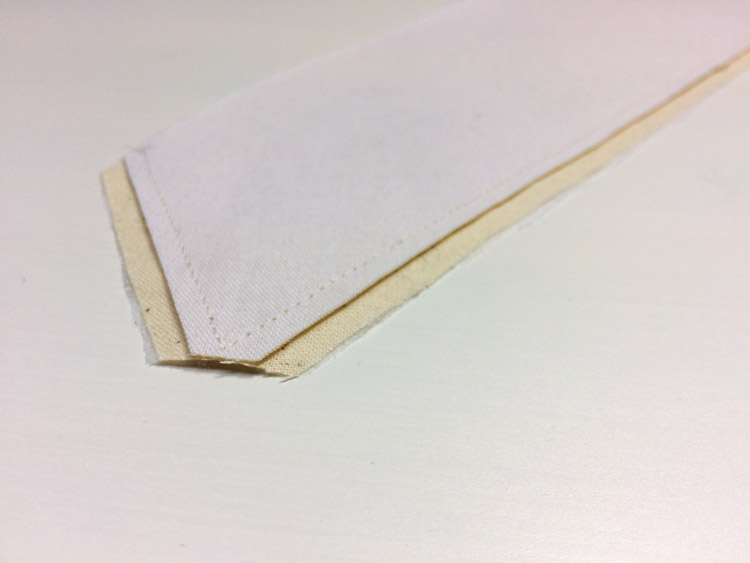
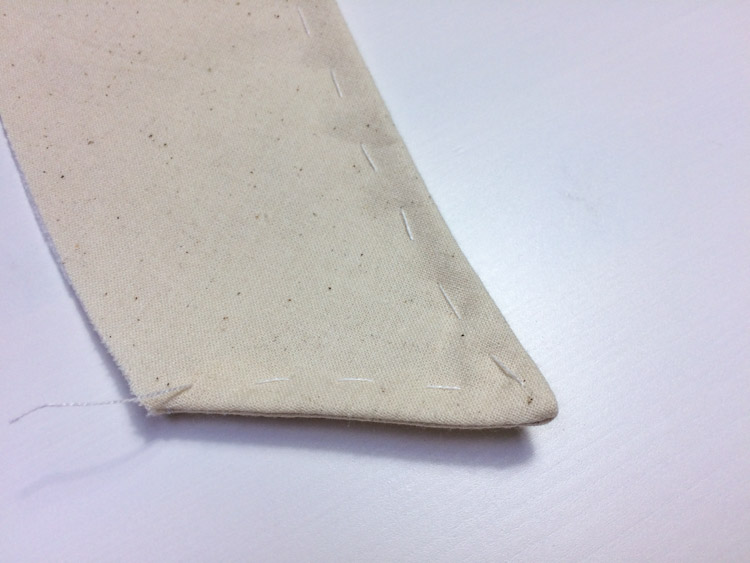
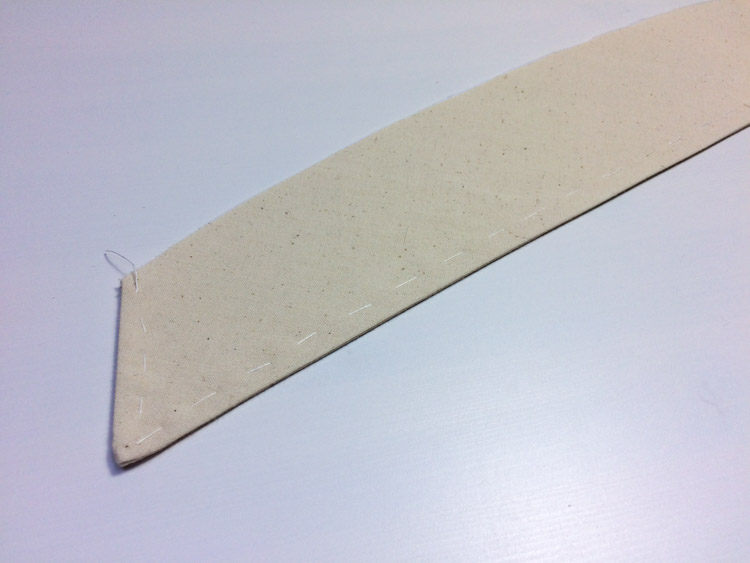
Turn the collar on the face side. "Massage" the edge of the collar so that the edge of the undercollar is not visible from the top and baste the edge in this position. Then iron the collar thoroughly.
Sleeve plackets
I recommend sewing the sleeve plackets before you connect the sleeves to the torso of the shirt. It will be easier - you won’t have to move the whole shirt around when sewing.
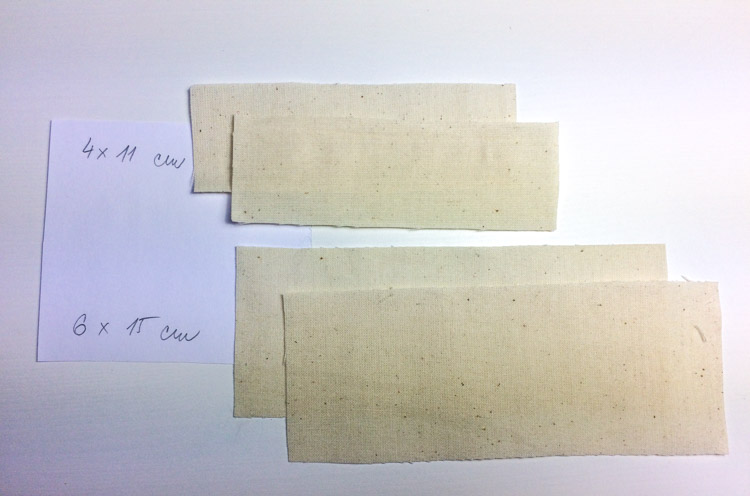
First, prepare the rectangles from which you will sew the “hems” of the sleeve plackets. Smaller rectangles should be as long as the slit on the sleeve (or 1 cm longer) and 4 cm wide. Larger rectangles should be 6 cm wide and 4 cm longer than smaller rectangles. My smaller rectangles are 4 x 11 cm and two larger rectangles are 6 x 15 cm.
Take one of the sleeve pieces and place it face side down. Then take one of the smaller rectangles and place it on the edge of the slit (also face side down). This small rectangle should lie on the side of the slit that is closer to the sleeve seam. Sew the rectangle to the sleeve (sew 1 cm from the edge of the slit).
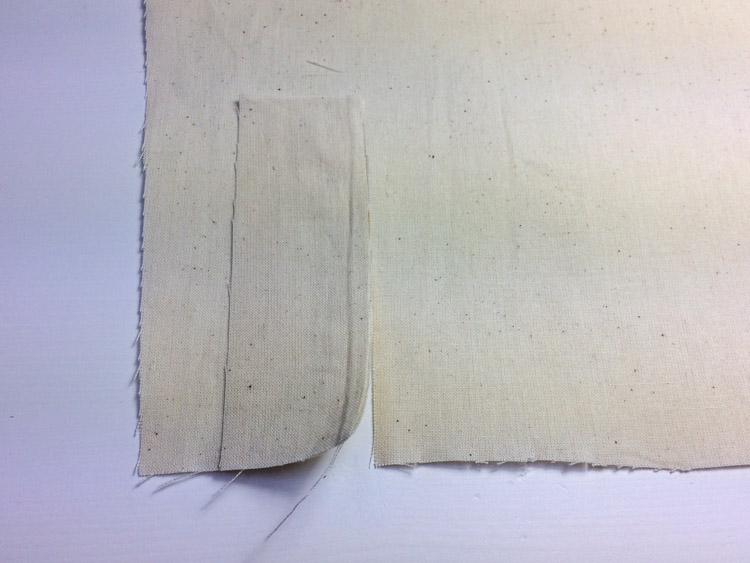
Flip the rectangle over the slit (so you can see its face side) and iron the seam.
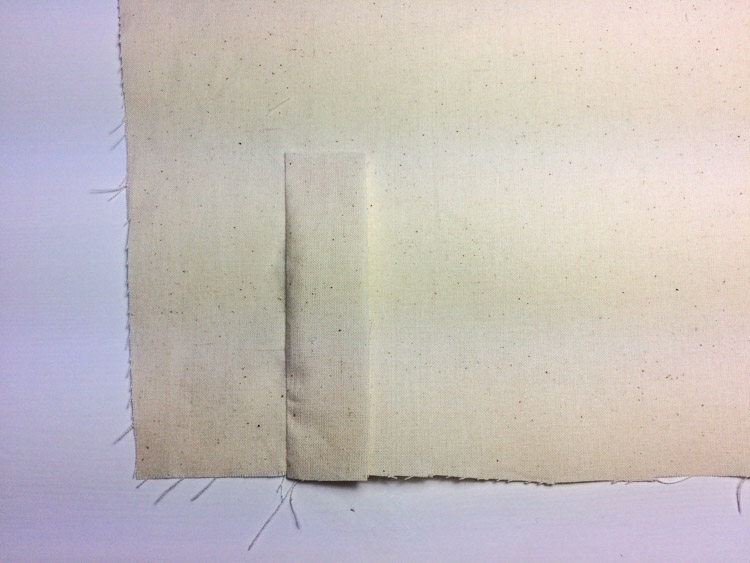
Now flip the whole sleeve face side up and pull the free edge of the rectangle through the slit so that it lies on the face side of the sleeve. This is what it looks like from the face side of the sleeve:
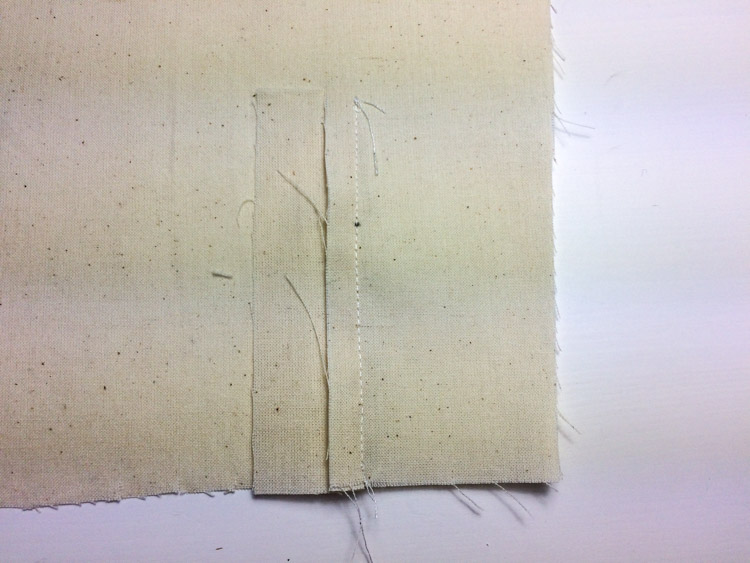
And this is what it looks like from the reverse side of the sleeve:
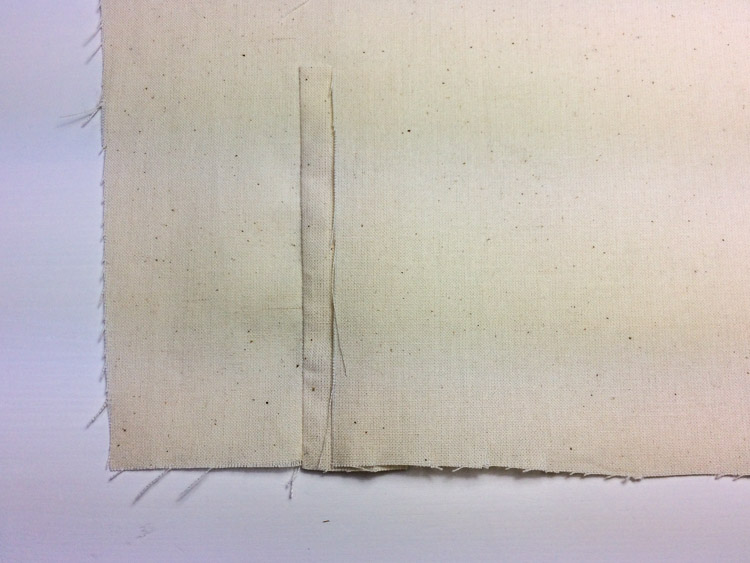
OK... So now you have the sleeve face side up and the rectangle sticking out through the slit... Fold 1 cm of the rectangle back on itself...
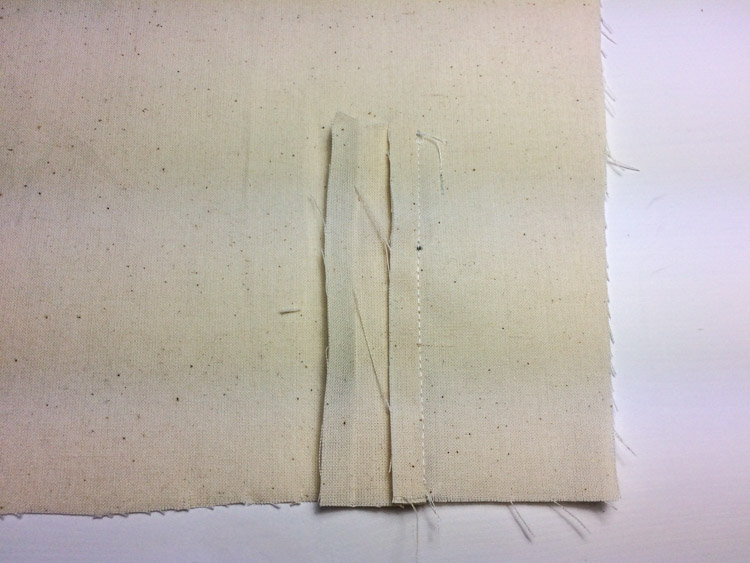
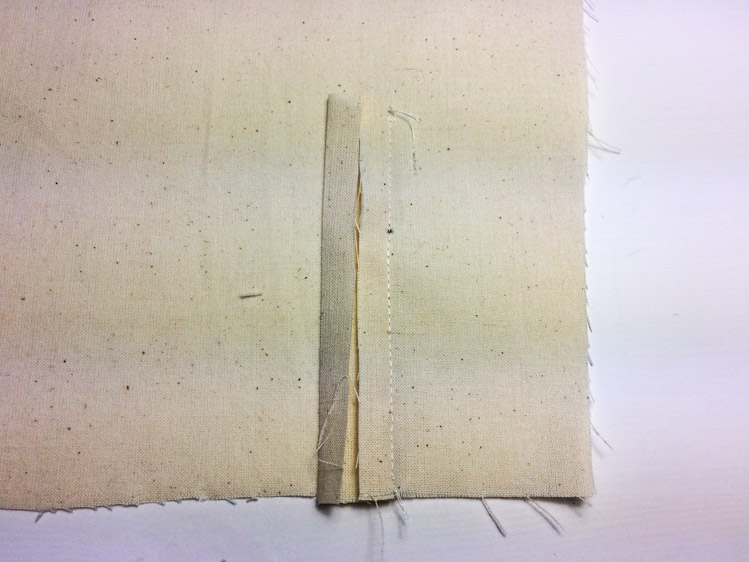
...and then fold it one more time - over the edge of the slit - to create the first hem. Pin / baste the hem and sew it to the sleeve.
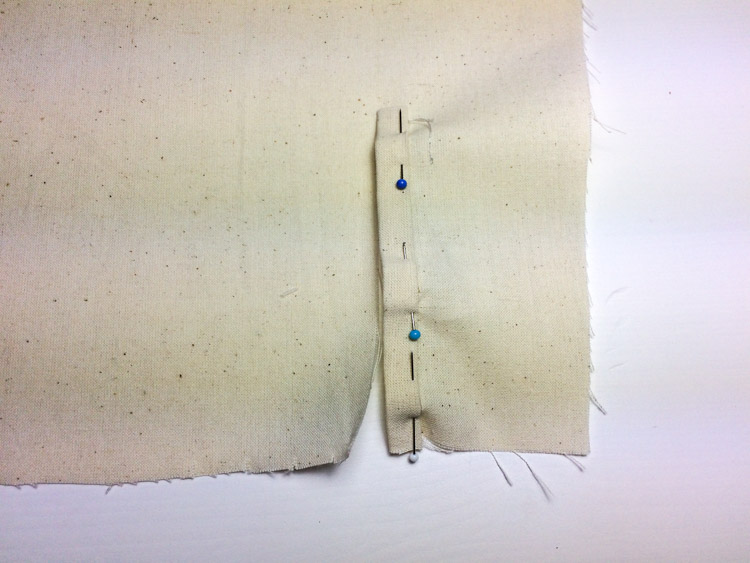
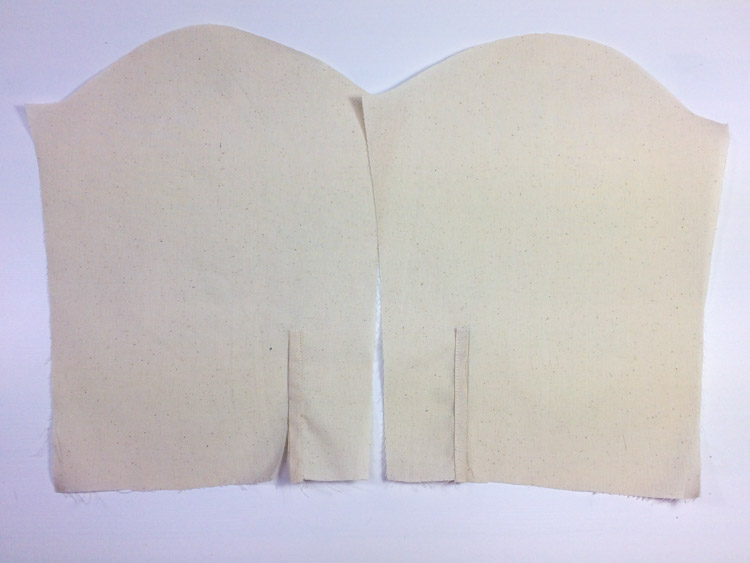
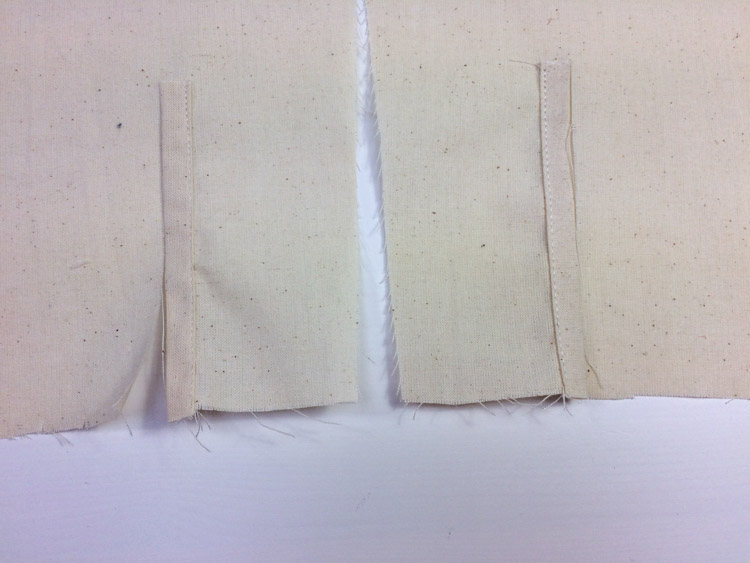
Let’s sew the hem of the other side of the slit. Put the larger rectangle on the other side of the slit (face side to face side)...
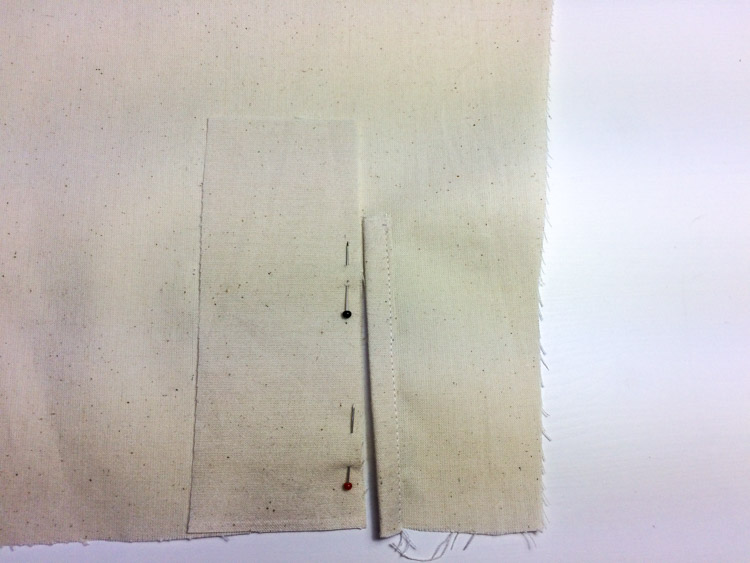
...and sew the rectangle to the sleeve - start sewing at the top of the slit (not at the top of the rectangle) and sew 1 cm from the edge of the slit towards the bottom edge of the sleeve. Cut the seam allowance of the sleeve at the top of the slit as shown below. Cut should be 1 cm long.
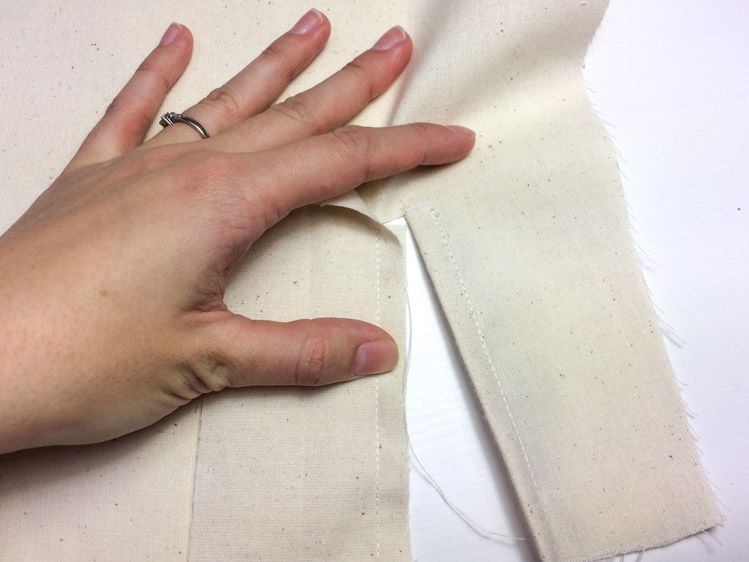
Flip the sleeve reverse side up and pull the rectangle through the slit. It should be easy to do thanks to that small cut.
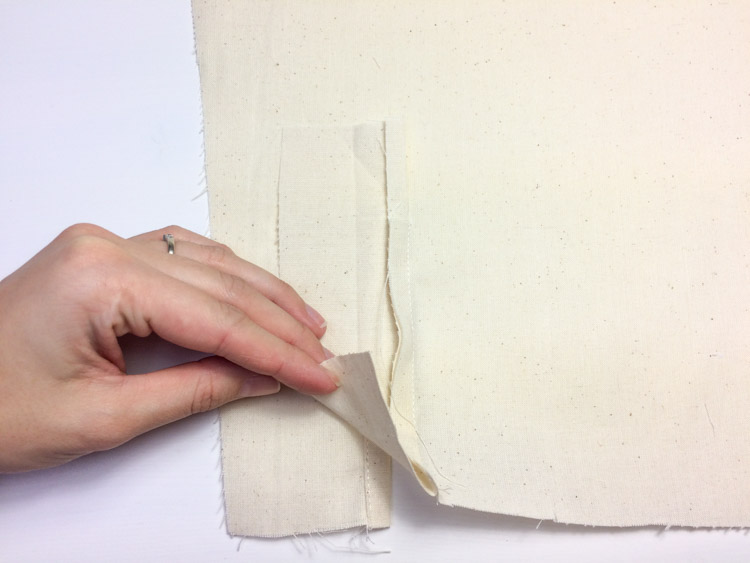
Fold 1 cm of the side that is attached to the sleeve - you should actually only have to fold its top part, because the rest is already “folded” after you have pulled the rectangle through the slit.
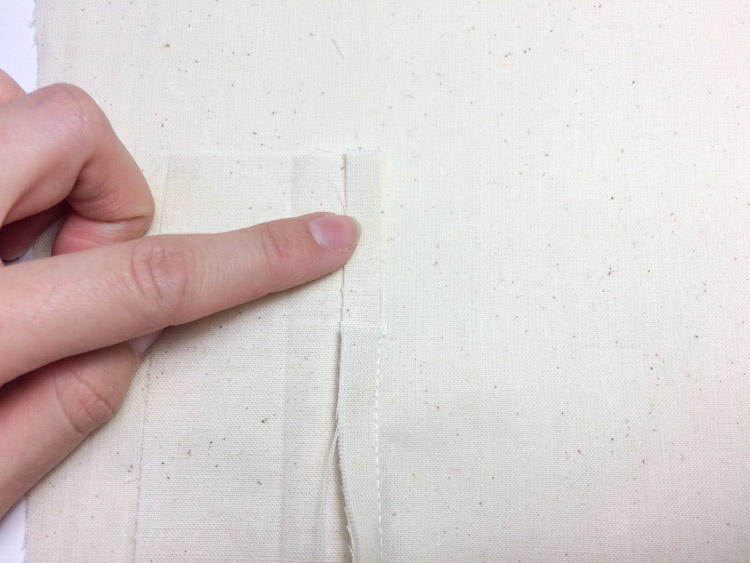
Then fold 1 cm of the other long side of the rectangle.
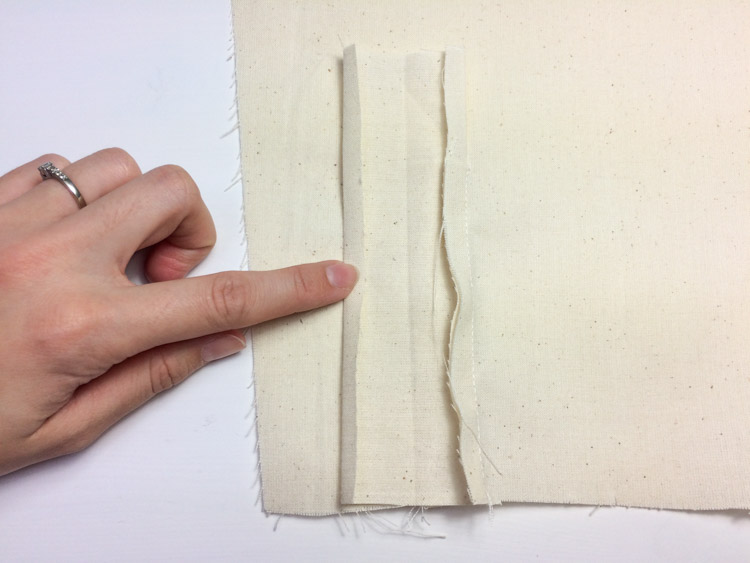
Next, fold the upper part of the rectangle so that its upper edge touches the top of the slit.
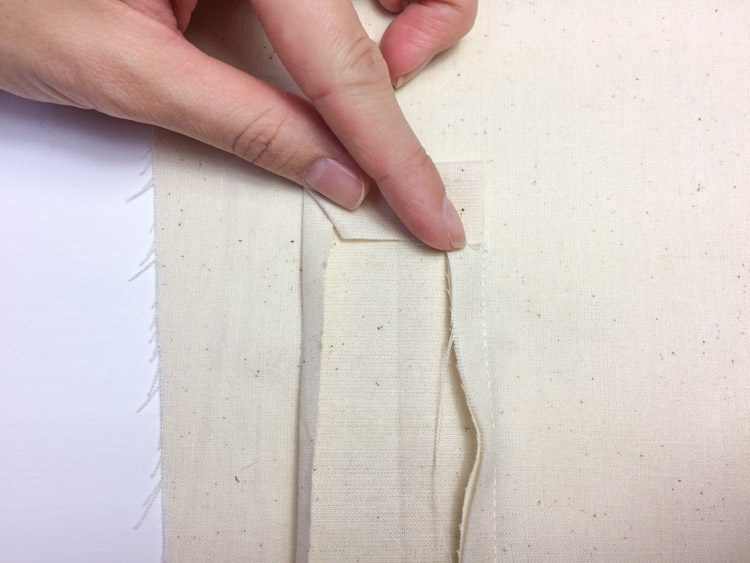
Then fold the prepared rectangle in half (and over the edge of the slit) and pin it to the sleeve.
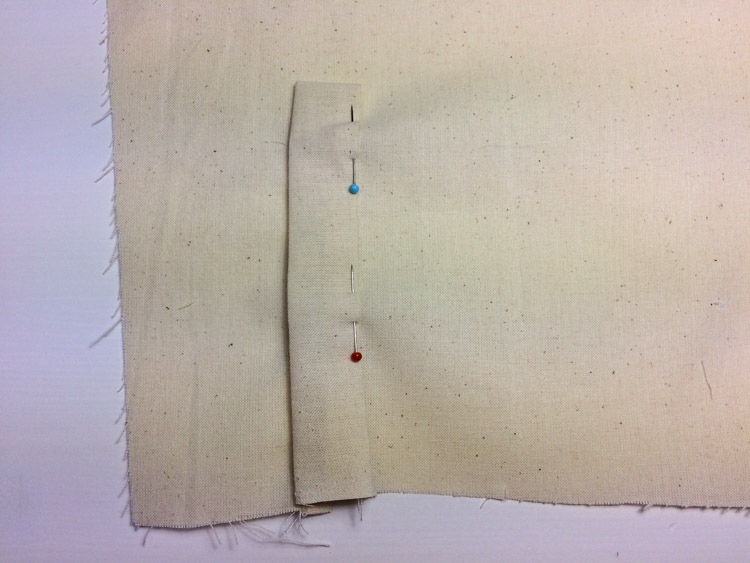
Mark the top of the slit (end of the first hem). I used a green pin.
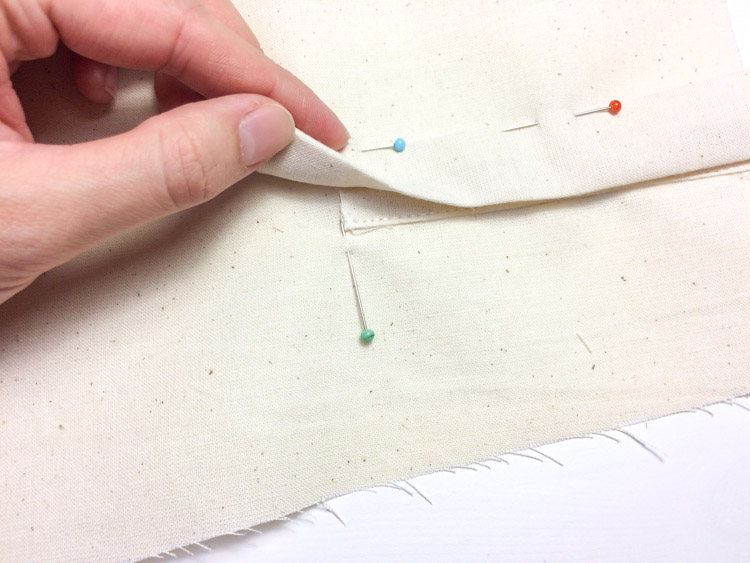
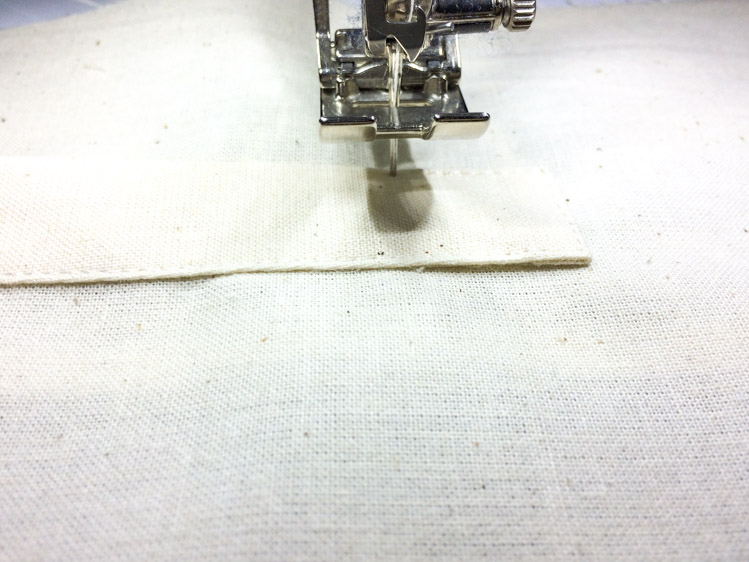
Sew the hem to the sleeve - sew 1-2 mm from the edge of the hem.
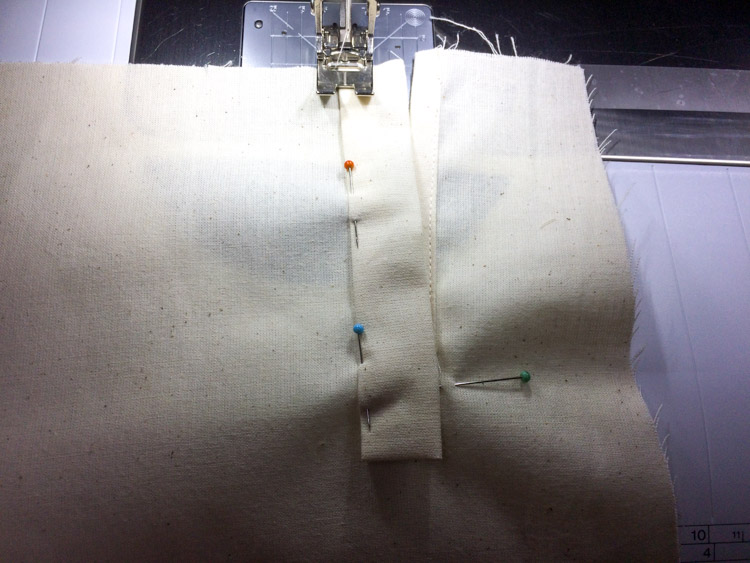
Sew from the bottom edge of the sleeve up to the fold at the top of the rectangle (i.e. beyond the top of the slit), but don’t finish the seam yet...
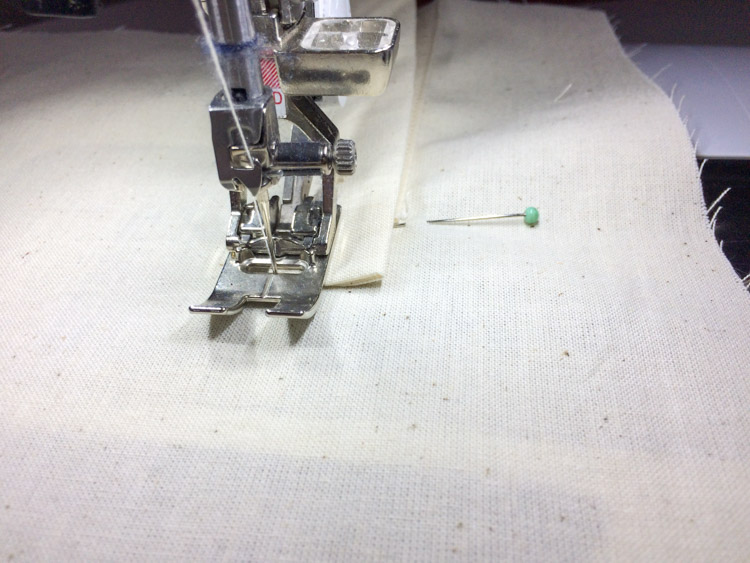
...rotate the sleeve and sew along the upper edge of the rectangle too...
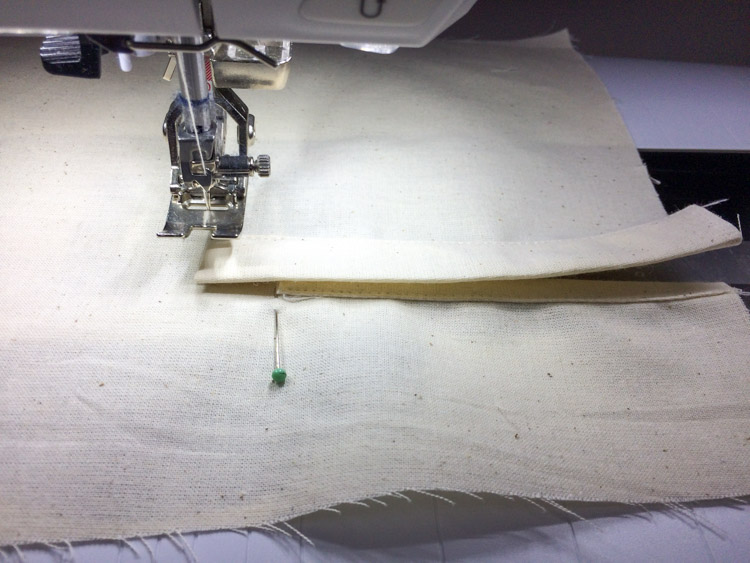
...then continue down the other side of the rectangle - to the mark - and...
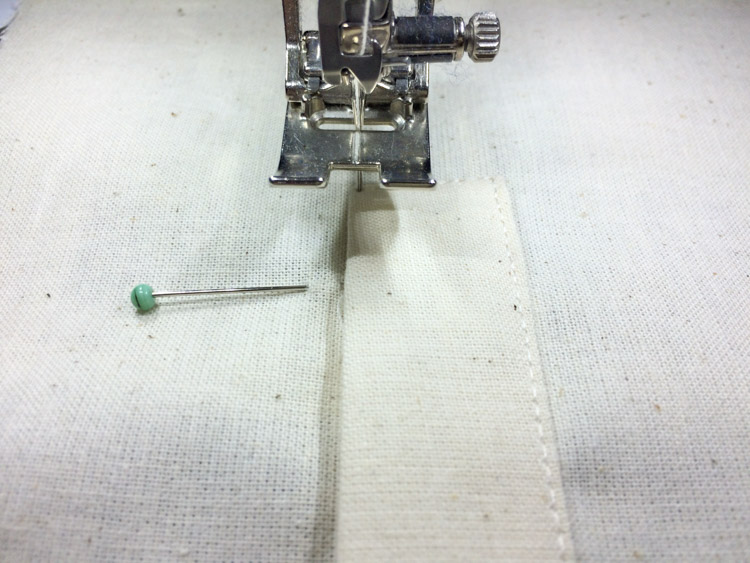
...2 mm beyond the mark...
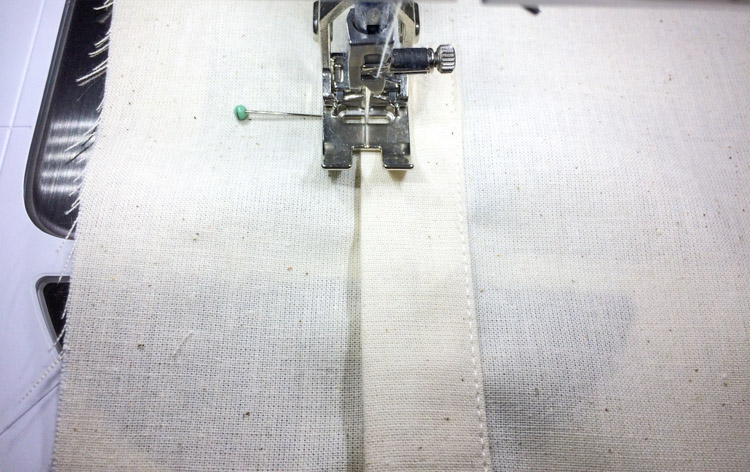
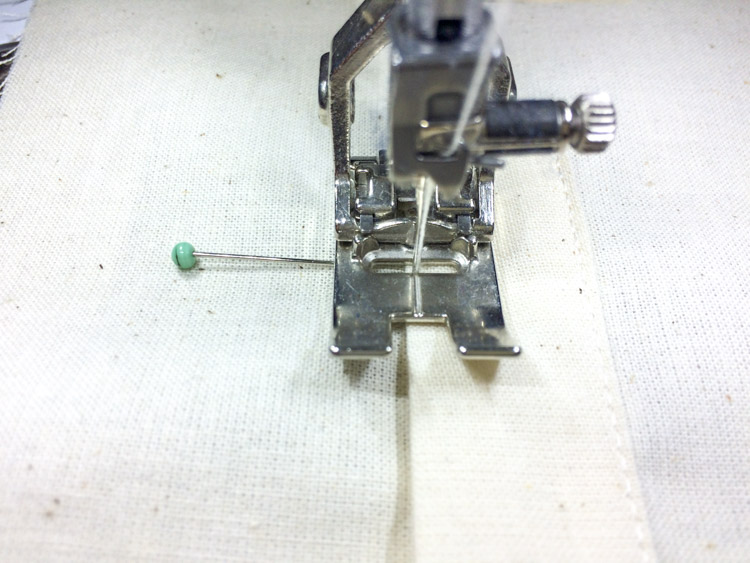
...rotate the sleeve one more time and sew across the rectangle towards the side you sewed first. That will be the end of this seam. This whole maneuver attaches the hem and reinforces the top of the slit at the same time.
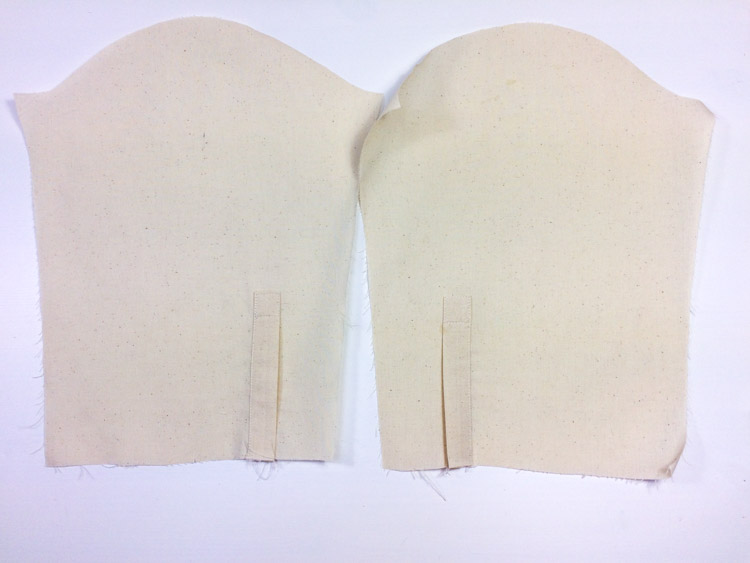
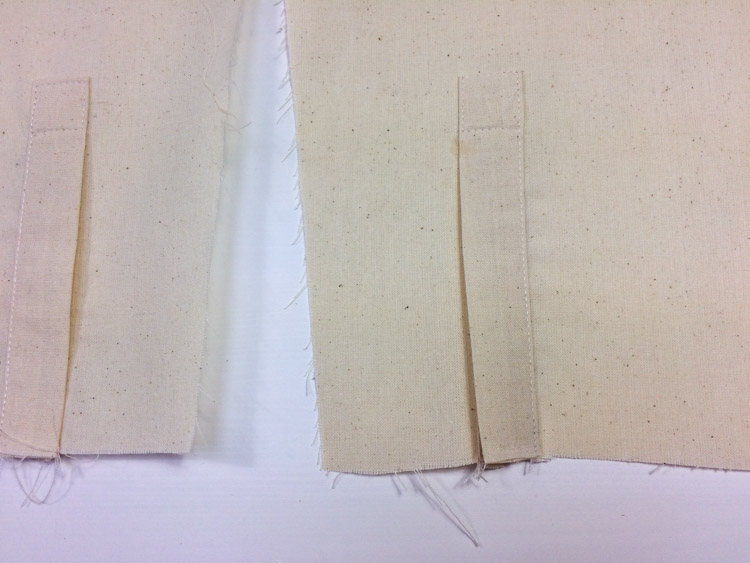
Sleeves
Easestitch the top of the sleeve using two parallel seams. Use long straight stitch and reduce the bobbin thread tension as much as possible.
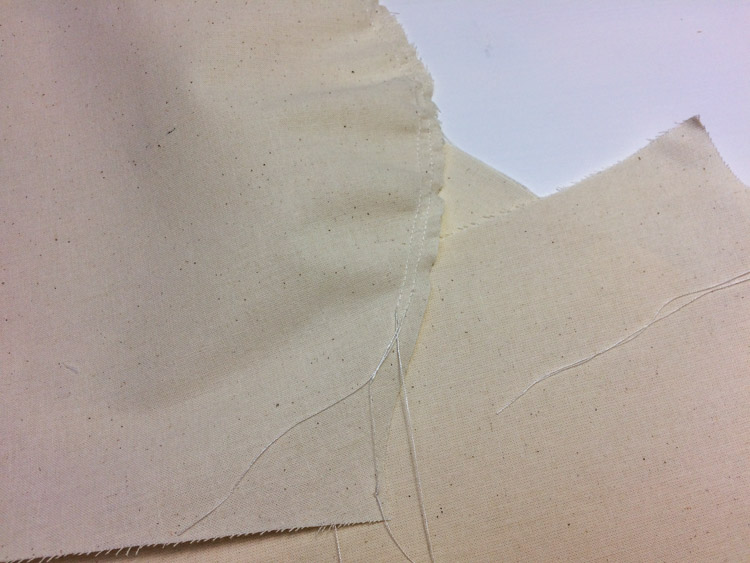
First pin both sides of the sleeve in the armpit area and on top of the armscye, then pin the curved parts in the armpit area - never easestitch these areas.
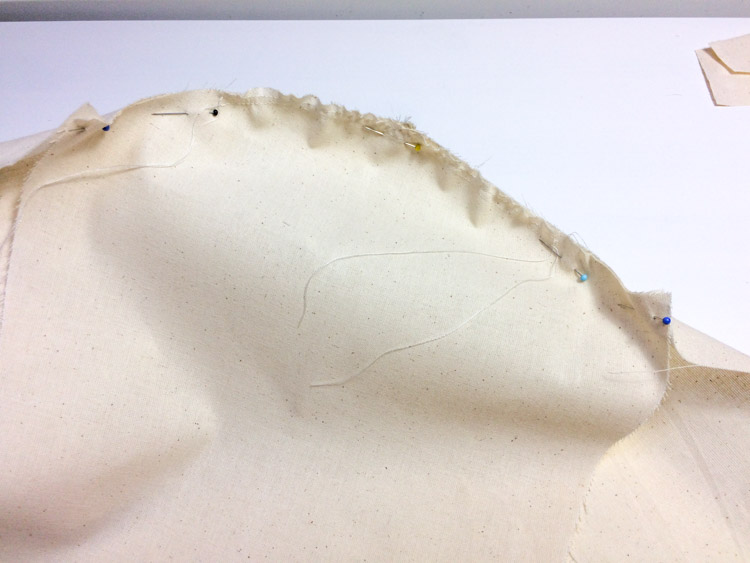
By pulling the threads, you can adjust the shape of the sleeve, which can then be easily attached to the torso. Pin the rest of the sleeve.
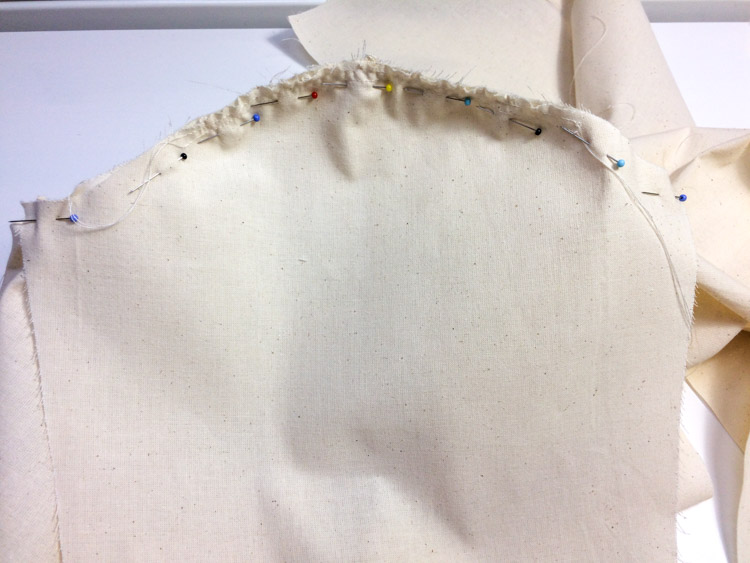
Sew the sleeve to the torso and clean the seam allowances.
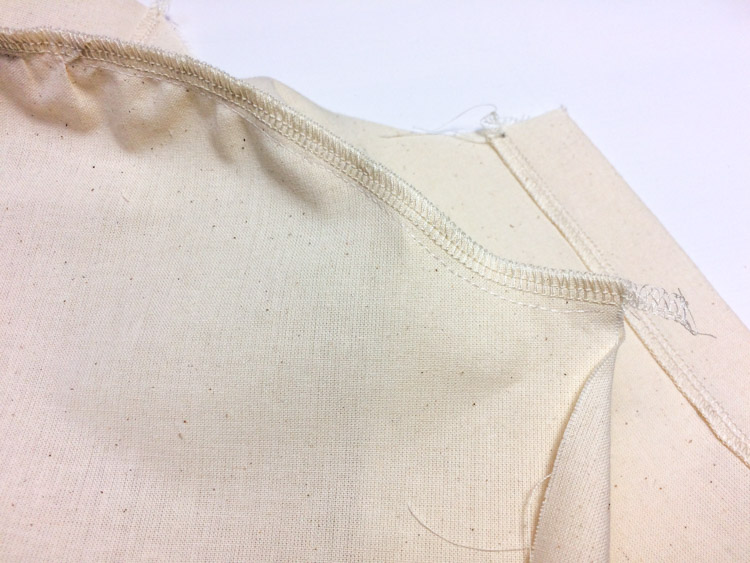
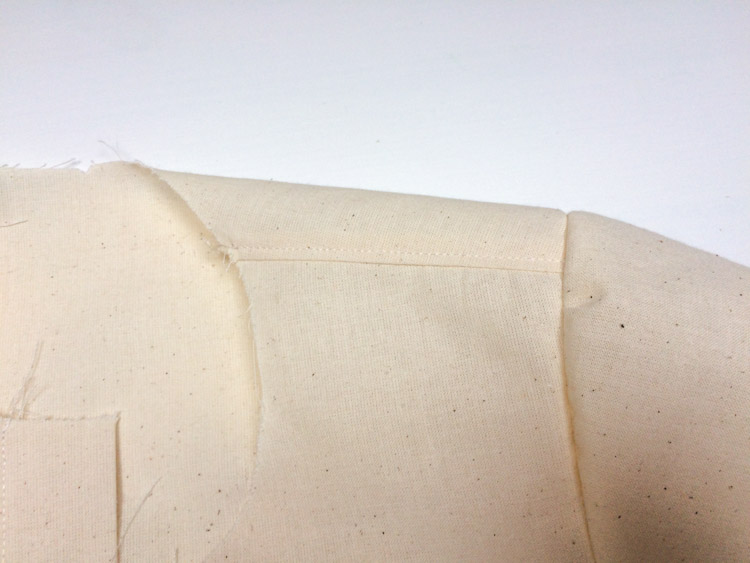
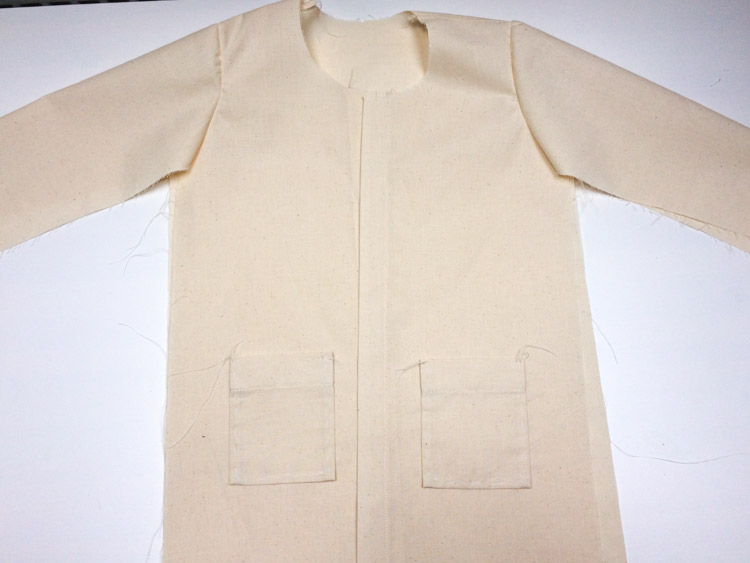
You can now topstitch the seam from the face side. First, press the seam allowances towards the torso. Now sew on the torso-side of the seam (about 0.5 cm from the seam) to attach the seam allowances to the garment. This will strengthen and flatten the seam.
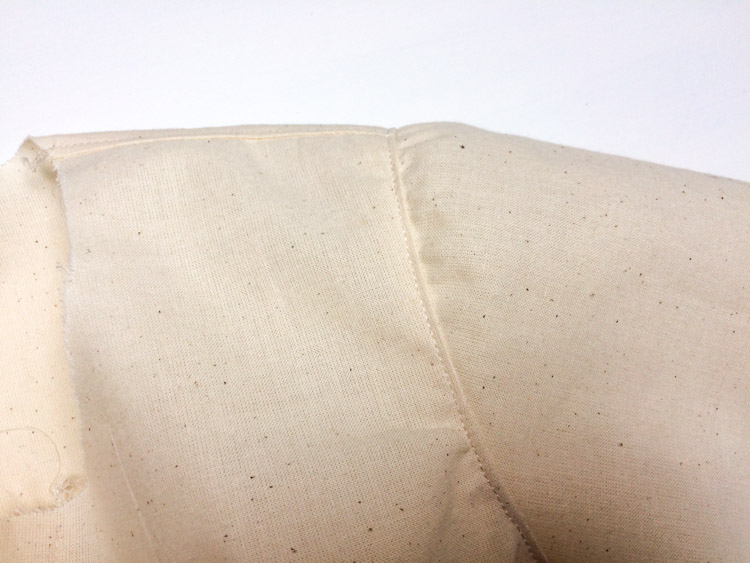
Sleeve seams & side seams
Now sew the side seam and the sleeve seam in one go. Clean the seam allowances.
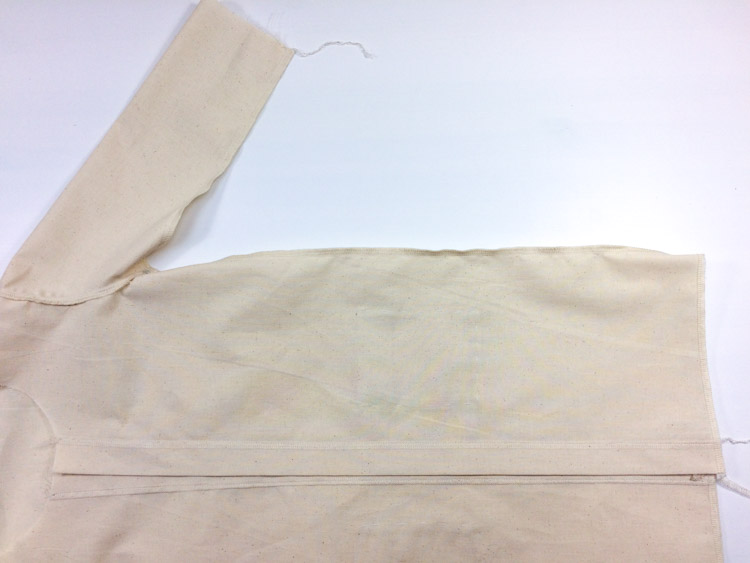
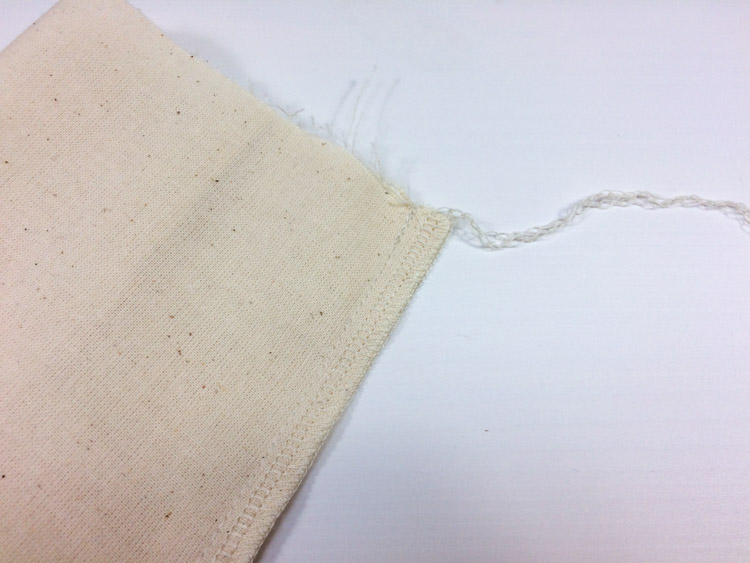
You can also clean the bottom edge of the shirt. Leave longer thread chain at the end of the seam and pull it under the loops (when using an overlock).
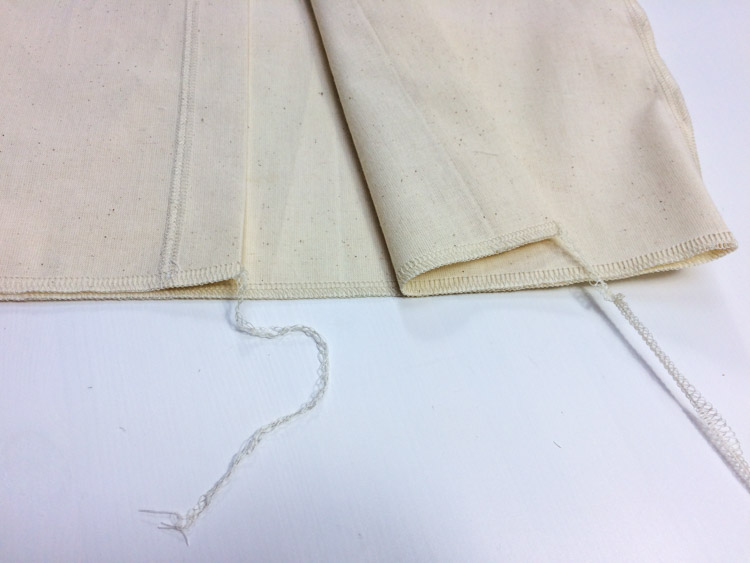
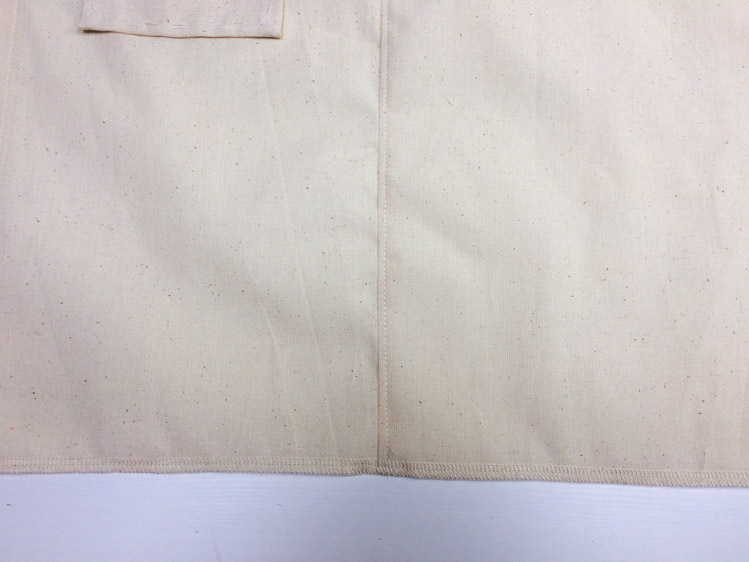
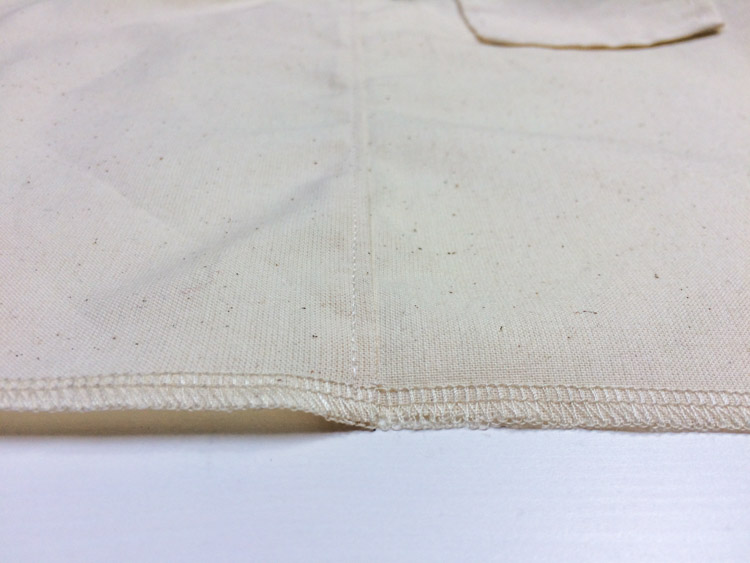
You can topstitch the sleeve and side seams too. This is commonly done on both women's and men's shirts and blouses. When sewing children's clothing, this may be difficult to do (due to the narrow sleeves). Press the seam allowances towards the back pieces and sew through them from the face side. Sew 0.5 cm from the original seam.
Cuffs
Mark important points for the pleats with pins. Going from the wider side of the sleeve placket - first pin is 1 cm from the placket, the second 1.5 cm from the first pin, the third 1 cm from the second and the fourth is 1.5 cm from the third.
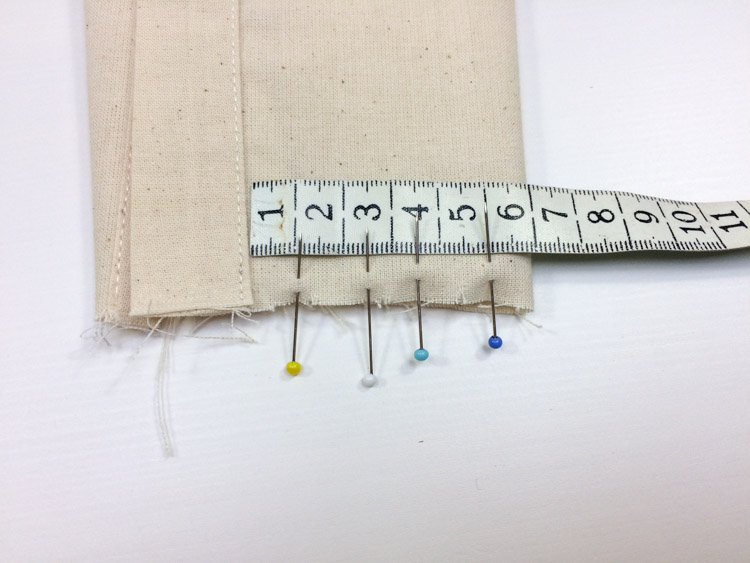
Now fold the sleeve so that the fourth pin lies on the third one.
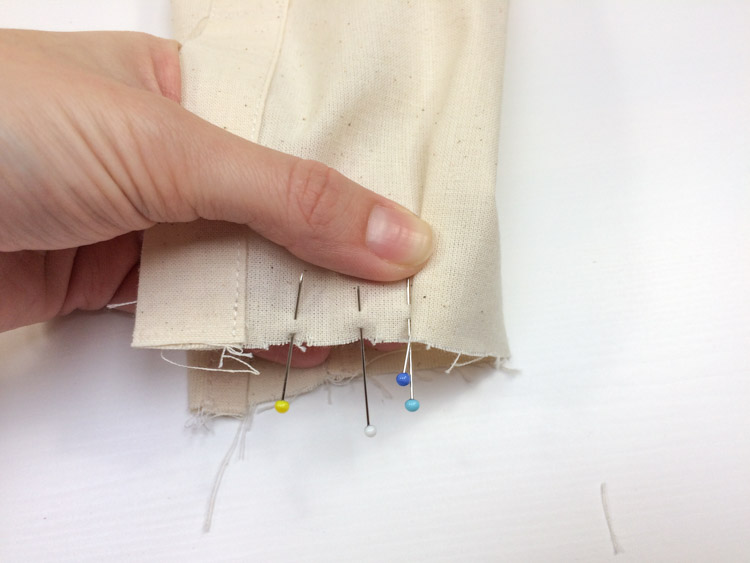
Pin the fold.
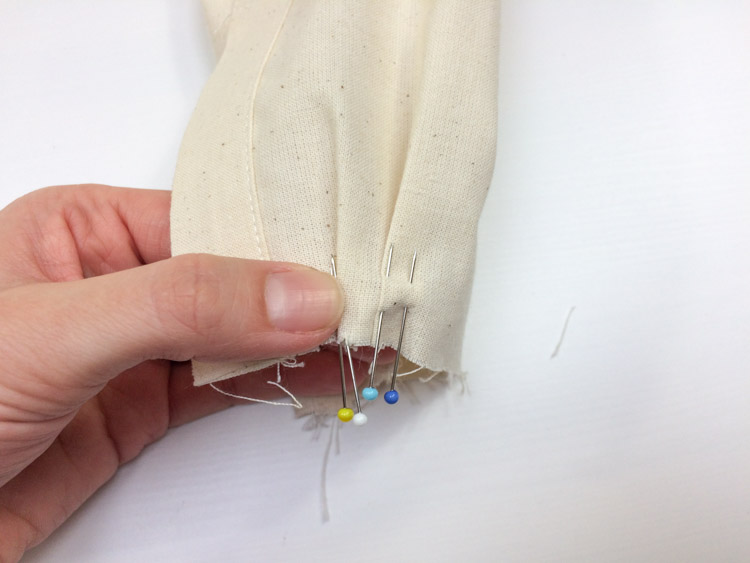
Then place the second pin on the first one and pin again. Now you have 1.5 cm wide pleats that point towards the button placket.
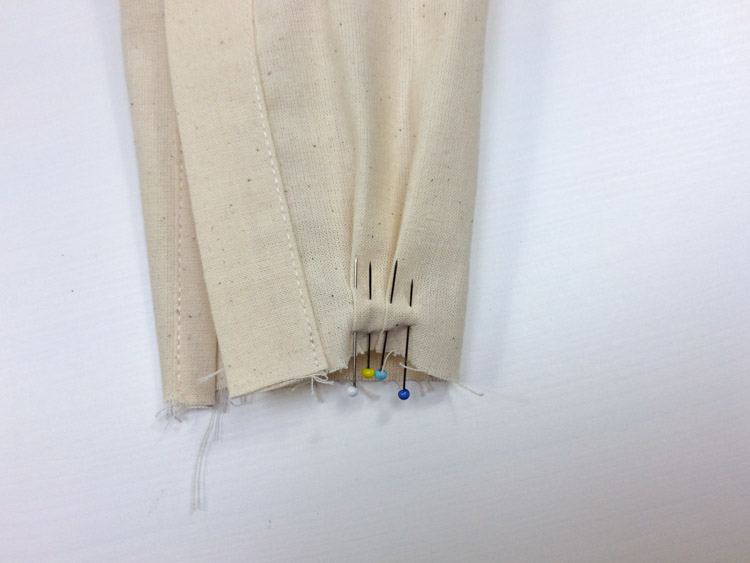
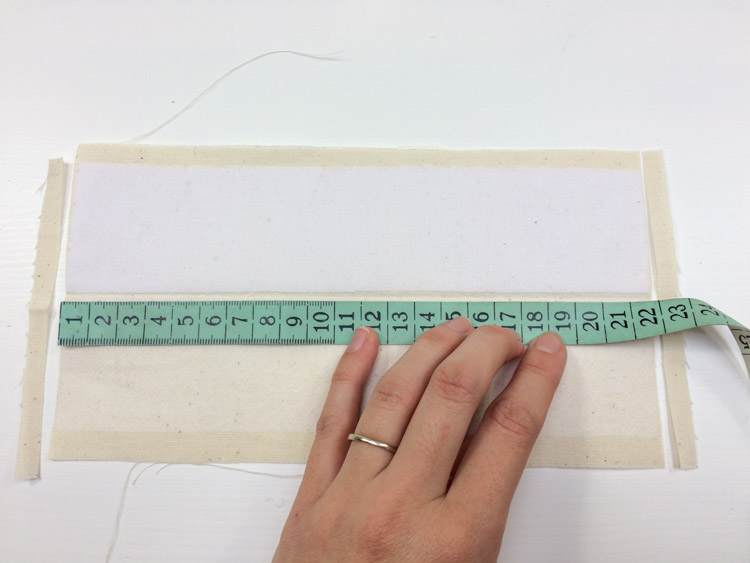
Now measure the circumference of the bottom sleeve (including the plackets).
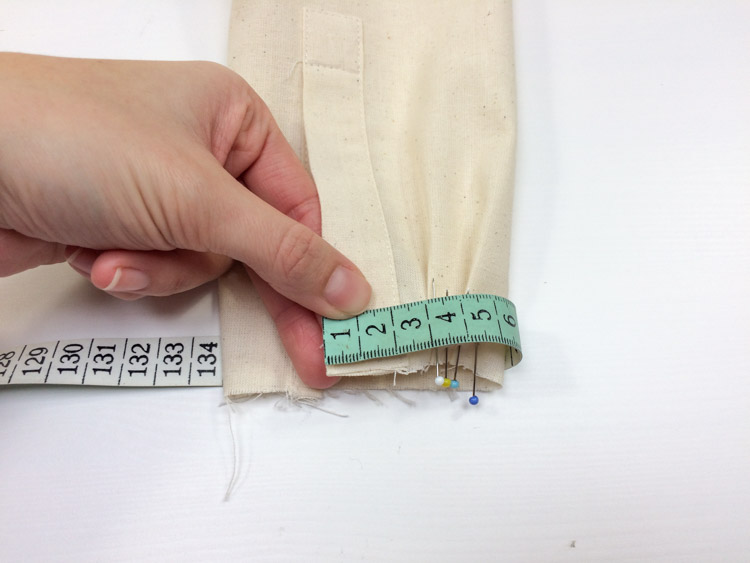
If necessary, adjust the length of the cuff according to your measurement. The length of the cuff is the circumference of the sleeve + 2.4 cm (2 cm for seam allowances and 4 mm extra so that the cuff can fit on the sleeve).
Fold the cuff in half lengthwise (face side in). Pin the shorter sides...
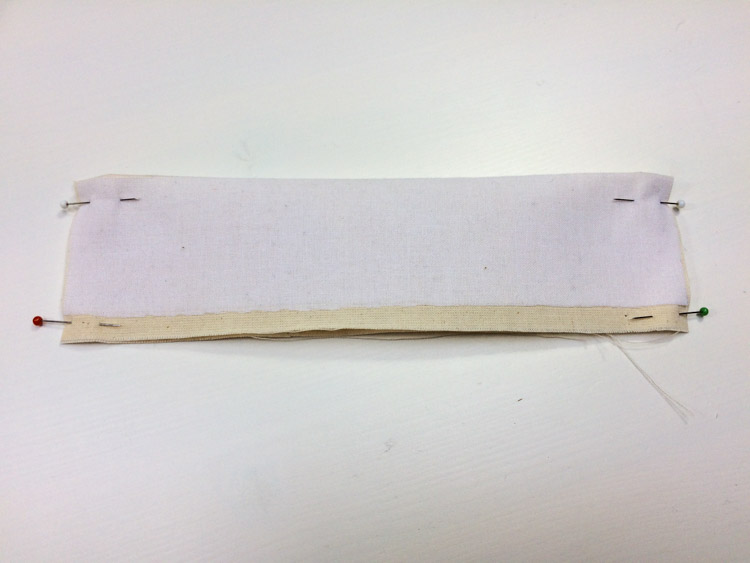
...and sew them. Grade the seam allowances and cut off their corners.
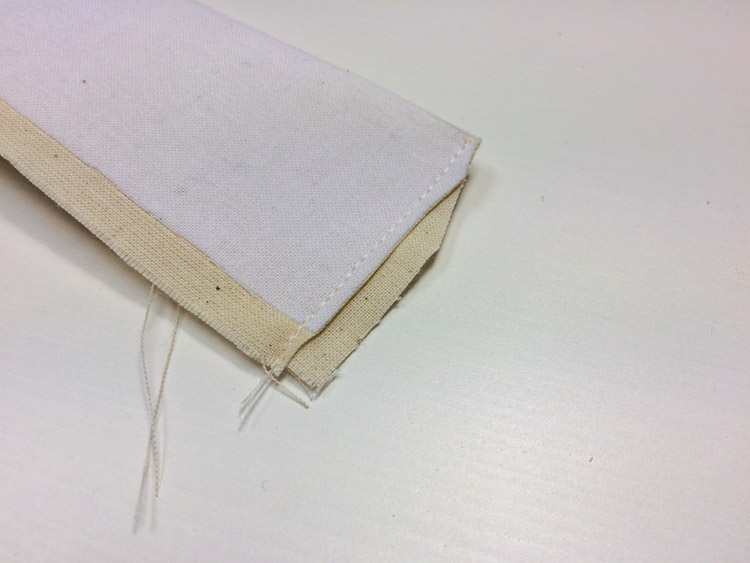
Place the more reinforced side of the cuff on the edge of the sleeve (face side to face side).
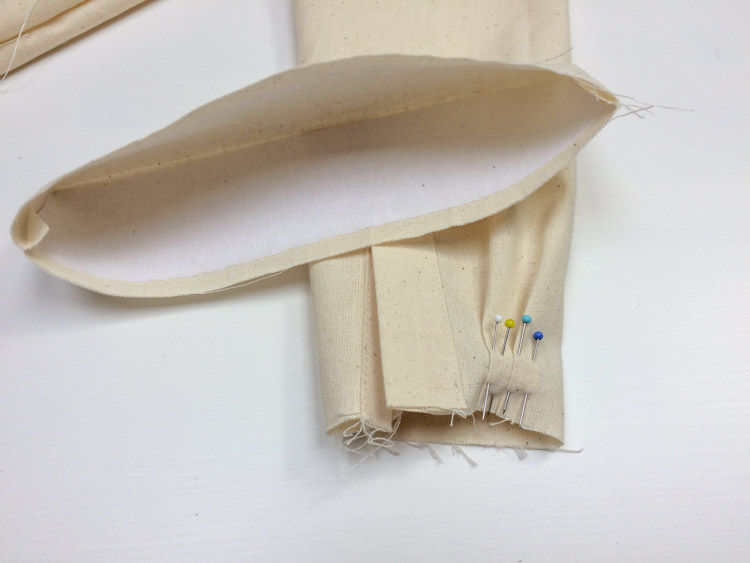
Pin this side (just this side for now) to the sleeve. Pin from one side of the placket towards the other one.
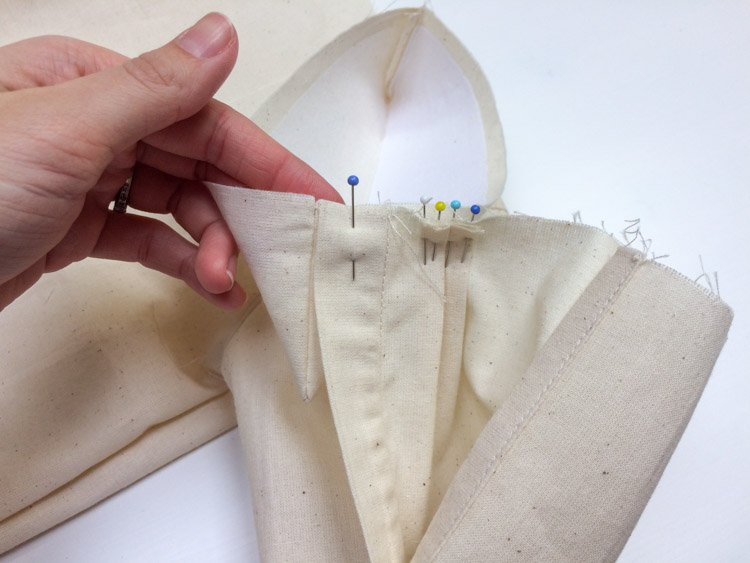
At the end, let the cuff protrude about 2 mm beyond the button placket so that you can easily turn it around later.
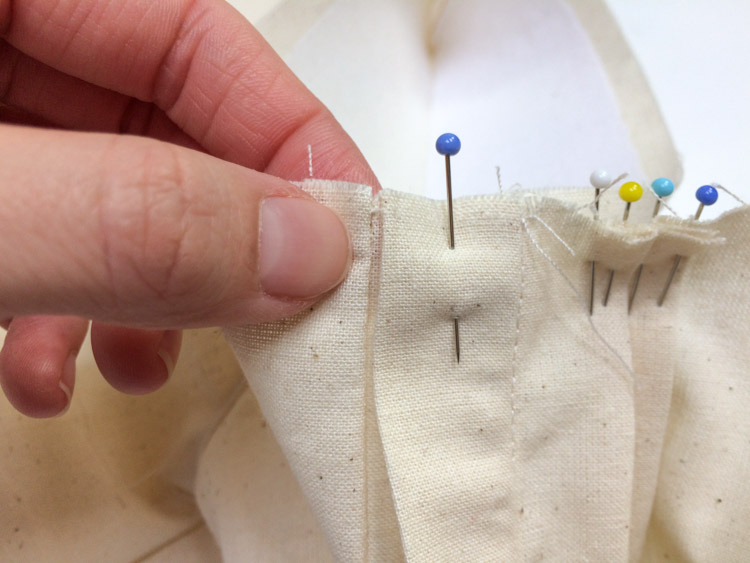
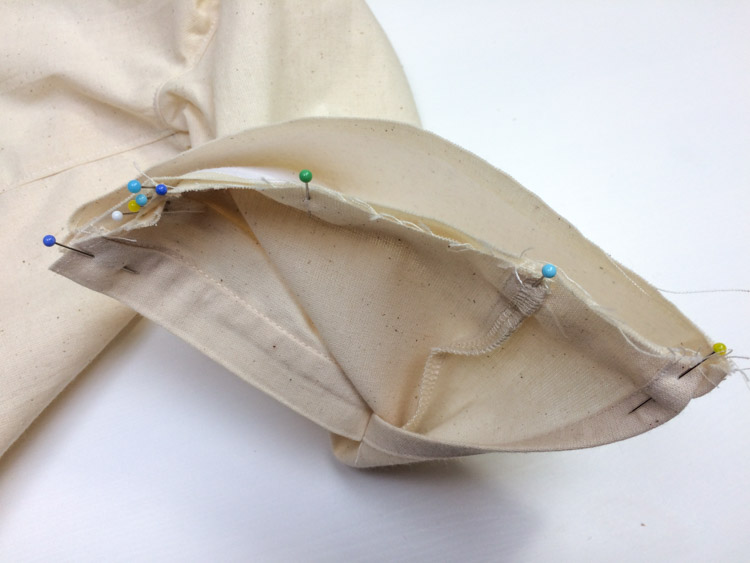
Sew the pinned side of the cuff to the sleeve.
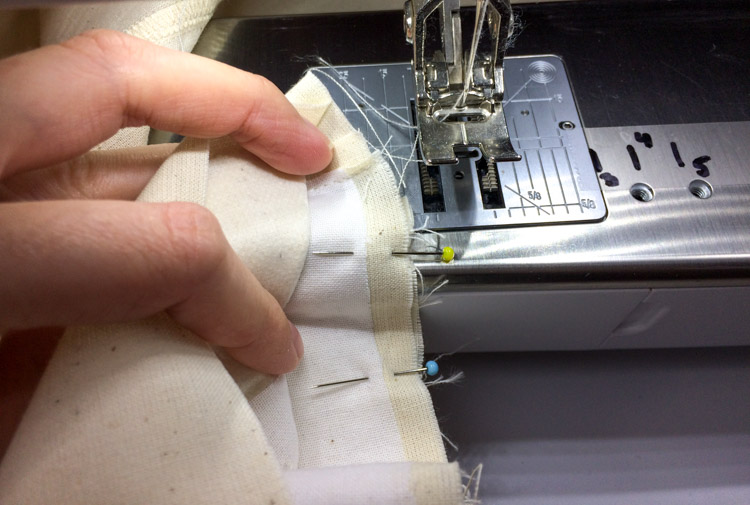
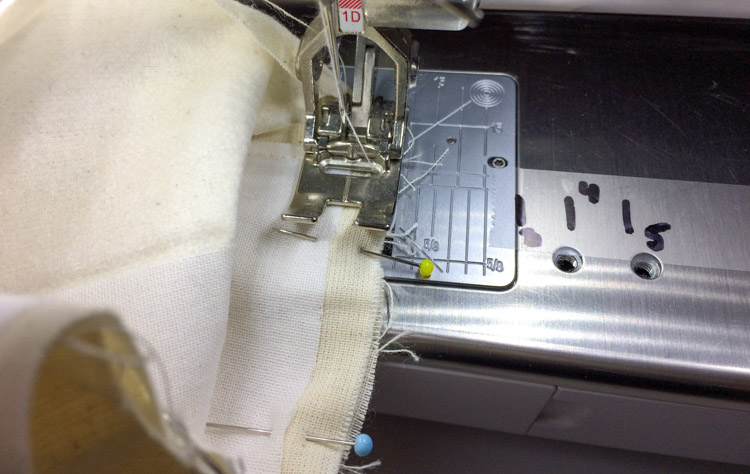
I recommend sewing over the pins that hold the pleats - the pleats can easily move by mistake when removing the pins.
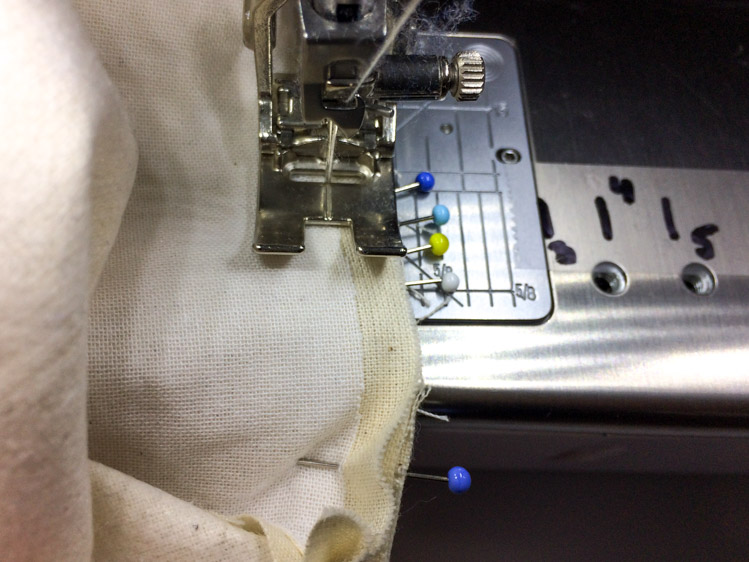
The face side of the cuff is now sewn to the sleeve.
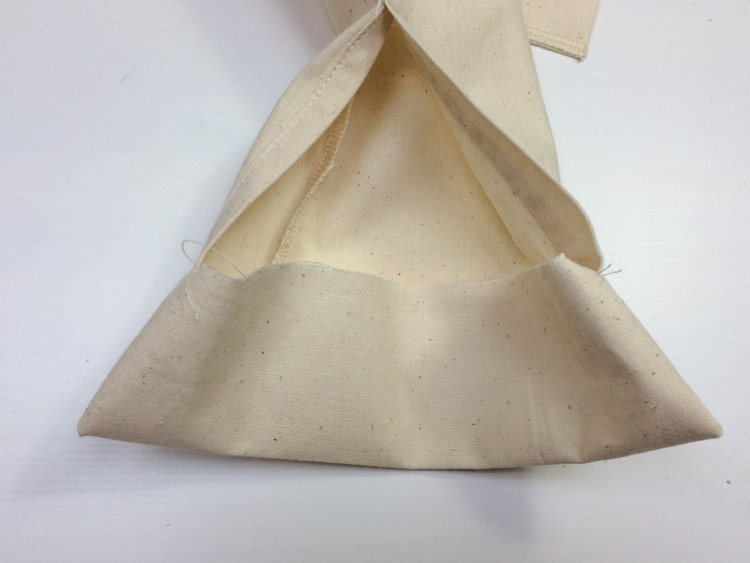
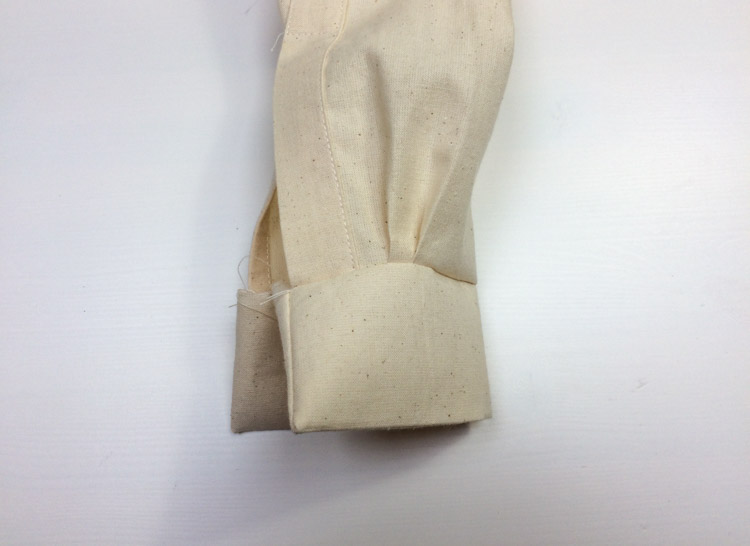
Press the seam allowances towards the cuff.
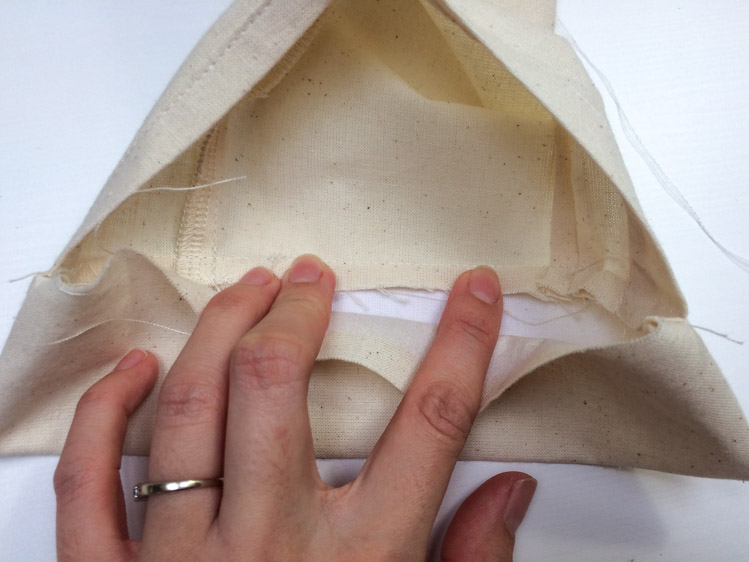
Fold 1 cm of the free edge of the cuff to the reverse side and place it over the seam allowances.
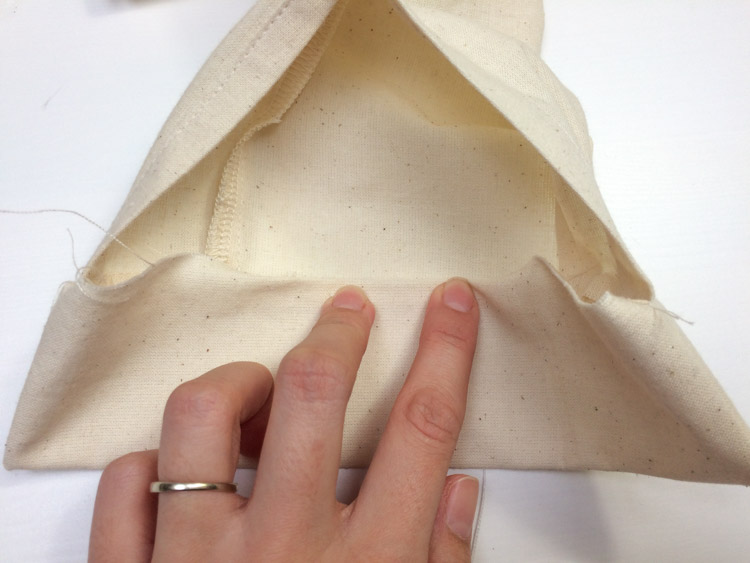
Baste the cuff to the sleeve.
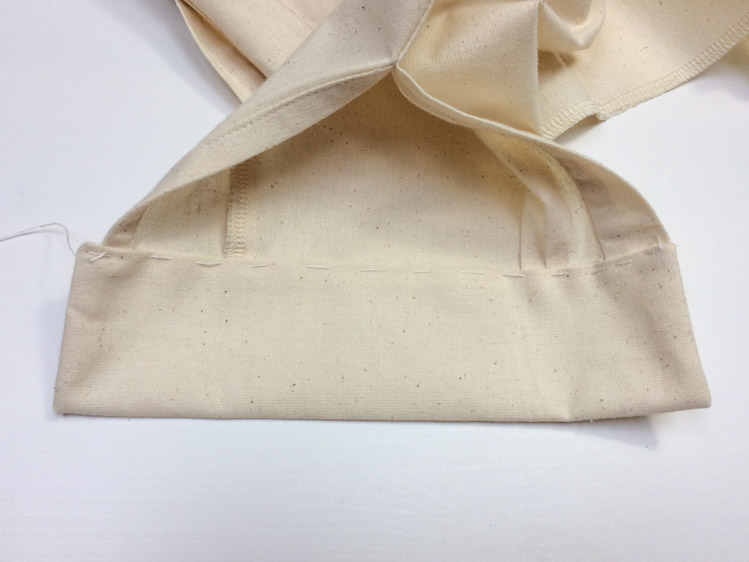
Topstitch the cuff.
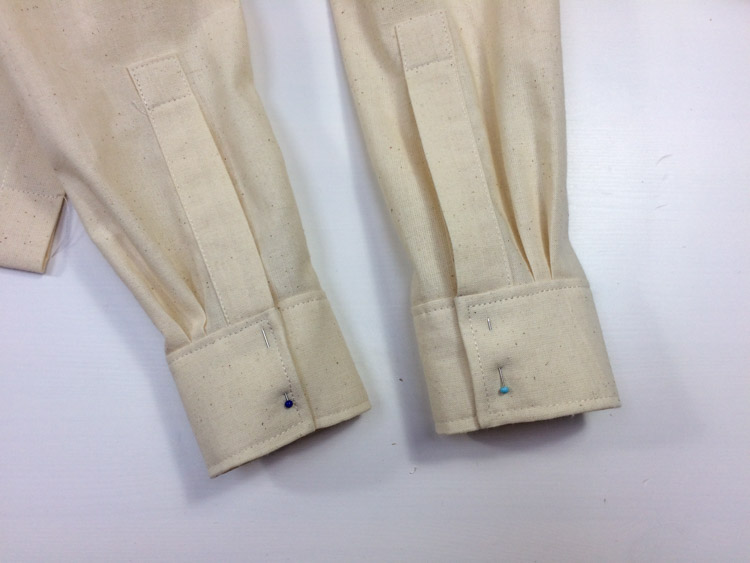
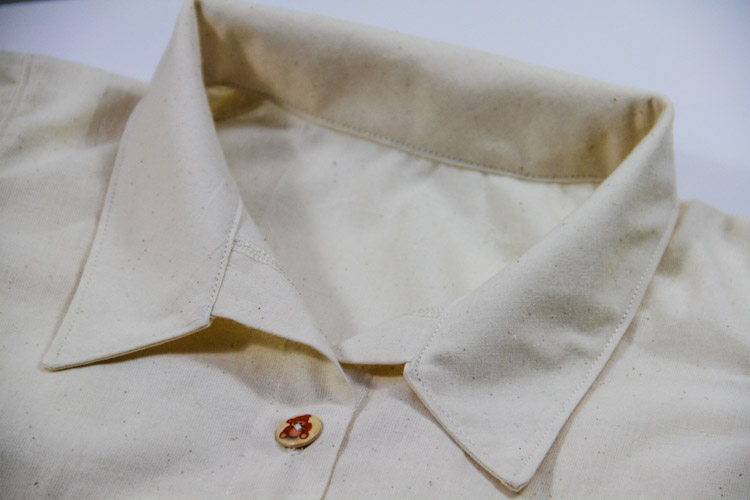
Collar
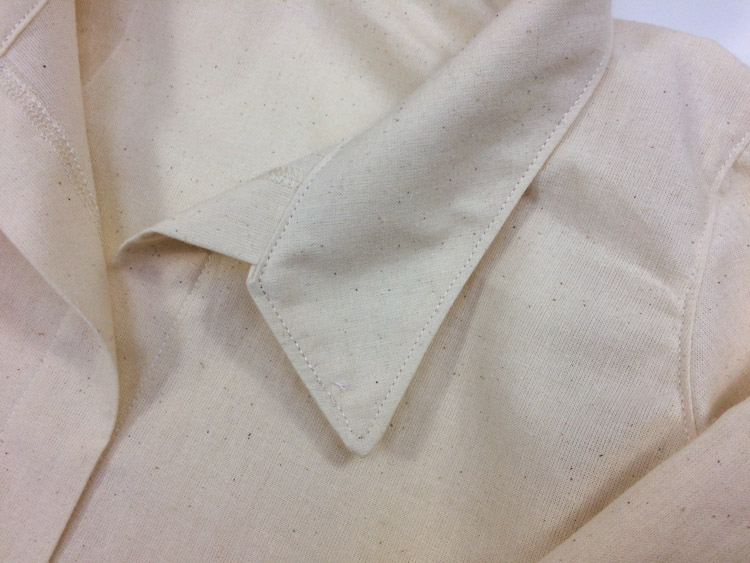
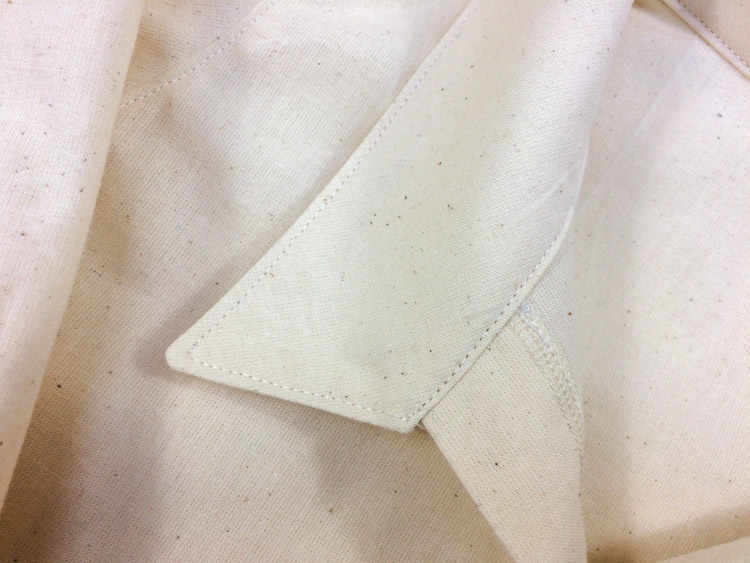
The procedure for sewing a collar is similar to the procedure for sewing cuffs. Pin the upper collar (less reinforced side) to the reverse side of the neck opening.
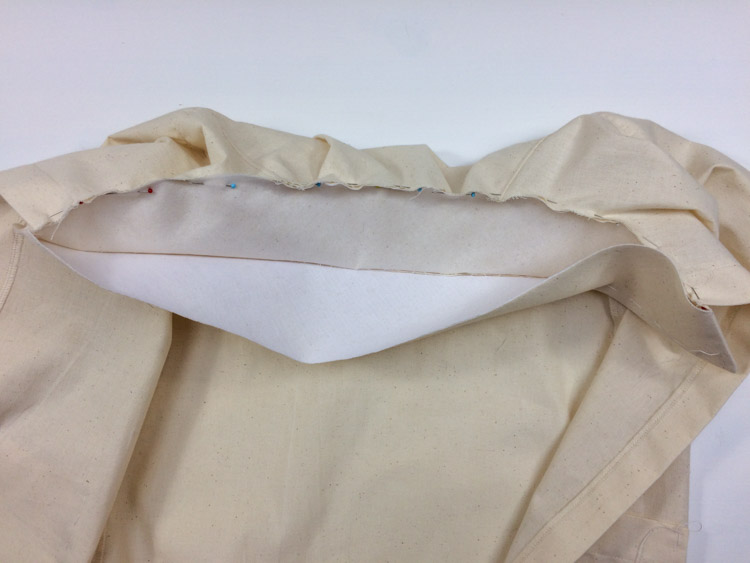
Sew the upper collar to the neck opening.
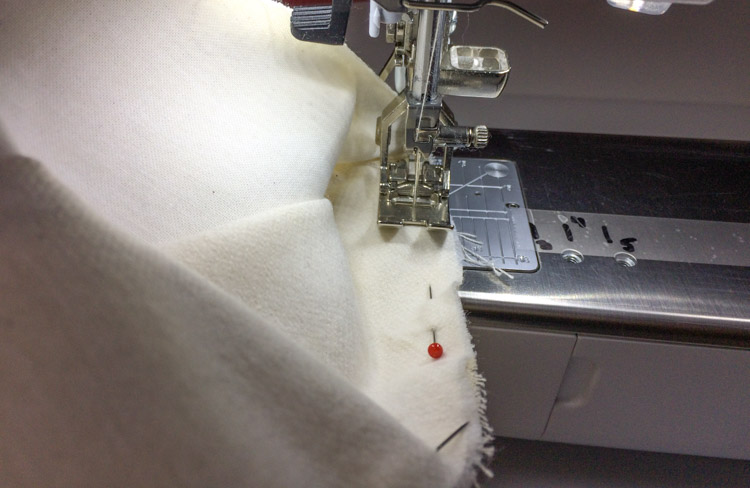
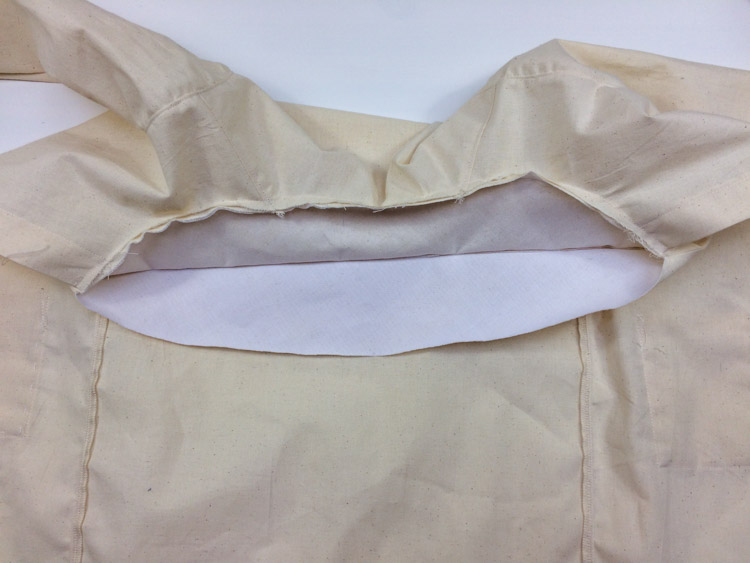
Cut the seam allowances perpendicular to the seam to make the neck opening looser - make a cut every centimeter or so. I also recommend cutting half of the seam allowances of the torso parts (grading the seam allowances).
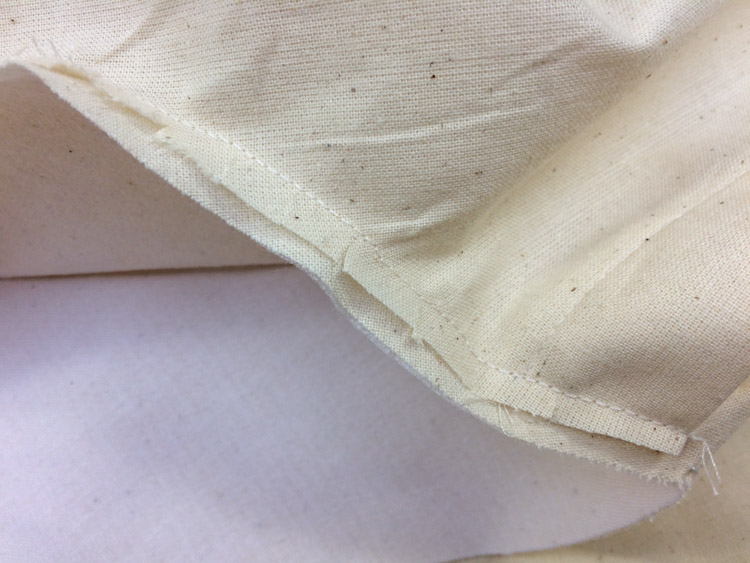
Fold 1 cm of the cutting edge of the undercollar to the reverse side and baste it to the neck opening.
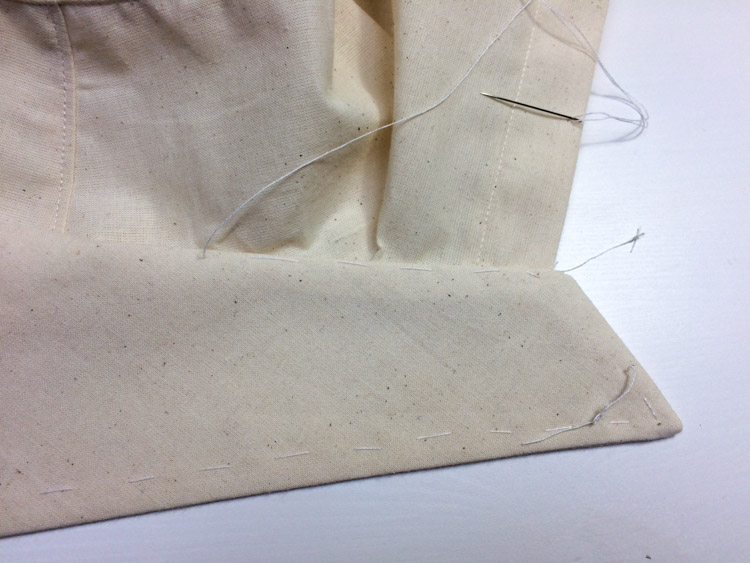
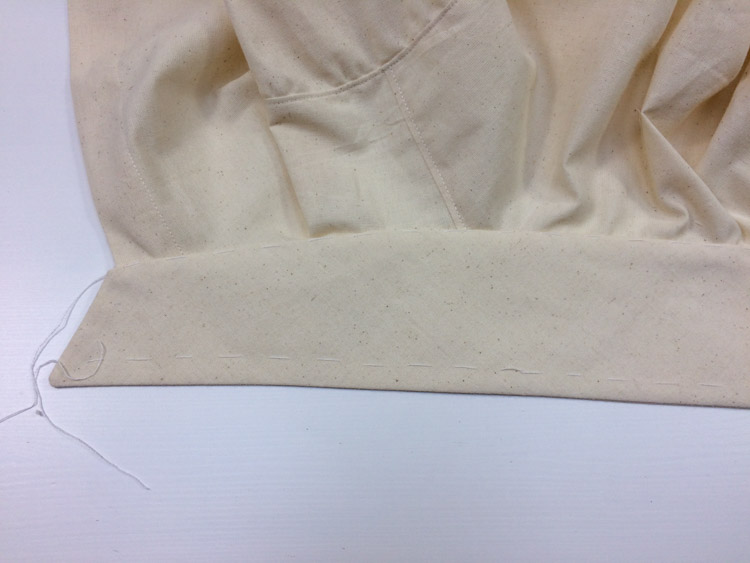
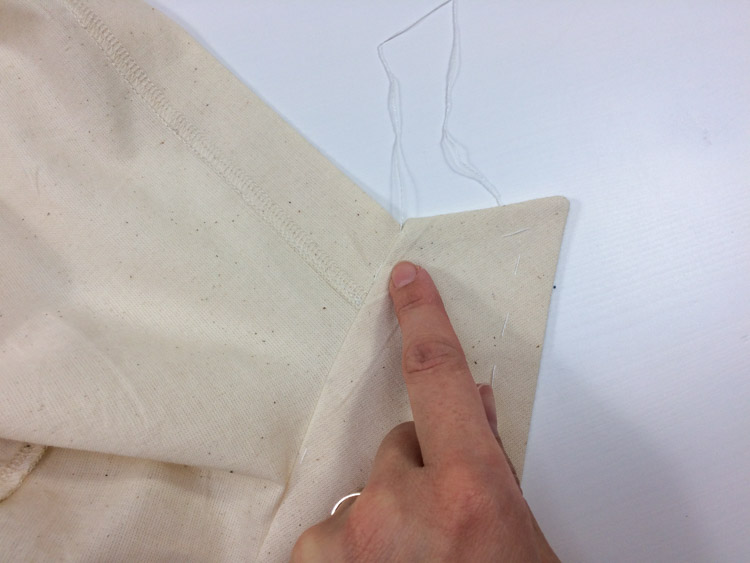
Turn the shirt inside out so that the upper collar is facing you. Topstitch along the neck opening seam (0.5 cm from it) to attach the undercollar.
Bottom hem
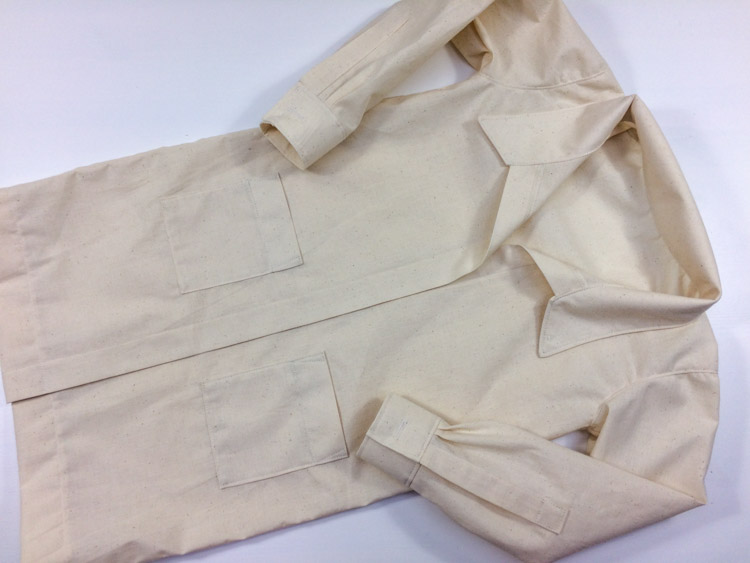
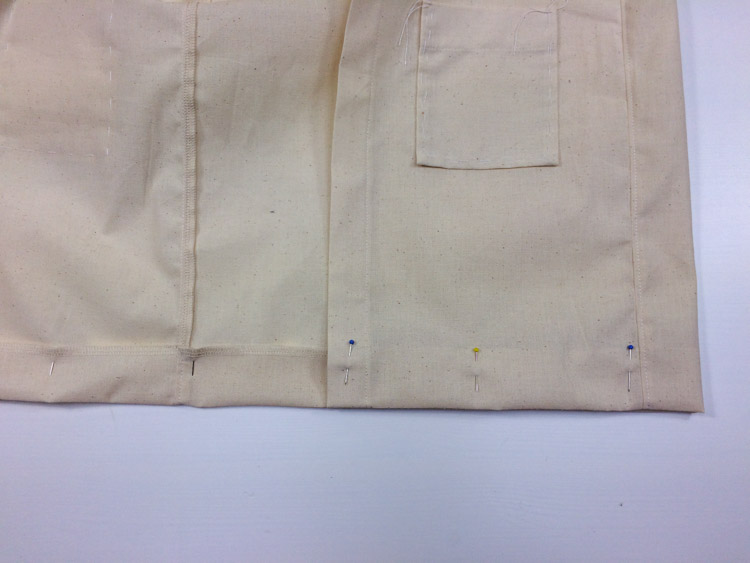
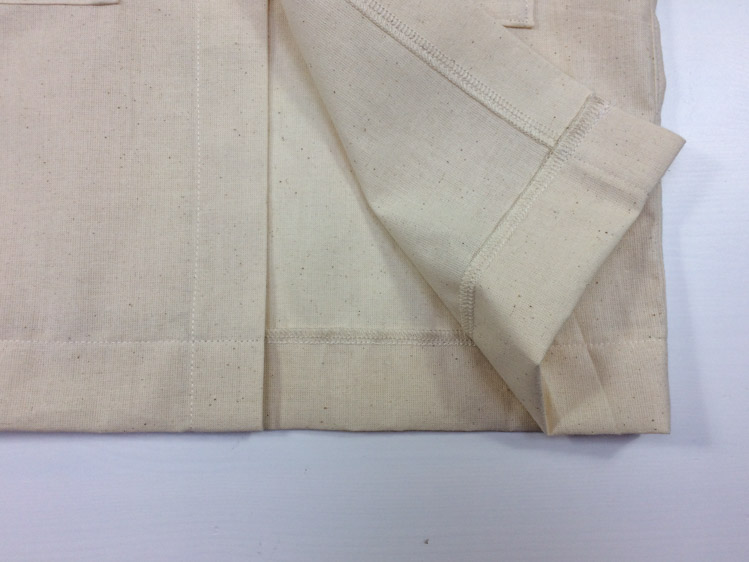
Fold the bottom edge of the shirt to the reverse side depending on the selected width of the seam tab (usually 3 cm). Sew the tab to the shirt.
Pockets
Test the placement of the pockets. If it seems fine, sew them to the shirt.
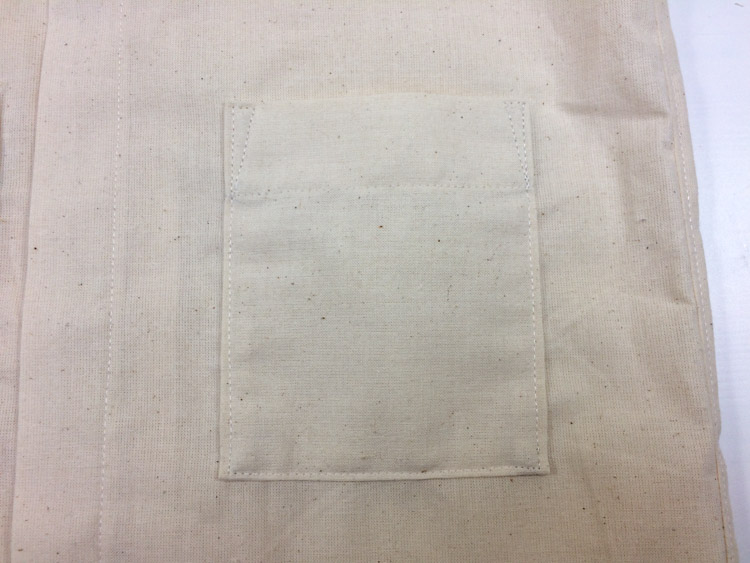
Sew small triangular tacks at the sides of the pocket openings.
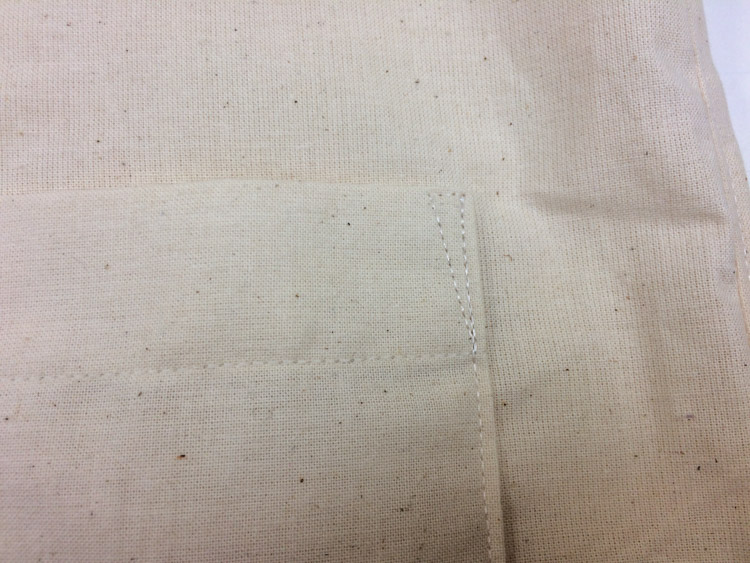
Detailed instructions for sewing tacks can be found in my video tutorial on How to sew pants step by step:
PS: Don't forget to turn on captions.
Buttons & buttonholes
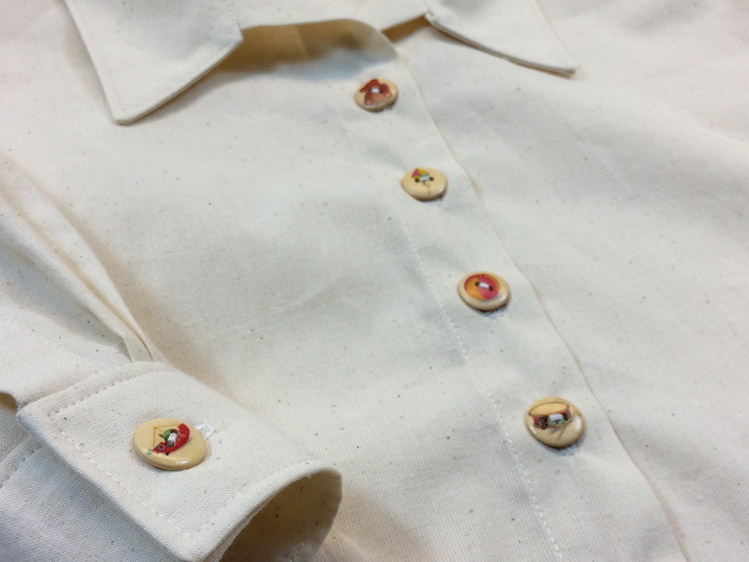
Now all you have to do is sew the buttonholes (and buttons) of the cuffs and front pieces.
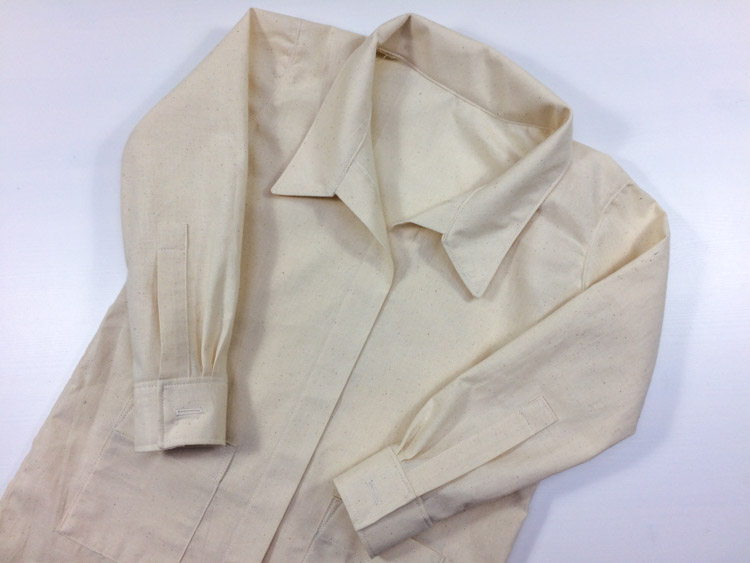
Place the cuff buttonhole in the middle of the cuff, about 1 cm from the edge (it depends on the size of the button). Keep in mind that the button shouldn’t reach beyond the edge of the cuff.
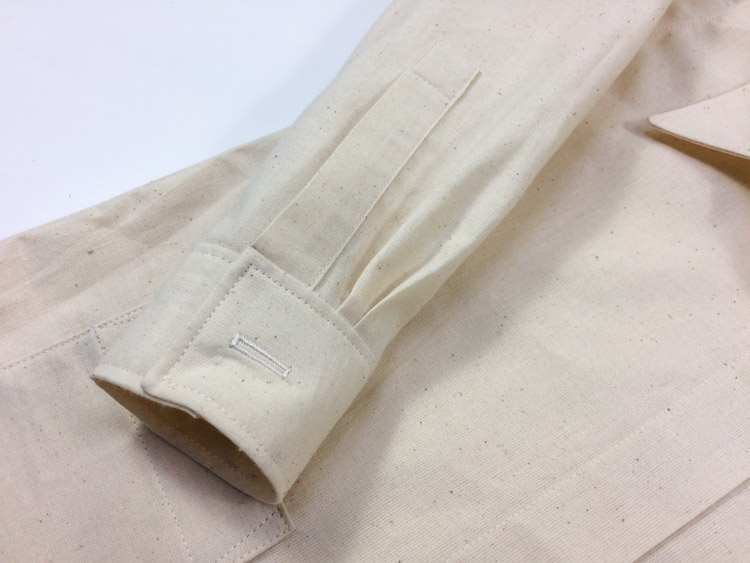
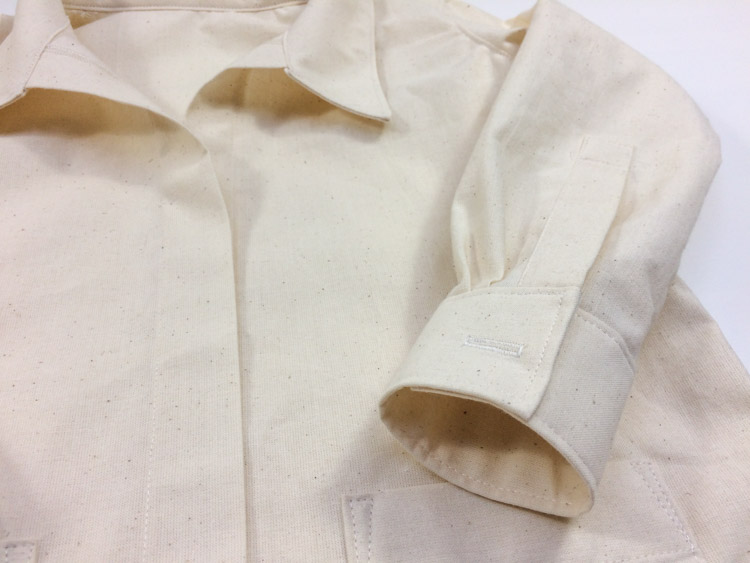
Place the cuff buttonhole in the middle of the cuff, about 1 cm from the edge (it depends on the size of the button). Keep in mind that the button shouldn’t reach beyond the edge of the cuff.
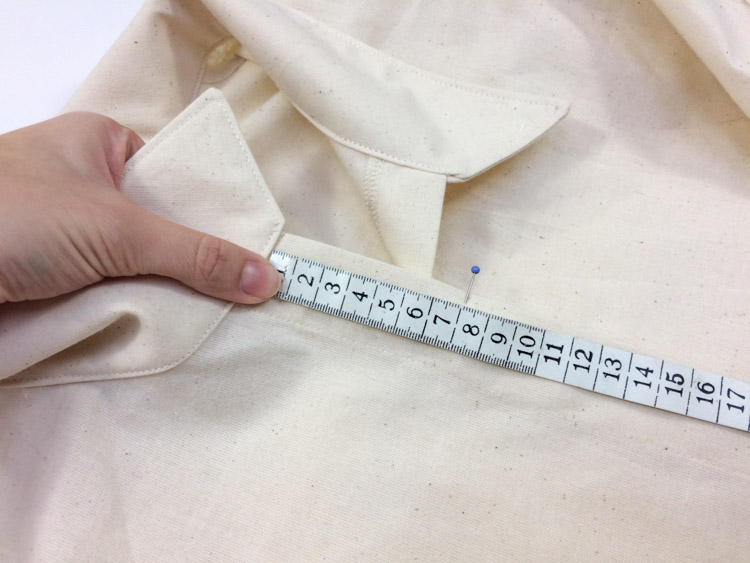
Choose the size of the gaps between the other buttonholes according to the size of the buttons you want to use.
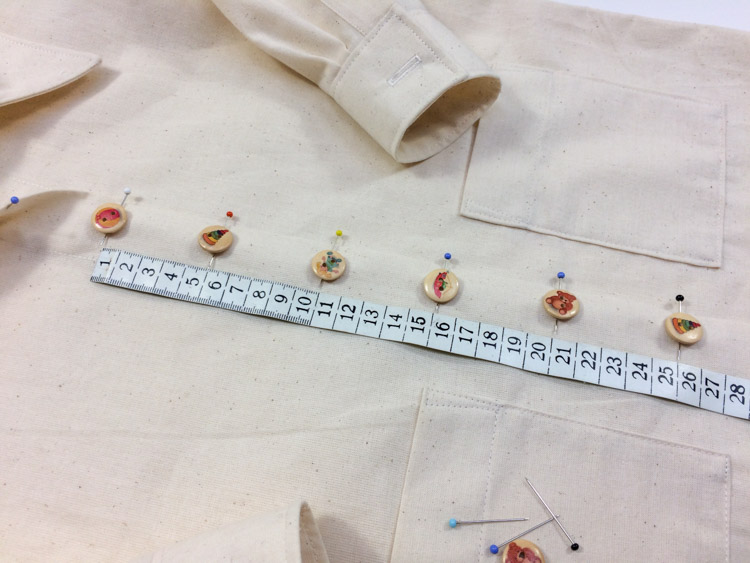
You can stop placing the buttons / buttonholes about 13 - 15 cm from the bottom hem of the extended version of the shirt / jacket.
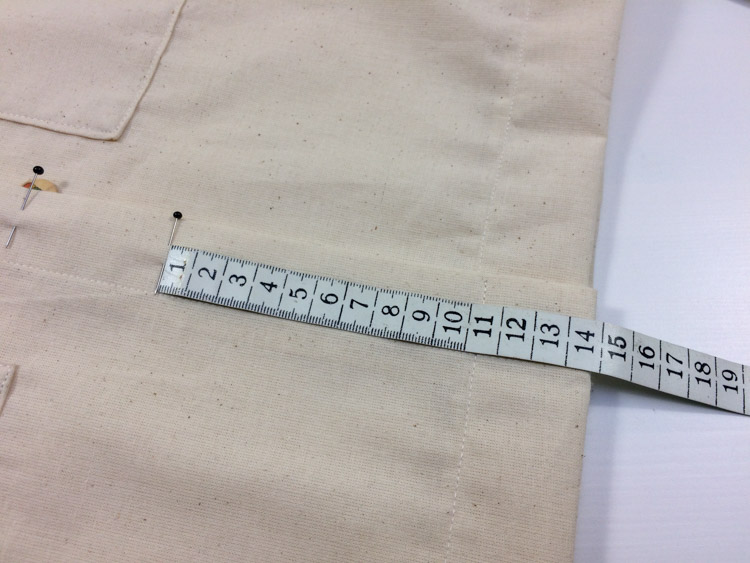
Place the buttonholes in the center of the button placket. I recommend sewing them in one go, without cutting the threads, it is faster, and you will use less thread. :)
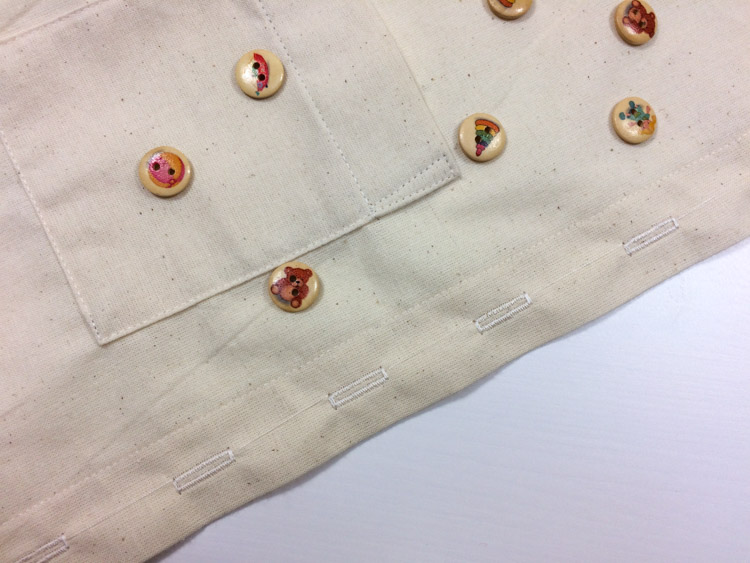
Now you just sew the buttons and the shirt is finished!
You can get this pattern for shirt / painter’s jacket here:
Pattern for simple children’s shirt / blouse
Have a nice day, Peťa
