A few days ago, I introduced the autumn pattern for a children's coat and sewing instructions for version with lining. This time we look at the same pattern together, but in its simplified version without lining and collar.

Pattern for children’s coat ROMANCE in sizes 80 - 164 is now available in our online store:
Pattern for children’s coat ROMANCE

Click on this link if you want to know how to sew a classic version of the coat with the same pattern: Sewing children’s coat ROMANCE with lining
Recommended material
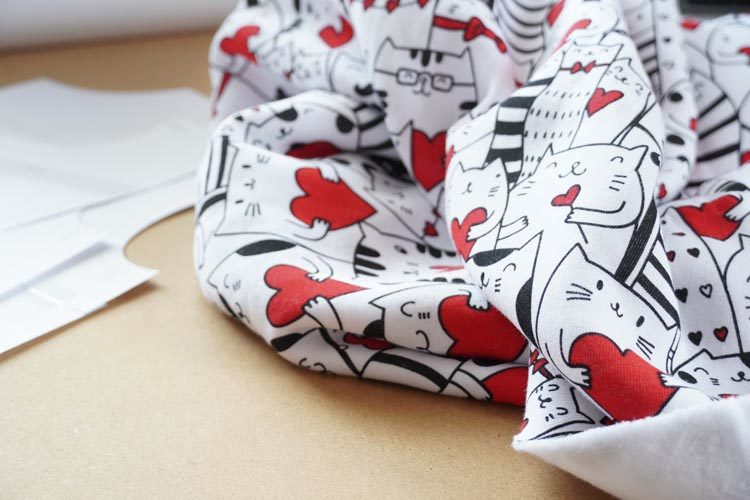
For sewing a children's coat, I recommend using jacket fabrics, bouclé and other strong but flowing fabrics. For a sportier version, for example without a collar, you can even use a thick fleece sweater fabric, but it is not as flowing as jacket fabrics, so take into consideration that such a coat will look slightly "unsuited". I’ve used fleece sweater fabric to sew the simplified version of the coat...
What else do you need
You will need some larger buttons. Number of buttons depends on their size. The smaller the buttons, the more you need. I recommend using buttons with a diameter of 2 - 3 cm. I’ve used six buttons with diameter of 2 cm for the button flap and another two for the pockets for my shortened coat (size 128).
You will also need interfacing to reinforce the coat. I’ve used fusible facing with warp threads to reinforce facing, pockets, and front pieces along the button flap.
Further recommendations on the reinforcement (especially if you are sewing from a jacket or a cloak fabric) are described in detail in the previous article:
Sewing children’s coat ROMANCE with lining

Cuts preparation
According to the paper pattern prepare:
- 1x back piece (folded fabric cut)
- 2x front piece
- 2x sleeve piece
- 1x back piece of the neck opening facing
- 2x front piece facing
- 2x pocket piece
As you can see in the picture below, the front and back pieces are shorter than the paper pattern. I’ve shortened the coat so that its bottom hem is aligned with the bottom side of the pockets. Pieces extend 3 cm below the bottom line of the pockets (3 cm for the seam flap).
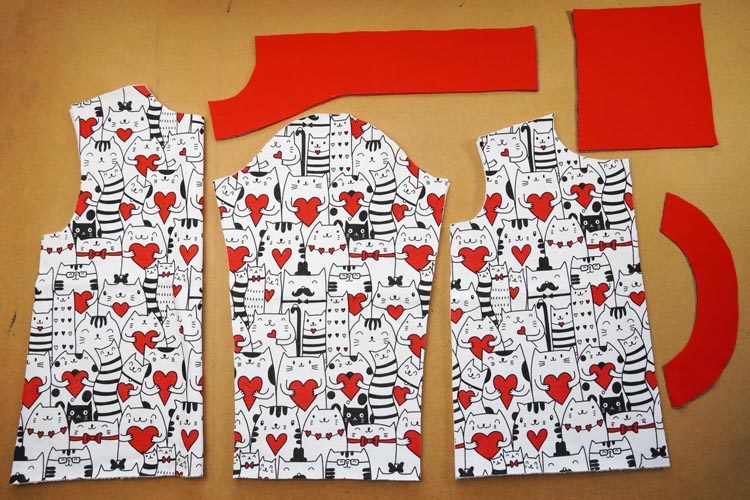
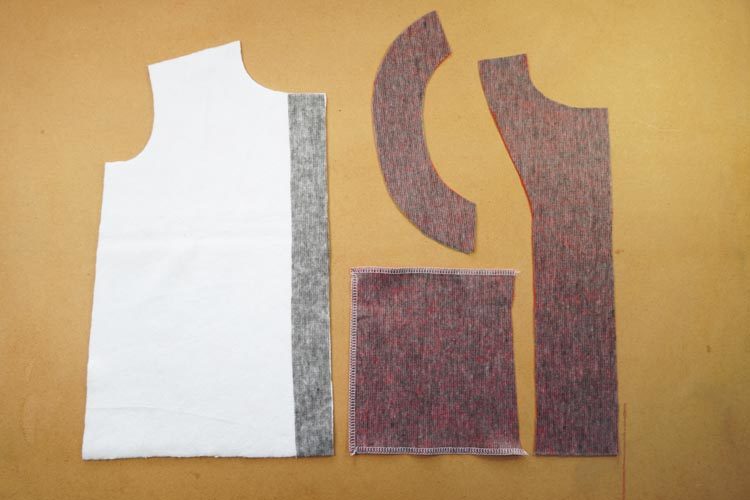
You need to reinforce some pieces after cutting them. Reinforce all pieces of the facing, whole pockets and front pieces along the button flap. I’ve used 4 cm wide strip of fusible facing to reinforce front pieces.
How to sew the children’s coat - sewing

Pockets
Let’s do the pockets first. Clean the upper side first (the pocket opening) then do the straight side which will be placed along the button flap and the bottom side. Use overlock or regular sewing machine.

Fold the pocket opening seam flap to the inside and iron the fold.

Sew through the flap from the face side of the pocket pieces. You can do one seam, or two parallel seams like I did.


Now fold the remaining two cleaned sides 1 cm to the inside and use stitching to fix them in place. Iron the pockets.


Determine correct position of the pockets on the side seam and pin them to the front pieces.


You can stitch the pockets to the front pieces to fix them in place. You don’t need to do the stitching if you are confident that the fabrics won’t slip during the sewing.

Sew the pockets to the front pieces along the (along the bottom sides and sides closer to the button flap of the coat. Sew near edges with regular straight seam.

Reinforce the corner (one closer to the button flap) of the pocket openings with triangle stitching, as in the picture, or zigzag on the spot to keep the pockets from tearing.

Now clean the side seam of the front pieces and at the same time attach the pockets to the side seams.

Clean the side seams of the back piece too.

Shoulder seams
Lay both front pieces over the back piece (face sides to face side). Pin the shoulder seams.
If you haven’t sewed the pattern before, then stitch the shoulder seams (and side seams) and try the coat on before sewing.
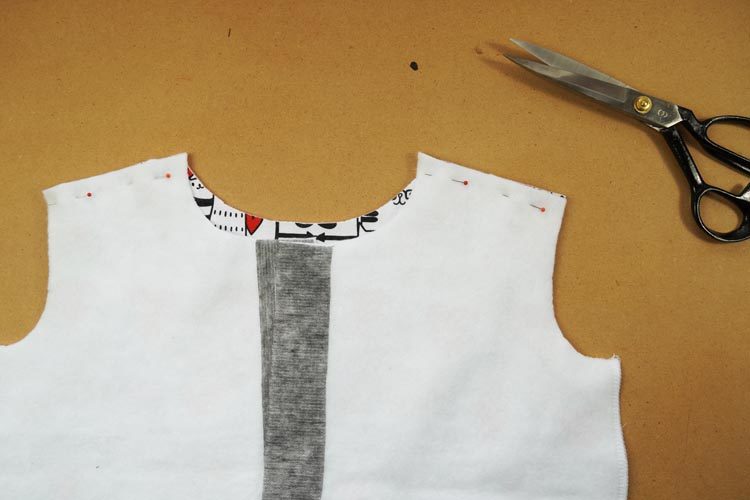
If everything is OK, you can sew the shoulder seams and then clean both seam allowances at the same time.

Spread the coat on the flat surface, fold the seam allowances of the shoulder seams towards the back piece and iron them. Topstitch through the seam allowances and fix them to the back piece.


Sleeves
Clean sleeve seams (both sides) on both sleeve pieces.


Pin the sleeves to the armholes. If you have a very rigid fabric, the sleeves may need to be ease stitched a little before pinning. Align the mark near the top of the sleeve and the shoulder seam.


Then align mark on the front side of the sleeve and mark on the front piece of the coat.


Pin both sleeve seam corners to the corresponding side seam corners on the coat. Pin the rest of the sleeve to the armhole.

Sew the sleeves into the armholes and clean the seam allowances.


Pull free ends of thread chains under the loops on both sides.

Pin the side seam of the coat and sleeve seam.

Now sew both seams in one go. Note that the seam allowances of the sleeve seam and the side seam are both 2 cm wide.

Now you have entire torso part including the sleeves.

Spread the seam allowances of the side seams and the sleeve seams and iron them thoroughly.

You can clean the bottom hem of the coat.

Facing
Sew the front pieces of the facing to the back piece in the shoulder seams. This time fold the seam allowances towards the front piece, iron them.

Clean the entire loose (outer) edge of the facing.

Pin the facing to the coat along the button flaps of both front pieces and around the neck opening.

Fold the bottom hem in this way:

Hem of the coat is folded 3 cm to the inside, hems of the facing are folded about 3,3 -3,5 cm to the inside.


It’s important to check that both front pieces are of exactly the same length before sewing.

Sew the facing to the coat along both button flaps and around the neck opening in one go.


Shoulder seam allowances of the coat and facing are pointed in opposite directions and aligned nicely, so they do not form any "bulge".

Cut off the corners of the seam allowances in the neck opening up to the seam itself to make it easier to turn them outside out.

Also cut off the seam allowance of the facing around the neck opening to flatten the entire seam.


Even so, it is necessary to cut the rest of the seam allowances of the front and back coat pieces perpendicular to the seam to make the neck opening looser. Make a cut every centimeter or so.

Fold the facing to the inside of the coat and pin it.

Fold the bottom hem of the coat too.


Facing can be folded so that it’s not visible at all from the face side, or (if we used a contrasting fabric) we can “admit” the facing and make it visible intentionally.


I recommend stitching the facing in its position and ironing the whole coat.

You also need to clean the cutting edge of the sleeve hems.

Fold the seam flaps to the inside of the sleeves and pin (or stitch) them in place.


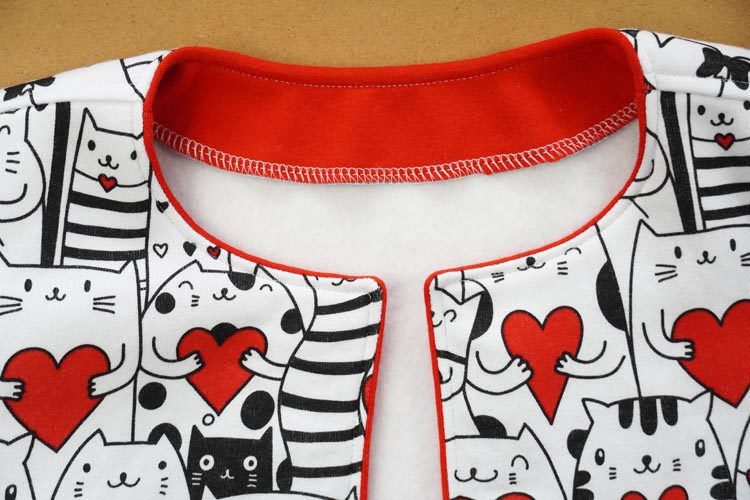

You can simply topstitch the facing in the neck opening and along the button flap, or if you do not want to have a seam there, you can attach it with a small herringbone stitch along the edge.

Use hidden mattress stitch to attach the facing near the bottom hem.

Same with the sleeves. You can finish them in hand or on sewing machine. It’s up to you.
Now you just need to do the buttonholes. Number of holes and spacing vary greatly depending on your specific preferences and button size. If you do not know how to place the buttonholes, simply place the buttons on the coat and move them around until you are satisfied.
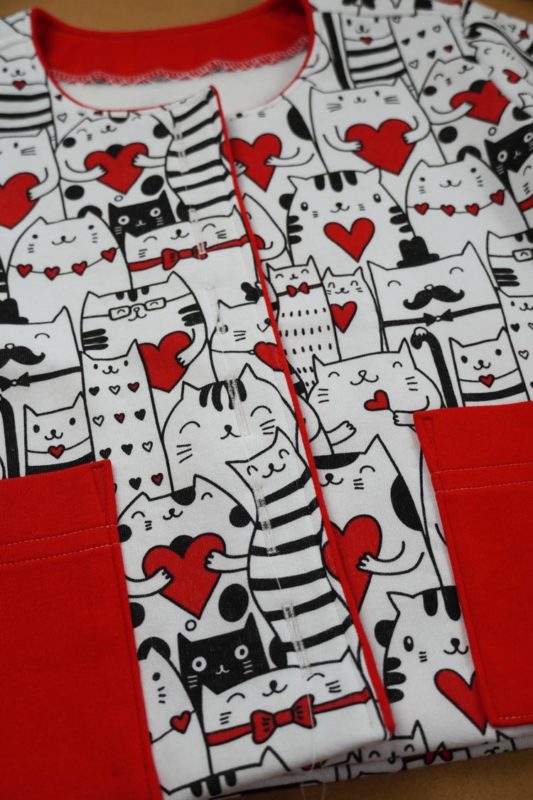

This is the inside of the coat before sewing the buttons. Seam allowances of the side seams are pressed open and attached with the herringbone stitch. I’ve also finished the bottom hem by hand and facing is attached along the entire edge in the same way.


I’ve done the buttons last, according to the placement of the buttonholes. Thanks to the thick material, I’ve been able to attach the buttons only to the top fabric in the front part and not to the facing.


Therefore, there are no knots or other visible stitches on the inside.


I’ve also sewed purely decorative buttons into the center of the pocket openings. If you want to have the buttons functional (with a buttonhole), I recommend sewing the pocket buttonholes before sewing the pocket to the front part. If you are afraid that you will be inaccurate while sewing and that you will not have the buttonhole centered, then sew the buttonhole at the very end. It will be a bit harder, but you can be 100% certain of the buttonhole placement.


Your coat is finished!

If you have a moment, leave a comment about how you liked the pattern and today's instructions below the article. I will be glad for any feedback!
Just to remind you, you can find the pattern for the children’s coat here:
Pattern for children’s coat ROMANCE (size 80 – 164)
Have a nice day, Peťa


